background image

229

Using Optional Accessories

Still Images

Movies

Using Speedlite Bracket SB-E2 (Sold Separately)

z

z

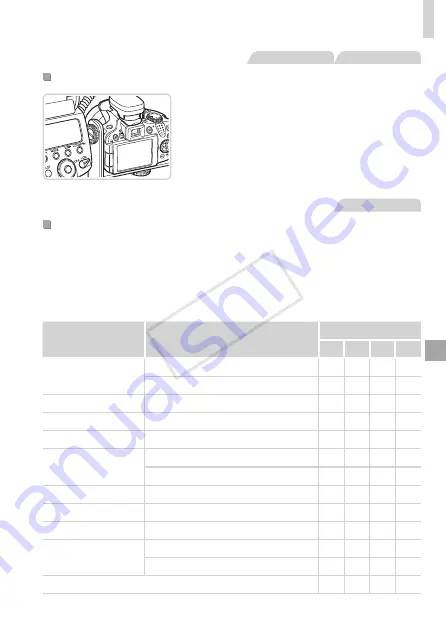
Using the optional Speedlite Bracket SB-

E2 can help prevent unnatural shadows 

next to subjects during vertical shooting.

z

z

To keep the LCD screen out of the way 

of the bracket, use the screen closed and 

facing outward.

Still Images

Camera Settings Available with an External Flash (Sold 

Separately)

The following settings are available in <

G

>, <

M

>, <

B

>, or <

D

> mode. 

In other shooting modes, only [Red-Eye Corr.] and [Red-Eye Lamp] can 

be configured. (With autoflash control, the flash always fires.) However, 

external flash units do not fire in modes that the built-in flash does not fire 

(

=

  260).

Item

Options

Shooting Mode

G M B D

Flash Mode

Auto*

1

O

O

O

Manual*

2

O

O

O

O

Flash Exp. Comp*

3

–3 to +3

O

O

O

Flash Output*

4

1/128*

5

 to 1/1 (in 1/3-stop increments)

O

O

O

O

Shutter Sync.

1st-curtain/2nd-curtain/Hi-speed

O

O

O

O

Slow Synchro

On

O

O

O

O

Off

O

O

Wireless Func.*

6

On/Off

O

O

O

O

Red-Eye Corr.

On/Off

O

O

O

O

Red-Eye Lamp

On/Off

O

O

O

O

Safety FE*

7

On

O

O

O

Off

O

O

O

O

Clear Flash Settings*

8

O

O

O

O

COP

Y

Summary of Contents for 6352B001

Page 1: ...re you read this guide including the Safety Precautions section before using the camera Reading this guide will help you learn to use the camera properly Store this guide safely so that you can use it in the future ENGLISH COPY ...

Page 2: ...parately can be used regardless of capacity SD memory cards SDHC memory cards SDXC memory cards Eye Fi cards Conforms to SD specifications However not all memory cards have been verified to work with the camera About Eye Fi Cards This product is not guaranteed to support Eye Fi card functions including wireless transfer In case of an issue with an Eye Fi card please check with the card manufacture...

Page 3: ...era problems while abroad return to the area of purchase before contacting a Canon Customer Support Help Desk Although the LCD monitor and viewfinder are produced under extremely high precision manufacturing conditions and more than 99 99 of the pixels meet design specifications in rare cases some pixels may be defective or may appear as red or black dots This does not indicate camera damage or af...

Page 4: ...rt In this guide icons are used to represent the corresponding camera buttons and dials on which they appear or which they resemble The following camera buttons and controls are represented by icons q Left button on back o Up button on back r Right button on back p Down button on back 5 Control dial on back Shooting modes and on screen icons and text are indicated in brackets Important information...

Page 5: ...splay Up button Self timer Right button FUNC SET button Down button Control dial z z Turning the control dial is one way to choose setting items switch images and perform other operations Most of these operations are also possible with the o p q r buttons For convenience all supported memory cards are simply referred to as the memory card The tabs shown above titles indicate whether the function i...

Page 6: ... Auto Mode 45 Shooting Smart Auto 46 Common Convenient Features 55 Using Face ID 63 Image Customization Features 73 Helpful Shooting Features 79 Customizing Camera Operation 82 3 Other Shooting Modes 85 Auto Clip Recording Movie Digest 86 Moving Subjects Sports 87 Specific Scenes 89 Image Effects Creative Filters 92 Special Modes for Other Purposes 102 Shooting Various Movies 108 4 P Mode 113 Shoo...

Page 7: ...ge Categories 184 Editing Still Images 188 Editing Movies 194 7 Setting Menu 197 Adjusting Basic Camera Functions 198 8 Accessories 213 Tips on Using Included Accessories 214 Optional Accessories 215 Using Optional Accessories 218 Printing Images 231 Using an Eye Fi Card 245 9 Appendix 247 Troubleshooting 248 On Screen Messages 252 On Screen Information 255 Handling Precautions 259 Functions and M...

Page 8: ...ching specific scenes Sports 87 Night Scenes 89 t Fireworks 90 Applying special effects Vivid Colors 92 Poster Effect 92 Fish Eye Effect 94 Miniature Effect 95 Toy Camera Effect 96 Soft Focus 97 Monochrome 98 z z Focus on faces 46 89 133 139 z z Without using the flash Flash Off 47 z z With myself in the shot Self Timer 58 104 z z Add a date stamp 61 COPY ...

Page 9: ...e 160 z z Automatic playback Slideshow 173 z z On a TV 218 z z On a computer 29 z z Browse through images quickly 166 z z Erase images 179 E Shoot View Movies z z Shoot movies 46 108 z z View movies Playback Mode 160 z z Fast moving subjects slow motion playback 111 c Print z z Print pictures 231 Save z z Save images to a computer 32 COPY ...

Page 10: ...avoid the risk of injury do not touch the interior of the product if it has been dropped or otherwise damaged Stop using the product immediately if it emits smoke a strange smell or otherwise behaves abnormally Do not use organic solvents such as alcohol benzine or thinner to clean the product Do not let the product come into contact with water e g sea water or other liquids Do not allow liquids o...

Page 11: ...s It is possible to suffer hearing loss from listening with headphones to the loud sounds of a CD ROM played on an audio CD player music player Additionally this could damage the speakers Caution Denotes the possibility of injury When holding the camera by the strap be careful not to bang it subject it to strong impacts or shocks or let it get caught on other objects Be careful not to bump or push...

Page 12: ... heat build up and damage to the unit Remove and store the battery when you are not using the camera If the battery is left inside the camera damage caused by leakage may occur Before you discard the battery cover the terminals with tape or other insulators Contacting other metal materials may lead to fire or explosions Unplug the battery charger from the power outlet after charging is complete or...

Page 13: ...13 Basic Guide Gives basic instructions from initial preparations to shooting playback and saving on a computer COPY ...

Page 14: ...om the camera and attach the lens cap cord to the strap z z Always remove the lens cap before turning the camera on Try clipping the lens cap to the neck strap when the cap is not in use z z Keep the lens cap on the lens when the camera is not in use Holding the Camera z z Place the strap around your neck z z When shooting keep your arms close to your body and hold the camera securely to prevent i...

Page 15: ...B 2LCE Plug the power cord into the charger then plug the other end into a power outlet X X The charging lamp turns orange and charging begins X X When the charging is finished the lamp turns green 3 Remove the battery z z After unplugging the battery charger remove the battery by pushing it in and up To protect the battery and keep it in optimal condition do not charge it continuously for more th...

Page 16: ...rite protect tab when the tab is in the locked downward position Slide the tab up until it clicks into the unlocked position 2 Open the cover z z Slide the switch and open the cover Terminals Battery Lock 3 Insert the battery z z While pressing the battery lock in the direction of the arrow insert the battery as shown and push it in until it clicks into the locked position z z If you insert the ba...

Page 17: ... Lower the cover in the direction of the arrow and press it until it clicks into the closed position For guidelines on how many shots or hours of recording can be saved on one memory card see Specifications 274 Removing the Battery and Memory Card Remove the battery z z Open the cover and press the battery lock in the direction of the arrow X X The battery will pop up Remove the memory card z z Pu...

Page 18: ...of the screen as needed to suit shooting conditions z z To protect the screen when the camera is not in use always keep it closed and facing the camera body Open the screen to activate it when the camera is on This will deactivate the viewfinder Similarly close the screen facing the camera body to deactivate it and activate the viewfinder When including yourself in shots you can view a mirror imag...

Page 19: ...s if you wish 61 1 Turn the camera on z z Press the power button X X The Date Time screen is displayed 2 Set the date and time z z Press the q r buttons to choose an option z z Press the o p buttons or turn the 5 dial to specify the date and time z z When finished press the m button 3 Set the home time zone z z Press the q r buttons or turn the 5 dial to choose your home time zone 4 Finish the set...

Page 20: ... the o p buttons or turn the 5 dial to choose Date Time and then press the m button 3 Change the date and time z z Follow step 2 on 19 to adjust the settings z z Press the n button to close the menu Date time settings can be retained for about 3 weeks by the camera s built in date time battery backup battery after the battery pack is removed The date time battery will be charged in about 4 hours o...

Page 21: ...p q r buttons or turn the 5 dial to choose a language and then press the m button X X Once the display language has been set the setting screen is no longer displayed The current time is displayed if you wait too long in step 2 after pressing the m button before you press the n button In this case press the m button to dismiss the time display and repeat step 2 You can also change the display lang...

Page 22: ...button X X The startup screen is displayed 2 Enter A mode z z Set the mode dial to A z z Aim the camera at the subject The camera will make a slight clicking noise as it determines the scene X X Icons representing the scene and image stabilization mode are displayed in the upper right of the screen X X Frames displayed around any detected subjects indicate that they are in focus 3 Compose the shot...

Page 23: ...ift the flash with your finger to prepare it for use If you prefer not to use the flash push it down with your finger into the camera Shoot z z Press the shutter button all the way down X X As the camera shoots a shutter sound is played and in low light conditions when you have raised the flash it fires automatically z z Keep the camera still until the shutter sound ends X X Your shot is only disp...

Page 24: ...displayed on the top and bottom edges of the screen and the subject is slightly enlarged The black bars indicate image areas not recorded X X Frames displayed around any detected faces indicate that they are in focus z z Once recording begins you can take your finger off the movie button Finish shooting z z Press the movie button again to stop shooting The camera beeps twice as recording stops COP...

Page 25: ...s image press the q button or turn the 5 dial counterclockwise To view the next image press the r button or turn the 5 dial clockwise z z Press and hold the q r buttons to browse through images quickly z z To access Scroll Display mode turn the 5 dial rapidly In this mode turn the 5 dial to browse through images z z To return to single image display press the m button z z Movies are identified by ...

Page 26: ... begins and after the movie is finished is displayed z z To adjust the volume press the o p buttons To switch to Shooting mode from Playback mode press the shutter button halfway Erasing the Images You can choose and erase unneeded images one by one Be careful when erasing images because they cannot be recovered 1 Choose an image to erase z z Press the q r buttons or turn the 5 dial to choose an i...

Page 27: ... displayed press the q r buttons or turn the 5 dial to choose Erase and then press the m button X X The current image is now erased z z To cancel erasure press the q r buttons or turn the 5 dial to choose Cancel and then press the m button You can also erase all images at once 179 COPY ...

Page 28: ...rowse process and edit RAW images Auto Update Function Using the included software you can update to the latest version and download new functions via the Internet some software excluded Be sure to install the software on a computer with an Internet connection so you can use this function Internet access is required to use this function and any ISP account charges and access fees must be paid sepa...

Page 29: ...igher Mac OS X 10 6 Core Duo 1 83 GHz or higher Movies Core 2 Duo 2 6 GHz or higher RAM Windows 7 64 bit 2 GB or more Windows 7 32 bit Windows Vista 64 bit 32 bit Windows XP 1 GB or more still images 2 GB or more movies Mac OS X 10 7 2 GB or more Mac OS X 10 6 1 GB or more still images 2 GB or more movies Interfaces USB Free Hard Disk Space 640 MB or more 750 MB or more Display 1024 x 768 resoluti...

Page 30: ...onnection What you will need z z Computer z z USB cable camera end Mini B z z Included CD ROM DIGITAL CAMERA Solution Disk 2 1 Insert the CD ROM in the computer s CD ROM drive z z Insert the included CD ROM DIGITAL CAMERA Solution Disk 2 in the computer s CD ROM drive z z On a Macintosh computer after inserting the disc double click the desktop disc icon to open it and then double click the icon d...

Page 31: ... details about USB connections on the computer refer to the computer user manual 4 Install the files z z Turn the camera on and follow the on screen instructions to complete the installation process X X The software will connect to the Internet to update to the latest version and download new functions Installation may take some time depending on computer performance and the Internet connection z ...

Page 32: ...n screen installation instructions for each Doing so will ensure that each camera will receive the correct updates and new functions via the auto update function Saving Images to a Computer Windows 7 and Mac OS X 10 6 are used here for the sake of illustration 1 Connect the camera to the computer z z Follow step 3 on 31 to connect the camera to a computer 2 Turn the camera on to access CameraWindo...

Page 33: ...mputer z z Click Import Images from Camera and then click Import Untransferred Images X X Images are now saved to the Pictures folder on the computer in separate folders named by date z z After images are saved close CameraWindow press the 1 button to turn the camera off and unplug the cable z z For instructions on viewing images on a computer refer to the Software Guide 28 COPY ...

Page 34: ... accessible Images shot in vertical orientation may be saved in horizontal orientation RAW images or JPEG images recorded with RAW images may not be saved Image protection settings may be cleared from images saved to a computer Some problems may occur when saving images or image information depending on the operating system version the software in use or image file sizes Some functions provided by...

Page 35: ...ite 3 600EX RT 600EX 580EX II 430EX II 320EX 270EX II Canon brand Lens Filter 67 mm dia 4 Lens Hood LH DC60 Remote Switch RS 60E3 Included Accessories Power Flash Units Lens Accessories Other Accessories Canon PictBridge Compatible Printers Cables 1Also available for purchase separately 2A genuine Canon accessory is also available Interface Cable IFC 400PCU 3These accessories are also supported Sp...

Page 36: ...l not be liable for any damage to this product and or accidents such as fire etc caused by the malfunction of non genuine Canon accessories e g a leakage and or explosion of a battery pack Please note that this warranty does not apply to repairs arising out of the malfunction of non genuine Canon accessories although you may request such repairs on a chargeable basis COPY ...

Page 37: ...37 Camera Basics Practical guide that introduces other camera basics and describes shooting and playback options 1 Advanced Guide COPY ...

Page 38: ...1 button Power Saving Features Auto Power Down As a way to conserve battery power the camera automatically deactivates the screen Display Off and then turns itself off after a specific period of inactivity Power Saving in Shooting Mode The screen is automatically deactivated after about one minute of inactivity In about two more minutes the lens is retracted and the camera turns itself off To acti...

Page 39: ...ra beeps twice and AF frames are displayed around image areas in focus 2 Press all the way down From the halfway position press fully to shoot X X The camera shoots as a shutter sound is played z z Keep the camera still until the shutter sound ends Images may be out of focus if you shoot without initially pressing the shutter button halfway Length of shutter sound playback varies depending on the ...

Page 40: ...ess each shooting mode Movie Mode For shooting movies 108 You can also shoot movies when the mode dial is not set to Movie mode simply by pressing the movie button Auto Mode Fully automatic shooting with camera determined settings 22 46 Scene Mode Shoot with optimal settings for specific scenes 89 Creative Filters Mode Add a variety of effects to images when shooting 92 Movie Digest Mode You can m...

Page 41: ...se a menu item X X Available options are shown at the bottom of the screen 3 Choose an option z z Press the q r buttons or turn the 5 dial to choose an option z z Options labeled with a icon can be configured by pressing the l button 4 Finish the setup process z z Press the m button X X The screen before you pressed the m button in step 1 is displayed again showing the option you configured To und...

Page 42: ...om lever to choose a tab z z After you have pressed the o p buttons to choose a tab initially you can switch between tabs by pressing the q r buttons 3 Choose a setting z z Press the o p buttons or turn the 5 dial to choose a setting z z To choose settings with options not shown first press the m or r button to switch screens and then either press the o p buttons or turn the 5 dial to select the s...

Page 43: ...s on This will deactivate the viewfinder Similarly close the screen facing the camera body to deactivate it and activate the viewfinder 18 No information is displayed LCD Monitor Screen Viewfinder No information is displayed Information is displayed Information is displayed Screen brightness is automatically increased by the night display function when you are shooting under low light making it ea...

Page 44: ...ake or jolt the camera which may corrupt images or damage the camera or memory card Clock You can check the current time z z Press and hold the m button X X The current time appears z z If you hold the camera vertically while using the clock function it will switch to vertical display Press the q r buttons or turn the 5 dial to change the display color z z Press the m button again to cancel the cl...

Page 45: ...45 Smart Auto Mode Convenient mode for easy shots with greater control over shooting 2 COPY ...

Page 46: ...e X X Icons representing the scene and image stabilization mode are displayed in the upper right of the screen 51 53 X X Frames displayed around any detected subjects indicate that they are in focus Zoom Bar Focus Range approx 3 Compose the shot z z To zoom in and enlarge the subject move the zoom lever toward i telephoto and to zoom away from the subject move it toward j wide angle A zoom bar sho...

Page 47: ...aise the flash is displayed lift the flash with your finger to prepare it for use If you prefer not to use the flash push it down with your finger into the camera Shoot z z Press the shutter button all the way down X X As the camera shoots a shutter sound is played and in low light conditions when you have raised the flash it fires automatically z z Keep the camera still until the shutter sound en...

Page 48: ...re in focus z z Once recording begins you can take your finger off the movie button Resize the subject and recompose the shot as needed z z To resize the subject do the same thing as in step 3 on 46 However note that the sound of camera operations will be recorded and movies shot at zoom factors shown in blue will look grainy z z When you recompose shots the focus brightness and colors will be aut...

Page 49: ...flash range see Specifications 274 The subject may be too close if the camera only beeps once when you press the shutter button halfway For details on the focusing range shooting range see Specifications 274 To reduce red eye and to assist in focusing the lamp may be activated when shooting in low light conditions A blinking h icon displayed when you attempt to shoot indicates that shooting is not...

Page 50: ...tton when shooting movies because sounds made by the camera will be recorded Once movie recording begins a smaller image display area field of view is shown with the subject enlarged This change is due to rotational image stabilization To shoot subjects at the same size shown before shooting adjust the image stabilization setting 148 To correct suboptimal image color that may occur in movie shooti...

Page 51: ...en the background is a blue sky dark blue when the background is dark and gray for all other backgrounds The background color of icons is light blue when the background is a blue sky and gray for all other backgrounds The background color of and is dark blue and the background color of is orange When shooting movies only People Other Subjects and At Close Range icons will be displayed When shootin...

Page 52: ...cons in the table below is displayed one of the following icons will be displayed to inform you that the camera will shoot continuous images or W Smiling including Babies Consecutive images are captured and the camera analyzes details such as facial expressions to save the image determined to be the best Sleeping including Babies Beautiful shots of sleeping faces created by combining consecutive s...

Page 53: ...n shooting movies at telephoto Powered IS Image stabilization for macro shots Hybrid IS No image stabilization because the camera is mounted on a tripod or held still by other means However some shooting conditions will activate image stabilization Displayed when you pan following moving subjects with the camera When you follow subjects moving horizontally image stabilization only counteracts vert...

Page 54: ... Frames follow moving subjects within a certain range to keep them in focus However if the camera detects subject movement only the white frame will remain on the screen When you are pressing the shutter button halfway and the camera detects subject movement a blue frame is displayed and the focus and image brightness are constantly adjusted Servo AF Try shooting in G mode 113 if no frames are dis...

Page 55: ...e zoom lever will display the zoom bar which indicates the zoom position The color of the zoom bar will change depending on the zoom range White range optical zoom range where the image will not appear grainy Yellow range digital zoom range where the image is not noticeably grainy ZoomPlus Blue range digital zoom range where the image will appear grainy Because the blue range will not be available...

Page 56: ...s out and displays a white frame around the area previously shown before you pressed the button 2 Reacquire the subject z z Aim the camera so that the subject in the white frame and then release the button X X The previous magnification is now restored so that the area outlined in white fills the screen again Some shooting information is not displayed while the camera is zoomed out During movie sh...

Page 57: ...ton and choose one of the three levels in Display Area on the 4 tab The zoom factor cannot be changed with the button after you press the shutter button all the way down in self timer mode 58 Still Images 0 Minimizing Camera Shake While Composing Shots Framing Assist Lock Even at high magnification you can reduce camera shake while composing shots as follows 1 Press the button X X is displayed and...

Page 58: ...bilization icon is shown while you are holding down the button optimal image stabilization will be applied when you press the shutter button halfway To fine tune the size of subjects gradually move the zoom lever while holding down the button Still Images Movies Using the Self Timer With the self timer you can include yourself in group photos or other timed shots The camera will shoot about 10 sec...

Page 59: ...l Images Movies Using the Self Timer to Avoid Camera Shake This option delays shutter release until about two seconds after you have pressed the shutter button If the camera is unsteady while you are pressing the shutter button it will not affect your shot Configure the setting z z Follow step 1 on 58 and choose X X Once the setting is complete is displayed z z Follow step 2 on 58 to shoot Still I...

Page 60: ...ts the delay before recording begins but the Shots setting has no effect When you specify multiple shots image brightness and white balance are determined by the first shot More time is required between shots when the flash fires or when you have specified to take many shots Shooting will stop automatically when the memory card becomes full When a delay longer than two seconds is specified two sec...

Page 61: ...d that the date and time are correct 19 1 Configure the setting z z Press the n button choose Date Stamp on the 4 tab and then choose the desired option 42 X X Once the setting is complete DATE is displayed 2 Shoot X X As you take shots the camera adds the shooting date or time to the lower right corner of images z z To restore the original setting choose Off in step 1 Date stamps cannot be edited...

Page 62: ... Shoot after choosing a subject to focus on as follows 1 Specify Tracking AF z z Press the o button X X is displayed in the center of the screen 2 Choose a subject to focus on z z Aim the camera so that is on the desired subject and then press the shutter button halfway X X A blue frame is displayed and the camera will keep the subject in focus and image brightness adjusted Servo AF 3 Shoot z z Pr...

Page 63: ...ormation name birthday will be saved on the camera Additionally when registered people are detected their names will be recorded in still images When using the Face ID function be careful when sharing the camera or images with others and when posting images online where many others can view them When disposing of a camera or transferring it to another person after using Face ID be sure to erase al...

Page 64: ...gray frame at the center of the screen z z A white frame on the person s face indicates that the face is recognized Make sure a white frame is displayed on the face and then shoot z z If the face is not recognized you cannot register face information 3 Save the settings z z After Register is displayed press the q r buttons or turn the 5 dial to choose OK and then press the m button COPY ...

Page 65: ...ton to move the cursor z z To delete the previous character either press the a button or choose and press the m button z z Press the n button to return to the edit profile screen 5 Enter a birthday z z Press the o p buttons or turn the 5 dial to choose Birthday and then press the m button z z Press the q r buttons to choose a setting z z Press the o p buttons or turn the 5 dial to specify the date...

Page 66: ... and outside The flash will not fire when following step 2 If you do not register a birthday in step 5 Babies or Children icons 51 will not display in A mode You can overwrite registered face info and add face info later if you have not filled all 5 face info slots 69 Shooting If you register a person ahead of time the camera will prioritize that person as the main subject and optimize focus brigh...

Page 67: ...ng playback 171 Because faces of babies and children change quickly as they grow you should update their face info regularly 69 Names will still be recorded in images even if you clear the Shooting Info check box in Custom Display 154 on the 4 tab so that the names are not displayed If you don t want names to be recorded in still images choose Face ID Settings on the 4 tab choose Face ID and then ...

Page 68: ... on 67 68 choose Edit Profile and press the m button 2 Input changes z z Press the o p buttons or turn the 5 dial to choose an item and follow steps 4 5 on 65 to input changes Even if you change names in Edit Profile the names recorded in previously shot images will remain the same You can use the included software to edit registered names Some characters entered with the included software may not...

Page 69: ...press the m button 2 Choose the name of the person to overwrite z z Press the o p q r buttons or turn the 5 dial to choose the name of a person to overwrite and then press the m button z z If 4 or less face information slots are registered follow step 5 on 70 to add more face info 3 Access the face info screen z z Read the message that displays press the q r buttons or turn the 5 dial to choose OK...

Page 70: ...formation You can follow the above steps to register new face info when there is at least one slot open however you cannot overwrite any face information Instead of overwriting face info first erase unwanted existing info see below and then register new face information 63 as needed Erasing Face Information 1 Access the Check Edit Info screen z z Following step 1 on 63 choose Check Edit Info and p...

Page 71: ... then press the m button X X The selected face info will be erased Erasing Registered Information You can erase information face info name birthday registered to Face ID However names recorded in previously shot images will not be erased 1 Access the Erase Info screen z z Follow step 1 on 63 and choose Erase Info 2 Choose the name of the person whose info you want to erase z z Press the o p q r bu...

Page 72: ... Face ID If you erase a registered person s info you will not be able to display their name 66 overwrite their info 171 or search images for them 166 You can also erase a person s name only from images 172 COPY ...

Page 73: ...atio will be updated z z To restore the original setting repeat this process but choose Used for display on widescreen HDTVs or similar display devices Same aspect ratio as 35mm film used for printing images at 5 x 7 inch or postcard sizes Native aspect ratio of the camera screen also used for display on standard definition televisions or similar display devices or for printing images at 3 5 x 5 i...

Page 74: ...d see Specifications 274 Configure the setting z z Press the m button choose in the menu and choose the desired option 41 X X The option you configured is now displayed z z To restore the original setting repeat this process but choose Guidelines for Choosing Resolution Based on Paper Size for 4 3 Images A2 16 5 x 23 4 in A3 A5 11 7 x 16 5 5 8 x 8 3 in 5 x 7 in Postcard 3 5 x 5 in z z For e mailin...

Page 75: ... then choose On 42 X X Once the setting is complete R is displayed z z To restore the original setting repeat this process but choose Off Red eye correction may be applied to image areas other than eyes if the camera misinterprets red eye makeup as red pupils for example You can also correct existing images 193 You can also access the screen in step 2 by holding down the h button for at least one ...

Page 76: ...sing Multi area White Balance Configure the setting z z Press the n button choose Hg Lamp Corr on the 4 tab and then choose On 42 X X Once the setting is complete is displayed z z To restore the original setting repeat this process but choose Off After you are finished shooting under mercury lamps you should set Hg Lamp Corr back to Off Otherwise green hues not caused by mercury lamps may be corre...

Page 77: ...ion you configured is now displayed z z To restore the original setting repeat this process but choose Image Quality Resolution Frame Rate Details 1920 x 1080 24 fps For shooting in Full HD 1280 x 720 30 fps For shooting in HD 640 x 480 30 fps For shooting in standard definition Fine Detail Movie Processing This function quickly processes a large amount of information making it possible to recorde...

Page 78: ...en choose Manual 42 z z Press the p button and then press the q r buttons to configure the Level setting z z To restore the original setting repeat this process but choose Auto Movies Using the Wind Filter Distorted audio caused by recording when the wind is strong can be reduced However the recording may sound unnatural when this option is used when there is no wind Configure the setting z z Acce...

Page 79: ...vel is green If the electronic level is not displayed in step 1 press the n button and on the 4 tab choose Custom Display Add a to choose the electronic level Tilting the camera too far forward or backward will prevent you from using the electronic level which will turn gray The electronic level is not displayed during movie recording If you hold the camera vertically the orientation of the electr...

Page 80: ...oose On 42 2 Check the focus z z Press the shutter button halfway The face detected as the main subject is now magnified z z To restore the original setting choose Off in step 1 The area in focus will not be magnified when you press the shutter button halfway if a face was not detected if the person is too close to the camera and their face is too large for the screen or if the camera detects subj...

Page 81: ...hoot z z is displayed when the camera detects a person whose eyes are closed z z To restore the original setting choose Off in step 1 When you have specified multiple shots in mode this function is only available for the final shot This feature is not available during continuous shooting in mode 52 A frame is displayed around people whose eyes are closed when you have selected 2 10 seconds in Revi...

Page 82: ...sist Beam on the 4 tab and then choose Off 42 z z To restore the original setting repeat this process but choose On Still Images Deactivating the Red Eye Reduction Lamp You can deactivate the red eye reduction lamp that lights up to reduce red eye when the flash is used in low light shots 1 Access the Built in Flash Settings screen z z Press the n button choose Flash Control on the 4 tab and then ...

Page 83: ...tab and then choose the desired option 42 z z To restore the original setting repeat this process but choose Quick Quick Displays images only until you can shoot again 2 10 sec Displays images for the specified time Even while the shot is displayed you can take another shot by pressing the shutter button halfway again Hold Displays images until you press the shutter button halfway Off No image dis...

Page 84: ... n button choose Review Info on the 4 tab and then choose the desired option 42 z z To restore the original setting repeat this process but choose Off Off Displays only the image Detailed Displays shooting details 257 Focus Check Shows the area in the AF frame magnified enabling you to check the focus Follow the steps in Checking the Focus 165 This setting is set to Off and cannot be changed when ...

Page 85: ...85 Other Shooting Modes Shoot more effectively in various scenes and take shots enhanced with unique image effects or captured using special functions 3 COPY ...

Page 86: ...cause clips are recorded for each shot Any sounds from camera operations during movie recording will be included in the movie Movies created in mode can be viewed by date 169 Movies created in mode are saved as iFrame movies 110 Although the clips recorded on a particular day are combined into a single file individual clips chapters can be edited 196 Clips are saved as separate movie files in the ...

Page 87: ...oting stops when you release the shutter button or reach the maximum number of shots after which Busy is displayed and the shots are shown in the order you took them In mode shots may look grainy because the ISO speed 117 is increased to suit the shooting conditions For details on the shooting range in mode see Specifications 274 There may be a delay after continuous shooting before you can shoot ...

Page 88: ...ayed back individually 170 and ungrouped 170 Protecting 175 a grouped image will protect all images in the group Grouped images can be viewed individually when played back using Image Search 166 or Smart Shuffle 174 In this case images are temporarily ungrouped Grouped images cannot be tagged as favorites 184 edited 182 193 categorized 185 printed 231 set for printing individually 240 added to a P...

Page 89: ...ose a shooting mode 41 3 Shoot Still Images Movies I Shoot portraits Portrait z z Take shots of people with a softening effect Still Images Shoot evening scenes without using a tripod Handheld NightScene z z Beautiful shots of evening scenes or portraits with evening scenery in the background without the need to hold the camera very still as with a tripod z z A single image is created by combining...

Page 90: ... in mode compared to other modes Because the camera will shoot continuously in mode hold it steady while shooting In mode excessive camera shake or certain shooting conditions may prevent you from obtaining the desired results In t mode mount the camera on a tripod or take other measures to keep it still and prevent camera shake Additionally you should set IS Mode to Off when using a tripod or oth...

Page 91: ...screen z z Press the l button 3 Configure the setting z z Press the o p buttons to choose an option Choose an effect level either press the q r buttons or turn the 5 dial and then press the l button z z A preview is shown of how your shot will look with the effect applied 4 Shoot Areas other than people s skin may be modified Try taking some test shots first to make sure you obtain the desired res...

Page 92: ...he m button choose in the menu and then choose a shooting mode 41 3 Shoot Still Images Movies Shoot in vivid colors Super Vivid z z Shots in rich vivid colors Still Images Movies Posterized shots Poster Effect z z Shots that resemble an old poster or illustration In and modes try taking some test shots first to make sure you obtain the desired results COPY ...

Page 93: ...2 and choose 2 Hold the camera still z z Mount the camera on a tripod or take other measures to keep it still and prevent camera shake 3 Shoot z z When you press the shutter button all the way down the camera will take three shots and combine them Set IS Mode to Off 147 in this mode Any subject movement will cause images to look blurry There will be a delay before you can shoot again as the camera...

Page 94: ...s Effect Fish eye Effect Shoot with the distorting effect of a fish eye lens 1 Choose z z Follow steps 1 2 on 92 and choose 2 Choose an effect level z z Press the l button choose an effect level either press the q r buttons or turn the 5 dial and then press the l button again X X A preview is shown of how your shot will look with the effect applied 3 Shoot Try taking some test shots first to make ...

Page 95: ...ly during playback Note that sound is not recorded 1 Choose z z Follow steps 1 2 on 92 and choose X X A white frame is displayed indicating the image area that will not be blurred 2 Choose the area to keep in focus z z Press the l button z z Move the zoom lever to resize the frame and press the o p buttons to move it 3 For movies choose the movie playback speed z z Press the n button and then choo...

Page 96: ... or vice versa press the m button in step 2 You can move the frame in vertical orientation by pressing the q r buttons Movie image quality is at an aspect ratio of and at an aspect ratio of 73 These quality settings cannot be changed The zoom factor cannot be changed with the button on the screens in steps 2 and 3 or while shooting movies Still Images Shooting with a Toy Camera Effect Toy Camera E...

Page 97: ...ooler tone than with Standard Try taking some test shots first to make sure you obtain the desired results Still Images Shooting With a Soft Focus Effect This function allows you to shoot images as if a soft focus filter is attached to the camera You can adjust the effect level as desired 1 Choose z z Follow steps 1 2 on 92 and choose 2 Choose an effect level z z Press the l button choose an effec...

Page 98: ...lor tone z z Press the l button choose a color tone either press the q r buttons or turn the 5 dial and then press the l button again X X A preview is shown of how your shot will look with the effect applied 3 Shoot B W Black and white shots Sepia Sepia tone shots Blue Blue and white shots Still Images Movies Shooting with Color Accent Choose a single image color to keep and change other colors to...

Page 99: ...ress the q button X X The specified color is recorded 4 Specify the range of colors to keep z z Press the o p buttons or turn the 5 dial to adjust the range z z To keep only your specified color choose a large negative value To keep colors similar to your specified color as well choose a large positive value z z Press the l button to return to the shooting screen 5 Shoot Using the flash in this mo...

Page 100: ...ng screen z z Press the l button X X The original image and the Color Swap image are displayed one after another X X By default green will be replaced with gray 3 Specify the color to replace z z Position the center frame over the color to replace and then press the q button X X The specified color is recorded 4 Specify the new color z z Position the center frame over the new color and then press ...

Page 101: ...e only your specified color choose a large negative value To replace colors similar to your specified color as well choose a large positive value z z Press the l button to return to the shooting screen 6 Shoot Using the flash in this mode may cause unexpected results In some shooting scenes images may look grainy and colors may not look as expected COPY ...

Page 102: ... a person z z Each time the camera detects a smile it will shoot after the lamp lights up z z To pause smile detection press the r button Press the r button again to resume detection Switch to another mode when you finish shooting or the camera will continue shooting each time a smile is detected You can also shoot as usual by pressing the shutter button The camera can detect smiles more easily wh...

Page 103: ...e l button 2 Compose the shot and press the shutter button halfway z z Make sure a green frame is displayed around the face of the person who will wink 3 Press the shutter button all the way down X X The camera now enters shooting standby mode and Wink to take picture is displayed X X The lamp blinks and the self timer sound is played 4 Face the camera and wink X X The camera will shoot about two ...

Page 104: ... will shoot after a person enters the shooting area and winks The zoom factor cannot be changed with the button after you press the shutter button all the way down Still Images Using the Face Self Timer The camera will shoot about two seconds after detecting that the face of another person such as the photographer has entered the shooting area 133 This is useful when including yourself in group ph...

Page 105: ... self timer sound will speed up When the flash fires the lamp will remain lit About two seconds later the camera will shoot z z To cancel shooting after you have triggered the self timer press the n button Even if your face is not detected after you join the others in the shooting area the camera will shoot about 15 seconds later To change the number of shots press the o p buttons after choosing i...

Page 106: ...ou release the shutter button or reach the maximum number of shots after which Busy is displayed and the shots are shown in the order you took them z z Each set of images shot continuously is managed as a single group and only the first image in that group will be displayed 88 Focus image brightness and color are determined by the first shot The screen is blank while you are shooting There may be ...

Page 107: ...termine the exposure and white balance 3 Take additional shots z z Compose the second shot so that it partially overlaps the image area of the first shot z z Minor misalignment of overlapping portions will be corrected automatically when the images are combined z z You can take up to 26 shots the same way you took the second shot 4 Finish shooting z z Press the m button 5 Use the software to combi...

Page 108: ...on z z To stop movie recording press the movie button again Still Images Movies Shooting Still Images During Movie Recording Shoot still images during movie recording as follows 1 While shooting a movie focus on a subject z z Make sure that 4 is displayed and then press the shutter button halfway X X Focus and exposure are now readjusted However the camera does not beep X X Movie recording will co...

Page 109: ...en and shutter sound will be included in the movie The flash does not fire The shooting date and time 61 will not be recorded in images i Contrast 120 is not available Movie recording may stop if shooting still images fills up the internal memory During recording of or movies with at aspect ratio of 16 9 still images will have an aspect ratio of During recording of movies with at aspect ratio of 4...

Page 110: ... z Turn the 5 dial to adjust the exposure as you watch the screen 3 Shoot 108 Movies Shooting iFrame Movies Shoot movies that can be edited with iFrame compatible software or devices You can quickly edit save and manage iFrame movies using the included software 28 1 Choose z z Set the mode dial to E z z Press the m button choose E in the menu and then choose 41 X X Black bars displayed on the top ...

Page 111: ...z z Press the m button choose in the menu and choose the desired frame rate 41 X X The option you configured is now displayed 3 Shoot 108 X X A bar showing the elapsed time is displayed Maximum clip length is approx 30 sec Frame Rate Image Quality Playback Time For a 30 sec Clip 240 fps 320 x 240 Approx 4 min 120 fps 640 x 480 Approx 2 min Zooming is not available during recording even if you move...

Page 112: ... Movies The movie will be played back in slow motion when you follow steps 1 3 on 160 You can change the playback speed of movies shot in mode by using the included software For details refer to the Software Guide 28 COPY ...

Page 113: ...ing style Instructions in this chapter apply to the camera with the mode dial set to G mode G Program AE AE Auto Exposure Before using a function introduced in this chapter in modes other than G make sure the function is available in that mode 260 271 4 COPY ...

Page 114: ...ure cannot be obtained when you press the shutter button halfway shutter speeds and aperture values are displayed in orange To obtain adequate exposure try adjusting the following settings Activate the flash 142 Change the ISO speed 117 Movies can be recorded in G mode as well by pressing the movie button However some H and n settings may be automatically adjusted for movie recording For details o...

Page 115: ...ss Exposure AE Lock Before shooting you can lock the exposure or you can specify focus and exposure separately 1 Lock the exposure z z Aim the camera at the subject to shoot with the exposure locked With the shutter button pressed halfway press the o button X X is displayed and the exposure is locked z z To unlock AE release the shutter button and press the o button again In this case is no longer...

Page 116: ...nes the average brightness of light across the entire image area calculated by treating brightness in the central area as more important Spot Metering restricted to within the Spot AE Point frame You can also link the Spot AE Point frame to the AF frame see below Still Images Linking the Spot AE Point Frame to the AF Frame 1 Set the metering method to z z Follow the steps above to choose 2 Configu...

Page 117: ... fair weather For shooting in cloudy conditions or at twilight For shooting night scenes or in dark rooms To view the automatically set ISO speed when the camera is set to press the shutter button halfway Although choosing a lower ISO speed may reduce image graininess there may be a greater risk of subject blurriness in some shooting conditions Choosing a higher ISO speed will increase shutter spe...

Page 118: ...he setting z z Choose a menu item to configure and then choose the desired option 42 You can also access the ISO Auto Settings screen when the ISO speed setting screen 117 is displayed by pressing the n button Changing the Noise Reduction Level High ISO NR You can choose from 3 levels of noise reduction Standard High Low This function is especially effective when shooting at high ISO speeds Choose...

Page 119: ...2 Configure the setting z z Press the l button and then adjust the setting by pressing the q r buttons or turning the 5 dial AEB is only available in mode 47 Continuous shooting 127 is not available in this mode If exposure compensation is already in use 115 the value specified for that function is treated as the standard exposure level for this function You can also access the setting screen of s...

Page 120: ...ions correction may be inaccurate or may cause images to appear grainy You can also correct existing images 192 Still Images Dynamic Range Correction DR Correction Tone down bright image areas which might otherwise look washed out as follows z z Press the m button choose in the menu and choose the desired option 41 X X Once the setting is complete is displayed Item Details Available ISO Speed 117 ...

Page 121: ...upported range if you have specified a value outside the supported range indicated here Still Images Shadow Correct Automatically preserve image detail in shadows as follows z z Press the m button choose in the menu press the l button and choose 41 X X Once the setting is complete is displayed COPY ...

Page 122: ...ance for the shooting conditions Day Light For shooting outdoors in fair weather Cloudy For shooting in cloudy conditions in the shade or at twilight Tungsten For shooting under ordinary incandescent tungsten lighting and similarly colored fluorescent lighting Fluorescent For shooting under warm white or similarly colored or cool white fluorescent lighting Fluorescent H For shooting under daylight...

Page 123: ...oting Set the white balance under the same light source that will illuminate your shot z z Follow the steps on 122 and choose or z z Aim the camera at a plain white subject so that the entire screen is white Press the n button X X The tint of the screen changes once the white balance data has been recorded Colors may look unnatural if you change camera settings after recording white balance data C...

Page 124: ...s to adjust the correction level z z To reset the correction level press the n button z z Press the l button to complete the setting The camera will retain white balance correction levels even if you switch to another white balance option by following steps on 122 but correction levels will be reset if you record custom white balance data B blue A amber M magenta G green One level of blue amber co...

Page 125: ...s Sepia Creates sepia tone images B W Creates black and white images Positive Film Combines the effects of Vivid Blue Vivid Green and Vivid Red to produce intense yet natural looking colors resembling images on positive film Lighter Skin Tone Lightens skin tones Darker Skin Tone Darkens skin tones Vivid Blue Emphasizes blues in images Makes the sky ocean and other blue subjects more vivid Vivid Gr...

Page 126: ...ation red green blue and skin tones in a range of 1 5 1 Access the setting screen z z Follow the steps on 125 to choose and then press the l button 2 Configure the setting z z Press the o p buttons to choose an option and then specify the value by pressing the q r buttons or turning the 5 dial z z For stronger more intense effects or darker skin tones adjust the value to the right and for weaker l...

Page 127: ...the shutter button halfway Continuous Shooting AF Continuous shooting and focusing AF Frame is set to Center and cannot be changed Continuous Shooting LV Continuous shooting with the focus fixed at the position determined in manual focusing In t mode focus is determined by the first shot In t mode 90 AF lock 140 or manual focus mode 130 is changed to For details on the continuous shooting speed in...

Page 128: ...ng If you use Face ID 63 in W the name recorded in the image will be fixed to the location where it is displayed in the first shot Even if the subject moves the name will stay fixed in the same position for any subsequent shots COPY ...

Page 129: ...tton choose e either press the q r buttons or turn the 5 dial and then press the m button X X Once the setting is complete e is displayed If the flash fires vignetting may occur Be careful to avoid damaging the lens In the yellow bar display area below the zoom bar e will turn gray and the camera will not focus To prevent camera shake try mounting the camera on a tripod and shooting with the camer...

Page 130: ...ns 274 1 Choose z z Press the q button choose either press the q r buttons or turn the 5 dial and then press the m button X X and the MF indicator are displayed MF Indicator 2 Focus z z Referring to the on screen MF indicator bar which shows the distance and focal position and the magnified display area press the o p buttons or turn the 5 dial to specify the general focal position 3 Fine tune the ...

Page 131: ...r digital tele converter 132 or when using a TV as a display 222 but the magnified display will not appear To focus more accurately try attaching the camera to a tripod to stabilize it To hide the magnified display area press the n button and set MF Point Zoom on the 4 tab to Off 42 To deactivate automatic focus fine tuning when the shutter button is pressed halfway press the n button and set Safe...

Page 132: ...choose Digital Zoom on the 4 tab and then choose the desired option 42 X X The view is enlarged and the zoom factor is displayed on the screen The digital tele converter cannot be used with digital zoom 55 and AF point zoom 80 The respective focal lengths when using 1 5x and 2 0x are 36 1800 mm and 48 2400 mm 35mm film equivalent The shutter speed may be equivalent when you move the zoom lever all...

Page 133: ...ment frames will follow moving subjects within a certain range After you press the shutter button halfway up to nine green frames are displayed around faces in focus If faces are not detected or when only gray frames are displayed without a white frame an AF frame is displayed in the center of the screen when you press the shutter button halfway If faces are not detected when Servo AF 137 is set t...

Page 134: ...annot focus when you press the shutter button halfway Note that AF point zooming 80 is not possible To compose shots so that subjects are positioned at the edge or in a corner first aim the camera to capture the subject in an AF frame and then hold the shutter button halfway down As you continue to hold the shutter button halfway recompose the shot as desired and then press the shutter button all ...

Page 135: ... move the AF frame or press the o p q r buttons to move it by a smaller amount z z To return the AF frame to the original position in the center keep the button held down z z To reduce the AF frame size press the l button Press it again to restore it to the original size 3 Finish the setup process z z Press the button AF frames are displayed at normal size when you use the digital zoom 55 or digit...

Page 136: ...tton X X When the subject is detected the camera beeps and is displayed Even if the subject moves the camera will continue to track the subject within a certain range X X If no subject is detected is displayed z z To cancel tracking press the button again 3 Shoot z z Press the shutter button halfway changes to a blue which follows the subject as the camera continues to adjust the focus and exposur...

Page 137: ...re as long as you press the shutter button halfway 1 Configure the setting z z Press the n button choose Servo AF on the 4 tab and then choose On 42 2 Focus z z The focus and exposure are maintained where the blue AF frame is displayed while you are pressing the shutter button halfway Focusing may not be possible in some shooting conditions In low light conditions Servo AF may not be activated AF ...

Page 138: ... pressed Instead you can limit camera focusing to the moment you press the shutter button halfway z z Press the n button choose Continuous AF on the 4 tab and then choose Off 42 On Helps avoid missing sudden photo opportunities because the camera constantly focuses on subjects until you press the shutter button halfway Off Conserves battery power because the camera does not focus constantly COPY ...

Page 139: ... detected as the main subject z z Even if the subject moves the face frame follows the subject within a certain range z z If a face is not detected is not displayed 3 Choose the face to focus on z z To switch the face frame to another detected face press the button z z After you have switched the face frame to all detected faces Face Select Off is displayed and the specified AF frame mode screen i...

Page 140: ...ill not change even when you release your finger from the shutter button 1 Lock the focus z z With the shutter button pressed halfway press the q button X X The focus is now locked and and the MF indicator are displayed z z To unlock the focus once again hold the shutter button halfway down and press the q button 2 Compose the shot and shoot COPY ...

Page 141: ...ose z z Press the m button choose in the menu and then choose 41 2 Configure the setting z z Press the l button and then adjust the setting by pressing the q r buttons or turning the 5 dial Focus bracketing is only available in mode 47 Continuous shooting 127 is not available in this mode You can also access the setting screen in step 2 by choosing in step 1 on 130 and pressing the l button Three ...

Page 142: ... 2 Configure the setting z z Press the h button choose h either press the q r buttons or turn the 5 dial and then press the m button X X Once the setting is complete h is displayed The setting screen cannot be accessed by pressing the h button when the flash is lowered Lift the flash with your finger in advance If the flash fires vignetting may occur COPY ...

Page 143: ...oose Z either press the q r buttons or turn the 5 dial and then press the m button X X Once the setting is complete Z is displayed 3 Shoot z z Even after the flash fires ensure that the main subject does not move until the shutter sound is finished playing Mount the camera on a tripod or take other measures to keep it still and prevent camera shake Additionally you should set IS Mode to Off when u...

Page 144: ...shoot at optimal exposure However you can deactivate automatic adjustment of the shutter speed and aperture value by accessing n 42 and setting Safety FE in Flash Control on the 4 tab to Off You can also configure the flash exposure compensation by accessing n 42 and choosing Flash Exp Comp in Flash Control on the 4 tab You can also access the Built in Flash Settings n screen as follows except whe...

Page 145: ...ed 3 Compose the shot and shoot z z After one shot FE is unlocked and is no longer displayed FE Flash Exposure Still Images Changing the Flash Timing Change the timing of the flash and shutter release as follows 1 Access the setting screen z z Press the n button choose Flash Control on the 4 tab and then press the m button 42 2 Configure the setting z z Choose Shutter Sync and then choose the desi...

Page 146: ...ge quality from the camera s image processing The data cannot be used in this state for viewing or printing on a computer You must first use the included software Digital Photo Professional to convert images to ordinary JPEG or TIFF files Images can be adjusted with minimal loss of image quality For details on resolution and the number of shots that will fit on a card see Specifications 274 Record...

Page 147: ...ss the setting screen z z Press the n button choose IS Settings on the 4 tab and then press the m button 42 2 Configure the setting z z Choose IS Mode and then choose the desired option 42 Continuous Optimal image stabilization for the shooting conditions is automatically applied Intelligent IS 53 Shoot Only Image stabilization is active only at the moment of shooting Off Deactivates image stabili...

Page 148: ...own with the subject slightly enlarged due to rotational image stabilization To shoot subjects at the same size shown before shooting you can disable this image stabilization z z Follow the steps on 147 to access the IS Settings screen z z Choose Dynamic IS and then choose 2 42 You can also set IS Mode to Off so that subjects are recorded at the same size shown before shooting COPY ...

Page 149: ...149 Tv Av M C1 and C2 Mode Take smarter more sophisticated shots and customize the camera for your shooting style Instructions in this chapter apply to the camera as set to the respective mode 5 COPY ...

Page 150: ...econds or slower there will be a delay before you can shoot again as images are processed to remove noise When shooting at low shutter speeds on a tripod you should set IS Mode to Off 147 The speed you set may be lowered automatically as needed if the flash fires With shutter speeds of 1 3 seconds or slower ISO speed is and cannot be changed Orange display of aperture values when you press the shu...

Page 151: ...shutter speeds when you press the shutter button halfway indicates that the settings deviate from standard exposure Adjust the aperture value until the shutter speed is displayed in white or use safety shift see below B Aperture value size of the opening made by the iris in the lens To avoid exposure problems in M and B modes you can have the camera automatically adjust the shutter speed or apertu...

Page 152: ...standard exposure level X X The exposure level mark is shown in orange when the difference from standard exposure exceeds 2 stops 2 or 2 is displayed in orange in the lower right when you press the shutter button halfway After you set the shutter speed or aperture value the exposure level may change if you adjust the zoom or recompose the shot Screen brightness may change depending on your specifi...

Page 153: ...ttons or turning the 5 dial 41 X X Once the setting is complete X is displayed You can also set the flash level by accessing n 42 and choosing Flash Output in Flash Control on the 4 tab You can set the flash level in M or B mode by accessing n 42 choosing Flash Control on the 4 tab and then setting Flash Mode to Manual You can also access the Built in Flash Settings n screen as follows except when...

Page 154: ... Items you choose for display are labeled with z z In LCD Viewfinder you can specify to show or hide this information in LCD monitor or viewfinder display modes switched by pressing the l button Press the o p q r buttons or turn the 5 dial to choose the screen or and then press the m button To hide this information in the display mode accessed by pressing the l button add to the icon Note that the...

Page 155: ...hen press the m button 3 Use the assigned function as needed z z Press the button to activate the assigned function To restore default settings choose Icons labeled with indicate that the function is not available in the current shooting mode or under current function conditions When the or function is used each press of the button records white balance data 123 and the white balance settings chan...

Page 156: ...settings can be retained this way Settings that can be saved Shooting modes G M B and D Items set in G M B or D modes 115 152 Shooting menu settings Zoom positions Manual focus positions 130 My Menu settings 157 1 Enter a shooting mode with settings you want to save and change the settings as desired 2 Configure the setting z z Press the n button choose Save Settings on the 4 tab and then press th...

Page 157: ... Menu Save up to five commonly used shooting menus as menus on the tab for instant access to all of these items from a single screen 1 Access the setting screen z z Press the n button choose My Menu settings on the tab and then press the m button 42 2 Configure the setting z z Press the o p buttons or turn the 5 dial to choose Select items and then press the m button z z Press the o p buttons or t...

Page 158: ...choose a menu to move and then press the m button z z Press the o p buttons or turn the 5 dial to change the order and then press the m button z z Press the n button Grayed out items in step 2 can also be specified but they may not be available in some shooting modes To make My Menu immediately accessible by pressing the n button in Shooting mode choose Set default view and press the q r buttons t...

Page 159: ...browse or edit them in many ways To prepare the camera for these operations press the 1 button to enter Playback mode It may not be possible to play back or edit images that were renamed or already edited on a computer or images from other cameras 6 COPY ...

Page 160: ...counterclockwise To view the next image press the r button or turn the 5 dial clockwise z z Press and hold the q r buttons to browse through images quickly z z To access Scroll Display mode turn the 5 dial rapidly In this mode turn the 5 dial to browse through images z z To return to single image display press the m button z z To browse images grouped by shooting date press the o p buttons in Scro...

Page 161: ...n X X After the movie is finished is displayed To switch to Shooting mode from Playback mode press the shutter button halfway To deactivate Scroll Display press the n button choose Scroll Display on the 1 tab and then choose Off If you prefer to have the most recent shot displayed when you enter Playback mode press the n button and on the 1 tab choose Resume and then Last shot To change the transi...

Page 162: ...immediately after you shoot while your shot is displayed However simple information display is not available To change the initial display mode press the n button and choose Review Info on the 4 tab 84 Still Images Movies Overexposure Warning for Image Highlights Washed out highlights in the image flash on the screen in detailed information display see above Still Images Movies Histogram High Dark...

Page 163: ... o button again to return to detailed information display Still Images Checking People Detected in Face ID If you switch the camera to simple information display mode 162 the names of up to five detected people registered in Face ID 63 will be displayed Switch to simple information display mode and check z z Press the l button repeatedly until simple information display is activated and then press...

Page 164: ...with and press the m button 2 Play the clip z z After Play back movie is displayed press the q r buttons or turn the 5 dial to choose OK and then press the m button X X The movie clip recorded automatically on the day of still image shooting is played back from the beginning Movies created in mode can also be viewed by date 169 After a moment will no longer be displayed when you are using the came...

Page 165: ...ed over faces detected later in Playback mode X X The portion of the image in the orange frame is magnified 2 Switch frames z z Move the zoom lever toward k once X X The screen at left is displayed z z To switch to a different frame when there are multiple frames press the m button 3 Zoom in or out or view other image areas z z As you examine the focus use the zoom lever to zoom in or out Press th...

Page 166: ... p q r buttons to choose an image X X An orange frame is displayed around the selected image z z Press the m button to view the selected image in single image display Still Images Movies Finding Images Matching Specified Conditions Find desired images quickly on a memory card full of images by filtering image display or jumping between images according to your specified conditions You can also pro...

Page 167: ...ss the m button and go to step 3 2 Choose the second condition and check the images found z z Press the q r buttons to choose another condition Once you turn the 5 dial you can view the images narrowed down by your conditions z z To cancel display filtering press the n button z z To switch to filtered image display press the m button and go to step 3 3 View the filtered images z z Images matching ...

Page 168: ...lect All Images in Search in Protecting Images 175 Erasing All Images 179 Adding Images to the Print List DPOF 238 or Adding Images to a Photobook 243 However if you recategorize images 185 or edit them and save them as new images 188 193 a message is displayed and filtered image display ends Still Images Filtering Display by 1 Choose z z Following steps 1 2 on 167 choose and press the m button 2 ...

Page 169: ...iewing Movie Digest Movies Movies created in mode 86 can be viewed by date 1 Choose a movie z z Press the n button choose Movie Digest Playback on the 1 tab and then choose the date 2 Play the movie z z Press the m button to start playback COPY ...

Page 170: ...tton will display Display all images Press m to cancel group playback During group playback step 2 you can browse through images quickly Navigating Through Images in an Index 166 and magnify them Magnifying Images 172 You can protect erase or print all images in a group at once or add them to a photobook by choosing All Images in Group in Protecting Images 175 Erasing All Images 179 Adding Images ...

Page 171: ...5 dial to choose Edit ID Info and then press the m button 2 Choose an image z z Following the procedure on 160 choose an image and press the m button z z An orange frame is displayed around the selected face When multiple names are displayed in an image press the q r buttons or turn the 5 dial to choose the name to change and then press the m button 3 Choose the item to edit z z Press the o p q r ...

Page 172: ...ge z z Moving the zoom lever toward k will zoom in and magnify the image You can magnify images up to about 10x by continuing to hold the zoom lever z z To zoom out move the zoom lever toward g You can return to single image display by continuing to hold it 2 Move the display position and switch images as needed z z To move the display position press the o p q r buttons z z To switch to other imag...

Page 173: ...n press the m button X X The slideshow will start a few seconds after Loading image is displayed z z Press the n button to stop the slideshow The camera s power saving functions 38 are deactivated during slideshows To pause or resume slideshows press the m button You can switch to other images during playback by pressing the q r buttons or turning the 5 dial For fast forward or fast rewind hold th...

Page 174: ...tton 42 X X Four candidate images are displayed 2 Choose an image z z Press the o p q r buttons to choose the image you want to view next X X Your chosen image is displayed in the center surrounded by the next four candidate images z z For full screen display of the center image press the m button To restore the original display press the m button again z z Press the n button to restore single ima...

Page 175: ...ose a selection method z z Choose a menu item and a setting as desired 42 z z To return to the menu screen press the n button Protected images on a memory card will be erased if you format the card 203 204 Protected images cannot be erased using the camera s erasure function To erase them this way first cancel protection Choosing Images Individually 1 Choose Select z z Following step 2 above choos...

Page 176: ...ages 3 Protect the image z z Press the n button A confirmation message is displayed z z Press the q r buttons or turn the 5 dial to choose OK and then press the m button Images will not be protected if you switch to Shooting mode or turn the camera off before finishing the setup process in step 3 Selecting a Range 1 Choose Select Range z z Following step 2 on 175 choose Select Range and press the ...

Page 177: ... press the m button z z Press the q r buttons or turn the 5 dial to choose an image and then press the m button z z Images before the first image cannot be selected as the last image 4 Protect the images z z Press the p button to choose Protect and then press the m button You can also choose the first or last image by turning the 5 dial when the top screen in steps 2 and 3 is displayed COPY ...

Page 178: ...n 175 choose Select All Images and press the m button 2 Protect the images z z Press the o p buttons or turn the 5 dial to choose Protect and then press the m button To cancel protection for groups of images choose Unlock in step 4 of Selecting a Range or in step 2 of Specifying All Images at Once COPY ...

Page 179: ...Erase is displayed press the q r buttons or turn the 5 dial to choose Erase and then press the m button X X The current image is now erased z z To cancel erasure press the q r buttons or turn the 5 dial to choose Cancel and then press the m button Pressing the a button while images are displayed will give you the option of choosing Erase Erase JPEG or Erase JPEG for deletion Erasing All Images You...

Page 180: ... n button Choosing Images Individually 1 Choose Select z z Following step 2 above choose Select and press the m button 2 Choose an image z z Once you follow step 2 on 176 to choose an image is displayed z z To cancel selection press the m button again is no longer displayed z z Repeat this process to specify other images 3 Erase the image z z Press the n button A confirmation message is displayed ...

Page 181: ...eps 2 3 on 176 to specify images 3 Erase the images z z Press the p button to choose Erase and then press the m button Specifying All Images at Once 1 Choose Select All Images z z Following step 2 on 185 choose Select All Images and press the m button 2 Erase the images z z Press the q r buttons or turn the 5 dial to choose OK and then press the m button COPY ...

Page 182: ...choose Rotate on the 1 tab 42 2 Rotate the image z z Press the q r buttons or turn the 5 dial to choose an image z z The image is rotated 90 each time you press the m button z z To return to the menu screen press the n button Movies with an image quality of or cannot be rotated Rotation is not possible when Auto Rotate is set to Off 183 COPY ...

Page 183: ...mera z z Press the n button choose Auto Rotate on the 1 tab and then choose Off 42 Images cannot be rotated 182 when you set Auto Rotate to Off Additionally images already rotated will be displayed in the original orientation In Smart Shuffle 174 mode even if Auto Rotate is set to Off images shot vertically will be displayed vertically and rotated images will be displayed in the rotated orientatio...

Page 184: ... z z Press the n button and choose Favorites on the 1 tab 42 2 Choose an image z z Press the q r buttons or turn the 5 dial to choose an image and then press the m button is displayed z z To untag the image press the m button again is no longer displayed z z Repeat this process to choose additional images 3 Finish the setup process z z Press the n button A confirmation message is displayed z z Pre...

Page 185: ...ages are automatically categorized at the time of shooting according to shooting conditions Images with detected faces or images shot in I or mode Images detected as or in A mode or images shot in mode Images shot in P or t mode Choosing a Selection Method 1 Access the setting screen z z Press the n button and then choose My Category on the 1 tab 42 2 Choose a selection method z z Choose a menu it...

Page 186: ...y and then press the m button is displayed z z To cancel selection press the m button again is no longer displayed z z Repeat this process to choose additional images 4 Finish the setup process z z Press the n button A confirmation message is displayed Press the q r buttons or turn the 5 dial to choose OK and then press the m button Images will not be assigned to a category if you switch to Shooti...

Page 187: ... on 176 to specify images 3 Choose a category z z Press the p button to choose the type of image and then press the q r buttons or turn the 5 dial to choose a category 4 Finish the setup process z z Press the p button to choose Select and then press the m button You can clear the selection of all images in the Select Range category by choosing Deselect in step 4 COPY ...

Page 188: ...e Resize on the 1 tab 42 2 Choose an image z z Press the q r buttons or turn the 5 dial to choose an image and then press the m button 3 Choose an image size z z Press the q r buttons or turn the 5 dial to choose the size and then press the m button X X Save new image is displayed 4 Save the new image z z Press the q r buttons or turn the 5 dial to choose OK and then press the m button X X The ima...

Page 189: ...new image is displayed z z Press the q r buttons or turn the 5 dial to choose Yes and then press the m button X X The saved image is now displayed Editing is not possible for images saved as in step 3 RAW images cannot be edited Images cannot be resized to a higher resolution COPY ...

Page 190: ... of the image to be cropped X X The original image is shown in the upper left and a preview of the image as cropped is shown in the lower right z z To resize the frame move the zoom lever z z To move the frame press the o p q r buttons z z To change the frame orientation press the l button z z Faces detected in the image are enclosed in gray frames in the upper left image To crop the image based o...

Page 191: ...rs on the 1 tab 42 2 Choose an image z z Press the q r buttons or turn the 5 dial to choose an image and then press the m button 3 Choose an option z z Press the q r buttons or turn the 5 dial to choose an option and then press the m button 4 Save as a new image and review z z Follow steps 4 5 on 188 Image quality of pictures you repeatedly edit this way will be a little lower each time and you ma...

Page 192: ... n button and then choose i Contrast on the 1 tab 42 2 Choose an image z z Press the q r buttons or turn the 5 dial to choose an image and then press the m button 3 Choose an option z z Press the q r buttons or turn the 5 dial to choose an option and then press the m button 4 Save as a new image and review z z Follow steps 4 5 on 188 For some images correction may be inaccurate or may cause images...

Page 193: ...displayed around corrected image areas z z Enlarge or reduce images as needed Follow the steps in 172 4 Save as a new image and review z z Press the o p q r buttons or turn the 5 dial to choose New File and then press the m button X X The image is now saved as a new file z z Follow step 5 on 189 Some images may not be corrected accurately To overwrite the original image with the corrected image ch...

Page 194: ... turn the 5 dial to move Cut the beginning of the movie from by choosing and cut the end of the movie by choosing z z Even if you move to a position other than a mark choosing will only cut the portion from the nearest to the left and choosing will cut the portion from the nearest to the right 3 Review the edited movie z z Press the o p buttons to choose and then press the m button The edited movi...

Page 195: ...e movie is now saved as a new file To overwrite the original movie with the cut one choose Overwrite in step 4 In this case the original movie will be erased Overwrite is only available when memory cards lack sufficient free space Movies may not be saved if the battery runs out while saving is in progress When editing movies you should use a fully charged battery or an AC adapter kit sold separate...

Page 196: ...e z z Choose the chapter to erase by pressing the q r buttons or turning the 5 dial and then choosing or 2 Choose z z Following steps 1 3 on 160 161 choose and press the m button X X The selected chapter is played back repeatedly 3 Confirm erasure z z Press the q r buttons or turn the 5 dial to choose OK and then press the m button X X The chapter is erased and the clip is overwritten is not displ...

Page 197: ...197 Setting Menu Customize or adjust basic camera functions for greater convenience 7 COPY ...

Page 198: ...ose On Operation can also be silenced by holding down the l button as you turn the camera on Sound is not played during movies if you mute camera sounds 160 To restore sound during movies press the o button Adjust volume with the o p buttons as needed Adjusting the Volume Adjust the volume of individual camera sounds as follows z z Choose Volume and then press the m button z z Choose an item and t...

Page 199: ... to choose an option 1 Preset sounds cannot be modified 2 Preset sounds Can be changed by using the included software The default shutter sound is used in mode 106 regardless of any changes to Shutter Sound Hiding Hints and Tips Hints and tips are normally shown when you choose FUNC menu 41 or Menu 42 items If you prefer you can deactivate this information z z Choose Hints Tips and then choose Off...

Page 200: ...abroad simply register the destination in advance and switch to that time zone This convenient feature eliminates the need to change the Date Time setting manually Before using the world clock be sure to set the date and time and your home time zone Setting the Date and Time 19 1 Specify your destination z z Choose Time Zone and then press the m button z z Press the o p buttons or turn the 5 dial ...

Page 201: ...reen brightness as follows Screen and viewfinder brightness can be set separately Activate the desired display in advance by pressing the l button z z Choose LCD Brightness and then press the q r buttons to adjust the brightness For maximum brightness press and hold the l button for at least one second when the shooting screen is displayed or when in single image display This will override the LCD...

Page 202: ...Assign a desired shot or use the included software to change the image Customizing the Start up Screen 1 Access the Start up Image screen in Playback mode z z Press the 1 button z z Following the previous procedure choose 2 and press the m button 2 Choose one of your shots z z Choose an image and press the m button After Register is displayed choose OK either press the q r buttons or turn the 5 di...

Page 203: ...er or take other steps to back them up An Eye Fi card 245 contains software on the card itself Before formatting an Eye Fi card install the software on a computer 1 Access the Format screen z z Choose Format and then press the m button 2 Choose OK z z Press the o p buttons to choose Cancel choose OK either press the q r buttons or turn the 5 dial and then press the m button 3 Format the memory car...

Page 204: ...r continuous shooting is slower or movie recording suddenly stops Low level formatting erases all data on a memory card Before low level formatting copy images on the memory card to a computer or take other steps to back them up Perform low level formatting z z On the screen in step 2 on 203 press the o p buttons or turn the 5 dial to choose Low Level Format and then select this option mark with a...

Page 205: ...ory cards or when a new folder is created Regardless of the option selected in this setting shots may be numbered consecutively after the last number of existing images on newly inserted memory cards To start saving shots from 0001 use an empty or formatted 203 memory card Refer to the Software Guide 28 for information on the card folder structure and image formats Date Based Image Storage Instead...

Page 206: ...c Power Saving Adjustment Adjust the timing of automatic camera and screen deactivation Auto Power Down and Display Off respectively as needed 38 1 Access the Power Saving screen z z Choose Power Saving and then press the m button 2 Configure the settings z z After choosing an item press the q r buttons to adjust it as needed To conserve battery power you should normally choose On for Auto Power D...

Page 207: ...t seems ineffective in helping you level the camera For greater calibration accuracy display grid lines 154 to help you level the camera in advance 1 Level the camera z z Place the camera on a flat surface such as a table 2 Access the Electronic Level screen z z Choose Electronic Level and then press the m button 3 Calibrate the electronic level z z Choose Calibrate and press the m button A confir...

Page 208: ...tion to Record in Images To record the author s name and copyright details in images set this information beforehand as follows 1 Access the setting screen z z Choose Copyright Info and then press the m button z z Press the o p buttons or turn the 5 dial to choose Enter Author s Name or Enter Copyright Details and then press the m button 2 Enter a name z z Press the o p q r buttons or turn the 5 d...

Page 209: ...ge and delete copyright information Some characters entered with the included software may not display on the camera but will be correctly recorded in images You can view change and delete copyright information recorded in images by using the included software to save images to a computer Deleting All Copyright Information You can delete both the author s name and copyright details at the same tim...

Page 210: ...lay Language Change the display language as needed 1 Access the Language screen z z Choose Language and then press the m button 2 Configure the setting z z Press the o p q r buttons or turn the 5 dial to choose a language and then press the m button You can also access the Language screen in Playback mode by pressing and holding the m button and immediately pressing the n button Adjusting Other Se...

Page 211: ...choose OK and then press the m button X X Default settings are now restored The following functions are not restored to default settings 3 tab settings Date Time 19 Language 21 Time Zone 200 the image assigned to Start up Image 202 and Video System 222 Custom white balance data you have recorded 123 Colors chosen in Color Accent 98 or Color Swap 100 The shooting mode 89 Information registered usin...

Page 212: ...212 COPY ...

Page 213: ...213 Accessories Use included accessories effectively and enjoy the camera in more ways with optional Canon accessories and other compatible accessories sold separately 8 COPY ...

Page 214: ...n an uncharged battery Long term battery storage After using up all remaining battery power remove the battery from the camera Store the battery with the cover attached Storing a partially charged battery over extended periods about a year may shorten its life or affect performance Using the battery charger abroad The charger can be used in areas with 100 240 V AC power 50 60 Hz For power outlets ...

Page 215: ...AC Adapter Kit ACK DC80 z z For powering the camera using household power Recommended when using the camera over extended periods or when connecting the camera to a printer or computer Cannot be used to charge the camera battery The battery charger and AC adapter kit can be used in areas with 100 240 V AC power 50 60 Hz For power outlets in a different format use a commercially available adapter f...

Page 216: ... to subjects during vertical shooting Includes Off Camera Shoe Cord OC E3 Speedlite Transmitter ST E2 z z Enables wireless control of slave Speedlite flash units except Speedlite 270EX 220EX Other Accessories Interface Cable IFC 400PCU z z For connecting the camera to a computer or printer Stereo AV Cable AVC DC400ST z z Connect the camera to a TV to enjoy playback on the larger TV screen HDMI Cab...

Page 217: ...duce image quality Filter Adapter FA DC67A z z Adapter required when mounting a 67 mm filter Canon Lens Filter 67 mm dia z z Protects the lens and enables a variety of shooting effects A lens hood and filter adapter cannot be attached to the camera at the same time Printers Canon PictBridge Compatible Printers z z Printing images without a computer is possible by connecting the camera to a Canon P...

Page 218: ...ng the camera to an HDTV with the HDMI Cable HTC 100 sold separately enables you to view your shots on the larger screen of the TV Movies shot at a resolution of or can be viewed in high definition 1 Make sure the camera and TV are off 2 Connect the camera to the TV z z On the TV insert the cable plug fully into the HDMI input as shown z z On the camera open the terminal cover and insert the cable...

Page 219: ...o turn the camera on X X Images from the camera are now displayed on the TV Nothing is displayed on the camera screen z z When finished turn off the camera and TV before disconnecting the cable Camera operating sounds are not played while the camera is connected to an HDTV COPY ...

Page 220: ...n the 3 tab and then choose Enable 42 2 Connect the camera to the TV z z Follow steps 1 2 on 218 to connect the camera to the TV 3 Display images z z Turn on the TV On the camera press the 1 button X X Images from the camera are now displayed on the TV Nothing is displayed on the camera screen 4 Control the camera with the TV remote z z Press the q r buttons on the remote to browse images z z To d...

Page 221: ...is selected Slideshow Starts slideshow playback To switch images during playback press the q r buttons on the remote control Index Playback Displays multiple images in an index l Change Display Switches display modes 43 Pressing the n button on the camera will switch control to the camera itself which will prevent remote control until you return to single image display The camera may not always re...

Page 222: ...s as shown z z On the camera open the terminal cover and insert the cable plug fully into the camera terminal 3 Display images z z Follow steps 3 4 on 218 to display images Correct display is not possible unless the camera video output format NTSC or PAL matches the TV format To change the video output format press the n button and choose Video System on the 3 tab When the camera and TV are connec...

Page 223: ...eed to monitor the remaining battery level 1 Make sure the camera is off 2 Open the cover z z Follow step 2 on 16 to open the memory card battery cover and then open the coupler cable port cover as shown 3 Connect the adapter to the coupler z z Insert the adapter plug fully into the coupler 4 Insert the coupler z z Insert the coupler as shown until it locks into place COPY ...

Page 224: ...en plug the other end into a power outlet z z Turn the camera on and use it as desired z z When finished turn the camera off and unplug the power cord from the outlet Do not disconnect the adapter or unplug the power cord while the camera is still on This may erase your shots or damage the camera Do not attach the adapter or adapter cord to other objects Doing so could result in malfunction or dam...

Page 225: ...mera mark and turn the lens hood in the direction of the arrow until it locks in place z z To remove the lens hood turn it the opposite direction z z To attach the lens hood inverted as shown when the hood is not used align the lens hood mark with the camera mark and turn the lens hood in the direction of the arrow until it locks in place Vignetting may occur if you use the built in flash when the...

Page 226: ...se occur when pressing the shutter button directly This optional accessory is convenient when shooting at slow shutter speeds 1 Connect the remote switch z z Make sure the camera is off z z Open the terminal cover and insert the remote switch plug 2 Shoot z z To shoot press the release button on the remote switch Bulb photography long exposures is not supported COPY ...

Page 227: ...sh units may not fire correctly or may not fire at all in some cases Use of non Canon flash units especially high voltage flash units or flash accessories may prevent normal camera operation and may damage the camera Also refer to the Speedlite EX series manual for additional information Still Images Movies Speedlite EX Series These optional flash units can provide bright lighting and meet a varie...

Page 228: ...t the setting by pressing the q r buttons z z Available settings vary depending on the shooting mode and the flash attached 229 Settings for the built in flash cannot be configured while a Speedlite EX series flash is attached because that setting screen is no longer accessible You can also access the setting screen by pressing the h button for at least one second Flash settings in shooting mode c...

Page 229: ...G M B or D mode In other shooting modes only Red Eye Corr and Red Eye Lamp can be configured With autoflash control the flash always fires However external flash units do not fire in modes that the built in flash does not fire 260 Item Options Shooting Mode G M B D Flash Mode Auto 1 O O O Manual 2 O O O O Flash Exp Comp 3 3 to 3 O O O Flash Output 4 1 128 5 to 1 1 in 1 3 stop increments O O O O Sh...

Page 230: ...peedlite 430EX II 430EX 320EX 270EX II 270EX 6For options other than On Off configure the setting on the flash unit itself Not available with Speedlite 430EX II 320EX 270EX II 270EX When this setting is set to On Shutter Sync cannot be set to 2nd curtain If Shutter Sync is set to 2nd curtain it will be changed to 1st curtain 7Can only be configured when Flash Mode is Auto 8Restores all default set...

Page 231: ...printer Also refer to the printer manual for additional information Still Images Easy Print Easily print your shots by connecting the camera to a PictBridge compatible printer sold separately with the USB cable 1 Make sure the camera and printer are off 2 Connect the camera to the printer z z Open the cover Holding the smaller cable plug in the orientation shown insert the plug fully into the came...

Page 232: ... the image z z Press the c button X X Printing now begins z z To print other images repeat steps 5 6 after printing is finished z z When you are finished printing turn the camera and printer off and disconnect the interface cable For Canon PictBridge compatible printers sold separately see 217 RAW images cannot be printed COPY ...

Page 233: ... q r buttons Default Matches current printer settings Date Prints images with the date added File No Prints images with the file number added Both Prints images with both the date and file number added Off Default Matches current printer settings Off On Uses information from the time of shooting to print under optimal settings Red Eye 1 Corrects red eye No of Copies Choose the number of copies to ...

Page 234: ...e image area to print 2 Adjust the cropping frame as needed z z To resize the frame move the zoom lever or turn the 5 dial z z To move the frame press the o p q r buttons z z To rotate the frame press the l button z z When finished press the m button 3 Print the image z z On the screen in step 1 press the o p buttons or turn the 5 dial to choose Print and then press the m button Cropping may not b...

Page 235: ...size z z Press the o p buttons or turn the 5 dial to choose an option and then press the m button 3 Choose a type of paper z z Press the o p buttons or turn the 5 dial to choose an option and then press the m button 4 Choose a layout z z Press the o p buttons or turn the 5 dial to choose an option z z When choosing N up press the q r buttons to specify the number of images per sheet z z Press the ...

Page 236: ...on of L and an aspect ratio of 4 3 Fixed Size Choose the print size Choose from 3 5 x 5 in postcard or wide format prints Still Images Printing ID Photos 1 Choose ID Photo z z Following steps 1 4 on 235 choose ID Photo and press the m button 2 Choose the long and short side length z z Press the o p buttons or turn the 5 dial to choose an item Choose the length by pressing the q r buttons and then ...

Page 237: ... the 5 dial to choose and then press the q r buttons to choose the printing method 3 Print the image Movie Printing Options Single Prints the current scene as a still image Sequence Prints a series of scenes a certain interval apart on a single sheet of paper You can also print the folder number file number and elapsed time for the frame by setting Caption to On To cancel printing in progress pres...

Page 238: ...he Print List via the c Button You can add images to the print list DPOF after your shot or later during playback simply by pressing the c button 1 Choose an image z z Press the q r buttons or turn the 5 dial to choose an image 2 Add the image to the print list z z Press the c button z z Press the o p buttons to specify the number of prints Choose Add by pressing the q r buttons or turning the 5 d...

Page 239: ...heet Both Both standard and index formats are printed Date On Images are printed with the shooting date Off File No On Images are printed with the file number Off Clear DPOF data On All image print list settings are cleared after printing Off Not all of your DPOF settings may be applied in printing by the printer or photo development service in some cases may be displayed on the camera to warn you...

Page 240: ...ess the q r buttons or turn the 5 dial to choose an image and then press the m button X X You can now specify the number of copies z z If you specify index printing for the image it is labeled with a icon To cancel index printing for the image press the m button again is no longer displayed 3 Specify the number of prints z z Press the o p buttons or turn the 5 dial to specify the number of prints ...

Page 241: ...2 3 on 176 to specify images 3 Configure the print settings z z Press the o p buttons to choose Order and then press the m button Still Images Setting Up Printing for All Images 1 Choose Select All Images z z Following step 1 on 240 choose Select All Images and press the m button 2 Configure the print settings z z Press the q r buttons or turn the 5 dial to choose OK and then press the m button CO...

Page 242: ...al to choose OK and then press the m button Still Images Printing Images Added to the Print List DPOF z z When images have been added to the print list 238 241 the screen at left is displayed after you connect the camera to a PictBridge compatible printer Press the o p buttons to choose Print now and then simply press the m button to print the images in the print list z z Any DPOF print job that y...

Page 243: ...ion Method z z Press the n button choose Photobook Set up on the 1 tab and then choose how you will select images may be displayed on the camera to warn you that the memory card has print settings that were configured on another camera Changing the print settings using this camera may overwrite all previous settings After importing images to your computer also refer to the Software Guide 28 and th...

Page 244: ...l Images Adding All Images to a Photobook 1 Choose Select All Images z z Following the procedure on 243 choose Select All Images and press the m button 2 Configure the print settings z z Press the q r buttons or turn the 5 dial to choose OK and then press the m button Still Images Removing All Images from a Photobook 1 Choose Clear All Selections z z Following the procedure on 243 choose Clear All...

Page 245: ...nd computer settings For details refer to the card s user manual Poor Eye Fi connections may cause image transfer to take a long time and transfer may be interrupted in some cases Eye Fi cards may become hot due to their transfer functions Battery power will be consumed faster than in normal use Camera operation may become sluggish To resolve this try setting Eye Fi trans to Disable Connection sta...

Page 246: ...m button z z Choose Connection info and then press the m button X X The connection information screen is displayed Disabling Eye Fi Transfer Configure the setting as follows to disable Eye Fi transfer by the card if necessary Choose Disable in Eye Fi trans z z Press the n button choose Eye Fi Settings on the 3 tab and then press the m button z z Choose Eye Fi trans and then choose Disable Eye Fi S...

Page 247: ...247 Appendix Helpful information when using the camera 9 COPY ...

Page 248: ... Purchase a new battery The lens is not retracted Do not open the memory card battery cover while the camera is on Close the cover turn the camera on and then turn it off again 17 The battery is swollen Battery swelling is normal and does not pose any safety concerns However if battery swelling prevents the battery from fitting in the camera contact a Canon Customer Support Help Desk Display on a ...

Page 249: ...F lock 134 140 No AF frames are displayed and the camera does not focus when the shutter button is pressed halfway To have AF frames displayed and the camera focus correctly try composing the shot with higher contrast subject areas centered before you press the shutter button halfway Otherwise try pressing the shutter button halfway repeatedly Subjects in shots look too dark Raise the flash and se...

Page 250: ...ings or FUNC menu settings are not available Available setting items vary by shooting mode Refer to Functions Available in Each Shooting Mode FUNC Menu and Shooting Menu 260 266 The Babies or Children icon does not display The Babies and Children icons will not display if the birthday is not set in face information 63 If the icons still do not display even when you set the birthday re register fac...

Page 251: ...ons when playing movies copied to memory cards that have slow read speeds When movies are played on a computer frames may be dropped and audio may skip if computer performance is inadequate Sound is not played during movies Adjust the volume 26 161 if you have activated Mute 198 or the sound in the movie is faint No sound is played for movies shot in 95 or 111 mode because audio is not recorded in...

Page 252: ...insert a memory card with enough free space 16 Charge the battery 15 No Image The memory card does not contain any images that can be displayed Protected 175 Unidentified Image Incompatible JPEG Image too large Cannot play back AVI RAW Unsupported or corrupt images cannot be displayed It may not be possible to display images that were edited or renamed on a computer or images shot with another cam...

Page 253: ... card slot Naming error The folder could not be created or images could not be recorded because the highest supported folder number 999 for storing images on the card has been reached and the highest supported image number 9999 for images in folders has been reached In the 3 menu change File Numbering to Auto Reset 205 or format the memory card 203 Lens Error This error may occur if the lens is he...

Page 254: ...setting 235 If this error message is displayed when the setting is correct restart the printer and complete the setting on the camera again Ink absorber full Contact a Canon Customer Support Help Desk to request assistance with ink absorber replacement COPY ...

Page 255: ...ing method 116 Still image compression 147 Resolution 74 Histogram 162 Recordable shots 275 Self timer 58 Movie quality 77 Remaining time 275 Digital zoom magnification 55 Digital tele converter 132 Focusing range 129 130 AF lock 140 IS mode icon 53 Shooting mode 260 Scene icon 51 Flash mode 142 143 LED light 228 AF frame 133 Red eye correction 75 Flash exposure compensation 144 Flash output level...

Page 256: ... 78 Exposure compensation bar 115 Regular orientation Held vertically The camera detects the shooting orientation and adjusts settings for optimal shots Orientation is also detected during playback and in either orientation the camera automatically rotates images as needed However the orientation may not be detected correctly when the camera is pointed straight up or down Battery Level An on scree...

Page 257: ...ering method 116 Folder number File number 205 Current image no Total no of images Shutter speed still images 150 Image quality Frame rate movies 77 Aperture value 151 i Contrast 120 192 Flash exposure compensation 144 Flash output level 153 Focusing range 129 130 File size Still images Resolution 275 Movies Playback time Compression image quality 147 Resolution 74 RAW 146 MOV movies Grouped image...

Page 258: ...button Previous Frame For fast rewind keep holding down the m button Next Frame For fast forward keep holding down the m button Skip Forward or Next Clip 86 To continue skipping forward keep holding down the m button Edit 194 Shown when you have selected a movie created in mode 196 c Shown when the camera is connected to a PictBridge compatible printer 231 Displays the frame approx 4 sec before or...

Page 259: ... solvents to clean the camera or screen Use a blower brush to remove dust from the lens If cleaning is difficult contact a Canon Customer Support Help Desk To prevent condensation from forming on the camera after sudden temperature changes when the camera is transferred from cold to warm environments put the camera in an airtight resealable plastic bag and let it gradually adjust to the temperatur...

Page 260: ...k 115 144 6 O O O O O O AE Lock Movie Exposure Shift 110 AF Lock when assigned to the button 155 O O O O O O O Focusing Range 129 130 1 1 O O O O O O O e 1 1 O O O O O 130 AF Lock 140 1 1 O O O O O Move AF Frame 135 1 1 O O O O Resize AF Frame 135 1 1 O O O O O Face Select 139 O O O O O O O O Tracking AF 62 136 O O O O O O O O 56 57 O O O O O O O O O Shoot Still Images During Movies 108 O O O O O ...

Page 261: ...O O O O O O O O O O O O O O O O O O O O O O O O O O O O O O O O O O O O O O O O O O O O O O O O O O O O O O O O O O O O O O O O O O O O O O O O O O O O O O O O O O O O O O O O O O O O O O O O O O O O O O O O O O O O O O O O O O O O O O O O O O O O O O O O O O O O O O O O O O O O O O O O O O O O O O O O O O O O O O O O O O O O O O Available or set automatically Not available 4 Set to when the flash...

Page 262: ... O O O O O White Balance Correction 124 1 1 O O O O My Colors 125 1 1 O O O O O O O 3 3 4 1 1 O O O O O Bracketing 141 1 1 O O O O O O O 1 1 O O O 1 1 O O O O Drive Mode 127 1 1 O O O O O O O O 1 1 O O O O 5 1 1 O O O O O 1 Options vary depending on the assigned shooting mode 2 Not available in x or v 3 White balance is not available 4 Set in a range of 1 5 contrast sharpness color saturation red ...

Page 263: ... O O O O O O O O O O O O O O O O O O O O O O O O O O O O O O O O O O O O O O O O O O O O O O O O O O O O O O O O O O O O O O O O O O O O O O O O O O O O O O O O O O O O O O O O O O O O O O O O O O O O O O O O O O O O O O O O O O O O O O O O O O O O O O O O O O O O O O O O Available or set automatically Not available COPY ...

Page 264: ...till Image Aspect Ratio 73 1 1 O O O O O O Image Type 146 1 1 O O O O Resolution 74 1 1 O O O O O O O 1 1 O O O O O O O Compression 147 1 1 O O O O 1 1 O O O O O O O Movie Quality 77 1 1 O O O O O O O 1 1 O O O O O O O 1 1 O O O O O O O 1 Options vary depending on the assigned shooting mode 2 Only and are available 3 Synchronizes with the aspect ratio setting and is automatically set 96 COPY ...

Page 265: ... O O O O 2 O O O O O O O O O O O O O O O O O O O O O O O O O O O O O O O O O O O O O O O O O O O O O O O O O O O O O O O O O O O O O O O O O O O O O O O O O O O O O O O O O O O O O O O O O 3 O O O O O O O O O O O O O O O O O O O O 3 O O O O O O O O O Available or set automatically Not available COPY ...

Page 266: ... O O Servo AF 137 On 2 2 O O O O O Off 5 2 2 O O O O O O Continuous AF 138 On 2 2 O O O O O O O Off 2 2 O O O O AF assist Beam 82 On 2 2 O O O O O O Off 2 2 O O O O O O O MF Point Zoom 130 On 2 2 O O O O Off 2 2 O O O O O O O Safety MF 130 On 2 2 O O O O O Off 2 2 O O O O O O O 1 Operation when no faces are detected varies by shooting mode 2 Options vary depending on the assigned shooting mode 3 O...

Page 267: ... O O O O O O O O O O O O O O O O O O O O O O O O O O O O O O O O O O O O O O O O O O O O O O O O O O O O O O O O O O O O O O O O O O O O O O O O O O O O O O O O O O O O O O O O O O O O O O O O O O O O O O O O O O O O O O O O O O O O O O O O O O O O O O O O O O O O O O O O O O O O O O O O O O O O O O O O O O O O O O O O O O O O O O O O O O O O O O O O O O O O O O O O O O O O O Available or set auto...

Page 268: ... O Red Eye Lamp On 1 1 O O O O O O Off 1 1 O O O O O O Safety FE On 1 1 O O O O O Off 1 1 O O O O O ISO Auto Settings 118 Max ISO Speed 1 1 O O O O Rate of Change 1 1 O O O High ISO NR 118 Standard High Low 1 1 O O O O Hg Lamp Corr 76 On Off O Spot AE Point 116 Center 1 1 O O O O O AF Point 1 1 O O O O Safety Shift 151 On 1 1 O O Off 1 1 O O O O O O O Movie Audio 78 Mic Level 1 1 O O O O O O O Lev...

Page 269: ...O O O O O O O O O O O O O O O O O O O O O O O O O O O O O O O O O O O O O O O O O O O O O O O O O O O O O O O O O O O O O O O O O O O O O O O O O O O O O O O O O O O O O O O O O O O O O O O O O O O O O O O O O O O O O O O O O O O O O O O O O O O O O O O O O O O O O O O O O O O O O O O Available or set automatically Not available COPY ...

Page 270: ...Off 1 1 O O O O O O O Continuous 1 1 O O O O O O O Shoot Only 1 1 O O O O O Dynamic IS 1 1 1 O O O O O O O 2 1 1 O O O O O O O Display Area 57 Large Medium Small 1 1 O O O O O O O Date Stamp 61 Off 1 1 O O O O O O O Date Date Time 1 1 O O O O O O O Face ID Settings 63 On Off 1 1 O O O O O O O Set Shortcut button 155 1 1 O O O O O O O Save Settings 156 Destination C1 C2 O O O O O O 1 Options vary d...

Page 271: ...O O O O O O O O O O O O O O O O O O O O O O O O O O O O O O O O O O O O O O O O O O O O O O O O O O O O O O O O O O O O O O O O O O O O O O O O O O O O O O O O O O O O O O O O O O O O O O O O O O O O O O O O O O O O O O O O O O O O O O O O O O O O O O O O O O O O O O O O O O O O O O O O O O O O O O O O O O O O O O O O O O O O O O O O O O O O O O O O O O O O O O O O O O O O O O O O O O O O O O O O ...

Page 272: ...9 Units 207 Hints Tips 199 Electronic Level 79 Date Time 19 Video System 222 Time Zone 200 Ctrl via HDMI 220 LCD Brightness 201 Eye Fi Settings 245 Start up Image 202 Copyright Info 208 Format 203 204 Certification Logo Display 210 File Numbering 205 Language 21 Create Folder 205 Reset All 211 My Menu Menu Item Ref Page My Menu settings 157 COPY ...

Page 273: ...ize 188 Erase 179 My Colors 191 Protect 175 Face ID Info 163 Rotate 182 Scroll Display 161 Favorites 184 Group Images 170 My Category 185 Auto Rotate 183 Photobook Set up 243 Resume 161 i Contrast 192 Transition 161 2 Print Menu Item Ref Page Item Ref Page Print Select All Images 241 Select Images Qty 240 Clear All Selections 242 Select Range 241 Print Settings 239 COPY ...

Page 274: ...n CIPA Guidelines Approx 595 g approx 21 0 oz including the battery and memory card Approx 551 g approx 19 4 oz camera body only Number of Shots Recording Time Playback Time Number of Shots Screen On Approx 315 Viewfinder On Approx 335 Movie Recording Time 1 Screen On Approx 1 hour 15 minutes Viewfinder On Approx 1 hour 20 minutes Continuous Shooting 2 Screen On Approx 2 hours 25 minutes Viewfinde...

Page 275: ...er since 16 9 images have a setting of 1920 x 1080 pixels their data size will be larger than 4 3 images Recording Time per Memory Card Image Quality Recording Time per Memory Card 8 GB 32 GB 29 min 39 sec 1 hr 59 min 43 sec 42 min 11 sec 1 2 hr 50 min 19 sec 2 1 hr 28 min 59 sec 5 hr 59 min 10 sec 127 min 39 sec for iFrame movies 110 21 hr 51 min 37 sec for iFrame movies 110 The values in the tab...

Page 276: ...in 50 cm 1 6 ft f 0 cm 0 in infinity 1 3 m 4 3 ft infinity Not available in some shooting modes Continuous Shooting Speed Shooting Mode Continuous Shooting Mode Speed G W Approx 2 2 shots sec Approx 0 8 shots sec Approx 0 9 shots sec W Approx 13 shots sec Shutter Speed A mode automatically set range 1 1 2000 sec M mode available values sec 15 13 10 8 6 5 4 3 2 2 5 2 1 6 1 3 1 0 8 0 6 0 5 0 4 0 3 1...

Page 277: ... Charger CB 2LC CB 2LCE Rated Input 100 240 V AC 50 60 Hz 16 VA 100 V 22 VA 240 V 0 18 A 100 V 0 12 A 240 V Rated Output 8 4 V DC 0 7 A Charging Time Approx 1 hour 50 min when using NB 10L Charge Indicator Charging orange Fully charged green Operating Temperature 5 40 C 41 104 F Dimensions 92 8 x 63 0 x 27 0 mm 3 65 x 2 48 x 1 06 in Weight CB 2LC Approx 80 g approx 2 82 oz CB 2LCE Approx 74 g appr...

Page 278: ...uality 147 Continuous shooting 127 High speed burst HQ shooting mode 106 Creative filters shooting mode 92 Cropping 190 Custom white balance 123 D Date time Adding date stamps 61 Changing 20 Date time battery 20 Setting 19 World clock 200 Defaults Reset all DIGITAL CAMERA Solution Disk 2 Digital tele converter 132 Digital zoom 55 Display language 21 DPOF 238 Drive mode 127 Dynamic Range Correction...

Page 279: ...urst HQ shooting mode 106 Household power 223 I i Contrast 120 192 iFrame movies movie mode 110 Image quality Compression ratio image quality Images Display period 83 Erasing 179 Playback Viewing Protecting 175 Indicator 44 ISO speed 117 L Lamp 82 M Macro focus mode 129 Magnified display 172 Manual focus focus mode 130 Memory cards 2 Recording time 275 Menu Basic operations 42 Table 260 Mercury la...

Page 280: ...104 Wink self timer shooting mode 103 Sepia tone images 94 125 Servo AF 137 Shadow Correct 121 Shooting Shooting date time Date time Shooting information 154 255 Slideshow 173 Smart Shuffle 174 Smart Shutter shooting mode 102 Smile shooting mode 102 Snow shooting mode 90 Soft focus shooting mode 97 Software DIGITAL CAMERA Solution Disk 2 Installation 30 Saving images to a computer 32 Sounds 198 St...

Page 281: ...281 Index Slideshow 173 Smart Shuffle 174 TV display 218 W White balance color 122 Widescreen resolution 74 Wink self timer shooting mode 103 World clock 200 Z Zoom 22 46 55 Zoom framing assist 56 COPY ...

Page 282: ...ded Battery Charger CB 2LCE The adapter can be used with a power supply between 100 and 240 V AC Contact your Canon dealer for information about plug adapter for overseas use For U S A customers only For areas where 120 V AC power is not used you will need a special plug adapter For only United States Use a UL listed 1 8 3m 6 10ft Type SPT 2 or NTSPT 2 AWG no 18 power supply cord rated for 125V 7A...

Page 283: ...d on the user is encouraged to try to correct the interference by one or more of the following measures Reorient or relocate the receiving antenna Increase the separation between the equipment and receiver Connect the equipment into an outlet on a circuit different from that to which the receiver is connected Consult the dealer or an experienced radio TV technician for help The cable with the ferr...

Page 284: ... that was encoded only 1 for a personal and non commercial purpose or 2 by a video provider licensed under the AT T patents to provide MPEG 4 compliant video No license is granted or implied for any other use for MPEG 4 standard Notice displayed in English as required Disclaimer Reprinting transmitting or storing in a retrieval system any part of this guide without the permission of Canon is prohi...

Page 285: ...285 COPY ...

Page 286: ...CDD E492 010 CANON INC 2012 COPY ...

Reviews: