background image

36 

Š


Preparations

Relay Recording of Movies

You can activate the relay recording so if the memory you are using 
becomes full while recording movies, the recording will continue unin-
terrupted on a memory card.
When recording on memory card 

X

, you can use memory card 

Y

 for 

relay recording (

57

). 

c

 only: When recording in the built-in 

memory, you can choose to use only memory card 

X

 for relay record-

ing (

34

), or use both memory cards (

357

).

1 Insert a memory card that contains no video recordings into the 

card slot of the memory card you want to use for relay recording.

• When relay recording from the built-in memory (

c

 only): 

memory card slot 

X

 or both memory card slots. 

• When relay recording from memory card 

X

: memory card slot 

Y

only.

2 Activate the relay recording. 

* The approximate available recording time will now reflect the combined space in 

the memories used for relay recording.

NOTES

c

 You cannot use relay recording from the built-in memory to 

memory card 

Y

. When using a single memory card, be sure to insert it  

into memory card slot 

X

.

• Any of the following actions will deactivate the relay recording function: 

- Turning off the camcorder.
- Opening the double memory card slot cover.
- Changing the position of the mode switch.
- Changing the camcorder's operating mode.
- Changing the memory used for recording movies.

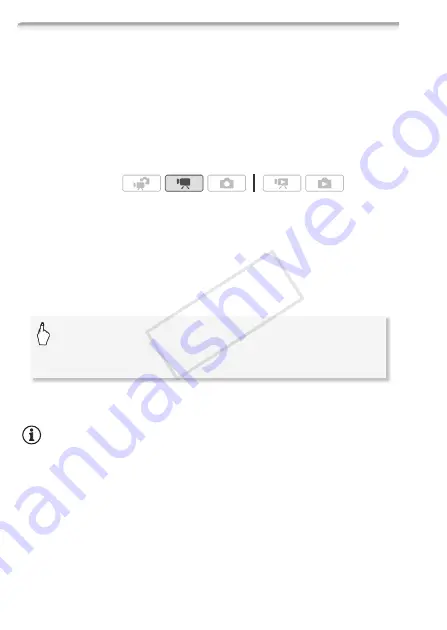
Operating modes:

[FUNC.] 

8

 [MENU] 

8


8


8

 [Rec Media for Movies] 

8


[

f

] (

c

 only) or [

4

8

 [Relay Recording] 

8

Desired option* 

8

 [

a

]

CO

PY

Summary of Contents for 4374B001

Page 1: ...PUB DIE 0346 000 HD Camcorder Instruction Manual Y COPY ...

Page 2: ...NS PLUG FROM THE SUPPLY SOCKET WHEN NOT IN USE To reduce the risk of electric shock do not expose this product to dripping or splashing The Mains plug is used as the disconnect device The Mains plug shall remain readily operable to disconnect the plug in case of an accident While using the compact power adapter do not wrap it or cover it with a piece of cloth and do not place it in confined narrow...

Page 3: ...tes and or other countries Macintosh and Mac OS are trademarks of Apple Inc registered in the U S and other countries x v Colour and the x v Colour logo are trademarks HDMI the HDMI logo and High Definition Multimedia Interface are trademarks or registered trademarks of HDMI Licensing LLC AVCHD and the AVCHD logo are trademarks of Panasonic Corporation and Sony Corporation Manufactured under licen...

Page 4: ...emory or on commercially available memory cards 0 33 The memory almost full Use the double memory card slot to keep on recording video without interruption 0 36 1 1 080 lines 34 57 1 Full HD 1080 refers to Canon camcorders compliant with high definition video composed of 1 080 vertical pixels scanning lines 2 Video is recorded at this resolution only when the recording mode is set to MXP or FXP mo...

Page 5: ...your favorite background music Face Detection 0 64 Image Stabilization The camcorder automatically detects people s faces and adjusts the focus and other settings accordingly for beautiful results Dynamic IS 0 61 compensates for camcorder shake when you shoot video while walking Powered IS 0 62 will produce stable shots when you zoom in on distant subjects full telephoto Just point the camcorder a...

Page 6: ... site Save or upload to the Web Standard Definition Convert your HD movies in the camcorder itself to standard definition files 0 136 142 High Definition Standard DVDs Use the supplied software ImageMixer 3 SE 0 129 142 4 AVCHD discs containing scenes recorded in MXP mode cannot be created with the optional DW 100 DVD burner Use the supplied software ImageMixer 3 SE to back up such scenes 5 Refer ...

Page 7: ...7 COPY ...

Page 8: ... b only Using the Viewfinder 26 Basic Operation of the Camcorder 26 Using the Touch Screen 27 Operating Modes 29 Using the Menus 31 First Time Settings 31 Setting the Date and Time 32 Changing the Language 32 Changing the Time Zone 33 Using a Memory Card 33 Memory Cards Compatible for Use with the Camcorder 34 Inserting and Removing a Memory Card 35 Selecting the Memory for the Recordings 36 Relay...

Page 9: ... Advanced Functions 56 Shooting Video in y Manual Mode 57 Selecting the Video Quality Recording Mode 58 Special Scene Recording Programs 60 Cinema Mode Giving a Cinematic Look to your Recordings 61 Advanced Image Stabilization 63 Pre Recording 64 Face Detection 65 Touch Track 66 Video Snapshot 67 Digital Effects 68 Manually Setting the Shutter Speed or Aperture 70 Manual Exposure Adjustment 72 Aut...

Page 10: ...ck 96 Capturing Photos and Video Snapshot Scenes from a Movie 98 Dividing Scenes Photos 100 Basic Playback 100 Viewing Photos 102 Deleting Photos 104 Additional Functions 104 Taking Photos in y Manual Mode 105 Selecting Photo Size and Quality 107 Flash 108 Drive Mode Continuous Shooting and Exposure Bracketing 110 Taking Photos while Recording Movies Simultaneous Recording 111 Light Metering Mode ...

Page 11: ...ard Definition Discs DVD 140 Saving Photos on Photo DVDs 141 Copying Recordings to an External Video Recorder 142 Uploading Movies to Video Sharing Web Sites Additional Information 148 Appendix Menu Options Lists 148 FUNC Panel 152 Setup Menus 166 Appendix Onscreen Icons and Displays 171 Trouble 171 Troubleshooting 179 List of Messages 189 Do s and Don ts 189 Handling Precautions 194 Maintenance O...

Page 12: ...n the icon The following terms are used in this manual When not specified as memory card or built in memory the term memory by itself refers to both Screen refers to the LCD and the viewfinder screen b only Scene refers to one movie unit from the point you press the g button to start recording until you press again to pause the recording The photos included in this manual are simulated pictures ta...

Page 13: ...recording photos Turning off the camcorder Operating modes FUNC 8 MENU 8 8 8 Self Timer 8 A On n 8 a Brackets are used to refer to control buttons and menu options you will touch on the screen and to other onscreen messages and displays indicates that a function is available in the operating mode indicated and indicates that the function is not available For a detailed explanation refer to Operati...

Page 14: ...es are supplied with the camcorder XCA 570 Compact Power Adapter incl power cord BP 808 Battery PackW XWL D89 Wireless Controller incl CR2025 lithium button battery STV 250N Stereo Video CableW Yellow Red White plugs XCTC 100 S Component Cable Red Green Blue plugs IFC 300PCU USB CableW XQuick Guide COPY ...

Page 15: ... Manual Photo Applications Ver 34 0 Music Data Disc CD ROM referred in the manual as the Camcorder Supplemental Disc Contains the following components Full version instruction manual of the camcorder this PDF file Photo Application Software for saving managing and printing photos Music files that can be used as background music during playback The CD ROM includes the instruction manual of the soft...

Page 16: ...rminal 0 121 123 A q AV OUT terminal 0 121 123 X headphones terminal 0 81 A a REMOTE zoom remote controller terminal 0 86 A s Memory card slot X 0 34 A d Memory card slot Y 0 34 A f Mode switch 0 27 A g Stereo microphone R 0 79 A h Strap mount 0 22 A j USB terminal 0 121 124 A k HDMI OUT terminal 0 121 122 A l Grip belt 0 22 S q MIC terminal 0 84 S a Mini video light 0 78 S s Flash 0 107 S d Insta...

Page 17: ...ator Green ON Orange Standby 0 44 Red Charging 0 19 D s Remote sensor 0 22 D d LCD touch screen 0 23 26 D f POWERED IS button 0 62 WEB button 0 142 D g DC IN terminal 0 19 D h Viewfinder 0 25 D j START STOP button 0 39 56 D k Serial number The serial number label is located inside the battery attachment unit Remove the battery pack to find it D l Battery attachment unit 0 19 b only LCD panel Top v...

Page 18: ... STOP button 0 39 56 2 b index selection button 0 50 Press and hold for more than 2 seconds to switch between shooting and playback mode 3 MENU button 0 30 152 4 DISP onscreen display button 0 93 5 SET button 6 B stop button 0 46 7 PHOTO button 0 39 104 8 Zoom buttons 0 43 9 Navigation buttons Z O y A A q A C play pause button 0 46 Bottom view COPY ...

Page 19: ...il the battery pack is com pletely exhausted Doing so will ensure that the remaining recording time will be displayed accurately For approximate charging times and recording playback times with a fully charged battery pack refer to Charging Recording and Playback Times 0 198 1 Connect the power cord to the compact power adapter 2 Plug the power cord into a power outlet 3 Connect the compact power ...

Page 20: ...down 2 Slide the battery pack in the direction of the arrow and then pull it out IMPORTANT Turn off the camcorder before connecting or disconnecting the com pact power adapter After pressing x to turn off the camcorder important data is updated in the memory Be sure to wait until the green ON OFF CHG indicator goes out We recommend charging the battery pack in temperatures between 10 C and 30 C Ou...

Page 21: ... power adapter so the battery pack will not be con sumed Charged battery packs continue to discharge naturally Therefore charge them on the day of use or the day before to ensure a full charge We recommend that you prepare battery packs to last 2 to 3 times longer than you think you might need Preparing the Accessories Wireless Controller First insert the supplied CR2025 lithium button battery int...

Page 22: ...180 degrees to use the wireless controller from the front of the camcorder NOTES The wireless controller may not work properly when the remote sensor is situated under strong light sources or direct sunlight Grip Belt and Straps Fasten the grip belt Adjust the grip belt so that you can reach the zoom lever with your index finger and the g button with your thumb COPY ...

Page 23: ...tate the panel 90 degrees downward You can rotate the panel 180 degrees toward the lens Rotating the LCD panel 180 degrees can be useful in the following cases b To allow the subject to monitor the LCD screen while you use the viewfinder To include yourself in the picture when recording with the self timer To allow the camcorder to be operated with the wireless controller from the front 180 90 Sub...

Page 24: ... use the LCD screen Turn on the LCD backlight to make it brighter With the camcorder on hold h pressed down for more than 2 seconds Repeat this action to switch the LCD backlight between off normal and on bright b This changes the brightness of both the LCD and view finder screen NOTES The LCD backlight does not affect the brightness of the recordings Using the bright setting will shorten the effe...

Page 25: ... recording To use the viefinder hold out both sides of the viewfinder firmly and pull it out until it clicks You can close the LCD panel or rotate it toward the subject as you prefer Adjust the viewfinder as necessary with the dioptric adjustment lever The LCD backlight setting is common to the LCD screen and the viewfinder NOTES b For details about how to take care of the viewfinder refer to Han ...

Page 26: ...select it and have the camcorder choose the optimal settings Drag Swipe your finger up and down or left and right across the screen to scroll menus to browse through index screen pages or to adjust slider controls for example to adjust the volume IMPORTANT The camcorder uses a pressure sensitive touch screen Press firmly when using touch operations In the following cases you may not be able to per...

Page 27: ...e selected by the Smart AUTO function 0 40 Operating mode Mode switch Onscreen icon Operation Dual Shot Record video and take photos easily letting the camcorder take care of all the settings Great for beginners or if you just prefer not to bother with detailed camcorder settings Easy recording of movies and photos 0 39 Flexible recording Use one of the dedicated recording modes to enjoy full acce...

Page 28: ...turn it on directly in playback mode NOTES When switching to a playback mode the memory selected for playback will be the same currently used for recording You can also press and hold B on the wireless controller for more than 2 seconds to switch between recording and playback mode Initial mode Operating mode Operation Press S in or mode Playing back movies Original index screen 0 46 Press S in mo...

Page 29: ...the FUNC panel and then touch the function you want to set or adjust You may need to drag your finger up and down along the scroll bar to find the control button of the desired function In and mode touch Edit to display a similar panel contain ing the various operations that are available after selecting one or more scenes or photos for example deleting adding scenes to the playlist protecting pho...

Page 30: ...ange into the orange selection bar Menu items not available appear grayed out 5 When the desired menu item is in the orange bar touch inside the frame on the right 6 Touch the desired option and touch a You can touch a to close the menu at any time NOTES A small font size is used in menu screens so you can see the options currently selected You can enlarge the font size by setting 6 8 Font Size to...

Page 31: ...y 4 Touch Y M D M D Y or D M Y to select the date format you prefer 5 Touch 24H to use 24 hour clock or leave this control unchecked to use 12 hour clock AM PM 6 Touch OK to start the clock and close the setup screen NOTES When you do not use the camcorder for about 3 months the built in rechargeable lithium battery may discharge completely and the date and time setting may be lost In such case re...

Page 32: ...e Change the time zone to match your location The default setting is Paris 1 Open the Time Zone DST screen Only when performing the procedure in a recording mode 2 Touch S to set the home time zone or V to set the time zone of your destination when you are traveling 3 Touch Z or O to set the desired time zone If necessary touch U to adjust for daylight saving time 4 Touch a to close the menu Opera...

Page 33: ...ns including wireless transfer In case of an issue with an Eye Fi card please check with the card manufacturer Also note that an approval is required to use Eye Fi cards in many countries or regions Without approval use of the card is not permit ted If it is unclear whether the card has been approved for use in the area please check with the card manufacturer Memory card Capacity SD Speed Class Re...

Page 34: ...lot until it clicks To use the wireless communication features of an Eye Fi card insert it into memory card slot Y Be sure you understand the information provided in Eye Fi Cards 0 33 before using an Eye Fi card 4 Close the double memory card slot cover Do not force the cover closed if the memory card is not correctly inserted To remove the memory card Push the memory card once to release it When ...

Page 35: ...he memory you can check the approximate available recording time number of photos based on currently used settings NOTES Select to record movies in the built in memory c only or mem ory card X if you later want to convert the movies to standard definition in order to upload them to the Web or to create standard DVDs Operating modes FUNC 8 MENU 8 8 8 Rec Media for Movies or Rec Media for Photos 8 f...

Page 36: ...c only memory card slot X or both memory card slots When relay recording from memory card X memory card slot Y only 2 Activate the relay recording The approximate available recording time will now reflect the combined space in the memories used for relay recording NOTES c You cannot use relay recording from the built in memory to memory card Y When using a single memory card be sure to insert it i...

Page 37: ...ource or turn off the camcorder until the initialization is completed 2 Initialize the memory c d Touch this option if you want to physically erase all the data rather than just clear the file allocation table of the memory If you selected the Complete Initialization option you can touch Cancel to cancel the initialization while it is in progress All recordings will be erased and the memory can be...

Page 38: ...corder Supplemental Disc to a memory card after it is initialized For details refer to the ImageMixer 3 SE Software Guide PDF file Mac OS users Use Finder to transfer music files from the MUSIC folder on the supplied Camcorder Supplemental Disc to a memory card after it is initialized Refer to About the music files 0 206 for the folder structure of the memory card At the time of purchase Eye Fi ca...

Page 39: ...he mode switch to 5 2 Turn on the camcorder By default movies and photos are recorded in the built in memory c only or on memory card X d You can select the memory that will be used to record movies and photos 0 35 Please read the IMPORTANT section 0 41 before using an Eye Fi card To record video Press g to begin recording Press g again to pause the recording To take photos 1 Press j halfway Once ...

Page 40: ...ion 0 64 to get beautiful shots of people every time tracking the subject even if the person moves Touch Track 0 65 to track other moving subjects keeping them in focus and using the best settings to record them About the Smart AUTO mode When shooting in mode the camcorder will automatically detect certain characteristics of the subject background lighting conditions etc It will then adjust variou...

Page 41: ...o not change the camcorder s operating mode Smart AUTO icons The icon in parentheses appears under backlight conditions Background color of the icon Bright grey Blue skies light blue Vivid colors green red Sunsets orange Subject People stationary People moving Subjects other than people such as landscapes Close objects Background color of the icon Dark dark blue Subject Spotlight Night scene Peopl...

Page 42: ... 0 24 or adjust the brightness of the LCD screen with the 6 8 LCD Bright ness setting b You can also use the viewfinder 0 25 When taking photos If the subject is not suitable for autofocus h turns yellow Set the camcorder to mode and adjust the focus manually 0 72 When the subject is too bright Overexp will flash on the screen In such case use the optional 58 mm ND4 L or ND8 L filter Under certain...

Page 43: ...ing the Zoom Lever or Wireless Controller Move the zoom lever toward Q wide angle to zoom out Move it toward P telephoto to zoom in By default the zoom lever operates at a variable speed press gently for a slow zoom press harder for faster zooms You can also use the zoom buttons on the wireless controller Using the Touch Screen s Zoom Controls 1 Display the zoom controls on the touch screen Not ne...

Page 44: ... The zoom speed will be faster in record pause mode than when actually recording except when pre recording 0 63 is activated Quick Start Function When you close the LCD panel with the camcorder on the camcorder enters the standby mode In standby mode the camcorder consumes only about 1 3 the power used when recording saving energy when you are using a battery pack Additionally when you open the LC...

Page 45: ...r is pulled out b only The camcorder may also not enter standby mode if the LCD panel is closed while the double memory card slot cover is open or when the battery charge is too low Check that the ON OFF CHG indicator changes to orange About standby mode and auto power off The camcorder will power off automatically if left in standby mode for 10 minutes Press x to turn on the camcorder You can sel...

Page 46: ... operations For details about basic video shooting refer to Dual Shot Mode 0 39 Basic Playback Playing Back the Video 1 Press S You can also press and hold B on the wireless controller for more than 2 seconds to switch between shooting and playback mode 2 Open the Original index screen if it is not displayed Operating modes b 8 Original COPY ...

Page 47: ... your finger right for the previous index page E Select a different index screen to read different content or from a different memory 0 50 F Scene s timeline 0 87 and recording information G Narrow down the scenes shown in the index screen 0 53 While browsing through index pages a scroll bar will appear at the bottom of the screen for a few seconds When you have a large number of scenes it may be ...

Page 48: ...inning of the scene Double tap to jump to the previous scene C Pause the playback D Drag your finger left and right along the volume bar to adjust the volume E Touch anywhere else to hide the playback controls F Fast playback backward G Jump to the next scene H Fast playback forward Touch several times to increase the playback speed to approxi mately 5x 15x 60x the normal speed During fast playbac...

Page 49: ...ory card using another device NOTES Depending on the recording conditions you may notice brief stops in video or sound playback between scenes During fast slow playback you may notice some anomalies blocky video artifacts banding etc in the playback picture The speed indicated on the screen is approximate Slow reverse playback will look the same as continuous frame reverse A Resume playback B Slow...

Page 50: ... can also select the memory from which you want to play back your record ings In any index screen touch b During single photo view touch the screen once to display the controls then touch Q to open the Photos index screen Operating modes A Touch the tab of the desired memory built in memory c only memory card X or memory card Y B Touch a control button to select the content you want to play back C...

Page 51: ...y have been rearranged to your liking 3D Flip View See the following section 0 52 Photos Display the photo index screen SD Scenes c Only when a memory card is selected Scenes that were converted to standard definition to upload them to the Web 0 142 or to create standard DVD discs 0 136 Touch SD Scenes and then For Web MPEG 2 or For DVD SD VIDEO as necessary Video Snapshot To display only video sn...

Page 52: ...ay the controls then touch Q to open the Photos index screen A Drag your finger up and down to browse through the scenes recorded in the displayed date B Drag your finger left to go to the next date with record ings C Touch the scene in the front to play it back D Currently selected recording date E Drag your finger right to go to the previous date with recordings F Current scene Total number of s...

Page 53: ...ction 0 64 and in which people s faces were detected 1 Open the Original index screen if it is not displayed 2 Narrow down the scenes shown o Faces appears instead of All Scenes To show all scenes again touch y o Faces and then All Scenes Showing Only Scenes Recorded on a Specific Date This will narrow down the scenes shown in the Original or Video Snapshot Original index screen leaving only scene...

Page 54: ...S You can change on what day to start the week for the calendar display with the 6 8 Calendar Start Day setting Deleting Scenes You can delete those scenes that you are not interested in keeping Deleting scenes allows you also to free up space on the memory See also Deleting Scenes from the Playlist 0 95 1 Open the index screen that contains the scenes you want to delete Original or Video Snapshot...

Page 55: ...ANT Be careful when deleting original recordings Once deleted original scenes cannot be recovered Save copies of important scenes before deleting them 0 129 Observe the following precautions while the ACCESS indicator is on or flashing while scenes are being deleted Do not open the double memory card slot cover Do not disconnect the power source or turn off the camcorder Do not change the camcorde...

Page 56: ...he built in memory c only or on memory card X d You can select the memory that will be used to record movies 0 35 3 Press g to begin recording Press g again to pause the recording IMPORTANT Observe the following precautions while the ACCESS indicator is on or flashing Failing to do so may result in permanent data loss or damage to the memory Do not open the double memory card slot cover Do not dis...

Page 57: ...lect LP mode for longer recording times The following table gives approximate recording times NOTES Scenes recorded in MXP mode cannot be saved onto AVCHD discs using the optional DW 100 DVD Burner Use the supplied software ImageMixer 3 SE to back up such scenes The camcorder uses a variable bit rate VBR to encode video so the actual recording times will vary depending on the content of the scenes...

Page 58: ...s 3 A single scene can be recorded continuously for 12 hours at that point the camcorder will stop for about 3 seconds before resuming recording Recording mode MXP1 FXP1 XP SP LP Memory 4 GB Memory card 20 min 30 min 40 min 1 hr 10 min 1 hr 30 min 8 GB Memory card 40 min 1 hr 1 hr 25 min 2 hr 20 min 3 hr 16 GB Memory card 1 hr 25 min 2 hr 5 min 2 hr 50 min 4 hr 45 min 6 hr 5 min 32 GB Memory card ...

Page 59: ...ports scenes such as tennis or golf q Night Scene To record nightscapes with lower noise ISnow To record in bright ski resorts without the subject being underexposed JBeach To record on a sunny beach without the subject being underexposed KSunset To record sunsets in vibrant colors p Low Light To record in low light situations LSpotlight To record spotlit scenes COPY ...

Page 60: ...creen Autofocus may not work as well as in other modes In such case adjust the focus manually M Fireworks To avoid camcorder blur blur due to the camcorder moving we recommend using a tripod In mode slower shutter speeds are used so blur is more likely to occur Stabilize the camcorder for example by mounting it on a tripod Cinema Mode Giving a Cinematic Look to your Recordings Give your recordings...

Page 61: ...reduces camcorder blur blur due to the cam corder moving so you can get nice stable shots Select the image sta bilization mode according to the shooting conditions Operating modes FUNC 8 Rec Programs 8 D Cine Mode 8 a FUNC 8 MENU 8 8 8 Frame Rate 8 D PF25 8 a Operating modes FUNC 8 Image Stabilizer 8 Desired IS mode 8 a COPY ...

Page 62: ...ing while remaining sta tionary and is suitable for shooting natural looking scenes Use this setting when recording movies with the optional Wide con verter or Tele converter j Off Use this setting when the camcorder is mounted on a tri pod Powered IS When shooting video you can use Powered IS to make the image stabilization even more powerful Powered IS is most effective when you are stationary a...

Page 63: ...tifi cation sounds The camcorder will not record the full 3 seconds prior to pressing g if the button was pressed within 3 seconds of having turned on pre recording or having finished the previous recording Any of the following actions will deactivate the pre recording function Leaving the camcorder without any operation for 5 minutes Pressing S or z Changing the position of the mode switch Changi...

Page 64: ... it determines is the main subject The main subject is indicated by a white face detection frame and the camcorder will optimize the settings for that person Other faces will have gray frames Touch a different face on the touch screen to optimize the camcorder s settings for that person NOTES The camcorder may mistakenly detect the faces of non human sub jects In such case turn face detection off ...

Page 65: ...ra directly you can use Touch Track to keep your sub ject in focus and achieve the best results 1 Make sure face detection is activated 0 64 2 Point the camcorder at a moving subject and touch the subject on the touch screen A white double frame will appear around the subject and track it as it moves Touch Cancel z to remove the frame and cancel the tracking NOTES In certain cases Touch Track may ...

Page 66: ...reen Press z again to return to normal video recording mode 2 Press g By default the camcorder records for about 4 seconds the blue frame serves as a visual progress bar and then automatically returns to record pause mode You can change the length of video snapshot scenes with the 8 8 Video Snapshot Length setting When the camcorder stops recording the screen will momentarily turn black as if a ca...

Page 67: ...ally Faders cannot be used when recording video snapshot scenes or when pre recording is activated Operating modes N Off Select this setting when you do not intend to use the dig ital effects 2 Black White Records movies and photos in black and white 3 Sepia Records movies and photos in sepia tones for an old look 0 Fade Trigger Once 6 Fade Trigger Always 1 Wipe Once 7 Wipe Always Select one of th...

Page 68: ...Aperture Priority AE The actual range of values available for selec tion will vary depending on the initial zoom position When setting a numeric value aperture or shutter speed the number displayed will flash if the aperture value or shutter speed is not appropri ate for the recording conditions In such case select a different value Operating modes A Programmed AE The camcorder automatically adjus...

Page 69: ...ubjects W XWith small aperture values only the subject is in focus and the background is softly blurred Great for portraits or to isolate a single object With large aperture values every part of the image is clearly in focus Good for landscapes and architectural shots W 1 2000 1 1000 1 500 1 250 1 120 1 50 1 25 1 12 1 6 1 3 1 2 y mode mode A Low light situations Most ordinary conditions Indoor spo...

Page 70: ... the exposure will be adjusted automatically so the area you touched will be correctly exposed You have the option to further adjust the exposure manually as necessary Depending on the subject you may want to use the Highlights setting as described below You can touch y instead to adjust the exposure manually without activating the Touch AE function The manual adjustment dial appears and the adjus...

Page 71: ...the recording program is changed during exposure lock the cam corder will return to automatic exposure When shooting subjects with a strong light source behind them the camcorder automatically corrects for the backlight You can turn off the automatic backlight correction with the 7 8 8 Auto Backlight Correction setting Using the Zebra Pattern You can use the zebra pattern to identify areas that mi...

Page 72: ...C limit the picture will be darker but will have less the noise Touch z Automatic to remove the limit for the automatic gain control The AGC limit selected appears on the screen NOTES This function can also be assigned to the custom key dial 0 85 Manual Focus Adjustment Autofocus may not work well on the following subjects In such case focus manually Operating modes FUNC 8 P AGC Limit 8 y Manual 8...

Page 73: ...ction 0 74 to help you adjust the focus manually in a more precise manner The center of the screen will be magnified to help you focus more easily You can also turn off this function with the 7 8 Focus Assistance setting The focusing distance displayed will change as you adjust the focus You can change the units used for the distance display with the 6 8 Distance Units setting If you wish to focus...

Page 74: ... stronger contrast making it even easier to verify if the subject is in focus Touch 5 to select the peaking settings as described below Touch again to turn off the peaking function The outlines of subjects correctly in focus will be shown in color To turn the image to black and while using peaking To select the color of the peaking outlines NOTES Using the peaking function will not affect your rec...

Page 75: ...appears The camcorder will retain the custom white balance even if you turn it off Options Default value Operating modes Y Automatic The camcorder automatically sets the white bal ance for natural looking colors a Daylight To record outdoors on a bright day b Shade To record in shaded places c Cloudy To record on a cloudy day e Fluorescent To record under warm white cool white or warm white type 3...

Page 76: ...ained with e Fluorescent or f Fluorescent H If the color looks unnatural select Y Automatic or g Custom WB Digital Tele Converter Using the digital tele converter you can digitally increase the focal length of the camcorder by a factor of approx 1 7 and record the enlarged image at full HD resolution Touch again to deactivate the digital tele converter The center of the screen will be enlarged app...

Page 77: ...value Operating modes U Off Records with no image enhancing effects V Vivid Emphasizes the contrast and color saturation W Neutral Tones down the contrast and color saturation X Low Sharpening Records subjects with softened outlines Y Soft Skin Detail Softens the details in the skin tone area for a more complimentary appearance To obtain the best effect use this setting when recording a person in ...

Page 78: ...o Light You can use the optional VL 5 Video Light or VFL 2 Video Flash Light when you need a video light that is stronger than the built in mini video light Attach the optional video light to the mini advanced shoe Refer to Using the Mini Advanced Shoe 0 82 appears when you turn on the optional video light ON or AUTO For details about using the optional video light refer to the instruction manual ...

Page 79: ...s on the screen 2 seconds when using the wireless controller NOTES Once the countdown has begun any of the following actions will cancel the self timer Pressing g when recording movies or j fully when recording photos Turning off the camcorder Changing the camcorder s operating mode Setting the camcorder to standby mode Audio Recording Level You can adjust the audio recording level of the built in...

Page 80: ...so that the audio level meter will go to the right of the 12 dB mark yellow area only occasionally 3 Touch a to lock the audio recording level at the current level To display the audio level indicator Usually the audio level indicator will be displayed only after activating the manual adjustment of the audio recording level You can choose to display it also when the audio level is adjusted automat...

Page 81: ...e headphones for playback or to check the audio level while record ing The headphones are connected to the AV OUT X terminal which is used for both the headphones and the audio video output Before connecting the headphones follow the procedure below to change the function of the terminal from AV output to X headphones output Headphones can be used also in mode but the function of the terminal can ...

Page 82: ...mmercially available headphones with a 3 5 mm minijack and a cable no longer than 3 m Even if AV Headphones was set to J Headphones in a playback mode the function of the AV OUT X terminal will return automatically to AV output when you turn off the camcorder Using the Mini Advanced Shoe Using the mini advanced shoe you can attach to the camcorder a range of optional accessories to expand its func...

Page 83: ...ecording in very quiet surroundings the built in microphone may pick up the sound of the camcorder s internal machinery In such case we recommend using an external microphone Using the SM V1 Surround Microphone or DM 100 Directional Stereo Microphone Using the SM V1 you can add a sense of depth and presence to your recordings with 5 1ch surround sound Using the DM 100 you can accurately record aud...

Page 84: ...und sound playback on HDTVs com patible with 5 1ch surround sound connected to the camcorder using an HDMI cable Audio output from the AV OUT X terminal including headphone output will be converted to 2ch stereo The camcorder s built in speaker is monaural When an external microphone is connected to the camcorder 7 8 Wind Screen will automatically be set to B Off Z When using the optional SM V1 Su...

Page 85: ...to access any menus To select the function of the custom key using the menu To select the function of the custom key using the custom key 1 Press and hold f for about 2 seconds The icons of the functions that can be assigned to the custom key appear in a row 2 Turn the custom dial to select the desired function and press f Operating modes FUNC 8 MENU 8 7 8 8 Custom Key Dial 8 Desired function 8 a ...

Page 86: ...sure Manual exposure adjustment 0 70 Press f to turn the manual exposure on off and turn the dial to compensate the exposure o Tv Av Press f when the recording program is set to B Shutter Pri AE to display the shutter speed dial and turn the dial to select the shutter speed Press f when the recording program is set to C Aperture Pri AE to display the aperture dial and turn the dial to select the a...

Page 87: ...ime intervals ranging from 6 seconds to 6 minutes If you recorded movies using face detection 0 64 you can display the scene divided into segments every time the camcorder reg istered a change in the main subject of the scene 1 Open the Original or Playlist index screen Functions Available with the Zoom Remote Controller Using the ZR 2000 or ZR 1000 turning the power on off starting stopping a rec...

Page 88: ...he scene from that point To change the interval between frames A Touch twice to return to the index screen B Previous next scene C Drag your finger left along the ruler to display the next 5 frames D Current scene Total number of scenes E Scene s recording mode and length F Recording date and time G Drag your finger right along the ruler to display the previ ous 5 frames H Currently selected inter...

Page 89: ...f the supplied music tracks or connect an external audio player to use your favorite songs as background music Using One of the Supplied Music Tracks as Background Music The supplied Camcorder Supplemental Disc contains 3 music tracks you can use as background music c The music files comes pre installed in the built in memory POINTS TO CHECK To play back scenes or a slideshow of photos recorded on...

Page 90: ...uch a photo to go to single photo view and continue with the slideshow procedure 0 112 To delete a music track In the music track selection screen touch Z or O to select the track you want to delete MENU 8 y z 8 Select Music 8 A On 8 Z or O to select the desired music track 8 a A Select the desired music track B Play back the original sound no background music C Delete the music track selected D L...

Page 91: ...me according to the onscreen indications When the audio input is in the correct range stop the music playback and touch a on the camcorder Touch External Player Link to link the video playback to the start end of the music from the external player Playback with the video slideshow linked to the external audio 5 Start the music playback on the external player Playback will start from the first scen...

Page 92: ...estored after it is initialized Windows useres Use the supplied software ImageMixer 3 SE to transfer music files from the supplied Camcorder Supplemental Disc to a memory card after it is initialized For details refer to the ImageMixer 3 SE Software Guide PDF file Mac OS users Use Finder to transfer music files from the MUSIC folder on the supplied Camcorder Supplemental Disc to a memory card afte...

Page 93: ...s or the audio level meter Touch the screen to display the playback controls Operating modes mode All displays on Only data code on All displays off mode All displays on Only recording date and time on All displays off About the Data Code With every scene or photo recorded the camcorder keeps a data code date time of recording information about the camera setup etc In mode this information is disp...

Page 94: ...lection screen 3 Touch on the individual scenes you want to add to the playlist A checkmark O will appear on scenes selected Touch a selected scene again to remove the checkmark To select all the scenes at once Touch Select All instead of touching individual scenes Remove in advance any checkmarks from scenes you may have selected individually 4 Add the scenes to the playlist Scenes are added to t...

Page 95: ...Timeline screen appears This step is not necessary to delete the entire playlist 3 Delete the scenes from the playlist If you selected to delete all the scenes in the playlist touch Stop to interrupt the operation while it is in progress Some scenes will be deleted nevertheless Moving Scenes in the Playlist Move the scenes in the playlist to play them back in the order of your choice 1 Open the Pl...

Page 96: ... the video snapshot scene 2 Play back the desired scene 3 Press g to capture the video snapshot scene The camcorder captures the video snapshot scene for about 4 seconds the blue frame serves as a visual progress bar and then enters playback pause mode You can change the length of video snapshot scene you capture with the 8 8 Video Snapshot Length setting 4 Touch B to return to the index screen A ...

Page 97: ...than 1 second from the end of the scene the video snapshot scene will be captured starting from the beginning of the following scene During the playback of video snapshot scenes captured from a previ ously recorded movie you may notice some anomalies in the picture sound at the point where the playback switches to a new scene Capturing Photos You can capture a single photo or a series of photos Th...

Page 98: ...use See also Using an Eye Fi card 0 146 NOTES The data code of the photos will reflect the date and time of recording of the original scene Photos captured from a scene with a lot of fast movement may be blurred Photos will be recorded on the memory selected for recording photos B Photo Sequence Up to 100 photos can be captured at a time The photo sequence capture will stop when the end of the sce...

Page 99: ...g reversing frames while dividing the scenes the interval between frames is about 0 5 seconds If the scene cannot be divided at the point where you paused the play back advance reverse a frame and then divide the scene During the playback of a scene that was divided you may notice some anomalies in the picture sound at the point where the scene was cut The following scenes cannot be divided Video ...

Page 100: ... photos advanced shooting functions viewing photos and printing them For details about basic photo shooting refer to Dual Shot Mode 0 39 Basic Playback Viewing Photos 1 Press S 2 Open the Photos index screen if it is not displayed Operating modes b 8 Photos COPY ...

Page 101: ...splay the playback controls 2 Touch Q Photo Jump Function When you have recorded a large number of photos you can jump eas ily through the photos using the scroll bar 1 Touch the screen to display the playback controls 2 Jump through the photos using the scroll bar A Memory being read B Index screen currently displayed C Drag your finger left for the next index page D Drag your finger right for th...

Page 102: ...is camcorder Images edited on or uploaded from a computer Images whose file names have been changed Deleting Photos You can delete those photos that you are not interested in keeping Deleting a Single Photo 1 In single photo view select the photo you want to delete 2 Touch the screen to display the playback controls 3 Delete the photo 4 Drag your finger left right to select another photo to delete...

Page 103: ...uch Select All instead of touching individual photos Remove in advance any checkmarks from photos you may have selected individually 4 Delete the photos Touch Stop to interrupt the operation while it is in progress Some photos will be deleted nevertheless IMPORTANT Be careful when deleting photos Deleted photos cannot be recovered Protected photos cannot be deleted Edit 8 Delete 8 Yes 8 OK COPY ...

Page 104: ...ear 5 Press j fully The ACCESS indicator will flash as the photo is being recorded IMPORTANT Observe the following precautions while the ACCESS indicator is on or flashing Failing to do so may result in permanent data loss Do not open the double memory card slot cover Do not disconnect the power source or turn off the camcorder Do not change the camcorder s operating mode When recording photos on ...

Page 105: ...ng NOTES If you press h during the photo review time the photo will continue to be displayed indefinitely Press j halfway to return to normal shooting mode Selecting Photo Size and Quality Photos are recorded as JPG files As a general rule select a larger photo size for higher quality Select the K 3264x1840 size for photos with an aspect ratio of 16 9 The number displayed on the right corner indic...

Page 106: ... 1920x1440 To print photos up to L size 9 x 13 cm or postcard size 10 x 14 8 cm N 640x480 To send photos as e mail attachments or to post on the Web K 3264x1840 H 1920x1080 To print photos with a 16 9 aspect ratio Wide sized photo paper is required Approximate number of photos available on a 1 GB memory card Default value 1 This size is only available for simultaneous recording in mode or mode or ...

Page 107: ... 2 Video Flash Light You can use the optional VFL 2 Video Flash Light as an external flash when its POWER switch is set to n ON The procedure for setting the external flash is the same as for the built in flash Attach the optional VFL 2 Video Flash Light to the mini advanced shoe Refer to Using the Mini Advanced Shoe 0 82 Operating modes U Automatic The flash fires automatically according to the b...

Page 108: ...AF Assist Lamp to B Off so the assist lamp is not activated The camcorder may not be able to focus even if the AF assist lamp is on The practical range of the flash is approx 1 to 2 m The practical range with the VFL 2 attached is approx 1 to 4 m In any case the actual range will depend on the recording conditions The range of the flash decreases in continuous shooting mode For red eye reduction t...

Page 109: ...ects When the flash is used continuous shooting speed will decrease to approx 1 7 photos second Continuous shooting speed will decrease also when using slow shutter speeds 1 25 or slower A Single Records a single photo D AE Bracketing The camcorder records 3 photos using 3 dif ferent exposures dark normal light in 1 2 EV steps allowing you to choose the photo you like the best B Continuous C Hi Sp...

Page 110: ...ode the size quality of photos taken while recording video simultaneous recording will be determined by the setting selected with this procedure the size quality of photos taken in record pause mode will be determined by the photo size set in mode 0 105 IMPORTANT When recording photos on an Eye Fi card in memory card slot Y pho tos will be uploaded automatically if you are within the range of a co...

Page 111: ...n the subject you may want to change the way the light is measured and evaluated POINTS TO CHECK Select a recording program other than the Special Scene recording pro grams Options Default value Operating modes Q Evaluative Appropriate for standard shooting conditions including backlit scenes The camcorder divides the picture into several areas and the light is measured in all of them to achieve t...

Page 112: ...ack the slideshow set to the selected music track Slideshow not linked to the external audio 3 Touch the screen to display the playback controls then touch A to start the slideshow 4 Start the music playback on the external player Drag your finger left and right along the volume bar to adjust the volume Touch C to stop the slideshow Hide the playback controls if necessary To change the slideshow s...

Page 113: ...agnification times move it toward Q 2 Drag your finger across the photo to display the area you want to see enlarged To cancel the magnification move the zoom lever toward Q until the frame disappears Rotating Photos You can rotate photos 90 degrees to change their orientation 1 In single photo view select the photo you want to rotate 2 Touch the screen to display the playback controls 3 Rotate th...

Page 114: ...display the playback controls The histogram and Exif information panel are displayed as well Press h to hide the histogram and Exif information panel The area to the right of the histogram represents highlights and the left side represents shadows A photo whose histogram skews to the right is relatively bright while one whose histogram peaks to the left is rela tively dark Protecting Photos You ca...

Page 115: ...os you want to protect A checkmark O will appear on photos selected Touch a selected photo again to remove the checkmark To select all the photos at once Touch Select All instead of touching individual photos Remove in advance any checkmarks from photos you may have selected individually 4 Protect the photos Touch Remove Protection to remove the protection from the selected photos IMPORTANT Initia...

Page 116: ...for taking photos The way to set and use them was already explained in detail so we refer you to the relevant page in the Video section Zoom 0 43 Quick Start 0 44 Recording programs 0 58 60 68 Face detection 0 64 Touch Track 0 65 Digital effects 0 67 Manual exposure adjustment 0 70 Manual focus adjustment 0 72 White balance 0 75 Image effects 0 77 Mini video light 0 78 Self timer 0 79 COPY ...

Page 117: ...nection D Refer to Connection Diagrams 0 124 If the device selection screen appears touch Computer Printer V appears and changes to D IMPORTANT If V continues to flash for more than 1 minute or if D does not appear the camcorder is not correctly connected to the printer In such case disconnect the USB cable and turn off the camcorder and the printer After a short while turn them on again set the c...

Page 118: ...e camcorder correctly connected to the printer and the photo you want to print displayed in single photo view Printing starts When the printer finishes printing the photo the cam corder will return to single photo view Touch Stop 8 Yes to interrupt the printing in progress Drag your finger left right to select another photo to print To change the paper size NOTES Print setting options and the Defa...

Page 119: ...der and restore the USB connection Print Orders You can mark in advance photos you want to print from those recorded on a memory card and set the desired number of copies as a print order Later you can easily print out the print orders by inserting the memory card into the SD memory card slot of DPOF compatible print ers or self serviced digital photo kiosks You can set print orders for up to 998 ...

Page 120: ...eckmark O will appear on photos selected Touch a selected photo again to remove the checkmark To select all the photos at once Touch Select All instead of touching individual photos Remove in advance any checkmarks from photos you may have selected individually 4 Mark the photos with print orders Options NOTES c To set print orders for photos recorded in the built in memory copy the photos to memo...

Page 121: ...pen the side terminal cover The HDMI OUT terminal offers a high quality digital connection that combines audio and video in a single convenient cable 3COMPONENT OUT Terminal Access Open the LCD panel and terminal cover The component video terminal is for video only When you use connection B do not forget the audio connections using the AV OUT X terminal 4AV OUT X Terminal Access Open the LCD panel...

Page 122: ...s a convenient all digital connection using a single cable for both video and audio When you connect the camcorder to an HDTV equipped with an HDMI terminal you can enjoy video and audio playback at the highest quality The HDMI OUT terminal on the camcorder is for output only Do not connect it to an HDMI output terminal on an external device as this may damage the camcorder While the camcorder is ...

Page 123: ...Video Type Analog Quality Standard definition Output only Connect to a standard TV or a VCR with audio video input terminals Change the following settings on the camcorder y 8 TV Type according to the TV set widescreen or 4 3 if the TV cannot automatically detect and change the aspect ratio 6 8 AV headphones to H AV White CTC 100 S Component Cable supplied STV 250N Stereo Video Cable supplied Red ...

Page 124: ... SCART In all respects exactly the same connection as connection C Connect to a standard TV or VCR with SCART input terminal Requires a SCART adapter commercially available Connection D USB Type Digital data connection Connect to a computer to save your recordings to the optional DW 100 DVD Burner to create DVD discs from them or to a printer to print out photos STV 250N Stereo Video Cable supplie...

Page 125: ...nnected the camcorder Refer to the instruction manual of the connected TV 4 Turn on the camcorder and set it to or mode Play back the movies or photos NOTES To correctly play back movies recorded with x v Colour 0 158 on an HDTV compatible with this standard additional settings may be required on the connected HDTV Refer to the TV s instruction manual We recommend powering the camcorder using the ...

Page 126: ... the built in memory c only or the 4 tab to copy scenes from memory card X Original or Video Snapshot Original index screen To copy all the scenes recorded on a specific date narrow down the scenes shown to scenes recorded on that date 0 53 2 Touch a to open the scene selection screen When you copy scenes from the Playlist index screen including the playlist of video snapshot scenes you cannot sel...

Page 127: ...o number 2 Touch the screen to display the playback controls 3 Copy the photo 4 Drag your finger left right to select another photo to copy or touch a Copying Photos from the Index Screen 1 Open the Photos index screen Select the f tab to copy photos from the built in memory c only or the 4 tab to copy photos from memory card X 2 Touch a to open the photo selection screen Operating modes Operating...

Page 128: ...Do not change the camcorder s operating mode When copying photos onto an Eye Fi card in memory card slot Y pho tos will be uploaded automatically if you are within the range of a config ured network Always verify that Eye Fi cards have been approved in the country region of use See also Using an Eye Fi card 0 146 NOTES In the following cases you will not be able to copy recordings to the memory ca...

Page 129: ... library editing video and more Installation See PIXELA Applications Installation Guide Using the software See ImageMixer 3 SE Software Guide PDF file Saving Photos With the supplied software Photo Application you can save photos to your computer and easily organize and edit them Installation Install the software before you connect the camcorder to the computer for the first time See also the rele...

Page 130: ... computer Do not open the double memory card slot cover and do not remove the memory cards Do not access change or delete any of the camcorder s folders or files directly from the computer as this may result in permanent data loss Always save your movies on the computer and restore files to the camcorder using only the supplied software ImageMixer 3 SE Operation may not work correctly depending on...

Page 131: ...corder to a computer If you connect the camcorder to the computer while it is set to mode the process of creating scene thumbnails will start automatically If your intention was to save photos to the computer you can touch Skip to stop the process and use the computer s Safely Remove Hard ware function Windows or Eject function Mac OS to end the connec tion to the camcorder Disconnect the USB cabl...

Page 132: ...her to add to the disc all the scenes or only scenes that have not been previously added to a disc When you create the disc from the Playlist index screen including the playlist of video snapshot scenes the disc will contain the entire playlist Connecting to the DW 100 DVD Burner and Creating AVCHD Discs 1 Turn on the DVD Burner s Refer to Creating DVDs 2 Connect the camcorder to the DVD Burner us...

Page 133: ...essing the start button while the disc is being written the operation cannot be canceled When the last disc is finalized Task completed will be displayed Take out the disc and close the disc tray When the data requires multiple discs After a disc is finalized it will be ejected automatically and a message will appear Insert the next disc and close the disc tray To create an additional copy of the ...

Page 134: ...e DVD Burner step 2 above to be completed For best performance we recommend limiting the number of scenes to be saved to 500 or fewer scenes With 500 scenes it will take approximately 3 minutes to complete the con nection Playing Back AVCHD Discs Using the DW 100 DVD Burner You can use the optional DW 100 DVD Burner and the camcorder also to play back high definition AVCHD discs on a TV This is ve...

Page 135: ...back into the DVD Burner Use the OPEN CLOSE button on the DVD Burner to open and close the disc tray After the disc is recognized the disc s content will be displayed in an index screen 6 Select the scene you want to play back and touch it to start playing it back IMPORTANT While the camcorder is connected to the DVD Burner do not open the double memory card slot cover and do not remove the memory...

Page 136: ...ImageMixer 3 SE Software Guide PDF file Even without a computer you can convert your video recordings into standard definition scenes and create DVDs using the optional DW 100 DVD Burner Refer to this section along with the relevant sections in the instruction manual of the DW 100 Converting Scenes into Standard Definition 1 Power the camcorder using the compact power adapter 2 Make sure there is ...

Page 137: ...ndividually 6 Touch Edit 8 Convert HD9SD x DVD to open the HD9SD conversion screen If a copyright notice appears read it carefully and touch OK if you agree touch 5 to change the conversion settings as described below 7 Touch Yes 8 OK Touch B to interrupt the operation while it is in progress To embed the recording date and time The recording date and time will always be displayed on the converted...

Page 138: ...and Creating DVD Discs 1 Power the camcorder using the compact power adapter 2 Open the For DVD Burning index screen on memory card Y 3 Connect the camcorder to the computer using the supplied USB cable Connection D Refer to Connection Diagrams 0 124 If the device type selection screen appears touch Computer Printer On the computer ImageMixer 3 SE will start up automatically and the startup screen...

Page 139: ...s or only scenes that have not been previously added to a disc 4 Connect the camcorder to the DW 100 DVD Burner and create the disc The procedure is the same as that for burning AVCHD discs 0 132 To play back standard definition DVDs Standard definition DVDs are created using DVD Video specifications Play back these DVDs using standard DVD players NOTES When the camcorder contains a large number o...

Page 140: ...ct power adapter 2 Open the Photos index screen 3 Connect the camcorder to the DW 100 DVD Burner and create the disc The procedure is the same as that for burning AVCHD discs 0 132 To play back Photo DVDs Photo DVDs are created using DVD Video specifications Play back these DVDs using standard DVD players If you computer has a DVD drive you can play back the slideshow as a DVD and you can also acc...

Page 141: ...io video inputs Video output will be in standard definition although the original scenes are in high defi nition Connecting Connect the camcorder to the VCR using Connection C or c Refer to Connection Diagrams 0 123 Recording 1 External device Load a blank cassette or disc and set the device to record pause mode 2 Turn on the camcorder and set it to mode Verify that 6 8 AV Headphones is set to H A...

Page 142: ...nformation on compatible Web sites You can complete the conversion to standard definition in the cam corder and then use the supplied software ImageMixer 3 SE to upload your videos to the Web Installation See PIXELA Applications Installation Guide Using the software See ImageMixer 3 SE Software Guide PDF file Converting Scenes into Standard Definition 1 Power the camcorder using the compact power ...

Page 143: ...lect all the scenes at once Touch Select All instead of touching individual scenes Remove in advance any checkmarks from scenes you may have selected individually 6 Press Z and touch Yes If a copyright notice appears read it carefully and touch OK if you agree Before touching Yes you can touch 5 to change the conversion settings as described below Touch B to interrupt the operation while it is in ...

Page 144: ...e If the converted scene is too large it will be split into smaller 10 minute long scenes When converting only part of a scene the maximum length of the converted scene will be 10 minutes from the starting playback pause point The playlist cannot be converted when its total playback time exceeds 2 hours and 30 minutes The time required to convert scenes is approximately equal to the total playback...

Page 145: ... following precautions while the ACCESS indicator is on or flashing Failing to do so may result in permanent data loss Do not open the double memory card slot cover Do not disconnect the USB cable Do not disconnect the compact power adapter or turn off the camcorder or the computer Uploading your Videos Wirelessly If you are using an Eye Fi card you can automatically upload the mov ies from the Fo...

Page 146: ...card manufacturer Also note that an approval is required to use Eye Fi cards in many countries or regions Without approval use of the card is not permitted If it is unclear whether the card has been approved for use in the area please check with the card manufacturer Do not use Eye Fi cards on airplanes and in other places where wireless communication is forbidden Remove the Eye Fi card from the c...

Page 147: ...ting you will not be able to turn the wireless communication on off and the status icon will change to o To use wireless communication make sure the switch on the Eye Fi card is not in the LOCK position While using an Eye Fi Card the ACCESS indicator may flash from time to time Wirelessly uploading files is not possible when the Eye Fi card is in memory card slot X the Eye Fi icon will not appear ...

Page 148: ...es Underlined menu options indicate default values FUNC Panel FUNC Menu FUNC Panel Recording Modes Control Button Setting options Function 4 3 0 MENU Open the menus z z 30 Rec Programs A Programmed AE B Shutter Pri AE C Aperture Pri AE z z 68 D Cine Mode z z 60 F Portrait G Sports q Night Scene I Snow J Beach K Sunset p Low Light L Spotlight M Fireworks z z 58 m White Balance Y Automatic a Dayligh...

Page 149: ...z z 70 ZOOM Zoom controls g control b digital tele converter Toggle on x or off w z z 43 76 P AGC Limit z Automatic y Manual 0 dB 24 dB z 72 Metering Mode Q Evaluative S Center Wt Avg R Spot z 111 Y Video Light A On B Off z z 78 d Pre REC A On B Off z 63 Drive Mode A Single D AE Bracketing B Continuous C Hi Speed Cont z 108 O Digital Effects N Off 2 Black White 3 Sepia 0 Fade Trigger Once 6 Fade T...

Page 150: ...nes z z 126 All Scenes z z z This Scene from the Timeline screen z z Convert HD9SD x DVD Selected Scenes z z 136 All Scenes z z z This Scene from the Timeline screen z z Delete Selected Scenes z z 54 95 All Scenes z z z z This Scene from the Timeline screen or playback pause z z z Add to Playlist Selected Scenes All Scenes z z 94 This Scene from the Timeline screen z z Move This Scene from the Tim...

Page 151: ...itional Information 151 Edit Panel Mode Control Button Index Screen Single Photo View 0 Copy 497 c Copy f97 Selected Photos All Photos z 127 Delete z 102 Protect z 114 Print Orders z 119 Rotate z 113 COPY ...

Page 152: ... z Focus Assistance A On B Off z z Face Detection Tracking A On o B Off z z 64 Auto Backlight Correction A On B Off z z 71 Auto Slow Shutter A On B Off z Image Effects U Off V Vivid W Neutral X Low Sharpening Y Soft Skin Detail Z Custom Effect z z 77 Wind Screen O Automatic B Off Z z Microphone Attenuator O Automatic A On V z Surround Mic Directionality z Surround w Zoom x Shotgun z Surround Mic A...

Page 153: ...bject to a far subject in the background or when recording moving subjects When the optional Wide converter or Tele converter is attached to the camcorder it may partially obstruct the Instant AF sensor Set the AF mode to S Normal AF Focus Priority When the focus priority is activated the camcorder records a photo only after the focus has been adjusted automatically You can also select which AF fr...

Page 154: ... to A Programmed AE but the setting will not change even if you set the camcorder to mode If a trailing afterimage appears set the slow shutter to B Off If Y camcorder shake warning appears we recommend stabilizing the camcorder for example by mounting it on a tripod Wind Screen The camcorder automatically reduces the background sound of wind when recording outdoors Some low frequency sounds will ...

Page 155: ...ic Attenuator Helps prevent audio distortions due to high audio recording levels when the optional SM V1 Surround Microphone is attached to the camcorder When set to A On V V will appear on the screen Onscreen Markers You can display a grid or a horizontal line at the cen ter of the screen Use the markers as a reference to make sure your sub ject is framed correctly vertically and or horizontally ...

Page 156: ...the c Default for the d c Relay Recording B Off 34 357 57 d Relay Recording B Off 57 z 35 Recording Mode h High Quality 24 Mbps i High Quality 17 Mbps j High Quality 12 Mbps l Standard Play 7 Mbps k Long Play 5 Mbps z 57 Frame Rate w 50i Standard D PF25 z Rec Media for Photos P built in memory 4 memory card X 7 memory card Y Default for the c Default for the d z z z 35 Simultaneous Recording X Off...

Page 157: ...memory card Y z z z z x v Colour A On F B Off z Color Bars Test Tone B Off Color Bars Color Bars Tone z Auto Rotate A On B Off z Photo Review Time BOff i 2 sec j 4 sec k 6 sec l 8 sec m 10 sec z Photo Numbering a Reset b Continuous z z z z USB Connection Type M DVD Burner N Computer Printer V Connect and Set z z Add Recordings to Disc All Scenes Remaining Scenes z 132 Paper Settings Default 9 x 13...

Page 158: ...fications x v Colour Uses a color space with an extended gamut to achieve deeper colors closer to real life Use this function to record video only when you intend to play back your recordings on an HDTV compatible with x v Colour connected to the camcorder using an HDMI cable If recordings made with x v Colour are played back on a non compatible TV colors may not be reproduced correctly Color Bars...

Page 159: ...number a new photo will be assigned a number one higher than that of the last photo on the memory card We recommend using the b Continuous setting The photo number indicates the name and location of the file on the memory card For example the file name of a photo numbered 101 0107 is IMG_0107 JPG stored under the folder DCIM 101CANON USB Connection Type Select the connection protocol to use when c...

Page 160: ...etting according to the type of TV in order to display the picture in full and in the correct aspect ratio F Normal TV TV sets with 4 3 aspect ratio G Wide TV TV sets with 16 9 aspect ratio When the TV type is set to F Normal TV during the playback of video originally recorded with an aspect ratio of 16 9 the picture will not be displayed fullscreen Menu item Setting options 1 2 0 Select Music B O...

Page 161: ...rlands Norsk Polski Português Suomi Svenska Türkçe z z z z 32 LCD Brightness z z z z LCD Screen Dimmer A On B Off z z z z AV Headphones H AV J Headphones z z z 81 Volume Speaker r z z 48 81 Headphone e z z z Notification Sounds N High Volume M Low Volume B Off z z z z Wireless Remote Control A On B Off L z z z z Power Saving Mode Auto Power Off A On B Off z z z z Quick Start Standby B Off f 10 min...

Page 162: ...B Complete Initialization Toggle on x or off w Time Zone DST S home time zone or V travel time zone Paris list of world time zones U DST adjustment z z z z 32 Date Time Date Time z z z z 31 Date Format Y M D M D Y D M Y Y year M month D day 24H Toggle On x 24 hour clock or Off w 12 hour clock Calendar Start Day Saturday Sunday Monday z Battery Info z z z z Control for HDMI 2 A On B Off z z z z HDM...

Page 163: ... brightness setting Dimming the LCD screen does not affect the brightness of your record ings or the brightness of the playback image on a TV When the screen dimmer is set to B Off the LCD screen will return to the brightness level that was in use before the screen was dimmed Notification Sounds A beep will accompany some operations like turn ing on the camcorder the self timer countdown etc Wirel...

Page 164: ...right buttons and the OK or SET button on the TV s remote control to play back your recordings Depending on the TV set additional settings may be required on the TV itself to activate the HDMI CEC function Refer to the TV s instruction manual Correct operation of the HDMI CEC function cannot be guaranteed even when connecting the camcorder to compatible TV sets If you cannot use the remote control...

Page 165: ... compact power adapter if you leave it turned on without a memory card for more than 5 minutes To cancel the demo mode once it has started press any button or turn off the camcorder Reset All Resets all the camcorder s settings to default values Firmware You can verify the current version of the camcorder s firm ware This menu option is usually unavailable COPY ...

Page 166: ...AUTO mode 0 40 2 Onscreen zoom controls 0 43 3 Operating mode 0 27 4 In record pause mode Total number of scenes 5 Memory operation 0 170 6 Remaining battery time 0 170 7 Zoom 0 43 8 Recording mode 0 57 9 Control button Start Stop video recording A q Face detection frame 0 64 A a Touch Track frame 0 65 COPY ...

Page 167: ...ng 0 63 S f Image stabilizer 0 61 S g Digital tele converter 0 76 S h PF25 progressive frame rate 0 60 170 S j Remaining recording time 4 7 On memory card X or Y f In the built in memory 3 5 Relay recording 0 36 c only S k x v Colour 0 158 S l Face detection 0 64 D q Photo quality size simultaneous recording 0 110 D a Wind screen off 0 154 D s Microphone attenuator 0 154 Surround microphone attenu...

Page 168: ...ommunication 0 145 F k Number of available photos 4 7 On memory card X or Y c f In the built in memory F l Photo quality size 0 105 G q Control button Switch to movie recording 0 56 G a AF frame 0 153 G s Focus and exposure lock 0 39 104 G d Camcorder shake warning 0 154 Playing Movies during playback G f Playback control buttons 0 46 G g External audio input 0 91 G h Scene number G j Data code 0 ...

Page 169: ...umber of photos H s Photo number 0 159 H d Histogram 0 114 H f Control button Photo jump 0 101 H g Date and time of recording H h Control button Slideshow 0 112 H j Control button Open the Edit panel 0 151 H k Control button Switch to Photos index screen 0 100 H l Manual focus 0 72 J q File size J a Photo size 0 105 J s Shutter speed 0 68 J d Aperture value 0 68 COPY ...

Page 170: ... will display the charge status as a percentage and the remaining recording time in minutes for 5 seconds If the battery pack is exhausted the battery information may not be displayed S h PF25 progressive frame rate Select the PF25 progressive frame rate 0 60 to give your recordings a cinematic look You can combine this frame rate with the D Cine Mode recording program to enhance the effect S j Re...

Page 171: ...charging it if it is above 40 C let the battery pack cool down before charging it Charge the battery pack in temperatures between 0 C and 40 C The battery pack is faulty Replace the battery pack The camcorder cannot communicate with the battery pack attached Such battery packs can not be charged using this camcorder Power supply Is the battery charged Is the compact power adapter correctly con nec...

Page 172: ...does not work on the subject Focus manually 0 72 The lens or Instant AF sensor is dirty Clean the lens or sensor with a soft lens cleaning cloth 0 194 Never use tissue paper to clean the lens When a subject flits across in front of the lens the image appears slightly bent This is a phenomenon typical of CMOS image sensors When a subject crosses very quickly in front of the camcorder the image may ...

Page 173: ...r edited using another device Deleting scenes takes longer than usual When the memory contains a large number of scenes some operations may take longer than usual Save your recordings 0 129 and initialize the memory 0 37 Cannot delete a photo The photo is protected Remove the protection 0 114 Cannot capture a video snapshot scene from a movie You cannot capture video snapshot scenes from scenes re...

Page 174: ...nscreen Displays lights up in red Battery pack is exhausted Replace or charge the battery pack appears on the screen The camcorder cannot communicate with the battery pack attached so the remaining battery time cannot be displayed 4 7 lights up in red A memory card error occurred Turn off the camcorder Remove and reinsert the memory card Initialize the memory card if the display does not change ba...

Page 175: ...e the LCD screen to its previous brightness setting Screen displays turn on and off repeatedly The battery pack is exhausted Replace or charge the battery pack Remove the battery pack and reattach it correctly Abnormal characters appear on the screen and the camcorder does not operate properly Disconnect the power source and reconnect it after a short time If the problem still persists use the 6 8...

Page 176: ...e is connected to the camcorder disconnect it The AV terminal is set to headphone output Set 88 AV Headphones to AV Memory Card and Accessories Cannot insert the memory card The memory card was not facing the correct direction Turn the memory card over and insert it Cannot record on the memory card The memory card is full Delete some recordings 0 54 102 to free some space or replace the memory car...

Page 177: ...les of the TV Playback looks fine on the camcorder but there is no image on the TV screen The video input on the TV is not set to the video terminal to which you connected the cam corder Select the correct video input There is no sound from the TV When connecting the camcorder to an HDTV using the CTC 100 S Component Cable make sure to connect also the audio connections using the white and red plu...

Page 178: ...e turn it on again and restore the connection Cannot connect to a PictBridge compatible printer if the memory contains 2 500 photos or more After connecting the camcorder to a printer the message Busy continues to appear on the screen Disconnect the USB cable and restore the connection after a short while Photos are not correctly printed You may not be able to print correctly using a PictBridge co...

Page 179: ...he event of a malfunction recordings may be lost so back up your recordings regularly Buffer overflow Recording was stopped The data transfer rate was too high for the memory card in use and the recording was stopped Replace the memory card with one rated Speed Class 2 4 6 or 10 c Built in memory error The built in memory could not be read Contact a Canon Service Center c Built in memory is full T...

Page 180: ...emory 0 37 Write back the backup files and try dividing the scene again Cannot edit Could not move a scene in the playlist Delete some scenes from the playlist 0 95 Cannot enter standby mode now The camcorder cannot enter standby mode if the remaining battery charge is too low Charge or replace the battery pack 0 19 Cannot play back There is a problem with the memory If this message appears often ...

Page 181: ...ng the Complete Initialization option 0 37 If the problem persists contact a Canon Service Center Cannot record Check the memory card There is a problem with the memory card Save your recordings 0 129 and initialize the memory card using the Complete Initialization option 0 37 If the problem persists use a different memory card c Cannot record movies in the built in memory Initialize only using th...

Page 182: ...e camcorder cannot be operated while it is not being powered by the compact power adapter and is connected to a computer with the supplied USB cable In addition scenes can not be written back and music files cannot be transferred to the camcorder To avoid corrupt ing the data in the camcorder s memory use the computer s Safely Remove Hardware function to end the connection and disconnect the USB c...

Page 183: ...a Speed Class rating Replace the memory card with one rated Speed Class 2 4 6 or 10 Mem Card Number of scenes already at maximum The memory card already contains the maximum number of scenes 3 999 scenes no fur ther scenes can be copied onto the memory card Delete some scenes 0 54 to free some space Mem Card Unable to recognize the data The memory card contains scenes recorded in a different telev...

Page 184: ...Playlist is full Cannot divide the scene Scenes cannot be divided when the playlist already contains 999 scenes Delete some scenes from the playlist 0 95 Scene recorded using another device Cannot divide the scene Scenes recorded using another device cannot be divided with this camcorder Select the desired scene number A number of scenes have the same recording date but different file control info...

Page 185: ... the playlist Scenes that were not recorded with this camcorder cannot be added to the playlist This scene was recorded using another device and cannot be copied Scenes that were not recorded with this camcorder cannot be copied to memory card Y To record video on this memory card it is recommended to use only the XP SP LP recording modes Movies may not be recorded correctly on this memory card if...

Page 186: ...ted Replace with a brand new disc During disc playback mode this message can appear when a commercially available DVD disc or a brand new DVD disc is inserted Replace with an AVCHD disc created with the DVD Burner Close the memory card slot cover The memory card slot cover is open Close the cover after correctly inserting the memory card 0 34 Connect the compact power adapter The camcorder is bein...

Page 187: ...nting disconnect the USB cable and turn off the printer After a while turn the printer back on and reconnect the USB cable You attempted to print from a memory card that contains a large number of photos Reduce the number of photos File error You attempted to print a photo that was recorded with another camcorder has a different compression or was edited on a computer Hardware error Cancel printin...

Page 188: ...e error lamp flash alternately Disconnect the USB cable and turn off the printer Unplug the printer s power cord from the power outlet and contact the appropriate customer support center or service center Printer in use The printer is in use Check the printer status Printing error The printer does not support the paper size selected for Paper Settings Set Paper Settings to Default or a paper size ...

Page 189: ...eneath it Do not attach protective film on the touch screen The touch screen s operation is based on detecting applied pressure so you may not be able to correctly operate the touch screen with an additional protective layer Do not leave the camcorder in places subject to high temperatures like the inside of a car parked under direct sunlight or high humidity Do not use the camcorder near strong e...

Page 190: ...r for a long time store it in a place free of dust in low humidity and at temperatures not higher than 30 C Battery Pack Dirty terminals may cause a poor contact between the battery pack and the camcorder Wipe the terminals with a soft cloth Long term storage Store battery packs in a dry place at temperatures no higher than 30 C To extend the battery life of the battery pack discharge it completel...

Page 191: ...ent System mark If you attach to the camcorder battery packs that are not genuine Canon battery packs will appear and the remaining battery time will not be displayed Memory Card We recommend backing up the recordings on the memory card onto your computer Data may be corrupted or lost due to memory card defects or exposure to static electricity Canon shall not be liable for lost or corrupted data ...

Page 192: ...m Button Battery Do not pick up the battery using tweezers or other metal tools as this will cause a short circuit Wipe the battery with a clean dry cloth to ensure proper contact LOCK switch WARNING The battery used in this device may present a fire or chemical burn hazard if mishandled Do not disassemble modify immerse in water heat above 100 C or incinerate the battery Replace with a CR2025 bat...

Page 193: ...f the camcorder or memory card for example by physically damaging it to prevent the leakage of private data If giving the camcorder or memory card to another person initialize the built in memory c only or memory card using the Complete Initialization option 0 37 Fill it up with unimportant recordings and then initialize it again using the same option This makes recovering the original recordings ...

Page 194: ...w finder b only Never use tissue paper LCD Touch Screen Clean the LCD touch screen using a clean soft lens cleaning cloth Condensation may form on the surface of the screen when the temper ature changes suddenly Wipe it with a soft dry cloth Condensation Moving the camcorder rapidly between hot and cold temperatures may cause condensation water droplets to form on its internal surfaces Stop using ...

Page 195: ...t power adapter to operate the camcorder and to charge battery packs in any country with power supply between 100 and 240 V AC 50 60 Hz Consult a Canon Service Center for information on plug adapters for overseas use Playback on a TV Screen You can only play back your recordings on TVs compatible with the PAL system PAL or the compatible SECAM system is used in the following regions countries Euro...

Page 196: ...0 Shoulder Strap A l DTC 100 D Terminal Cable 2 WS 20 Wrist Strap S q CTC 100 Component Cable CTC 100 S Component Cable 3 WL D89 Wireless Controller 6 CA 570 Compact Power Adapter S a STV 250N Stereo Video Cable 7 DW 100 DVD Burner S s ZR 1000 Zoom Remote Controller A h IFC 300PCU USB Cable S d ZR 2000 Zoom Remote Controller A j Memory card TV HDTV VCR DVD recorder Computer Card reader writer AVCH...

Page 197: ...ry and display the remaining usage time accurate to 1 minute You can only use and charge these battery packs with camcorders and chargers compatible with Intelligent System 5 CG 800E Battery Charger Use the battery charger to charge the battery packs Use of genuine Canon accessories is recommended This product is designed to achieve excellent performance when used with genuine Canon accessories Ca...

Page 198: ...es given in the following tables are approxi mate and vary according to recording mode and charging recording or playback conditions The effective usage time of the battery pack may decrease when recording in cold surroundings when using the brighter screen settings etc Battery pack BP 808 BP 809 BP 819 BP 827 Charging conditions Using the camcorder 150 min 260 min 385 min Using the CG 800E Batter...

Page 199: ... 85 min 100 min 55 min 65 min 130 min SP 85 min 100 min 55 min 65 min 135 min LP 90 min 105 min 55 min 65 min 135 min BP 819 MXP 175 min 200 min 110 min 125 min 265 min FXP 175 min 200 min 110 min 130 min 265 min XP 175 min 205 min 110 min 130 min 265 min SP 175 min 205 min 115 min 130 min 270 min LP 180 min 210 min 115 min 130 min 275 min BP 827 MXP 265 min 305 min 175 min 195 min 390 min FXP 270...

Page 200: ...Recording maximum Recording typical Playback LCD Viewfinder LCD Viewfinder LCD BP 808 BP 809 MXP 85 min 100 min 55 min 65 min 135 min FXP 90 min 100 min 55 min 65 min 135 min XP 90 min 100 min 55 min 65 min 135 min SP 90 min 105 min 55 min 65 min 135 min LP 90 min 105 min 55 min 65 min 140 min BP 819 MXP 175 min 205 min 110 min 130 min 270 min FXP 180 min 205 min 110 min 130 min 275 min XP 180 min...

Page 201: ...o control difficult lighting condi tions A a SC 2000 Soft Carrying Case A handy camcorder bag with padded compartments and plenty of space for accessories A s SM V1 Surround Microphone Use 5 1ch surround sound to add a sense of presence to your movies You can link the surround sound to the zoom position or use the microphone as a highly directional shotgun microphone monaural A d DM 100 Directiona...

Page 202: ... even at night or in dark places It attaches to the cam corder s mini advanced shoe for cable free operation A k HTC 100 HDMI Cable Use this cable to connect the camcorder to an external device using an all digital connection allowing you to enjoy play back at the highest quality This cable sends both video and audio signals This mark identifies genuine Canon video accessories When you use Canon v...

Page 203: ...elding extremely high quality prints Only photos recorded on a memory card Television System 1080 50i Recordings made with the PF25 frame rate are converted and recorded on the memory as 50i Recording Media c Built in memory b 64 GB a 32 GB SD or SDHC SD High Capacity memory card not included Maximum Recording Time b 64 GB built in memory MXP mode 5 hr 55 min FXP mode 8 hr 20 min XP mode 11 hr 30 ...

Page 204: ...ight recording program Shutter speed at 1 2 3 5 lx Programmed AE recording program Shutter speed at 1 25 Auto slow shutter On Recommended Illumination More than 100 lx Image Stabilization Optical Shift Image Stabilizer Size of Video Recordings MXP FXP mode 1920 x 1080 pixels XP SP LP mode 1440 x 1080 pixels Size of Photos mode LW 3264 x 1840 L 3264 x 2456 M 1920 x 1440 S 640 x 480 pixels Simultane...

Page 205: ... Dimensions W x H x D excluding the grip belt b 75 x 74 x 148 mm e 75 x 74 x 140 mm Weight camcorder body only b 470 g e 460 g CA 570 Compact Power Adapter Power supply 100 240 V AC 50 60 Hz Rated output consumption 8 4 V DC 1 5 A 29 VA 100 V 39 VA 240 V Operating temperature 0 40 C Dimensions 52 x 29 x 90 mm Weight 135 g BP 808 Battery Pack Battery type Rechargeable lithium ion battery compatible...

Page 206: ... The specifications of the music files compatible with the camcorder are as follows Audio encoding Linear PCM Audio sampling 48 kHz 16 bits 2 channels Minimum length 1 second File extension WAV The music data is saved in the memory under the following folder structure c In the built in memory CANON MY_MUSIC MUSIC_01 WAV to MUSIC_99 WAV MUSIC_01 WAV to MUSIC_99 WAV CANON PRIVATE MY_MUSIC On the mem...

Page 207: ... backup battery 192 C Calendar 53 Camcorder supplemental disc 15 Capturing photos video snapshot scenes from a movie 96 Cine Mode recording program 60 Color bars Test tone 158 COMPONENT OUT terminal 121 123 Condensation 194 Connections to external devices 122 Continuous shooting 108 Copying Movies 126 Photos 127 Custom key dial 85 D Data code 93 160 Date and time 31 Deleting Movies 54 95 Photos 10...

Page 208: ...ed shoe 82 Mini video light 78 Mode switch 27 N Night scene recording program 59 Notification sounds 163 O Onscreen display selection 93 Onscreen icons 166 P P recording program 68 Peaking 74 PF25 progressive frame rate 158 170 Photo numbers 159 Photo quality 105 Photo size 105 Playback Movies 46 Photos 100 Playlist 94 Portrait recording program 59 Power saving 42 Powered IS 62 Pre recording 63 Pr...

Page 209: ...ording program 59 Sports recording program 59 Spotlight recording program 59 Sunset recording program 59 Surround sound 5 1ch 83 T Telephoto 43 Time zone DST 32 Timeline 87 Touch Track 65 Touch AE 70 Touch AF 72 Tripod 190 Troubleshooting 171 Tv recording program 68 U Uploading movies to video sharing Web sites 142 USB terminal 121 124 V Video snapshot 66 Viewfinder 25 Volume 48 82 W White balance...

Page 210: ... canon com au Canon New Zealand Ltd Tel 0800 222 666 within New Zealand only 64 09 489 0300 www canon co nz Canon Singapore Pte Ltd 1 HarbourFront Avenue 04 01 Keppel Bay Tower Singapore 098632 Tel 65 6799 8888 Fax 65 6799 8882 Canon Hongkong Company Ltd 19 F The Metropolis Tower 10 Metropolis Drive Hunghom Kowloon Hong Kong Tel 852 3191 2333 Fax 852 2428 3963 Canon Latin America Inc Sales Enquiri...

Reviews: