background image

59

[WIND SCREEN]: 

The camcorder automatically reduces the background sound of wind 

when recording outdoors (only while using the built-in microphone).
• The wind screen cannot be turned off when the mode switch is set to 

.

[MIX BALANCE]: 

When [12bit AUDIO] is set to [

 MIX/VAR.], adjust (

) the sound 

balance with the joystick.
• The camcorder will retain the audio balance adjustment, however if you turn off the 

camcorder, [12bit AUDIO] will be reset to [

 STEREO1].

Display Setup (LCD Brightness, Language, etc.)

 DISPLAY SETUP

1

 The default setting is [

 BRIGHT] when you power the camcorder using the compact power 

adapter.

2

 The list of languages available depends on the region of purchase.

[BRIGHTNESS]:

 Adjust (

) the brightness of the LCD display with the joystick.

• Changing the brightness of the LCD display does not affect that of the viewfinder or the 

recordings.

[TV SCREEN]:

 When set to [

 ON], the camcorder’s on-screen displays will appear also 

on the screen of a connected TV or monitor.
When the date and time are displayed on the camcorder’s screen they will also appear on 
a connected TV regardless of the [TV SCREEN] setting. Turn off the date/time display with 
the [DATA CODE] setting (

36).

Menu item

Setting options

CAMERA

PLAY

[BRIGHTNESS]

z

z

[BACKLIGHT]

[

 NORMAL]

1

, [

 BRIGHT]

z

z

26

[TV SCREEN]

[

ON]

, [

OFF]

z

[

ON], 

[

OFF]

z

[MARKERS]

[

 OFF]

, [

 LEVEL], [

GRID]

z

[DISPLAYS]

[

ON]

, [

OFF<PLAYBK>]

z

[6SEC.DATE]

[

ON], 

[

OFF]

z

[DATA CODE]

[

OFF]

, [

DATE], [

TIME], 

[

DATE & TIME]

z

36

[LANGUAGE]

2

Language Set A:

[

], 

[ENGLISH]

, [

], 

[

], [

], [

], [

], 

[

],  [

]

Language Set B:
[ENGLISH]

, [

], [

], [

]                                                 

z

z

24

[DEMO MODE]

[

ON]

, [

OFF]

z

Summary of Contents for 2486B001

Page 1: ...Mini Digital Video Cassette Digital Video Camcorder Instruction Manual Caméscope numérique Manuel d instruction English Français Español Videocámara digital Manual de Instrucciones NTSC PUB DIM 843 ...

Page 2: ...ssette If the symptoms reappear shortly after the cleaning the videocassette may be defective Stop using it Availability differs from area to area Video heads may become dirty under the following conditions When using the camcorder in humid or hot places When using cassettes with damaged or dirty tapes When using the camcorder in dusty places When using the video heads for a long time without clea...

Page 3: ... does cause harmful interference to radio or television reception which can be determined by turning the equipment off and on the user is encouraged to try to correct the interference by one or more of the following measures Reorient or relocate the receiving antenna Increase the separation between the equipment and receiver Connect the equipment into an outlet on a circuit different from that to ...

Page 4: ...nd Moisture Hazard of electric shock Do not use this product near water or in rainy moist situations 17 Placing or Moving Do not place on an unstable cart stand tripod bracket or table The product may fall causing serious injury to a child or adult and serious damage to the product A product and cart combination should be moved with care Quick stops excessive force and uneven surfaces may cause th...

Page 5: ...cabinet has been damaged f When the product exhibits a distinct change in performance This indicates a need for service 26 Replacement Parts When replacement parts are required be sure the service technician has used replacement parts that are specified by Canon or that have the same characteristics as the original part Unauthorized substitutions may result in fire electric shock or other hazards ...

Page 6: ...6 ...

Page 7: ...7 ...

Page 8: ...Charging the Battery Pack 19 Installing the Backup Battery 19 Preparing the Wireless Controller only and Accessories 21 Basic Operation of the Camcorder 21 Operating Modes 21 Joystick and Joystick Guide 22 Using the Menus 24 First Time Settings 24 Changing the Language 24 Changing the Time Zone 25 Setting the Date and Time 25 Getting Ready to Start Recording 25 Opening the Lens Cover and Adjusting...

Page 9: ...5 Returning to a Pre marked Position 35 Locating the Beginning of a Recording Date 36 Locating the End of the Last Scene 36 On Screen Displays Data Code 37 Advanced Function 37 Special Scene Recording Programs 39 Flexible Recording Changing the Shutter Speed 40 LCD Video Light 40 Self Timer 41 Audio Recording Mode 42 Audio Playback Modes 43 Manual Focus Adjustment 44 Manual Exposure Adjustment 44 ...

Page 10: ...ecting to a TV or VCR 49 Connection Diagrams 50 Playback on a TV Screen 50 Copying your Recordings to an External Video Recorder 51 Digital Video Dubbing 53 Audio Dubbing 54 Connecting to a Computer 54 PC Connection Diagram 55 Transferring Video Recordings ...

Page 11: ...V Type etc 58 Audio Setup Audio Mode Wind Screen etc 59 Display Setup LCD Brightness Language etc 60 System Setup Beep Power Save etc 61 Date Time Setup 62 Trouble 62 Troubleshooting 64 List of Messages 66 Do s and Don ts 66 Handling Precautions 68 Maintenance Others 70 Using the Camcorder Abroad 71 General Information 71 System Diagram 72 Optional Accessories 75 Product Codes 76 Specifications 79...

Page 12: ...l are simulated pictures taken with a still camera Note that unless indicated otherwise illustrations in this manual refer to the model About this Manual Setting the Date and Time 1 Open the date and time setup screen MENU DATE TIME SETUP DATE TIME Blinking arrows will be displayed around the first field of the date 2 Change each field of the date and time with the joystick and move to the next fi...

Page 13: ...purchase of your new Canon product on file to help you refer to this information in the event of an insurance claim such as loss or theft 9 Receive information on new products and promotions Upon your request we will send you information on Canon new products and promotions The serial number of this product can be found at the battery attachment unit of the camcorder Write down the number and othe...

Page 14: ... example Components Guide Left side view Front view Right side view Lens cover switch 28 open closed DV terminal 49 54 MIC microphone terminal 41 AV terminal 49 CHARGE indicator 17 Speaker Mode switch 29 Easy recording Recording programs Grip belt 20 Strap mount 74 Lock button switch 21 Stereo microphone FUNC ...

Page 15: ...D EFFECTS button 46 Remote sensor 20 Viewfinder 30 Dioptric adjustment lever 30 QUICK START button 32 Start Stop button 28 DC IN terminal 17 Backup battery compartment 19 Serial number Battery attachment unit 17 LCD screen 25 Cassette compartment 27 Cassette compartment cover 27 Zoom lever 30 OPEN EJECT switch 27 Tripod socket 20 BATT battery release switch 17 FUNC ...

Page 16: ...RT STOP PHOTO ZOOM CARD DATE SEARCH REW PLAY FF STOP PAUSE SLOW AUDIO DUB ZERO SET MEMORY TV SCREEN START STOP button 28 CARD buttons DATE SEARCH buttons 35 REW button 33 button 33 PAUSE button 33 SLOW button 33 AUDIO DUB button 53 ZERO SET MEMORY button 35 PHOTO button Zoom buttons 30 PLAY button 33 FF button 33 STOP button 33 button 33 button 33 TV SCREEN button 59 ...

Page 17: ...us 43 Image stabilizer 57 Recording mode 58 Tape operation 16 Time code hours minutes seconds Remaining tape 16 Remaining battery charge 16 Wind screen off 59 Audio recording mode 41 Remote sensor off 60 Backup battery warning 19 Level marker 60 Recording reminder 16 Operating mode 21 Audio playback mode 42 Speaker volume 34 Search function display END SEARCH 36 DATE SEARCH 35 Playback time hours ...

Page 18: ...e reaches its end the display changes to END When the time left is less than 15 seconds the remaining tape time may not appear Depending on the type of tape the remaining time displayed may not be correct In any case you will be able to record on the tape the number of minutes that appears on the cassette s label for example 85 minutes Remaining battery charge When starts flashing in red replace t...

Page 19: ...ll battery pack refer to the tables on page 73 1 Turn off the camcorder 2 Attach the battery pack to the camcorder Press the battery pack lightly and slide it up until it clicks 3 Plug the compact power adapter into a power outlet 4 Connect the compact power adapter to the camcorder s DC IN terminal The CHARGE indicator starts flashing The indicator will stay on when the charging is completed You ...

Page 20: ...se with this camcorder To prevent equipment breakdowns and excessive heating do not connect the supplied compact power adapter to voltage converters for overseas travels or special power sources such as those on aircraft and ships DC AC inverters etc NOTES The CHARGE indicator also serves as a rough estimate of the battery charge status Continuously on Battery pack fully charged Two quick flashes ...

Page 21: ...ckup battery cover 3 Insert the backup battery with the side facing out 4 Close the cover NOTES The battery life of the backup battery is about one year flashes in red when the lithium button battery is not installed or when it needs to be replaced Preparing the Wireless Controller only and Accessories First insert the supplied lithium button battery CR2025 into the wireless controller 1 Press the...

Page 22: ...less controller does not work check that WL REMOTE is not set to OFF 60 Otherwise replace the battery Accessories Fasten the grip belt Adjust the grip belt so that you can reach the zoom lever with your index finger and the button with your thumb Do not leave the viewfinder exposed to direct sunlight as it may melt due to concentration of the light by the lens Do not use tripods with fastening scr...

Page 23: ...s The joystick can also be used in combination with the joystick guide to operate additional functions Press to display hide the joystick guide when recording the joystick guide will appear only when the mode switch is set to The functions that appear on the joystick guide will change depending on the operating mode Operating mode switch Icon display Operation Recording movies 28 Playing movies 33...

Page 24: ...nu items not available will appear grayed out 3 Select the desired setting from the available options at the bottom bar The selected option will be highlighted in light blue Menu items not available will appear grayed out With some settings you will need to make further selections and or press Follow the additional operation guides that will appear on the screen such as the joystick icon small arr...

Page 25: ... close the menu at any time NOTES Instead of steps 1 and 2 you can also keep pressed down for more than 1 second to open the setup menus screen directly Abbreviation of Menu Selections in this Manual In this manual the arrow is used to abbreviate menu selections Below is an example of changing a setting using the setup menus MENU DISPLAY SETUP LANGUAGE Desired language For selections in the FUNC m...

Page 26: ...ange the time zone to match your location The default setting is New York or Singapore depending on the region of purchase MENU DATE TIME SETUP T ZONE DST Desired time zone To adjust for daylight saving time select the time zone with the mark next to the area World Time Zones Once you have set the time zone date and time you do not need to reset the clock every time you travel to another time zone...

Page 27: ...format 61 Getting Ready to Start Recording Opening the Lens Cover and Adjusting the LCD Screen Before you start recording open the lens cover Move the lens cover switch down to to open the lens cover Rotating the LCD Panel Open the LCD panel 90 degrees You can rotate the panel 90 degrees downward You can rotate the panel 180 degrees toward the lens allowing the subject to monitor the LCD screen wh...

Page 28: ...techniques with more than 99 99 of the pixels operating to specification Less than 0 01 of the pixels may occasionally misfire or appear as black red blue or green dots This has no effect on the recorded image and does not constitute a malfunction LCD Backlight You can set the brightness of the LCD screen to normal or bright MENU DISPLAY SETUP BACKLIGHT Desired option NOTES This setting does not a...

Page 29: ...e mark on the cassette compartment until it clicks 4 Wait for the cassette compartment to retract automatically and close the cassette compartment cover IMPORTANT Do not interfere with the cassette compartment while it is opening or closing automatically or attempt to close the cover before the cassette compartment has fully retracted Be careful not to get your fingers caught in the cassette compa...

Page 30: ... lock button pressed down set the switch to CAMERA 3 Press to begin recording Press again to pause the recording 1 Close the lens cover and the LCD panel 2 Turn off the camcorder 3 Remove the tape 4 Disconnect the power source and remove the battery pack Basic Recording Before You Begin Recording Make a test recording first to check if the camcorder operates correctly If necessary clean the video ...

Page 31: ... 30 seconds To resume recording press About the Power Save mode To save power when the camcorder is powered by a battery pack the camcorder will automatically shut off if left without any operations for 5 minutes 60 To restore the power turn the camcorder off and then on again When recording in very loud places such as fireworks shows or concerts sound may become distorted or it may not be recorde...

Page 32: ...en the LCD panel is turned 180 degrees to face the subject 25 21 OPTICAL 37x The zoom range is limited to the optical magnification ratio of the lens ADVANCED Advanced Zoom In addition to the optical zoom range the camcorder processes the image digitally to obtain a larger zoom range without any deterioration in image quality When recording movies with a 16 9 aspect ratio the field of view picture...

Page 33: ...as close as 1 cm 0 39 in You can also use the T and W buttons on the wireless controller The zoom speed with the wireless controller will be the same as with the camcorder or fixed at SPEED 3 when VARIABLE is selected WIDESCREEN set to ON 16 9 48x 41x The picture angle will be wider at both full telephoto and full wide angle The picture angle will be wider at full wide angle WIDESCREEN set to OFF ...

Page 34: ...ume recording press again Within approx 1 second the camcorder is ready to record NOTES When you wake up the camcorder from standby mode the following settings will be changed automatically Manual focus returns to automatic focus AF Manual exposure adjustment returns to automatic exposure Zoom position returns to full wide angle W The camcorder will shut off if left in standby mode for 10 minutes ...

Page 35: ... can also hold the joystick pressed toward or toward to play back the tape reverse or forward respectively in order to locate the point where you want to start recording Basic Playback Playing Back Video 1 Holding the lock button pressed down set the switch to PLAY 2 If the joystick guide does not appear on screen press to display it 3 Locate the point where you want to begin the playback Push the...

Page 36: ...HE VOLUME FUNC FUNC Special Playback Modes1 To enter most special playback modes you need to operate the buttons on the wireless controller2 14 There is no sound during the special playback modes 1 During some special playback modes you may notice some anomalies blocky video artifacts banding etc in the playback picture 2 The wireless controller is included only with the Special playback mode Init...

Page 37: ...pe counter shows a negative number press instead appears and the camcorder rewinds fast forwards the tape The tape stops at or near the zero mark disappears and the correct time code will be displayed again NOTES If there are blank sections between recordings the zero set memory may not work correctly Locating the Beginning of a Recording Date You can locate the change of the date time zone with t...

Page 38: ...tick toward NOTES End search cannot be used once you remove the cassette If there are blank sections between recordings the end search may not work correctly You cannot use the end search to locate the end of a scene that was audio dubbed On Screen Displays Data Code The camcorder keeps a data code containing the date and time of recording You can select the data to be displayed Options Default va...

Page 39: ...htness of the picture may change abruptly PORTRAIT SPORTS BEACH SNOW The picture may not appear smooth during playback PORTRAIT The blur effect of the background increases the more you zoom in T NIGHT Moving subjects may leave a trailing afterimage Picture quality may not be as good as in other modes White points may appear on the screen Autofocus may not work as well as in other modes In such cas...

Page 40: ...s on the subject while blurring other distracting details SUNSET Use this mode to record sunsets in vibrant colors SPORTS Use this mode to record sports scenes such as tennis or golf SPOTLIGHT Use this mode to record spotlit scenes NIGHT Use this mode to record in low light conditions FIREWORKS Use this mode to record fireworks SNOW Use this mode to record in bright ski resorts It prevents the sub...

Page 41: ...is displayed 250 indicates a shutter speed of 1 250 second etc NOTES Do not set the mode switch to during the actual recording of a scene the brightness of the picture may change abruptly PROGRAM AE When setting the shutter speed the number displayed will flash if the value selected is not appropriate for the recording conditions In such case select a different value If you use a slow shutter spee...

Page 42: ... ON Press The LCD display turns entirely white when used as the video light Use the viewfinder instead Using the viewfinder select LCD LIGHT OFF to turn the LCD video light off Self Timer POINTS TO CHECK Set the camcorder to record pause mode 1 Activate the self timer MENU CAMERA SETUP SELF TIMER ON 2 Press to close the menu appears Set SELF TIMER to OFF to cancel the self timer 3 Press on the cam...

Page 43: ...ing an External Microphone Connect the external microphone to the MIC terminal Use commercially available condenser microphones with their own power supply and a cable no longer than 3 m You can connect almost any stereo microphone with a 3 5 mm plug but audio recording levels may vary 21 16bit Records audio at the highest quality 12bit Records audio on 2 channels Stereo 1 leaving 2 free channels ...

Page 44: ...on to the original recorded audio Stereo 1 Options Default value MENU AUDIO SETUP 12bit AUDIO Desired option When you select MIX VAR adjust the mix balance with the MIX BALANCE setting 59 21 L R Left and right channels stereo Main and sub signals bilingual L L Left channel only stereo Main signal only bilingual R R Right channel only stereo Sub signal only bilingual FUNC 22 FUNC FUNC 21 STEREO1 Or...

Page 45: ... distance or push it toward for a closer focal distance Pushing the joystick toward FOCUS again will return the camcorder to autofocus 4 Push the joystick toward BACK to save the focus adjustment Infinity Focus Use this function when you wish to focus on faraway subjects such as mountains or fireworks POINTS TO CHECK Adjust the zoom before you start the procedure Mode switch 1 Keep the joystick pu...

Page 46: ...g on the initial brightness of the picture Pushing the joystick toward EXP again will return the camcorder to automatic exposure 4 Push the joystick toward BACK to lock and save the exposure setting If you operate the zoom during exposure lock the brightness of the image may change White Balance The white balance function helps you accurately reproduce colors under different lighting conditions so...

Page 47: ...e may provide better results in the following cases Changing lighting conditions Close ups Subjects in a single color sky sea or forest Under mercury lamps and certain types of fluorescent lights Image Effects You can use the image effects to change the color saturation and contrast to record images with special color effects POINTS TO CHECK Recording program PROGRAM AE Options Default value IMAGE...

Page 48: ...de then press to start recording with a fade in in playback pause mode then push the joystick toward to fade in and start the playback 21 D EFFECT OFF Select this setting when you do not intend to use the digital effects FADE T fade trigger WIPE Select one of the faders to begin or end a scene with a fade from or to a black screen BLK WHT Records images in black and white SEPIA Records images in s...

Page 49: ... fader not only the picture but also the sound will fade in or out When you apply an effect the sound will be recorded normally The camcorder retains the last setting used even if you turn off the digital effects or change the recording program The digital effects are not available when TV TYPE is set to NORMAL TV and the stereo video cable is connected to the AV terminal TO FADE OUT TO ACTIVATE A...

Page 50: ...R or computer Connecting to a TV or VCR Connecting to a TV or VCR AV Terminal Sound from the built in speaker will be muted while the STV 250N Stereo Video Cable is connected to the camcorder DV Terminal Check the type and orientation of the terminal and make sure you connect the DV cable properly Open the LCD panel to access ...

Page 51: ...or VCR with AV Terminals VIDEO AUDIO R L STV 250N Stereo Video Cable supplied Yellow White Red 2 Output connection signal flow to a high definition TV with a DV IEEE1394 terminal Input connection signal flow from a TV or other digital video source with a DV IEEE1394 output DV cable commercially available 4 pin 6 pin Be careful to correctly insert the 6 pin plug into the DV terminal Inserting it in...

Page 52: ...mpact power adapter Copying your Recordings to an External Video Recorder You can copy your recordings by connecting the camcorder to a VCR or a digital video device When recording to a digital video recorder using the DV terminal you can copy recordings with virtually no generation loss in video and sound quality Connecting Connect the camcorder to a VCR or other analog device using connection ty...

Page 53: ...ation cannot be guaranteed for all digital devices equipped with a DV terminal If the operation does not work use the AV terminal Digital Video Dubbing You can input video from other digital video devices and record the input video on the tape in the camcorder Connecting Connect the camcorder to the video input source using the digital connection connection type 49 shown in Connection Diagrams Dub...

Page 54: ...r turn the camcorder off and then on again You can only record video signals in DV standard standard definition SP or LP mode from devices carrying the logo Note that signals from identically shaped DV IEEE1394 terminals may be in different video standards NOTES We recommend powering the camcorder using the compact power adapter Copyright Signal Certain software tapes are copyright protected If yo...

Page 55: ...to begin dubbing Speak into the microphone 5 Press to stop dubbing IMPORTANT Audio dubbing will stop if the tape has a blank section or a section recorded in LP mode or 16bit audio The quality of the dubbed sound will not be as good when dubbing audio to a tape that was not recorded with this camcorder or after having dubbed audio over the same scene more than 3 times NOTES You can connect the cam...

Page 56: ... properly Open the LCD panel to access Terminal on the Camcorder Connecting Cable Terminal on the Connected Device Output connection signal flow to a computer with a DV IEEE1394 terminal or a DV capture board DV cable commercially available 4 pin 6 pin Be careful to correctly insert the 6 pin plug into the DV terminal Inserting it in the wrong direction can result in damage to the camcorder 1 ...

Page 57: ...eo editing software Refer to the instruction manual of the editing software IMPORTANT The video transfer may not work correctly depending on the software and the specifications settings of your computer If the computer freezes while the camcorder is connected to it disconnect the DV cable and turn off the camcorder and the computer After a short while turn them on again set the camcorder to mode a...

Page 58: ...w the tables FUNC Menu FUNC Menu 1 Option available only when the mode switch is set to Appendix Menu Options Lists Menu item Setting options CAMERA PLAY Recording programs1 PROGRAM AE PORTRAIT SPORTS NIGHT SNOW BEACH SUNSET SPOTLIGHT FIREWORKS z 37 White balance1 AUTO DAYLIGHT TUNGSTEN SET z 44 Image effects1 IMAGE EFFECT OFF VIVID NEUTRAL SOFT SKIN DETAIL z 45 LCD video light LCD LIGHT OFF LCD L...

Page 59: ...hen recording moving subjects The image stabilizer may not be effective when recording in dark places with A SL SHUTTER set to ON or using the NIGHT recording program The image stabilizer may not work well on subjects with low contrast with a recurring repetitive pattern or without vertical lines The image stabilizer cannot be turned off when the mode switch is set to We recommend setting the imag...

Page 60: ...s on the same tape during playback you may notice some video anomalies in the picture at the point where the recording mode changes When playing back in this camcorder tapes recorded in LP mode with other devices or vice versa you may notice some anomalies in the playback picture or the sound may stop briefly TV TYPE In order to display the picture in full and in the correct aspect ratio select th...

Page 61: ...ds on the region of purchase BRIGHTNESS Adjust the brightness of the LCD display with the joystick Changing the brightness of the LCD display does not affect that of the viewfinder or the recordings TV SCREEN When set to ON the camcorder s on screen displays will appear also on the screen of a connected TV or monitor When the date and time are displayed on the camcorder s screen they will also app...

Page 62: ...nstration mode displays the camcorder s main features It starts automatically when the camcorder is powered with the power adapter if you leave it turned on without loading a recording media for more than 5 minutes To cancel the demo mode once it started press any button turn off the camcorder or insert a videocassette System Setup Beep Power Save etc SYSTEM SETUP WL REMOTE Allows the camcorder to...

Page 63: ...ORMAT Changes the date format for on screen displays Menu item Setting options CAMERA PLAY T ZONE DST List of world time zones z z 24 DATE TIME z z 25 DATE FORMAT Y M D 2008 1 1 AM 12 00 M D Y JAN 1 2008 12 00 AM D M Y 1 JAN 2008 12 00 AM z z ...

Page 64: ...rge Charge the battery pack in temperatures between 0 C and 40 C 32 F and 104 F Battery packs become hot with use and may not charge When the battery pack is outside the charging temperature range the CHARGE indicator will flash irregularly The charging will start once the battery pack temperature is below 40 C 104 F The battery pack is damaged Use a different battery pack If you connect a faulty ...

Page 65: ...for 4 minutes 30 seconds To resume the operation press when recording or push the joystick toward during playback Recording Image will not appear on the screen Set the camcorder to 28 SET THE TIME ZONE DATE AND TIME appears on the screen Set the time zone date and time 24 Replace the backup lithium battery and set the time zone date and time 19 Pressing will not start recording Set the camcorder t...

Page 66: ... video heads 2 You attempted to play back or dub a copyright protected tape 52 Stop playback dubbing Editing Cannot record with this camcorder video input from an external video device connected using a DV cable Wrong signal standard Refer also to the instruction manual of the connected device List of Messages in alphabetical order CHANGE THE BATTERY PACK Battery pack is exhausted Replace or charg...

Page 67: ...o heads are dirty Clean the video heads 2 INCORRECT TAPE SPECIFICATION PLAYBACK IS RESTRICTED You attempted to play back a tape recorded in a different television system PAL or SECAM or in a recording standard not supported by this camcorder INPUT SIGNAL NOT SUPPORTED The digital device connected with the DV cable is incompatible with the camcorder REMOVE THE CASSETTE Camcorder stopped operating t...

Page 68: ...e Battery Pack Charged battery packs continue to discharge naturally Therefore charge them on the day of use or the day before to ensure a full charge Attach the terminal cover whenever a battery pack is not in use Contact with metallic objects may cause a short circuit and damage the battery pack Dirty terminals may cause a poor contact between the battery pack and the camcorder Wipe the terminal...

Page 69: ...d store them upright Rewind tapes from time to time if they are stored for a long time Do not leave the cassette in the camcorder after use Do not use spliced tapes or nonstandard cassettes as they may damage the camcorder Do not use tapes that have been jammed as video heads may become dirty Do not insert anything into the small holes of the cassette or cover them with cellophane tape Handle cass...

Page 70: ...or viewfinder Never use tissue paper LCD Screen Clean the LCD screen using a clean soft lens cleaning cloth Condensation may form on the surface of the screen when the WARNING The battery used in this device may present a fire or chemical burn hazard if mishandled Do not disassemble modify immerse in water heat above 100 C 212 F or incinerate the battery Backup battery Replace with a CR1616 batter...

Page 71: ...e Remove the cassette place the camcorder in an airtight plastic bag and let it adjust to temperature changes slowly before removing it from the bag The camcorder automatically shuts off the warning message CONDENSATION HAS BEEN DETECTED appears for approx 4 seconds and starts flashing If a cassette is loaded the warning message REMOVE THE CASSETTE appears and starts flashing Remove the cassette i...

Page 72: ...a Canada Chile Colombia Costa Rica Cuba Ecuador El Salvador Greenland Guam Guatemala Haiti Honduras Jamaica Japan Korea Mexico Micronesia Myanmar Nicaragua Panama Peru Philippines Puerto Rico Saint Kitts and Nevis Saint Lucia Saint Vincent and the Grenadines Surinam Taiwan Trinidad and Tobago USA Venezuela Virgin Islands Trademark Acknowledgements is a trademark Microsoft Windows and Windows Vista...

Page 73: ...85 Wireless Controller CBC NB2 Car Battery Charger STV 250N Stereo Video Cable CA 590 Compact Power Adapter Commercially available DV cable SC 2000 Soft Carrying Case WS 20 Wrist Strap SS 600 SS 650 Shoulder Strap NB 2LH BP 2L5 BP 2L14 Battery Pack TV VCR DVD recorder digital device with DV terminal MiniDV videocassette CB 2LW Battery Charger ...

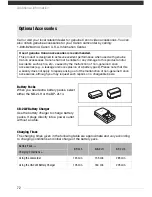
Page 74: ...nditions and initial charge of the battery pack Optional Accessories Use of genuine Canon accessories is recommended This product is designed to achieve excellent performance when used with genuine Canon accessories Canon shall not be liable for any damage to this product and or accidents such as fire etc caused by the malfunction of non genuine Canon accessories e g a leakage and or explosion of ...

Page 75: ...B2 Car Battery Charger Use the car battery charger to charge battery packs on the move The car battery cable plugs into your car s cigarette lighter and runs off a 12 24 V DC negative ground battery Battery Pack BP 2L5 NB 2LH BP 2L14 Screen Used Viewfinder LCD Viewfinder LCD Viewfinder LCD Maximum Recording Time 90 min 85 min 125 min 120 min 270 min 260 min Typical Recording Time 45 min 45 min 65 ...

Page 76: ...gth of the strap WS 20 Wrist Strap Use this for extra additional protection for active shooting SC 2000 Soft Carrying Case A handy camcorder bag with padded compartments and plenty of space for accessories This mark identifies genuine Canon video accessories When you use Canon video equipment we recommend Canon brand accessories or products bearing the same mark ...

Page 77: ...D83 0712 000 STV 250N Stereo Video Cable D82 0590 002 Optional Accessories NB 2LH Battery Pack 9612A001AA BP 2L14 Battery Pack 9582A002AA CB 2LW Battery Charger 0763B001AA CBC NB2 Car Battery Charger 7873A002AA WS 20 Wrist Strap 3118A002AA D81 0190 202 SC 2000 Soft Carrying Case 9389A001AA DVM CL DV Cleaning Cassette 3134A002AA D36 0032 201 ...

Page 78: ...all figures are approximate values 16 9 Movies advanced zoom 360 000 T 450 000 W pixels other zoom types 360 000 pixels 4 3 Movies 340 000 pixels Compatible Tapes Videocassettes bearing the mark Tape Speed SP 18 81 mm s 0 74 ips LP 12 56 mm s 0 49 ips Maximum Recording Time 60 min tape SP 60 minutes LP 90 minutes LCD Screen 2 7 in wide TFT color approx 112 000 pixels Viewfinder 0 35 in wide TFT co...

Page 79: ...AV Terminal 3 5 mm minijack output only Video 1 Vp p 75 ohms unbalanced Audio 10 dBV 47 kohms load 3 kohms or less DV Terminal 4 pin IEEE1394 standard input output MIC Terminal 3 5 mm stereo minijack 57 dBV with 600 ohm mic 5 kohms or more Power Others Power supply rated 7 4 V DC battery pack 8 4 V DC compact power adapter Power consumption 2 4 W viewfinder 2 5 W LCD screen normal brightness 2 2 W...

Page 80: ...ower input 100 240 V AC 50 60 Hz 0 14 0 08 A Rated output 8 4 V DC 0 6 A Operating temperature 0 40 C 32 104 F Dimensions 46 x 26 x 70 mm 1 8 x 1 0 x 2 8 in Weight 95 g 3 4 oz Battery type Rechargeable Lithium Ion Battery Rated voltage 7 4 V DC Operating temperature 0 40 C 32 104 F Battery capacity 530 mAh Dimensions 33 3 x 16 2 x 45 2 mm 1 3 x 0 64 x 1 8 in Weight 40 g 1 4 oz ...

Page 81: ... to a TV VCR 48 D Data code 36 Date and time Date format 61 Daylight saving time 24 Time zone 24 Date search 35 Digital effects 46 Digital video input DV dubbing 51 DV terminal 49 54 E EASY recording program 29 End search 36 Error messages 64 Exposure 44 F Fireworks recording program 38 FUNC menu 22 56 G Grip belt 20 I Image effects 45 Image stabilizer 57 J Joystick 21 Joystick guide 21 L Language...

Page 82: ...s 15 Self timer 40 Serial number 12 Setup menus 22 57 Shutter speed 39 Snow recording program 38 SP mode 58 Special scene recording programs 37 Sports recording program 38 Spotlight recording program 38 Sunset recording program 38 T Telephoto 30 Transferring movies to a computer 55 Tripod 20 Troubleshooting 62 V Video heads cleaning 2 Videocassettes 27 67 Viewfinder 30 Volume 34 W White balance 44...

Page 83: ...shandling accident improper maintenance or failure to follow operating instructions B If the Equipment is defective as a result of leaking batteries sand dirt or water damage C If defects or damages are caused by the use of unauthorized parts or by service other than by Canon USA s factory service centers or authorized service facilities D If the Equipment is used for commercial or industrial use ...

Page 84: ...finish of the Equipment media nor does it apply to Equipment purchased outside Canada If the Equipment contains a hard disk drive Canon Canada recommends that data stored on that drive be duplicated or backed up to prevent its loss in the event of a failure or other malfunction of such drive TO OBTAIN WARRANTY SERVICE Ship your Equipment in its original carton box or equivalent properly packed ful...

Page 85: ...If you have any questions call the Canon Canada Information Center toll free at 1 800 828 4040 CANADA only Si vous avez des questions veuillez téléphoner sand frais au Canada 1 800 828 4040 CANADA seulement MEXICO CANON MEXICANA S DE R L DE C V Periférico Sur No 4124 Col Ex Rancho de Anzaldo C P 01900 México D F México CANON U S A INC NEW JERSEY OFFICE 100 Jamesburg Road Jamesburg NJ 08831 USA CEN...

Reviews: