151
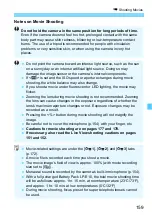
Live View Shooting Cautions
Image Quality
When you shoot at high ISO speeds, noise (such as dots of light and
banding) may become noticeable.
Shooting in high temperatures may cause noise and irregular colors in the image.
If Live View shooting is used continuously for a long period, the camera’s
internal temperature may rise, and image quality may deteriorate.
Always exit Live View shooting when you are not shooting.
If you shoot a long exposure while the camera’s internal temperature is
high, image quality may deteriorate. Exit Live View shooting and wait a
few minutes before shooting again.
White <
s
> and Red <
E
> Internal Temperature Warning Icons
If the camera’s internal temperature increases due to prolonged Live View shooting or
under a high ambient temperature, a white <
s
> or red <
E
> icon will appear.
The white <
s
> icon indicates that the image quality of still photos will
deteriorate. It is recommended that you temporarily exit Live View
shooting and allow the camera to cool down before shooting again.
The red <
E
> icon indicates that the Live View shooting will soon stop
automatically. If this happens, you will not be able to shoot again until the
camera’s internal temperature decreases. Exit Live View shooting or turn
off the power and let the camera rest for a while.
Using Live View shooting at a high temperature for a prolonged period
will cause the <
s
> or <
E
> icon to appear earlier. When you are not
shooting, turn off the camera.
If the camera’s internal temperature is high, the image quality of high ISO
speed images or long exposures may deteriorate even before the white
<
s
> icon is displayed.
Shooting Result
If you take the picture in magnified view, the exposure may not come out as
desired. Return to the normal view before taking the picture. In magnified view,
the shutter speed and aperture will be displayed in orange. Even if you take the
picture in magnified view, the image will be captured in the normal view range.
If [
z
2: Auto Lighting Optimizer
] (p.119) is set to other than [
Disable
],
the image may look bright even if a decreased exposure compensation
or decreased flash exposure compensation is set.
If you use a TS-E lens (except the TS-E17mm f/4L or TS-E24mm f/3.5L
II) and shift or tilt the lens or use an Extension Tube, the standard
exposure may not be obtained or an irregular exposure may result.
Summary of Contents for 1200D
Page 1: ...INSTRUCTION MANUAL ENGLISH The Quick Reference Guide is included at the end of this manual ...
Page 54: ......
Page 132: ......
Page 202: ......
Page 232: ......
Page 266: ......
Page 312: ...312 ...
Page 322: ...322 ...
Page 324: ...324 Quick Reference Guide ...
Page 325: ...325 Quick Reference Guide 5 56 7 5 5 86 5 Y _ 9 5 _ ...
Page 326: ...Quick Reference Guide 326 Y Z 5 X 5 5 ...
Page 327: ...327 Quick Reference Guide 3 ...
Page 328: ...Quick Reference Guide 328 2 14 0 _ Y ...
Page 329: ...329 Quick Reference Guide 5 0 _ ...
Page 330: ...Quick Reference Guide 330 6 6 6 1 5 5 5 X 5 5 5 X 5 ...
Page 331: ...331 Quick Reference Guide 6 5 5 5 5 5 5 5 ...
Page 332: ...Quick Reference Guide 332 6 0 5 5 5 5 5 0 65 F 0 68 0 6 F ...
Page 333: ...333 Quick Reference Guide 9 2 1 5 5 5 5 8 G 5 3 0 9 2 1 _ qz q q ...
Page 334: ...Quick Reference Guide 334 5 5 5 5 ...
Page 335: ...335 Quick Reference Guide QGH 6KRRWLQJ LQIRUPDWLRQ 0DJQLI 3OD EDFN UDVH 6HOHFW LPDJH ...


