background image

9 Daily Maintenance 


  35 / 41 

1) Cleaning Air Inlet and Outlet 
A huge amount of heat is generated in the process of running the inverter. The inverter adopts a controlled forced-air 
cooling method. 
In order to maintain good ventilation, please check to make sure the air inlet and outlet are not blocked. 
Clean the air inlet and outlet with soft brush or vacuum cleaner if necessary. 
2) Internal Fan Maintenance 
Fans inside the inverter are used to cool the inverter during operation. If the fans do not operate normally, the inverter 
may not be cooled down and inverter efficiency may decrease. Therefore, it is necessary to clean the dirty fans and replace 
the broken fans in time. 
The operation procedure is as follows: 
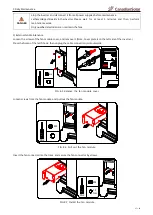
Step 1: Stop the inverter. 
Step 2: Loosen four screws on the front cover of the wiring compartment with screwdriver T30. 
Step 3: Open the wiring compartment. 

M6

T30


FIG  8-1  Open the wiring compartment 


Step 4: Cut off the cable ties that securing the fan connectors, press the hump of the latch hook, then unplug the cable 
connection joint outwards.


Step 5: Loosen screws from the fan module, and pull out the fan module. 

Items 

Methods 

Period 

System  clean 

Check the temperature and dust of the inverter. Clean the inverter enclosure.   
Check the humidity and dust of the environment.   
Meanwhile check whether the filter function of the air inlet is ok. 

Six months to a year (it 
depends on the dust 
contents in air) 

Fans 

Check whether there is fan warning using App. 
Check whether there is any abnormal noise when the fan is turning. 
Clean or replace the fans if necessary (see the following section). 

Once a year 

Cable entry 

Check whether the cable entry is insufficiently sealed or the gap is excessively 
large, and reseal the entry when necessary. 

Once a year 

Electrical 

Connection 

Check whether all cable are firmly in  place. 
Check whether a cable is damaged,  especially  the  part  contacting  the  metal 
enclosure.   

Six  months  to  a  year 

Summary of Contents for CSI-75K-T40001-E

Page 1: ...CSI 75K T40001 E CSI 100K T4001A E CSI 100K T4001B E CSI 110K T4001A E CSI 110K T4001B E CSI 120K T4001A E CSI 120K T4001B E PV Inverter User Manual Part No 91000076 Release Date February 2023...

Page 2: ...ion_________________________________________________________________________6 3 2 Identifying the Inverter ___________________________________________________________________________7 3 3 Scope of Del...

Page 3: ...onnection ______________________________________________________________________________ 26 5 8 1 PV Input Configuration _______________________________________________________________________________...

Page 4: ...English version shall prevail Please refer to our product lists and documents published on our website at http www csisolar com as these lists are updated on a regular basis Limitation of Liability CS...

Page 5: ...rnings on the PV strings and in its manual 1 1 Utility Grid Please follow the regulations related to the utility grid NOTICE All electrical connections must be in accordance with local and national st...

Page 6: ...following product models CSI 75K T40001 E CSI 100K T4001A E CSI 100K T4001B E CSI 110K T4001A E CSI 110K T4001B E CSI 120K T4001A E and CSI 120K T4001B E The inverter is designed to convert the direct...

Page 7: ...PV 11 PV 12 MPPT 5 PV 9 PV 10 MPPT 4 PV 7 PV 8 MPPT 3 PV 5 PV 6 MPPT 2 PV 3 PV 4 MPPT 1 PV 1 PV 2 DO NOT DISCONNECT UNDER LOAD DC SWITCH 3 ON OFF DC SWITCH 2 ON OFF DC SWITCH 1 ON OFF COMM PORT 4 COMM...

Page 8: ...ication data normally Off The solar inverter has not receives communication data for 10 seconds Steady green The solar inverter is in maintenance status Alarm indicator Steady red A major alarm is gen...

Page 9: ...e voltage to ground of all PV modules is greater than 0 that is the PV module to ground voltage is a positive value 3 FIG 2 5 PID functional system diagram NOTICE Before enabling the PID recovery func...

Page 10: ...de of the enclosure Made in China 3 N PE 230 400V 3 N PE 220 380V AC Nominal Voltage 120kVA Max Output apparent Power l Protection Class 30 C 60 C OperatingTemperature Range IP66 Degree of Protection...

Page 11: ...ng requirements should be met when the inverters need to be stored Storage temperature 40 C 70 C Storage humidity 0 100 RH Non Condensing The warehouse should be clean well ventilated and non corrosiv...

Page 12: ...e inverter is out of children s reach 3 The ambient temperature should be between 30 C to 60 C 4 The humidity of the installation location should be below 100 without condensation 5 Do not install the...

Page 13: ...than 800mm move the inverter from the mounting bracket or wall before maintaining fans 2 In case of multiple inverters reserve specific clearance between the inverters 600mm 800mm 1000mm 400mm 500mm F...

Page 14: ...oam cushion or the like to prevent the inverter bottom from scratches 4 3 2 Hoisting Transport Step 1 Install two M12 lifting eye nuts into the corresponding M12 holes at side handles of the inverter...

Page 15: ...ting Steps Step 1 Localize the hole positions in C or U section steel to install mounting bracket Step 2 Secure the mounting bracket with M10 bolts and nuts M10 30N m FIG 4 9 Locate the mounting hole...

Page 16: ...ounting bracket with the expansion bolts Note No expansion bolt is supplied M10 30N m FIG 4 11 Install the wall bracket Note No expansion bolt is supplied 4 8 Inverter Installation Step 1 Take out the...

Page 17: ...e utility grid All electrical connections must be in accordance with local and nationalstandards Only with the permission of the utility grid the inverter can be connected to the utility grid 5 2 Elec...

Page 18: ...grounding terminal cannot replace the connection of the PE terminal of the AC cable Make sure those terminals are both grounded reliably 5 3 1 Additional Grounding Requirements All non current carryi...

Page 19: ...o grounding terminals Use at least one of them to ground the inverter 5 4 Communication Cable Connection 5 4 1 Opening the Wiring Compartment Step 1 Loosen four screws on the front cover of the wiring...

Page 20: ...5_3 and RS485_4 The terminal block interface and RJ45 interface have the same function with only wiring manner different Select either interface for cable connection 5 4 3 1 Single inverter communicat...

Page 21: ...PE 12V A1B1 PE 12V RS485 RS485 METER TRACKER A1B1 PE 12V FIG 5 7 Multi inverter communication system RJ45 cables 3 More than15 pcs inverters communication system All the inverter are connected via te...

Page 22: ...pair Ethernet cables Step 1 Strip the protection layer and insulation layer by appropriate length Step 2 Loosen the swivel nut of the communication terminal and select an appropriate seal according to...

Page 23: ...network port 5 4 4 Dry Contact Connection Dry Contact Function Connection method of the dry contacts is similar to that of the RS485 terminal block DO terminal fault output dry contact the relay can...

Page 24: ...e dry contacts only support passive switch signal input Dry contacts connection procedure M2 For cable gland For connector 0 2N m 7mm 3 4 N m M20 FIG 5 13 Dry contacts connection Reinstall the protect...

Page 25: ...00V 160A CSI 100K T4001A 400V 200A CSI 100K T4001B 400V 200A CSI 110K T4001A 400V 250A CSI 110K T4001B 400V 250A CSI 120K T4001A 400V 250A CSI 120K T4001B 400V 250A If multiple inverters need to share...

Page 26: ...rounding fault voltage drop etc 14 Take ambient temperature relative humidity altitude air quality and other environmental conditions into account when selecting and installing the transformer 15 When...

Page 27: ...cable Step 8 Secure the wires to corresponding terminals Step 9 Gently pull the cable backwards to ensure firm connection and fasten the swivel nut clockwise 20 30 N m M12 For L1 L2 L3 N and internal...

Page 28: ...he gap between AC cable and waterproof gland must be blocked with fireproof mud to prevent water or moisture 5 6 Tracker System Power Supply Connection Optional 20 30 N m M12 For L N cable Remove the...

Page 29: ...the wiring compartment 5 8 DC Cable Connection DANGER Electric shock The PV array will generate lethal high voltage once exposed to sunlight Before performing electrical operations ensure that all cab...

Page 30: ...ultiple PV inputs PV inputs 1 n and each PV input is designed with an MPP tracker Each PV input operates independently and has its own MPPT In this way string structures of each PV input may differ fr...

Page 31: ...x x PV 13 x x x x x 4 PV 1 x x x PV 5 x PV 7 x x x x x PV 13 x x x x x 5 PV 1 x x x PV 5 x PV 7 x x x PV 11 x PV 13 x x x x x 6 PV 1 x x x PV 5 x PV 7 x x x PV 11 x PV 13 x x x PV 17 x 7 PV 1 x PV 3 x...

Page 32: ...mble the cable ends with the crimping pliers Step 3 Lead the cable through cable gland and insert into the insulator until it snaps into place Gently pull the cable backward to ensure firm connection...

Page 33: ...f the DC input power cable 6 Commissioning Inverter 6 1 Electrical Inspection 1 The inverter DC switch and external circuit breaker are disconnected 2 The inverter should be accessible for operation m...

Page 34: ...tablish communication connection to the inverter via the Blue tooth thereby achieving near end maintenance on the inverter Users can use the App to view basic information alarms and events set paramet...

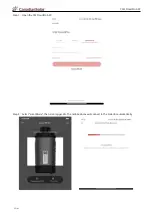
Page 35: ...7 CSI CloudPro APP 32 41 Step 1 Open the CSI CloudPro APP Step 2 Select Local Mode then scan logger SN The mobile phone will connect to the collector automatically...

Page 36: ...ter the connection succeeds users can view the real time operating data of the inverter Step 4 Select Params enter the password 000000 and login the system Then users can view and modify parameters AP...

Page 37: ...will be reinstalled in the future please refer to 3 4 Inverter Storage for a proper conservation 8 3 Disposal of the Inverter Users take the responsibility for the disposal of the inverter NOTICE Som...

Page 38: ...ent M6 T30 FIG 8 1 Open the wiring compartment Step 4 Cut off the cable ties that securing the fan connectors press the hump of the latch hook then unplug the cable connection joint outwards Step 5 Lo...

Page 39: ...and secure the screws Insert the fan connector and the internal cable connector in position note the correspondence and secure the fan connector by cable ties Fan No Wire No 21 22 22 22 1 5 N m M4 PH2...

Page 40: ...ernal Fan Maintenance Loosen the screws of the fan module cover and remove it Note Cover plate is on the left side of the inverter Press the hump of the latch hook then unplug the cable connection joi...

Page 41: ...some of the E codes may cannot be cleared in this case please contact the dealer or CSI Solar Co Ltd to replace a new one Errors as indicated in the table below Description Trouble shooting External F...

Page 42: ...lt occurs on rainy days check it again when the weather turns fine 4 If the fault is not caused by the foregoing reasons and still exists contact CSI Solar GFCI High Err 1 The fault can be caused by p...

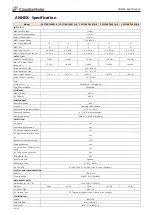
Page 43: ...ero Export Solution Supported EFFICIENCY Max Efficiency 98 5 EU Efficiency 98 3 ENVIRONMENT Protection Degree IP66 Cooling Intelligent Fan Cooling Operating Temperature Range 30 C to 60 C Operating Hu...

Page 44: ...ee IP66 Cooling Intelligent Fan Cooling Operating Temperature Range 30 C to 60 C Operating Humidity 0 100 Non condensing Operating Altitude 4000 m 3000 m derating PROTECTION DC Switch Yes Anti Islandi...

Page 45: ...Lushan Road SND Suzhou Jiangsu China 215129 Sales Inquiries Email support csisolar com This manual is subject to change without prior notification Copyright is reserved Duplication of any part of this...

Reviews: