background image

CPEC300/306/310 Closed-Path Eddy-Covariance Systems 

34 


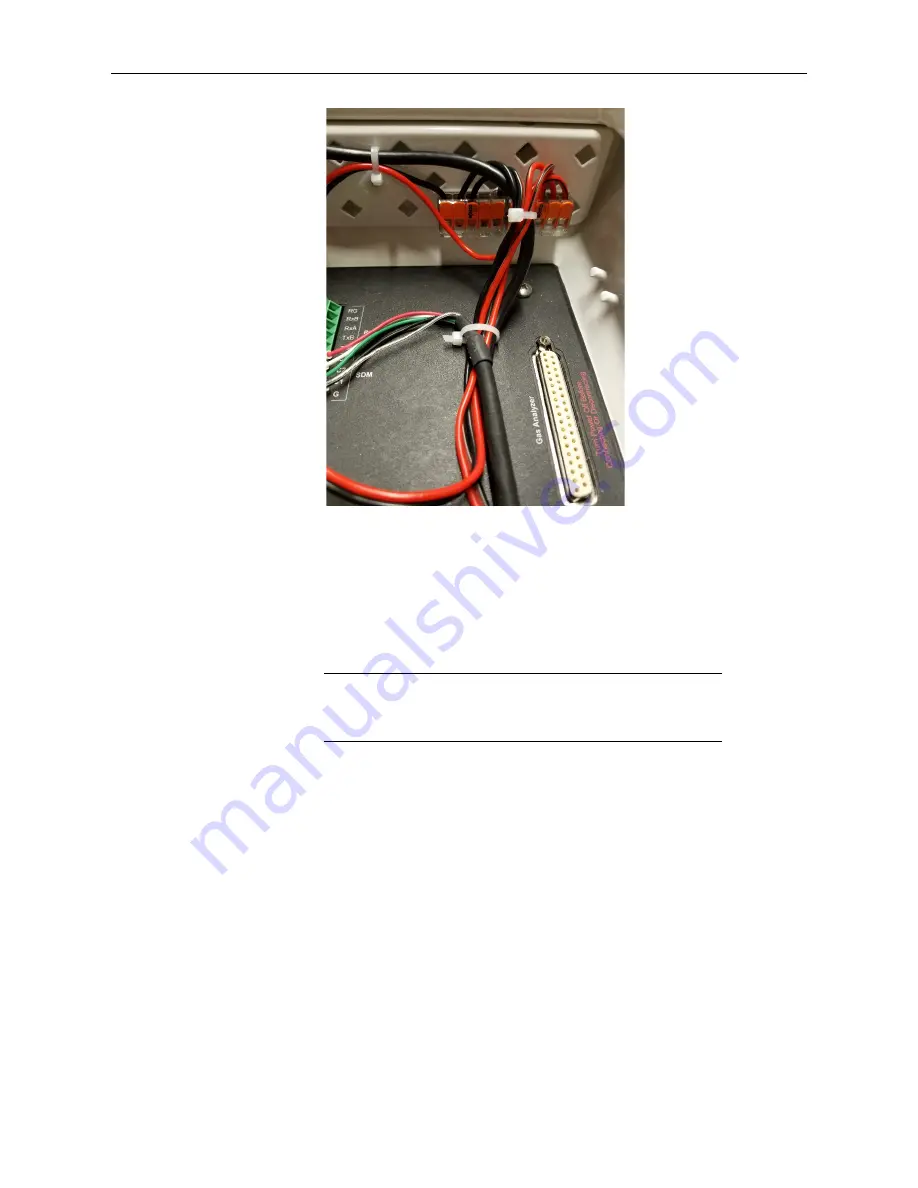
FIGURE 5-11.  CPEC300 splicing switches 

Replace the cap on the CPEC306 and CPEC310 enclosure feedthrough. Gently 

bend the cables back as you slide the cap on and rotate the cap to minimize the 

space around the cables. Tighten the thumbscrew to further relieve strain on the 

cable. This will also minimize air infiltration and extend the life of the 

enclosure desiccant packs. 

In very humid conditions  or locations with insects and small 

rodents  it may be helpful to seal the cable feedthrough with 

plumber’s putty. 

6.  Configure the 

EasyFlux DL

 Program 

EasyFlux

 DL CR6CP

 is a CRBasic program that enables a CR6 datalogger to 

collect fully corrected fluxes of CO

2

, latent heat (H

2

O), sensible heat, ground 

surface heat (optional), and momentum from any CPEC300-series system with 

optional GPS and energy balance sensors. The program processes EC data 

using commonly used corrections in the scientific literature. Because the 

number of analog channels on the CR6 is limited, the program also supports 

the addition of a CDM-A116 analog channel expansion module, which allows 

a full suite of energy balance sensors, thus enabling the program to calculate 

the ground surface heat flux and energy closure. 

Specifically, the program supports data collection and processing from the 

following systems and sensors. 

NOTE 

Summary of Contents for CPEC300

Page 1: ...CPEC300 306 310 Closed Path Eddy Covariance Systems 10 18 Copyright 2018 Campbell Scientific Inc ...

Page 2: ...ducts to CSI CSI will return such Products by surface carrier prepaid within the continental United States of America To all other locations CSI will return such Products best way CIP port of entry per Incoterms 2010 This warranty shall not apply to any Products which have been subjected to modification misuse neglect improper service accidents of nature or shipping damage This warranty is in lieu...

Page 3: ...ping address is CAMPBELL SCIENTIFIC INC RMA _____ 815 West 1800 North Logan Utah 84321 1784 For all returns the customer must fill out a Statement of Product Cleanliness and Decontamination form and comply with the requirements specified in it The form is available from our website at www campbellsci com repair A completed form must be either emailed to repair campbellsci com or faxed to 435 227 9...

Page 4: ...e beginning work Wear a hardhat and eye protection and take other appropriate safety precautions while working on or around tripods and towers Do not climb tripods or towers at any time and prohibit climbing by other persons Take reasonable precautions to secure tripod and tower sites from trespassers Use only manufacturer recommended parts materials and tools Utility and Electrical You can be kil...

Page 5: ...CDM A116 13 4 6 2 CPEC310 Scrub Module 13 4 7 Other Components 14 4 7 1 Carrying Cases 14 4 7 2 Enclosure Mounting Options 15 4 8 Common Accessories 15 4 9 Support Software 16 4 10 Replacement Parts 17 4 11 Theory of Operation 19 4 11 1 EC155 Gas Analyzer 19 4 11 2 CSAT3A Sonic Anemometer Head 19 4 11 3 Valve Module CPEC310 20 4 11 4 CPEC300 Series Pump Module 22 4 12 Specifications 23 5 Installat...

Page 6: ...an 88 8 Maintenance and Troubleshooting 89 8 1 Enclosure Desiccant 89 8 2 EC155 Windows 89 8 3 EC155 Molecular Sieve Bottles 90 8 4 Pump Module Filter 90 8 5 Testing Wind Offset 90 9 Repair 90 Appendices A EasyFlux DL CR6CP Process Flow A 1 B Sampling Site Regime and Mode B 1 C Wiring the CR6 and Optional Energy Balance Sensors C 1 C 1 Overview C 1 C 1 1 IRGA and Sonic Anemometer C 1 C 1 2 CDM A11...

Page 7: ... K 3 Installation K 2 K 4 Maintenance K 3 L CPEC300 Series Pump Replacement L 1 L 1 Introduction L 1 L 2 Removal L 1 L 3 Installation L 6 Figures 4 1 EC100 electronics module 3 4 2 EC155 closed path CO2 H2O gas analyzer 4 4 3 CSAT3A sonic anemometer 4 4 4 CPEC300 system 5 4 5 CPEC300 enclosure 6 4 6 CPEC300 enclosure with EC100 electronics and CR6 6 4 7 CPEC300 pump module 7 4 8 CPEC306 system 8 4...

Page 8: ... 39 6 2 Custom keypad menu arrows indicate submenus 47 J 1 Swagelok insert J 3 J 2 Front and back Swagelok ferrules J 3 J 3 Swagelok plug J 4 J 4 Swagelok cap J 4 K 1 CPEC310 scrub module K 1 K 2 CPEC310 scrub module interior K 3 K 3 Interior of CPEC310 scrub module with tubing and cover removed K 4 K 4 Empty bottle showing the top on the right with spring and bottom left caps K 5 L 1 Four screws ...

Page 9: ...ion 2 C 5 C 7 Default Wiring for Precipitation Gage C 6 C 8 Default Wiring for Soil Thermocouple Probes C 6 C 9 Default Wiring for Soil Water Content Probes C 7 C 10 Default Wiring for Non Calibrating Soil Heat Flux Plates C 8 C 11 Default Wiring for Soil Heat Flux Plates Self Calibrating C 9 D 1 Description of Bits for System Diagnostic Word D 1 E 1 Grades of relative non stationarity relative in...

Page 10: ...able system with pump module CPEC310 an expandable system with pump module and three valve zero and span module This manual discusses three separate instrument packages that have been developed to better address a wide variety of user needs The three instrument packages are the CPEC300 CPEC306 and CPEC310 Throughout the manual when the section being discussed applies to all three systems the syste...

Page 11: ...houghtfully to ensure uninterrupted power If needed contact Campbell Scientific for assistance o Retain all spare caps and plugs as these are required when shipping or storing any CPEC300 series system 3 Initial Inspection Upon receipt of a CPEC300 series system inspect the packaging and contents for damage File damage claims with the shipping company Verify receipt of all components of the CPEC30...

Page 12: ...l 4 1 CPEC300 306 310 System Components The following sections describe the components that come standard with any of the CPEC300 series systems 4 1 1 EC100 Electronics The EC100 electronics module FIGURE 4 1 controls the EC155 and CSAT3A In the CPEC300 system the CR6 is attached to the lid of the EC100 electronics enclosure see Section 4 5 1 CR6 Datalogger p 12 In the CPEC306 and 310 systems the ...

Page 13: ...es integrated electronics EC100 electronics with the EC155 gas analyzer The CSAT3A and EC155 are mounted on the same platform to reduce the separation between the instruments In January 2016 starting with CSAT3A serial number 2000 the mounting platform of the CSAT3A was updated Other changes also increased the stiffness of the head for improved long term accuracy of sonic temperature For detailed ...

Page 14: ...ple cell that are caused by the pump Section 4 2 CPEC300 p 5 Section 4 3 CPEC306 p 7 and Section 4 4 CPEC310 p 10 below describe each of the individual systems in greater detail 4 2 CPEC300 The CPEC300 is the most compact of the three systems yet has the core capabilities provided by the EC100 controlling the EC155 and CSAT3A and the measurement and control capabilities of the CR6 datalogger A typ...

Page 15: ...CPEC300 306 310 Closed Path Eddy Covariance Systems 6 FIGURE 4 5 CPEC300 enclosure FIGURE 4 6 CPEC300 enclosure with EC100 electronics and CR6 ...

Page 16: ...hown in FIGURE 4 8 The two enclosures of the CPEC306 system are the EC100 electronics enclosure and datalogger and pump module enclosure Unlike the CPEC300 the EC100 electronics are housed separately from the datalogger FIGURE 4 1 The CR6 datalogger is positioned within the CPEC306 enclosure FIGURE 4 9 and FIGURE 4 10 The CPEC306 enclosure also includes the pump module and capacity for optional CD...

Page 17: ...CPEC300 306 310 Closed Path Eddy Covariance Systems 8 FIGURE 4 8 CPEC306 system ...

Page 18: ...CPEC300 306 310 Closed Path Eddy Covariance Systems 9 FIGURE 4 9 CPEC306 system enclosure FIGURE 4 10 Interior of CPEC306 system enclosure ...

Page 19: ...n The CPEC310 can also be equipped with an optional scrub module providing a source of zero air for performing the zero and span procedures A CPEC310 requires a CO2 reference tank shown in FIGURE 4 11 and either a scrub module or a zero air reference tank to execute the automatic zero and span These tanks are not sold by Campbell Scientific A typical CPEC310 system including a scrub module is show...

Page 20: ...CPEC300 306 310 Closed Path Eddy Covariance Systems 11 FIGURE 4 12 CPEC310 system enclosure FIGURE 4 13 Interior of CPEC310 system enclosure ...

Page 21: ...operation Therefore H2O spans must be performed under manual control FIGURE 4 14 CPEC310 valve module 4 5 Other Components The following section describes the CR6 datalogger that is required for any of the CPEC300 series systems It is purchased separately as many users already own the CR6 datalogger 4 5 1 CR6 Datalogger The CR6 and EasyFlux DL are the core of the CPEC300 systems They are used to s...

Page 22: ...or the addition of CDM A116 modules FIGURE 4 16 CDM A116 4 6 2 CPEC310 Scrub Module The CPEC310 scrub module provides a source of zero air and is used for zeroing the EC155 It consists of a pump and a three stage molecular sieve and connects to the CPEC300 system enclosure The scrub module shown in FIGURE 4 17 and FIGURE 4 18 eliminates the need for a cylinder of zero air A cylinder of known CO2 i...

Page 23: ...scrub module enclosure FIGURE 4 18 CPEC310 scrub module shown with enclosure lid open 4 7 Other Components 4 7 1 Carrying Cases The EC155 and the CSAT3A may be ordered with optional carrying cases If the carrying cases are not ordered the sensors are shipped in cardboard boxes ...

Page 24: ...WG 16 within a rugged Santoprene jacket It is cut to the specified length and the end is finished for easy installation The L designation after certain parts designates a cable or tube length in feet The length is specified by the user at the time of order SDM Cable An SDM communication cable is required to connect the EC100 to the CPEC300 system enclosure The preferred SDM cable is CABLE4CBL L Th...

Page 25: ...facing a computer to the CR6 datalogger EasyFlux DL EasyFlux DL for Closed Path Eddy Covariance systems is a CRBasic program that comes pre installed into the CR6 that was purchased with this system If a user has a system that was not ordered with a CR6 or has an older CPEC system the EasyFlux DL program can be downloaded here www campbellsci com easyflux dl EasyFlux DL for Closed Path Eddy Covari...

Page 26: ... For EC155 analyzers with a vortex intake the bypass line from the vortex has a filter that will become clogged over time typically many months and requires replacement The filter consists of a 25 µm particulate filter with in Swagelok nuts on either side as shown in FIGURE 4 20 Replace the filter when the signal strength has dropped to 0 8 or less FIGURE 4 20 Vortex filter for EC155 intake Sonic ...

Page 27: ... of the sensor head Two bottles are included when purchasing the replacement Diaphragm Pump The pump module for any of the CPEC300 series systems includes a small double head diaphragm pump with a brushless DC motor The pump includes a speed control input and a tachometer to measure actual pumping speed It is mounted in an insulated temperature controlled box inside the CPEC300 system enclosure If...

Page 28: ...for increased sensor capacity with CDM A116 modules to accommodate additional sensor measurements The CPEC310 comes equipped with a three valve module for automated zero and CO2 span of the EC155 4 11 1 EC155 Gas Analyzer The EC155 FIGURE 4 25 is Campbell Scientific s closed path mid infrared absorption gas analyzer that measures molar mixing ratios of carbon dioxide and water vapor More informati...

Page 29: ...ound for each transducer pair These measurements are averaged and converted to sonic virtual temperature Ts based on the relationship between speed of sound and air temperature For more detailed information and specifications see the CSAT3B manual available at www campbellsci com FIGURE 4 26 CSAT3A sonic anemometer head 4 11 3 Valve Module CPEC310 The three valve module shown in FIGURE 4 14 is hou...

Page 30: ...ssure to equilibrate and 5 seconds to average and store the pressure offset measurement The CPEC310 valve module has a proportional control valve to actively control the flow of zero and span gas to the EC155 The Easyflux DL program for the CPEC310 adjusts public variable valve_ctrl_press as needed for the measured flow valve_flow to reach the desired flow as indicated by valve_flow_set_pt The def...

Page 31: ...of public variable pump_flow_duty_cycle to a value between 0 off and 1 full speed to adjust the pump s speed as needed to match pump_flow_raw to the setpoint flow pump_flow_set_pt Pump_flow_set_pt is a system configuration variable Pump Inlet Pressure The measured inlet pressure of the pump is reported in public variable pump_press This pressure will normally be slightly lower 1 kPa than the EC155...

Page 32: ...Pressure sensor range 15 to 115 kPa Pumping speed 3 to 9 LPM automatically controlled at the set point typically 7 LPM Dimensions CPEC300 35 6 x 29 2 x 13 5 cm 14 0 x 11 5 x 5 3 in Weight w out mounting 5 4 kg 11 8 lb CPEC310 three valve module Inlets Zero CO2 span and H2O span Outlets Analyzer and H2O bypass Connections 1 4 in Swagelok Flow rate 0 5 to 5 LPM automatically controlled at user enter...

Page 33: ... EC sensors The EC100 mounting bracket will accommodate a pipe at any orientation with outer diameter from 2 5 cm to 4 8 cm 1 0 in to 1 9 in For CPEC 300 CPE300 pump module enclosure Mounted within 3 0 m 10 0 ft of the CPEC300 enclosure The pump module enclosure is similar to the ENC10 12 with the same mounting options tower tripod leg or pole For CPEC306 310 CPEC306 or CPEC310 enclosure Mounted w...

Page 34: ...nclosure mounted on the legs of a tripod They can also be mounted on a triangular tower or large diameter pole depending on the site requirements and the mounting options ordered CPEC310 The CPEC310 enclosure and the EC100 electronics are mounted as shown in FIGURE 4 11 with the CPEC306 enclosure and EC100 enclosure mounted on the legs of a tripod They can also be mounted on a triangular tower or ...

Page 35: ... CPEC300 series mounting platform FIGURE 5 2 shows mounting for the EC155 with vortex intake Adjust the tilt of the mounting platform to level the CSAT3A For more details see instructions in the EC155 CO2 and H2O Closed path Gas Analyzer manual FIGURE 5 2 Mounting of EC155 and CSAT3A CSAT3A Sonic Anemometer Head EC155 Gas Analyzer CM20X Crossarm CM250 Leveling Mount CPEC300 Mounting Platform CM20X...

Page 36: ...nector and the pump module umbilical cord is connected to the connector labeled Pump Module on the CPEC300 enclosure FIGURE 5 3 Plumbing connections for CPEC300 FIGURE 5 4 depicts the plumbing required for the CPEC306 The only plumbing required is the connection of the EC155 to the inlet connector of the pump on the bottom of the CPEC306 enclosure FIGURE 5 4 Plumbing connections for CPEC306 FIGURE...

Page 37: ...nd the pump module are sized for 3 8 in OD tubing A reducer is required at each end for the larger tubing size Campbell Scientific supplies pre swaged pump tube assemblies with reducers at each end for this purpose Connect one end of the pump tube to the last fitting of the vortex assembly which is connected to the port labeled Pump on the back of the EC155 analyzer Connect the other end to the fi...

Page 38: ...k could cause the contents of the tank to be lost When inlets are not in use replace the Swagelok plugs to keep the system clean Connect the valve module s Analyzer outlet to the Zero Span fitting on back of the EC155 analyzer Similar tubing or pre swaged tube assembly is recommended for this connection The length of this tube should also be minimized to reduce equilibration time Open the shutoff ...

Page 39: ... 1 Ground Connections Any CPEC300 series system enclosure and the EC100 electronics must be earth grounded as illustrated in FIGURE 5 7 Ground the tripod and enclosures by attaching heavy gage grounding wire 12 AWG minimum to the grounding lug found on the bottom of each enclosure The other end of the wire should be connected to earth ground through a grounding rod For more details on grounding se...

Page 40: ...te EC100 wiring For users that need to wire the system follow the next sections to wire the connection between the EC100 and the CPEC300 series enclosure Wire the SDM communications cable CABLE4CBL L between the EC100 and the CPEC300 series enclosure as shown in FIGURE 5 9 and FIGURE 5 10 TABLE 5 1 shows the color scheme of the SDM wires TABLE 5 1 SDM Wiring Description Wire Color EC100 CR6 SDM Da...

Page 41: ...e square hole to open the spring loaded contacts Insert the wire into the corresponding round hole and then remove the screwdriver Gently tug the wire to confirm it is secure Ensure the CPEC306 and CPEC310 enclosure is not powered and wire the power cable CABLEPCBL L from the EC100 electronics to the enclosure as shown in FIGURE 5 9 and FIGURE 5 10 FIGURE 5 9 Wiring the EC100 to a CPEC306 and CPEC...

Page 42: ...ovided 12 Vdc battery system charged with solar panels Before applying power verify all of the tubes and cables have been connected according to the instructions above To reduce the risk of shorting the power supply especially when using batteries connect the power cable to the CPEC300 series system first then connect to the power source Carefully design any DC power source to ensure uninterrupted...

Page 43: ...igure the EasyFlux DL Program EasyFlux DL CR6CP is a CRBasic program that enables a CR6 datalogger to collect fully corrected fluxes of CO2 latent heat H2O sensible heat ground surface heat optional and momentum from any CPEC300 series system with optional GPS and energy balance sensors The program processes EC data using commonly used corrections in the scientific literature Because the number of...

Page 44: ...ver optional qty 0 to 1 GPS16X HVS Fine wire thermocouple optional qty 0 to 1 FW05 FW1 FW3 Biometeorology biomet and energy balance sensors optional Temperature Relativity Humidity RH Probe qty 0 to 1 o HMP155A o EE181 Radiation measurements o Option 1 NR LITE2 Net Radiometer qty 0 to 1 CS300 LI200X or LI200RX Pyranometer qty 0 to 1 LI190R Quantum Sensor qty 0 to 1 SI 111 Infrared Radiometer qty 0...

Page 45: ...ation the values for constants should be set or verified TABLE 6 1 lists all of the constants with descriptions Generally the constants fall into four categories Program Function Constants These are constants that determine the timing of code execution frequency of writing to output tables memory allocation etc In most cases the default constants for these values can be maintained Sensor Selection...

Page 46: ...der CR6 with smaller CPU memory i e 1 MB is transferred into a CPEC300 series system then the constants may only be set using the CRBasic Editor as described in the section Using CRBasic Editor below CPU memory size of a logger may be verified by connecting to it with the LoggerNet Connect Screen and then using File Control to view the CPU memory size Using the Datalogger Keypad If the system is a...

Page 47: ... view the table again to verify the new values were saved Once this is done the user is ready to set site specific variables see Section 6 3 Edit Input Variables p 43 Using CRBasic Editor The constants may be edited by opening the program in CRBasic Editor Find the constants near the top of the program code just after the introductory comments in a section titled USER DEFINED CONFIGURATION CONSTAN...

Page 48: ...CPEC300 306 310 Closed Path Eddy Covariance Systems 39 FIGURE 6 1 Example screen from CRBasic Editor showing user defined configuration constants ...

Page 49: ...r of the CDM A116 CPI_ADDR_CDM 1 The CPI address of the CDM A116 CPI_DEVICE CDMA116 A custom name the user can give the CDM A116 It must be in quotation marks SDM_CLCK_SPD 30 SDM clock bit period in µs If long cables are used that result in skipped scans this value should be increased In most cases the default is adequate EC100SDM_ADR 1 The SDM address of the EC100 BANDWIDTH 5 The bandwidth for me...

Page 50: ...the readings to the H2O span concentration Note this is typically set to 0 since having an autonomous field H2O span gas source is difficult CPEC310SCRUB 0 Set to 1 TRUE if the system has a scrub module else set to 0 FALSE SENSOR_GPS 0 Set to 1 TRUE if using a GPS16X sensor if not set to 0 FALSE UTC_OFST 7 Difference between local time and UTC GMT time in hours SENSOR_FW 0 Set to 1 TRUE if using a...

Page 51: ...true SENSOR_NR01 and SENSOR_CNR4 must be set to false m0_SI111 0 Enter the unique calibration parameter called m0 found on the sensor calibration sheet m1_SI111 0 Unique sensor calibration parameter m2_SI111 0 Unique sensor calibration parameter b0_SI111 0 Unique sensor calibration parameter b1_SI111 0 Unique sensor calibration parameter b2_SI111 0 Unique sensor calibration parameter SENSOR_NR01 0...

Page 52: ... If using heat flux plates enter the unique sensitivity of the first plate as reported on the sensor calibration sheet Units µV m2 W 1 HFP_SNSTVT_2 62 0 Unique sensitivity of second heat flux plate Units µV m2 W 1 HFP_SNSTVT_3 62 0 Unique sensitivity of third heat flux plate Units µV m2 W 1 HFP_SNSTVT_4 62 0 Unique sensitivity of fourth heat flux plate Units µV m2 W 1 CAL_INTV 1440 If using a HFP0...

Page 53: ... the right of the variable name type the new value and press Enter The values of user input variables are stored in memory such that if the station loses power the values will be retained FIGURE 6 2 is a schematic of the entire menu structure When beginning operation of a system the user must review and set constants in the Const Table see Section 6 2 Set Constants p 36 and variables in the follow...

Page 54: ...CPEC300 306 310 Closed Path Eddy Covariance Systems 45 ...

Page 55: ...CPEC300 306 310 Closed Path Eddy Covariance Systems 46 ...

Page 56: ...nus The single asterisk marks variables that are only displayed if the system is a CPEC310 and the double asterisk marks variables that are only displayed if the system is a CPEC300 or CPEC306 In the constants table indented constants are only applicable if the preceding non indented constant is applicable ...

Page 57: ...scribed in the CSAT3B manual CORRCTN_ON enables the correction while CORRCTN_OFF disables it shadow_corr 1 CORRCTN_ON 0 CORRCTN_OFF Set Crrctn FALSE If the variable Pick Crrctn has been changed this variable must be set to TRUE to enable the change The program will return Set Crrctn to FALSE once the change has been applied set_shadow_corr_flg 1 True 0 False CO2 Spn Gas 400 ppm The dry molar mixin...

Page 58: ...ge Coeffs CO2 Zro Coef 1 Used to restore gas analyzer coefficients to 1 or a previously user recorded value Enter the desired value and then set Reset Coefs variable to TRUE in order to apply The program will return Reset Coefs to FALSE once the change has been applied dflt_CO2_zero_coeff CO2 Spn Coef 1 Used to restore gas analyzer coefficients to 1 or a previously user recorded value Enter the de...

Page 59: ...e of surface at the measurement site Options are CROP GRASS FOREST SHRUB BARELAND and WATER This is used to estimate displacement height surface_type 1 CROP 2 GRASS 3 FOREST 4 SHRUBLAND 5 BARELAND 6 WATER 7 ICE Canopy hght m 0 5 The average height of the canopy height_canopy d m 0 Auto Displacement height Set to zero 0 for program to auto calculate displacement_user z0 m 0 Auto Roughness length Se...

Page 60: ... Diam m FW05_DIA The diameter of the fine wire thermocouple A numberical value may be entered or for convenience the following pre defined constants may be selected FW05_DIA FW1_DIA and FW3_DIA Each constant corresponds to the diameter of the FW05 FW1 or FW3 thermocouple and their diameters are 1 27 x 10 5 2 54 x 10 5 and 7 62 x 10 5 m respectively If no fine wire thermocouple is being used this v...

Page 61: ... from the sector of 170 to 190 degrees in the sonic coordinate system wind blowing from behind sonic head 1 alpha_PF_170_190 190 300 decimal degrees 0 Planar fit alpha angle used to rotate the wind when the mean horizontal wind is blowing from the sector of 190 to 300 degrees in the sonic coordinate system wind blowing from the sector right and behind sonic head 1 alpha_PF_190_300 Planar Fit Beta ...

Page 62: ...he aerodynamic height z Recall that z is the difference between the measurement height and displacement height dist_intrst_60_300 60 170 m 100z The upwind distance of interest from the station when the mean horizontal wind is blowing from the sector of 60 to 170 degrees in the sonic coordinate system wind blowing from left and behind sonic head dist_intrst_60_170 170 190 m 100z The upwind distance...

Page 63: ...e zero span is initiated and the system will return to EC field measurements upon completion of the zero span This variable is ommitted if the system is a CPEC300 or CPEC306 i e no valve module prfm_auto_zero_span_flg Pump Off FALSE For CPEC300 and CPEC306 systems select TRUE to disable the pump Set to FALSE to enable the pump For CPEC310 systems the options are PMP_OFF to disable the pump FLD_MEA...

Page 64: ... from Campbell Scientific These cards are industrial grade and have passed Campbell Scientific hardware testing Use of consumer grade cards substantially increases the risk of data loss 6 5 Output Tables Besides the Const_Table see Section 6 2 Set Constants p 36 and the standard Public Status CPI Status and DataTableInfo tables that the datalogger reports the program has eight output tables TABLE ...

Page 65: ...records Flux_AmeriFluxFormat Processed flux and statistical data following reporting conventions and order of AmeriFlux OUTPUT_INTERVAL default 30 minutes NMBR_DAY_CPU default 7 days Broken up into 30 day files see TABLE 6 5 to calculate number of files Flux_CSFormat Processed flux and statistical data OUTPUT_INTERVAL default 30 minutes NMBR_DAY_CPU default 7 days Broken up into 30 day files see T...

Page 66: ...n Data Field Included Ux m s 1 Wind speed along sonic x axis Always Uy m s 1 Wind speed along sonic y axis Always Uz m s 1 Wind speed along sonic z axis Always T_SONIC deg C Sonic temperature Always diag_sonic Raw sonic diagnostic value 0 indicates no diagnostic flags set Always CO2 µmol mol 1 CO2 dry molar mixing ratio Always H2O mmol mol 1 H2O dry molar mixing ratio Always diag_irga Raw gas anal...

Page 67: ...er Sonic error flag set to TRUE or 1 if any sonic diagnostic flag detected Always irga_er EC155 error flag set to TRUE or 1 if any irga diagnostic flag detected Always pump_tmpr_er Pump temperature error flag Always pump_flow_er Pump flow error flag Always valv_tmpr_er Valve temperature error flag If CPEC310 with valve module valv_flow_er Valve flow error flag If CPEC310 scrb_tmpr_er Scrub tempera...

Page 68: ..._CO2_Io_var_f CO2 Io variation diagnostic flag Always irga_H2O_Io_var_f H2O Io variation diagnostic flag Always irga_CO2_sig_strgth_f CO2 signal strength diagnostic flag Always irga_H2O_sig_strgth_f H2O signal strength diagnostic flag Always irga_cal_err_f Calibration file read error flag Always irga_htr_ctrl_off_f Heater control off diagnostic flag Always irga_diff_press_f Differential pressure o...

Page 69: ...CO2 zero coefficient set from last CO2 zero Always CO2_span_coeff CO2 span coefficient set from last CO2 span Always CO2_span_mixra µmol mol 1 CO2 mixing ratio of span gas Always H2O_zero_coeff H2O zero coefficient set from last H2O zero Always H2O_span_coeff H2O span coefficient set from last H2O span Always H2O_span_T_DP deg C Dew point temperature of span gas Always EC155_pwr_off A parameter in...

Page 70: ...04 Always H W m 2 Sensible heat flux after corrections Always H_SSITC_TEST Result of steady state and integral turbulence characteristics for FC according to Foken et al 2004 Always G W m 2 Calculated heat flux at the ground surface If energy balance sensors used SG W m 2 The change in heat storage in the soil above the soil heat flux plates during the averaging interval If energy balance sensors ...

Page 71: ...c Pressure Always TA_1_1_1 deg C Average air temperature calculated from sonic temperature and H2O mixing ratio Always TA_SIGMA_1_1_1 deg C Standard deviation of air temperature calculated from sonic temperature and H2O mixing ratio Always RH_1_1_1 Average relative humidity calculated from TA_1_1_1 H2O mixing ratio and pressure Always T_DP_1_1_1 deg C Average dewpoint temperature calculated from H...

Page 72: ...4 used LW_OUT W m 2 Outgoing longwave radiation If NR01 or CNR4 used P mm Precipitation in output interval If TE525 used T_CANOPY deg C Canopy temperature If SI111 used TABLE 6 11 Data Fields in the Flux_CSFormat Data Output Table Data Field Name Units Description Data Field Included FC µmol m 2 s 1 Final corrected CO2 flux Always FC_mass mg m 2 s 1 Final corrected CO2 flux Always FC_QC grade Over...

Page 73: ...energy_closure fraction The ratio of sensible and latent heat fluxes over surface heat flux plus net radiation If energy balance sensors are used poor_energy_closure_flg If TRUE non zero energy closure is poor even though micrometeorological conditions are reasonably good with no precipitation If energy balance sensors and rain gauge are used Bowen_ratio fraction The ratio of final sensible heat f...

Page 74: ...easurements If temp RH probe used e_probe kPa Average water vapor pressure calculated from temp RH probe measurements If temp RH probe used e_sat_probe kPa Average saturated water vapor pressure calculated from temp RH probe measurements If temp RH probe used H2O_probe g m 3 Average water vapor density calculated from temp RH probe measurements If temp RH probe used PA kPa Average ambient air pres...

Page 75: ..._density mg m 3 Average CO2 mass density Always CO2_density_SIGMA mg m 3 Standard deviation of CO2 mass density Always H2O mmol mol 1 Average H2O dry molar mixing ratio Always H2O_SIGMA mmol mol 1 Standard deviation of H2O dry molar mixing ratio Always H2O_density mmol mol 1 Water vapor mass density Always H2O_density_SIGMA mmol mol 1 Standard deviation of water vapor mass density Always CO2_sig_s...

Page 76: ...efficient Ratio of the path length between the current solar position to the solar noon Always daytime fraction Day time in fraction of an output interval Always T_CANOPY deg C Average temperature of targeted object If SI111 is used T_SI111_body deg C Average temperature of sensor body If SI111 is used TS_x_1_1 deg C Average soil temperature for each soil temperature sensor x is an index for the n...

Page 77: ...UATION text Returns either Kljun or KormannMeixner the model of Kljun et al 2004 is used for applicable atmospheric conditions else the model of Kormann Meixner 2001 is used Always TABLE 6 12 Data fields in the Flux_Notes Output Table Data Field Name Units Description Data Field Included Ux m s 1 Average Ux Always Ux_SIGMA m s 1 Standard deviation of Ux Always Uy m s 1 Average Uy Always Uy_SIGMA m...

Page 78: ...ov_fc m C s 1 Covariance of vertical wind and sonic temperature after coordinate rotations and frequency corrections Always WT_SONIC_Cov__fc_SND m C s 1 Covariance of vertical wind and sonic temperature after coordinate rotations frequency corrections and SND correction Always sonic_samples count Number of raw sonic samples in averaging period without diagnostic flags Always no_sonic_head_Tot coun...

Page 79: ...H2O density after coordinate rotations Always VH2O_Cov g m 2 s 1 Covariance of crosswind and H2O density after coordinate rotations Always WH2O_Cov g m 2 s 1 Covariance of vertical wind and H2O density after coordinate rotations Always WCO2_Cov_fc mg m 2 s 1 Covariance of vertical wind and CO2 density after coordinate rotations and frequency corrections Always WH2O_Cov_fc g m 2 s 1 Covariance of v...

Page 80: ...stic flag Always irga_sync_f_Tot count Number of gas analyzer samples with synchronization diagnostic flag Always irga_amb_tmpr_f_Tot count Number of gas analyzer samples with ambient temperature probe diagnostic flag Always irga_amb_press_f_Tot count Number of gas analyzer samples with ambient pressure diagnostic flag Always irga_CO2_l_f_Tot count Number of gas analyzer samples with CO2 1 signal ...

Page 81: ...sed VFW_cov deg C m s 1 Covariance of crosswind and fine wire thermocouple temperature after coordinate rotations If FW05 FW1 or FW3 is used WFW_cov deg C m s 1 Covariance of vertical wind and fine wire thermocouple temperature after coordinate rotations If FW05 FW1 or FW3 is used WFW_cov_fc deg C m s 1 Covariance of vertical wind and fine wire thermocouple temperature after coordinate rotations a...

Page 82: ...r_secs s Number of seconds in the interval that the scrub module heater was on If the system has a scrub module scrub_fan_secs s Number of seconds in the interval that the scrub module fan was on If the system has a scrub module cell_tmpr deg C Average temperature of the sample cell Always cell_tmpr_SIGMA deg C Standard deviation of the sample cell temperature Always cell_press kPa Average pressur...

Page 83: ...anopy height Always surface_type_text text User entered surface type Always displacement_user m User entered displacement height 0 for auto calculation Always d m Displacement height used in calculations it will equal displacement_user if user entered a non zero value if displacement_user is zero program will auto calculate Always roughness_user m User entered roughness length 0 for auto calculati...

Page 84: ... data to account for separation along the axis of oncoming wind and wind velocity Always separation_x_FW m Separation between sonic and fine wire thermocouple with respect to sonic x axis If FW05 FW1 or FW3 is used separation_y_FW m Separation between sonic and fine wire thermocouple with respect to sonic y axis If FW05 FW1 or FW3 is used FW_diameter m Effective diameter of fine wire thermocouple ...

Page 85: ...pplied to momentum fluxes Always FreqFactor_WT_SONIC number Frequency correction factor applied to wTs covariance Always FreqFactor_WCO2 number Frequency correction factor applied to wCO2 covariance Always FreqFactor_WH2O Number Frequency correction factor applied to wH2O covariance Always FreqFactor_WFW number Frequency correction factor applied to fine wire thermocouple derived wFW covariance Al...

Page 86: ...e_Min ms Minimum processing time for a scan Always buff_depth number Average number of records stored in the buffer Always buff_depth_Max number Maximum number of records stored in the buffer Always TABLE 6 13 Data Fields in the Zero_Span_Notes Table Data Field Name Units Description Data Field Included CO2_gain Adimensional CO2 gain factor CO2_span_gas CO2_span CO2_zero Always H2O_gain Adimension...

Page 87: ...CO2 mixing ratio of CO2 span gas Always Td_span_gas C Dew point set point on the dew point generator providing the H2O span gas Always H2O_span_gas mmol mol 1 Mixing ratio of H2O span gas Always valve_flow_set_pt kPa Vapor pressure of H2O span gas Always zeroing_outof_spec_f Boolean Indicator of whether zeroing is necessary Always CO2span_outof_spec_f Boolean Inidcator of whether CO2 span is neces...

Page 88: ...ic wind measurements for maximization of CO2 and H2O covariances Horst and Lenschow 2009 Foken et al 2012 with additional constraints to ensure lags are physically possible 4 Frequency corrections using commonly used cospectra Moore 1986 van Dijk 2002a Moncrieff et al 1997 and transfer functions of block averaging Kaimal et al 1989 line volume averaging Moore 1986 Moncrieff et al 1997 Foken et al ...

Page 89: ...EC310 p 84 For CPEC310 systems that are not set up with a continuously available source of H2O span gas which is typically the case H2O spans must be manually setup and initiated by the user More details are found in Section 7 1 2 CPEC310 Manual H2O Span p 86 CPEC300 and CPEC306 systems require the user to manually setup and initiate the zero CO2 span and or H2O span since these systems do not inc...

Page 90: ...TABLE 7 1 Variables Found in Menus for Zero and Span Variable Name Default Description Name of variable in Public Table when no CR1000KD available Valv Tmpr Ok This is a TRUE FALSE read only variable It must read TRUE in order to perform an auto zero span If it reports FALSE the valve module temperature is not within its operating range and Valv T Ctl On should be set to TRUE to bring the temperat...

Page 91: ...ting on the H2O span gas source in C Td_span_gas H2O Span Gas This is a read only variable showing the calculated dry molar mixing ratio of the H2O span gas in mmol mol 1 The air pressure difference between ambient and the dew point generator is taken into account when calculating H2O_span_gas Pick AUTO_ZS Pick ZRO_ALL Pick SPN_CO2 Pick SPN_H2O FLD_MEA This variable indicates the current sampling ...

Page 92: ... mmol mol This is a read only variable showing the current measurement of H2O dry molar mixing ratio inside the sample cell in mmol mol 1 Sonic_irga_raw 7 GasFlw L min This is a read only variable showing the current flow in L min 1 through the sample cell valve_flow System Diag This is a read only variable showing the system diagnostic word A non zero result indicates an error condition is detect...

Page 93: ...of the CO2 span gas If it needs to be edited highlight the variable press Enter type in the correct value and press Enter again to save If the user entered CPEC310 related constants were set such that an H2O span would be included in the automatic zero span cycle see TABLE 6 1 Program Constants also confirm that the value of H2O Span TDP the H2O span gas dewpoint temperature is correct Next highli...

Page 94: ...ystem measures CO2 but does not set CO2 readings to the CO2 span gas concentration chk CO2 TIME_ZRO_SPN Default 60 TIME_ZRO_SPN 5 Default 55 4 Zero gas flows from the scrub module or a tank to the sample cell The pump is off The system measure CO2 and H2O but does not set them to zero chk zro TIME_ZRO_SPN 20 Default 80 TIME_ZRO_SPON 5 Default 75 5 Zero gas flows from the scrub module or a tank to ...

Page 95: ...stem enclosure is designed to vent excess H2O span gas flow Next navigate to the Prfrm Field H2O Span menu found under the Attendant Zero Span menu Within this menu verify the value of H2O Span TDP matches the dewpoint setting of the H2O span gas source generator If this value needs to be edited highlight it press Enter type in the new value and press Enter again to save Next highlight Pick SPN_H2...

Page 96: ...r H2O span When doing manual zero and or spans track the drift of the analyzer This requires the user to first check the CO2 and or H2O readings against their span gas concentrations and against the zero gas before setting either the zero or span Refer to the EC155 user manual for more information on tracking the analyzer gain and offset If errors in setting up and performing a zero or span lead t...

Page 97: ...f the CO2 span gas If this value needs editing highlight it press Enter type in the new value and press Enter again to save the value The Prfrm Field CO2 Span menu also includes readings of CO2 molar mixing ratio Watch the readings until they indicate that the span gas has flushed out the sample cell and equilibrium has been reached Once equilibrium is attained highlight Do CO2 Span found at the b...

Page 98: ...ate the percentage of humidity see FIGURE 4 23 Desiccant packets inside the enclosure should be replaced with fresh packets when the upper dot on the indicator begins to turn pink The indicator card does not need to be replaced unless the colored circles overrun Both the desiccant packs and humidity cards can be purchase as replacements See Section 4 10 Replacement Parts p 17 for more detail Campb...

Page 99: ...eating a zero wind environment This is best done in a laboratory setting with HVAC vents closed or covered to reduce air currents and by encircling the mounted sensor with a large plastic bag for example an unused refuse bag Caution should be used to not block the sonic paths Once the CSAT3A is connected to an EC100 and powered on wind offsets may be viewed by connecting the EC100 to a PC and usin...

Page 100: ... tables that will be used in later steps to align measurements and calculate covariances If the time for zero span is approaching turn on valve module heater and scrub module heater if applicable Calculate mean variables i e call site_block_mean table Check to see if the mode of operation has changed If yes perform functions associated with that mode e g zero and span and when finished return to E...

Page 101: ...AG TO MAX_LAG are used MAX_LAG default is 2 For each dataset with a particular lag recalculate cell and ambient climate variables If using FW store raw data in multiple datasets each dataset with a different lag applied to FW data relative to sonic data to be used later in cross correlation lags from MAX_LAG to MAX_LAG are used MAX_LAG default is 2 Control pump speed to achieve pressure set point ...

Page 102: ...VERAGING_INTERVAL default 30 minutes Filter out data with diagnostic flags or signal strengths or measurements outside of acceptable ranges Do coordinate rotations use double coordinate rotation method unless planar fit angles have been entered by user to find rotated orthogonal wind components u v and w Calculate sonic related covariances e g wTs wu vw See EasyFlux DL CR6OP manual Appendix B on D...

Page 103: ...riance of CO2 and wind components for each lagged dataset and do coordinate rotation on covariances Find the effective lateral separation distance between gas analyzer and sonic to use in frequency correction and the effective separation scan lag used to constrain which lagged datasets are physically possible See in EasyFlux DL CR6OP manual Appendix D on Frequency Corrections Find the dataset with...

Page 104: ...nt attenuation from block averaging line averaging spatial separation and tube attenuation See EasyFlux DL CR6OP manual Appendix D on Frequency Corrections Ibrom et al 2007 Brugon et al 2016 and program code Calculate final momentum flux from rotated and frequency corrected covariances of u with w and v with w Apply SND correction to the rotated and frequency corrected covariance of w and Ts Calcu...

Page 105: ...the lag that maximizes the covariance of FW temperature and vertical wind Use this dataset for the FLUX_AMERIFLUXFORMAT and FLUX_CSFORMAT output tables If any results are invalid continue with lag of zero Calculate the time constant for the FW to be used in frequency corrections See EasyFlux DL CR6OP manual Appendix D on Frequency Corrections Calculate frequency correction factors for covariances ...

Page 106: ...and other calculations for 25 seconds in order for the sample cell to be thoroughly flushed and the pressure equilibrated during this 25 second time period sampling_regime will have a value of 17 where the fourth bit is set high decimal value of 16 to indicate omitted measurements and bit zero is set to 1 decimal value of 1 corresponding to site 1 After the 25 second period has passed sampling_reg...

Page 107: ...sure offset is made ZRO_ALL User initiated automatic zero all mode This mode is applicable to CPEC310 systems After a zero gas source is connected to the CPEC310 system enclosure and gas is flowing this mode may be selected which will result in the system going through a sequence of sampling regimes that will zero the gas analyzer SPN_CO2 User initiated automatic CO2 span mode This mode is applica...

Page 108: ... the gas analyzer and pump and leaves the CSAT3A powered on and making measurements AUTO_ZS Automatic zero and span mode This mode automatically will check and or set the zero and CO2 span of the gas analyzer Whether or not the zero and span are set depends on the values to which the user set the zero span constants See Section 6 2 Set Constants p 36 ...

Page 109: ...CDM A116 effectively increases the CR6 analog channels If one or more of the optional sensors are not used the datalogger or CDM module terminals assigned to the wires of that sensor should be left unwired If the standard datalogger program is modified the wiring presented in TABLE C 1 may no longer apply In these cases refer directly to the program code to determine proper wiring or contact a Cam...

Page 110: ...ting CPI Address Change this value to 1 Hit the Apply button at the bottom of the page and exit the software 5 Use a Cat5e or Cat6 Ethernet Cable included with the CPEC enclosure to connect the CPI port on the module to the CR6 CPI port C 1 3 GPS Receiver A GPS receiver such as the GPS16X HVS is optional but will keep the datalogger clock synchronized to GPS time If the CR6 clock differs by one mi...

Page 111: ...LE C 4 shows wire colors for the HMP155A and EE181 where the colors for the EE181 are noted by italic text in TABLE C 4 TABLE C 4 Default Wiring for Temperature and Relative Humidity Probe Sensor Quantity Wire Description Color CDM A116 Terminal HMP155A EE181 0 or 1 Temp Signal Yellow Yellow CDM Diff 13H Temp Signal Reference White Jumper to AG CDM Diff 13L1 RH Signal Blue Blue CDM Diff 14H RH Sig...

Page 112: ...Reference Black CDM Diff 3L1 Ground Shield White and Clear CDM AG SI 111 Infrared Radiometer 0 or 1 Target Temp Signal Red CDM Diff 4H Target Temp Reference Black CDM Diff 4L Shield Clear CDM AG Sensor Temp Signal Green CDM Diff 5H Sensor Temp Reference Blue CDM AG Voltage Excitation White CDM X1 1 Jumper to with user supplied wire 2 Unlike the LI200X or LI200RX the CS300 requires a jumper wire to...

Page 113: ...l 1 CDM Diff 4H Pyrgeometer Down Reference Grey Green1 cbl 1 CDM Diff 4L1 PT100 Signal White Yellow cbl 2 CDM Diff 5H PT100 Reference Green cbl 2 CDM Diff 5L Current Excite Red cbl 2 CDM X2 Current Return Blue cbl 2 CDM AG Shields Clear CDM AG CNR4 4 Way Radiometer 0 or 1 Pyranometer Up Signal Red CDM Diff 1H Pyranometer Up Reference Blue1 CDM Diff 1L1 Pyranometer Down Signal White CDM Diff 2H Pyr...

Page 114: ... TCAV 1 in TABLE C 8 An additional TCAV sensor would be wired according to TCAV 2 in TABLE C 8 If only one TCAV is being used and it is wired to terminals 8H and 8L leaving terminals 7H and 7L empty the datalogger will not record any TCAV measurements TABLE C 8 Default Wiring for Soil Thermocouple Probes Sensor Quantity Wire Description Color CDM A116 Terminal TCAV 1 1 Signal Purple CDM Diff 7H Si...

Page 115: ... probe as described in TABLE C 9 If only one sensor is being used and it is wired according to the second sensor EasyFlux DL CR6CP will not record any measurements from the soil water content sensor TABLE C 9 Default Wiring for Soil Water Content Probes Sensor Quantity Wire Description Color CR6 Terminal CS650 CS655 1 1 SDI 12 Data Green U11 SDI 12 Power Red 12 V SDI 12 Reference Black G Shield Cl...

Page 116: ...ion Color CDM A116 Terminal HFP01 1 1 Signal White CDM Diff 9H Signal Reference Green CDM Diff 9L Shield Clear CDM AG HFP01 2 1 Signal White CDM Diff 10H Signal Reference Green CDM Diff 10L Shield Clear CDM AG HFP01 3 1 Signal White CDM Diff 11H Signal Reference Green CDM Diff 11L Shield Clear CDM AG HFP01 4 1 Signal White CDM Diff 12H Signal Reference Green CDM Diff 12L Shield Clear CDM AG C 1 12...

Page 117: ... Clear CDM AG Heater Power Red CDM SW12 11 Power Reference Black CDM G HFP01SC 3 1 Signal White CDM Diff 10H Signal Reference Green CDM AG Shield Clear CDM AG Heater Signal Yellow CDM Diff 12H Heater Reference Purple CDM AG Shield Clear CDM AG Heater Power Red CDM SW12 21 Power Reference Black CDM G HFP01SC 4 1 Signal White CDM Diff 10L Signal Reference Green CDM AG Shield Clear CDM AG Heater Sign...

Page 118: ...4 pump_tmpr_er Pump temperature error If pump temperatre is below 0 deg C or above 55 deg C this bit is set 3 8 pump_flow_er Pump flow error If pump flow is more than 0 5 L min 1 from the pump flow set point default set point is 8 L min 1 this bit is set 4 16 valv_tmpr_er Valve temperature error If valve module temperature is below 0 deg C or above 60 deg C this bit is set 5 32 valv_flow_er Valve ...

Page 119: ...haracteristics and wind direction in the sonic instrument coordinate system RNcov Relative non stationarity model 2 3 in Foken et al 2012 ITCsw and ITCtau Relative integral turbulence characteristics model 2 5 in Foken et al 2012 wnd_dir_sonic Wind direction Grade Range Grade Range Grade Range 1 best 0 15 1 best 0 15 1 best 0 150 210 360 2 15 30 2 15 30 2 150 170 190 210 3 30 50 3 30 50 3 worst 17...

Page 120: ...haracteristic and wind direction in sonic instrument coordinate system 1 Overall quality grade RNcov ITCsw wnd_dir_sonic Relative non stationarity Relative integral turbulence characteristic Wind direction 1 best 1 1 2 1 2 2 1 2 1 3 1 2 3 4 1 4 3 4 1 2 1 5 1 4 3 5 1 6 5 5 2 7 6 6 2 8 7 8 7 8 2 9 worst 9 9 3 1 Simplified Table 4 5 in Foken et al 2012 ...

Page 121: ...f these variables is described below message Public variable message shows the latest message written to the System_Operatn_Notes table The System_Operatn_Notes table stores a record that includes a text message as well as several variables that describe the state of the system when the record is written It notifies the user of a significant event such as a change to a configuration variable or ev...

Page 122: ...3 See notes on valve_status ERROR Valve temperature problem is equivalent to diag_cpec bit 2 See notes on valve_status ERROR Scrub module temperature problem is equivalent to diag_cpec bit 1 See notes on valve_status irga_status Public variable irga_status gives the status of the EC155 and is based on the diagnostic word from the EC155 diag_irga as well as the CO2 and H2O signal levels which do no...

Page 123: ...ater this is an indication that the vortex filter is likely plugged ERROR H2O signal is too low Check EC155 windows is displayed when the H2O signal level is below 0 8 As with CO2 signal level this normally indicates the EC155 windows have become dirty and should be cleaned For the newer design sample cell serial number 2000 or greater this is an indication that the vortex filter is likely plugged...

Page 124: ... a problem with the pump speed measurement See notes on bit 6 ERROR Pump flow is not at setpoint Check buff_depth is displayed if the pump flow is not within 10 of the setpoint pump_flow_OK False and the processing has fallen too far behind buff_depth_OK False A processing delay does not always cause a pump flow error In many cases the processing will catch up before the pump flow drifts too far f...

Page 125: ...ssible values for valve_status Valve flow is OK is displayed if the valve flow is within an acceptable range valve_flow_OK True ERROR Valves are disabled Check BattVolt is displayed if the battery voltage has dropped below the minimum and the CPEC300 has disabled the valves This correlates with BattVolt_OK False See notes for bit 9 ERROR Valves are disabled IRGA is OFF is displayed if the CPEC300 ...

Page 126: ...processing EC_mode True if the sample pump is on and no zero span sequence is running see Appendix F 1 Status Text Variables p F 1 Records for which EC_mode False should be excluded from EC calculations This variable is also used by the CPEC300 program to determine the relevance of some of the error conditions For example the pump flow is relevant only in EC mode but the battery voltage is always ...

Page 127: ...ule See Section 4 11 3 Valve Module p 20 for details If the valve zero span flow valve_flow is within its normal range valve_flow_OK True but False if it is outside this range This check is performed only if a valve is selected valve_number 0 The variable valve_flow_OK is ignored in EC mode but if a CPEC300 system is not in EC mode bit 3 of diag_cpec will be set if valve_flow_OK False to indicate ...

Page 128: ...ectly from the EC100 and are only partially decoded within a CPEC300 system program as needed to affect other variables They are stored in the time series output table for troubleshooting in post processing For a complete listing of the diagnostic bits encoded by these words see the EC155 CO2 and H2O Closed Path Gas Analyzer Manual Diagnostic word diag_cpec flags several conditions specific to the...

Page 129: ...et To decode other diagnostic bits subtract 256 from diag_cpec and compare the remainder to the bit values below Bit 9 of diag_cpec is equivalent to BattVolt_OK False It indicates the power source for a CPEC300 system has dropped below the acceptable voltage limit This triggers a CPEC300 system to power down as much of the system as possible to prevent a deep discharge that might damage the user s...

Page 130: ...in In this case the battery may need to be further recharged The voltage at the CPEC300 system power input terminals can also be measured and compared to BattVolt BattVolt is measured in the datalogger which has a diode for reverse voltage protection The actual voltage at the input terminals will be approximately 0 3 V higher than the value reported by BattVolt A CPEC300 system supply voltage must...

Page 131: ... make sure power is supplied to the EC100 2 If diag_sonic is 1 this indicates the EC100 does not recognize that a CSAT3A sonic head is connected Make sure the CSAT3A cable is connected to the EC100 Remove power from the EC100 before connecting or disconnecting the CSAT3A 3 If diag_sonic is a number greater than zero check that the sonic path is not blocked If no obvious reason for the problem such...

Page 132: ...an typical make sure the pump tube is connected between the EC155 and the pump module If the pressure does not vary when the pump is turned on and off it is likely the pump is not running If the pressure changes but the value of pump_flow does not it is likely that the pump is actually running but there may be a problem with the pump speed measurement Contact Campbell Scientific in either case If ...

Page 133: ... fan will stay on until the pump temperature falls below 40 C If the pump temperature is too high check the operation of the fan which is controlled by public variable pump_fan_ON For diagnosing a problem using data saved in the output table ts_data the state of fans and heaters is encoded into variable ControlBits to conserve memory space See Appendix I Control Bits p I 1 This value is saved only...

Page 134: ...ulations and second it will cause an automatic zero or span to be aborted Given this a CPEC300 system CRBasic program should be edited with care and measurement or processing tasks that cause excessive delay should not be added Bit 3 Valve Flow If the remainder of diag_cpec after subtracting the numeric value for higher bits that are set is greater than 3 this means that bit 3 of diag_cpec is set ...

Page 135: ...ylinder s regulator is connected to the proper fitting on the valve module and that it is regulating the pressure to 10 5 psig The value of valveControl should be between 0 2 and 1 0 If valveControl 0 2 and valve_flow is too high this indicates the control valve is unable to provide enough restriction to limit the flow The proportional control valve will be fully closed at any value of valveContro...

Page 136: ...igured to use a valve module in which case the check is performed continuously and Boolean variable valve_tmprOK is set accordingly However the valve module temperature is ignored in EC mode bit 2 of diag_cpec is set only if it is relevant If the valve module is outside its operating range the zero span sequence cannot be run and the valves cannot be selected manually This protects the valves from...

Page 137: ...is equal to one this means that bit 1 of diag_cpec is set Bit 1 of diag_cpec indicates the scrub module temperature is outside its operating range This check is performed only if the CPEC300 program is configured to use a scrub module In that case this check is performed all the time and Boolean variable scrub_tmprOK is set accordingly However the scrub module temperature is ignored in EC mode bit...

Page 138: ... temperatures from 30 to 50 C If the system is started in cold weather after being turned off for several hours it may take up to 20 minutes to warm up to operating temperature The scrub module will also be disabled if it is too warm above 50 C The scrub module has a fan that turns on if scrub_tmpr rises above 45 C The fan will stay on until the scrub temperature falls below 40 C If the scrub modu...

Page 139: ...iables are listed in TABLE G 1 TABLE G 1 CPEC300 public variables When Defined Usage Variable Name Units Description always TIMESTAMP TS Date and time the record was measured always RECORD RN Record number always DIAG latest_note Latest note written to the message_log table always DIAG mode_status Operating state of the CPEC300 always DIAG cpec_status Overall status of the CPEC300 always DIAG irga...

Page 140: ...ble to receive a value from the EC100 used for an EC150 but not used for an EC155 always INFO Td_cell ºC H2O converted to dewpoint temperature in the sample cell always INFO Td_ambient ºC Dewpoint temperature corrected for pressure difference between the sample cell and ambient always USER pump_ON set True to enable the sample pump always INFO pump_flow LPM sample pump speed converted to volumetri...

Page 141: ...INFO valveControl Zero span flow control valve can be from 0 closed to 1 open SCRUB_MODULE INFO scrub_tmpr ºC Temperature of the scrub module SCRUB_MODULE DIAG scrub_tmprOK Boolean flag True if the scrub module temperature is within its operating range SCRUB_MODULE INFO scrubHeat_ON Boolean flag True if the scrub module heater is on SCRUB_MODULE INFO scrubFan_ON Boolean flag True if the scrub modu...

Page 142: ...age rises this much above the lower limit always CONFIG SONIC_AZIMUTH degrees Angle between true north and the direction the CSAT3A is pointing always CONFIG BANDWIDTH Hz EC100 digital filter bandwidth always CONFIG AMB_PRESS_NOMIN AL kPa nominal ambient pressure for CPEC300 elevation always CONFIG PUMP_SETPT LPM Flow setpoint for sample pump speed control always CONFIG CAL_INTERVAL min Time betwe...

Page 143: ... the CO2 span during automatic zero span sequences always CONFIG CHECK_SPAN2 Set True to measure CO2 span cylinder 2 during automatic zero span sequences always CONFIG CHECK_SPAN3 Set True to measure CO2 span cylinder 3 during automatic zero span sequences always CONFIG CHECK_SPAN4 Set True to measure CO2 span cylinder 4 during automatic zero span sequences ...

Page 144: ... stored in table ts_data are shown in TABLE H 1 Values that are stored or not stored depending on compile switch settings have a V D or S in the first column of TABLE H 1 V means the value is stored only if VALVE_MODULE True D means the value is stored only if SaveAll_diagnostics True S means the value is stored only if SCRUB_MODULE True If multiple compile switches are listed for a value the valu...

Page 145: ...ured inside datalogger after diode voltage drop D process_time µs Time to process the scan a copy of ProcessTime from the Status table D buff_depth Number of scans in the pipeline buffer that have not yet been processed a copy of BuffDepth from the Status table flux The online flux calculations are stored in table flux A record is written to this table at the end of every output interval 30 min Sp...

Page 146: ... H 2 depends on the constants as described in Section 6 2 Set Constants p 36 The code shown in the table can be either V S or LWS or a combination of two of the codes V is defined if VALVE_MODULE True S is defined if SCRUB_MODULE True and VALVE_MODULE True LWS is defined if Leaf_Wetness_Sensor True TABLE H 2 Values stored in table flux Compile Switch Variable Name Units Description TIMESTAMP TS Da...

Page 147: ... m2 s 2 Covariance of Ux and Uz Uy_stdev m s 1 Standard deviation of Uy Uy_Uz_cov m2 s 2 Covariance of Uy and Uz Uz_stdev m s 1 Standard deviation of Uz CO2_stdev µmol mol 1 Standard deviation of CO2 CO2_Ux_cov µmol mol 1 m s 1 Covariance of CO2 and Ux CO2_Uy_cov µmol mol 1 m s 1 Covariance of CO2 and Uy CO2_Uz_cov µmol mol 1 m s 1 Covariance of CO2 and Uz H2O_stdev mmol mol 1 Standard deviation o...

Page 148: ...re was within its operating range V valve_tmpr_Avg ºC Average valve module temperature V valve_heat_Avg Fraction of time the valve module heater was on V valve_fan_Avg Fraction of time the valve module fan was on V S scrub_press_Avg kPa average pressure at the scrub pump outlet V S ScrubTmprOK_Avg Fraction of time the scrub module temperature was within its operating range V S scrub_tmpr_Avg ºC Av...

Page 149: ...Average of diag_irga V cell_tmpr_Avg ºC Average cell temperature V cell_press_Avg kPa Average cell pressure V CO2_signal_Avg Average CO2 signal V H2O_signal_Avg Average H2O signal V diff_press_Avg kPa Average differential pressure V source_tmpr_Avg ºC Average source temperature V pump_ON_Avg Fraction of time the pump was on V pump_flow_Avg LPM Average pump flow V pump_control_Avg Average pump cont...

Page 150: ...essage_log table stores a record that includes a text message as well as several variables that describe the state of the system when the record is written It notifies the user of a significant event such as a change to a configuration variable or events related to a zero span sequence Public variable latest_note shows the latest message written to the message_log table After one minute the text i...

Page 151: ...borted Check valve temperature If a CPEC300 system attempts to set the IRGA zero or span as part of a zero span sequence and there is a problem identified diag_cpec is nonzero the CPEC300 system will skip the zero or span setting step continue the rest of the sequence and display one of the following messages If the user attempts to set the zero or span manually this error or check is bypassed and...

Page 152: ...tatus of the sample pump valve_status Status of the valve module panel_tmpr ºC Temperature of the datalogger wiring panel BattVolt V Supply voltage measured inside datalogger after diode voltage drop Ts ºC Sonic virtual temperature CO2 µmol mol 1 CO2 mixing ratio relative to dry air H2O mmol mol 1 H2O vapor mixing ratio relative to dry air CO2_signal Relative strength of the infrared signal in the...

Page 153: ...tten to the config_history table at startup when a configuration variable is changed and once a day at 15 minutes past midnight This provides a historical record to be used as a troubleshooting aid The values stored in table config_history are shown in TABLE H 5 TABLE H 5 Values stored in table config_history Variable Name Units Description TIMESTAMP TS Date and time the record was written RECORD ...

Page 154: ...et the CO2 span during automatic zero span sequences CHECK_SPAN2 Set True to measure CO2 span cylinder 2 during automatic zero span sequences CHECK_SPAN3 Set True to measure CO2 span cylinder 3 during automatic zero span sequences CHECK_SPAN4 Set True to measure CO2 span cylinder 4 during automatic zero span sequences VALVE_MODULE Compile switch set True to enable the use of the valve module SCRUB...

Page 155: ...er is on 11 Used for scrub pump not included in ControlBits 10 512 pump_fan_ON Sample pump fan is on 9 256 pump_heat_ON Sample pump heater is on 8 128 valveFan_ON Valve module fan is on 7 64 valveHeat_ON Valve module heater is on 1 6 Used to switch valves not included in ControlBits none 0 All heaters and fans are off If ControlBits is greater than 4095 this indicates bit 13 of ControlBits is set ...

Page 156: ...greater than 127 this indicates bit 8 of ControlBits is set This means the valve module fan is on To decode other temperature control bits subtract 128 from ControlBits and compare the remainder to the bit values below If ControlBits is equal to 64 this indicates bit 7 of ControlBits is set This means the valve module heater is on ...

Page 157: ... it will damage the threads If a nut cannot be easily tightened by hand this indicates the threads have been damaged Replace any damaged nuts and fittings J 1 Assembly The first time a Swagelok fitting is assembled the ferrules become permanently swaged onto the tube Assembly instructions vary depending on plastic or metal tubing The assembly instructions are also slightly different for an initial...

Page 158: ... but the assembly process is slightly different than the first assembly 1 Insert the tube with pre swaged ferrules into the fitting until the front ferrule seats against the fitting body 2 Rotate the nut finger tight 3 While holding the fitting body steady tighten the nut slightly with a wrench J 2 Common Replacement Parts Tubing Campbell Scientific can provide several types and sizes of plastic t...

Page 159: ...8 B 405 2 1 4 0 17 B 405 170 1 4 3 16 B 405 3 3 8 1 4 B 605 4 1 2 3 8 B 815 6 5 8 1 2 B 1015 8 Ferrules Each Swagelok fitting comes assembled with the front and back ferrules included These ferrules are permanently swaged onto the tubing at the first assembly so spare ferrules may be needed for replacing the ends of tubing Back ferrule Front ferrule FIGURE J 2 Front and back Swagelok ferrules TABL...

Page 160: ...ep them clean Spare plugs may be needed if they become lost or damaged FIGURE J 3 Swagelok plug TABLE J 4 Dimensions and part numbers for Swagelok plugs Tubing OD in Swagelok part number 1 8 B 200 P 1 4 B 400 P 3 8 B 600 P 1 2 B 810 P 5 8 B 1010 P Caps Swagelok caps are used to cap the end of tubes when they are disconnected from the fitting It is strongly recommended to cap all disconnected tubes...

Page 161: ...Appendix J Using Swagelok Fittings J 5 TABLE J 5 Dimensions and part numbers for Swagelok caps Tubing OD in Swagelok part number 1 8 B 200 C 1 4 B 400 C 3 8 B 600 C 1 2 B 810 C 5 8 B 1010 C ...

Page 162: ...in Appendix K 2 Scrub Module Specifications p K 2 FIGURE K 1 CPEC310 scrub module K 1 Theory of Operation The CPEC310 Scrub Module provides an air stream with CO2 and H2O removed to zero the EC155 It includes a small diaphragm pump to push the zero air to the analyzer and three bottles containing a molecular sieve to remove CO2 and water vapor from ambient air The pump provides approximately 1 5 L...

Page 163: ...the operating range the public variable scrub_tmpr_ok will be set to True If the scrub pump temperature is outside this range the CPEC310 will disable the pump and the public variable scrub_tmpr_ok will be set to False The scrub pump module has a heater drawing 8W while operating that turns on if the pump temperature falls below 7 C If the CPEC310 is started at cold temperature it may take up to 2...

Page 164: ...pile The CPEC310 program will add the appropriate variables It will control the temperature of the scrub module whenever it controls the temperature of the valve module It will turn on the scrub module pump whenever the Zero Air valve is selected The scrub module will push a flow of ambient air that has been scrubbed of CO2 and water through the valve module to the EC155 K 4 Maintenance Once per y...

Page 165: ...RE K 2 and remove the cover plate to gain access to the bottles FIGURE K 3 Note that the thumb screws are captive they remain attached to the cover plate FIGURE K 3 Interior of CPEC310 scrub module with tubing and cover removed 5 Disconnect the remaining tubes from the bottles at the Swagelok fittings Caps are spring loaded 6 Remove the center bottle from the scrub module and set it aside 7 Remove...

Page 166: ...ill the bottle with new molecular sieve and replace the top cap the cap with the spring 12 Replace freshly filled bottle in the open position on the right side of the enclosure 13 Reconnect the tubes to the bottles 14 Replace the cover plate and retighten the thumb screws 15 Reconnect the black tube in its original location over the cover plate 16 Close the scrub module enclosure 17 Reconnect the ...

Page 167: ...m enclosure on a horizontal surface It is very difficult to replace the pump if the module is mounted vertically on a tower 2 Remove the four 10 self sealing screws that hold the filter assembly within the CPEC300 pump module or system enclosure see FIGURE L 1 If these screws become lost or damaged replace them with pn 26412 FIGURE L 1 Four screws holding filter assembly inside CPEC300 pump module...

Page 168: ... 4 With the filter assembly removed from the CPEC300 system pump module enclosure remove the six 4 screws FIGURE L 3 from the pump assembly FIGURE L 3 Location of 4 screws of pump assembly 5 Once the screws are removed fold back the pump assembly from the shell bottom as shown in FIGURE L 4 ...

Page 169: ...iginal pump module inner plate needs to be replaced with one that includes a large notch to provide clearance for the wire This replacement inner plate is included in the replacement pump kit 6 Using the notched end of the new inner plate slowly pry away the original inner plate working around all sides and being careful not to damage the foam backing FIGURE L 5 FIGURE L 5 Removal of original pump...

Page 170: ...of the adhesive tape on the new inner plate FIGURE L 6 and adhere to the foam in the same location as the original plate paying attention to the direction of the notch FIGURE L 7 FIGURE L 6 New inner plate with adhesive tape FIGURE L 7 New inner plate placement on pump module cover ...

Page 171: ... FIGURE L 8 Location of pump connector in CPEC300 pump electronics 9 Gently lift the pump assembly from foam leaving the tubes attached Turn it over and remove the two self tapping 6 screws that attach the pump to the metal box as shown in FIGURE L 9 FIGURE L 9 Self tapping screws attaching pump to metal box ...

Page 172: ...mbly from tubing 11 Remove the pump from the assembly L 3 Installation To reinstall a CPEC300 pump carry out the following steps 1 Position the pump with the label up and connect the coiled tubing on both sides of the pump see FIGURE L 11 Blue tubing connects the inlets and red connects the outlets as directional arrows show on the side of the pump FIGURE L 12 FIGURE L 11 Inlet and outlet tubing r...

Page 173: ...e the pump assembly back into the foam on the shell cover Make sure the fan is in the hole in the end and the small tab on the metal box is seated in the slit in the foam FIGURE L 13 Proper positioning of CPEC300 in shell cover 5 Hold the pump assembly securely to the shell cover while replacing the shell cover to the shell bottom Make sure the fan does not slide back out of its hole in the foam F...

Page 174: ...nscrew from the filter holder lid Be careful to not overtighten the fittings as this could cause damage to the hardware Finger tighten the fittings first then snug slightly with a wrench 7 Rotate the filter holder into position and mount in the enclosure with four 10 screws FIGURE L 1 Do not overtighten screws NOTE NOTE ...

Page 175: ...t Asia Location Bangkok Thailand Email info campbellsci asia Website www campbellsci asia China Location Beijing P R China Email info campbellsci com cn Website www campbellsci com cn Spain Location Barcelona Spain Email info campbellsci es Website www campbellsci es Costa Rica Location San José Costa Rica Email info campbellsci cc Website www campbellsci cc UK Location Shepshed Loughborough UK Em...

Reviews: