Step 1
Page 1 of 2
© 2012
WHEN DISASSEMBLING ALUMINUM EXTRUSION, TIGHTEN ALLSETSCREWS AND LOCKS TO PREVENT LOSS DURING SHIPPING
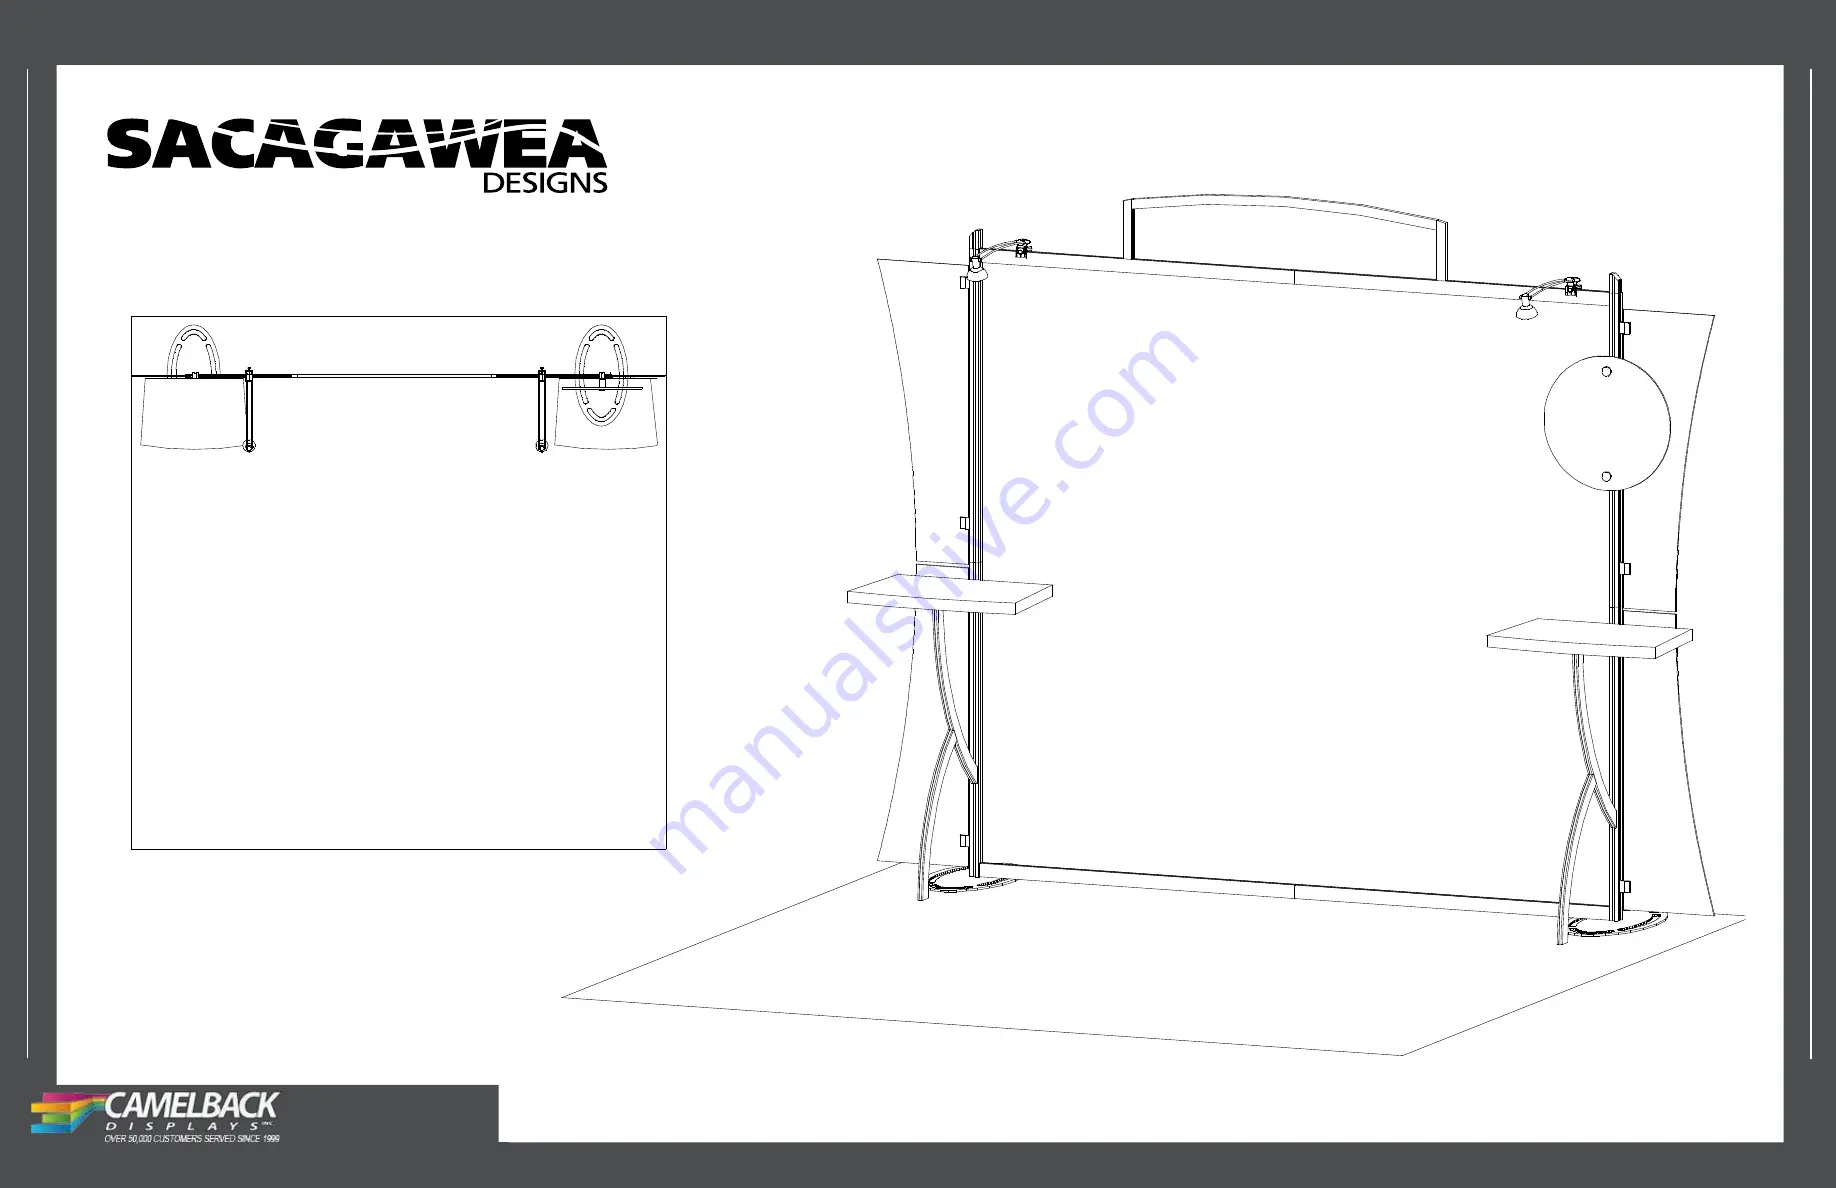
Sacagawea VK-1224 - General Layout
10’
Plan View
www.camelbackdisplays.com
Page 1: ...Step 1 Page 1 of 2 2012 WHEN DISASSEMBLING ALUMINUM EXTRUSION TIGHTEN ALL SETSCREWS AND LOCKS TO PREVENT LOSS DURING SHIPPING Sacagawea VK 1224 General Layout 10 10 Plan View www camelbackdisplays com...
Page 2: ...ts can be assembled with the supplied Hex Key Tool Occasionally a flat head screwdriver may be required Detail A Most horizontal extrusion connections have a patented expandable lock This lock inserts...
Page 3: ...en knobs to secure Connection Bar a Turn Knob Clockwise to Tighten Lock indicates location of knobs on BACKSIDE of unit Do not over tighten Knobs Knob Knob Horizontal Placement Stopper Set upper horiz...
Page 4: ...to holes on flange plate and secure with wing nuts Wing Nut Attach graphic to hook loop on back of header frame Item 7 8 9 10 10a 11 11a Description Header Frame 30 2 Curved Extrusion Leg Support 12 1...
Page 5: ...truction Setup Hardware Lights Graphic Counter Top Base Plates Backwall Counter Support Round Sign Extrusions 3 3a Extrusions 2 2a Horizontal extrusions 4a 4b abd 5a 5b Level 2 10a Counter Top Base Pl...