
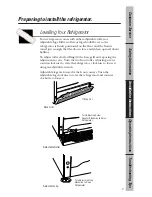


Preparing to install the refrigerator.
Read these instructions completely and carefully.
Water Supply to the Icemaker
(on some models)
You will need to connect your icemaker to a cold water line. A
water supply kit containing copper tubing, shutoff valve, fitting
and instructions is available at extra cost from your dealer.
There should be sufficient tubing for the icemaker from the
cold water supply to allow moving the refrigerator out from the
wall several feet. (You will need approximately 3 coils of 1/4
inch copper tubing that measures at least 25 cm (10") in
diameter.
Install the refrigerator on a floor strong enough to
support it when it is fully loaded.
Do not install refrigerator where temperature will go
below 16°C/60°F because it will not run often enough to
maintain proper temperatures.
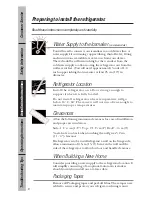
Refrigerator Location
Allow the following minimum clearances for ease of installation
and proper air circulation:
Side…1 1/4 cm (1/2") Top…2 1/2 cm (1") Back*…0 cm (0")
*metal cover on back when touching the wall gives 3.2 cm
(1 1/4 ") clearance
If refrigerator is to be installed against a wall on the hinge side,
allow a minimum of 4.5cm (l 3/4") between the wall and the
side of the refrigerator to allow for door and handle clearance.
Clearances
Consider providing a water supply to the refrigerator location. It
will simplify connecting of an optional automatic icemaker
should you wish to install one at a later date.
When Building a New Home
Remove all Packaging tapes and peel-off films. These tapes were
added to secure and protect your refrigerator during transit.
Packaging Tapes
Safety Infor
mation
Installation Instr
uctions
Customer Ser
vice
Operating Instr
uctions
Tr
oubleshooting T
ips
10