12
12
4.2
Replacing the Print Roller
1
6a
8
2
3
6c 6b
5
7c 7b 7a
9
4
10
11
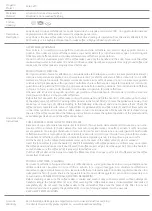
Fig. 9
Replacing the print rollers
1. Unlock the levers (10,11) and lift the printheads.
2. Loosen the screws (6,7) and remove the plates (5,9).
3. Remove the print rollers (2,3).
4. Slide new rollers (2,3) onto their shafts (1) and turn slightly the rollers until the shafts engage in the hexagon
sockets of the print rollers.
5. Set the plates (5,9) in place and fix them slightly with the screws (6,7).
6. Tighten the screws (6,7) each in order, i.e. a, b then c.
4
Replacing Assembly Units
Summary of Contents for XC Series
Page 1: ...Service Manual Label Printer XC Series ...
Page 34: ...34 34 7 Block Diagram Fig 32 Block diagram ...
Page 35: ...35 8 Layout Diagram CPU Fig 33 Layout diagram CPU components side ...
Page 36: ...36 36 8 Layout Diagram CPU Fig 34 Layout diagram CPU soldering side with measuring points ...


