background image

Made in Germany

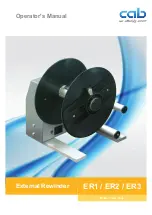
Operator's Manual

ER1 / ER2 / ER3

External Rewinder

Summary of Contents for 5943251

Page 1: ...Made in Germany Operator s Manual ER1 ER2 ER3 External Rewinder ...

Page 2: ...intended purpose demand the previous written authorization by cab Editor Regarding questions or comments please contact cab Produkttechnik GmbH Co KG Topicality Due to the constant further development of our products discrepancies between documentation and product can occur Please check www cab de for the latest update Terms and conditions Deliveries and performances are effected under the General...

Page 3: ... fittings Time Information in the display 1 2 Intended Use The device is manufactured in accordance with the current technological status and the recognized safety rules However danger to the life and limb of the user or third parties and or damage to the device and other tangible assets can arise during use The device may only be used for its intended purpose and if it is in perfect working order...

Page 4: ...ibed in this operating manual Work going beyond this may only be performed by trained personnel or service technicians Unauthorized interference with electronic modules or their software can cause malfunctions Other unauthorized work on or modifications to the device can also endanger operational safety Always have service work done in a qualified workshop where the personnel have the technical kn...

Page 5: ...203 mm 8 1 in Core diameter 40 mm 1 6 in on rewind axle 40 mm 1 6 in on cardboard core 76 mm 3 in with adapters on cardboard core Rewind speed 50 300 mm s 2 12 ips Label rewinding Labels outside inside Dimensions Height 280 mm 11 in Width 250 mm 9 8 in 310 mm 12 1 in 365 mm 14 3 in Length 285 mm 11 1 in Weight 4 5 kg 9 9 lbs 4 8 kg 10 5 lbs 5 1 kg 11 1 lbs Operating temperature 5 40 C at humidity ...

Page 6: ...isture and wetness X X Set up label printers only in dry locations protected from splash water 3 2 Mounting the Rewinder to the Printer Attention Risk of damage X X Switch off the printer before mounting or removing the rewinder 2 1 7 6 5 3 3 3 4 5 Figure 2 Mounting the rewinder 1 Loosen screw 2 2 Remove front cover 1 3 Insert the pin 5 of the rewinder into the hole 6 of the printer 4 Press the re...

Page 7: ...and under the roller 8 to the rewind axle 4 Ensure that the label strip is even with the disc 1 3 Attach the label strip to the rewind axle by setting the clamp 9 over the label strip in the groove of the rewind axle 4 Consider the rewind direction The full line is valid for outside wound labels The broken line is valid for inside wound labels 4 Slide the clamp 9 as far as possible towards the dis...

Page 8: ... little less than the width of the cardboard core 5 Tighten the knurled screw 9 6 Slide the cardboard core 11 over the two adapters 2 3 until it is touching the disc 1 7 Feed the label strip over the guide bar 5 and under the roller 10 to the rewind axle 4 Ensure that the label strip is even with the disc 1 8 Using adhesive tape or label affix the end of the label strip to the cardboard core Consi...

Page 9: ...abel strip is even with the disc 1 4 Using adhesive tape or label affix the end of the label strip to the cardboard core Consider the rewind direction The full line is valid for outside wound labels The broken line is valid for inside wound labels 5 Slide the plate 7 onto the rewind axle 4 until it stops i Note When using small labels it is possible that the cardboard core not covers the spring ov...

Page 10: ...undamental regulations of the EU Rules for Safety and Health Directive 2014 30 EU relating to electromagnetic compatibility Directive 2011 65 EU on the restriction of the use of certain hazardous substances in electrical and electronic equipment EU Declaration of Conformity https www cab de media pushfile cfm file 2706 ...

Reviews: