Section 4
– Assembling Your Guitar
JEM Section 4
- 6 -
Assembly of
your
Guitar is now complete
–
let’s
set it up!!
10.
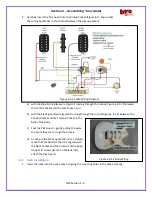
Replace the nut locking blocks, but do not tighten.
11.
Install the Tremolo arm (item #6 on the material list) on the Bridge. Offset the arm end by
approximately 2” (or at your preferred offset) from the high E string
4.6
Tremolo Claw Adjustment
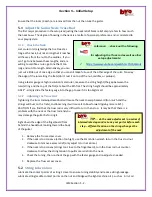
The overall objective of this adjustment is to use the Tuners & claw tension adjustment to have the
bridge base elevated 1/8”, parallel to the Body and the guitar close to tune.
1.
Recheck the height of the Bridge base ensuring the base is 1/8” on both sides of the Bridge –
adjust if necessary.
2.
Tune the low E string with the tuner – check base
and Body for being parallel. Tighten claw to return
to parallel if necessary. Ensure equal adjustment of
both screws so claw remains parallel to Tremolo
block.
3.
Repeat 1&2 on remaining strings.
4.
Recheck tuning on all strings – repeat 1, 2 & 3 as
necessary.
5.
Install the Tremolo cover over the Tremolo pocket using supplied 3/8” screws.
4.7
Installing the Strap Pins
Secure each strap pins (2) in the pre-drilled holes with the supplied screws (2ea, 1”).
4.8
Installing the String Retainer & Truss Bar Access Cover
4.8.1
Truss Access Cover
1.
Place the pearled access cover (item
14 on material list) over the Truss
hole in the Headstock;
2.
Attach with supplied screws.
4.8.2
String Restraint
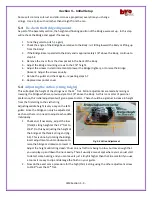
The String Restraint is used to ensure a steep
angle of the strings (relative to the nut) and is
placed on the Headstock approximately ½”to
the right of the nut string locks (Figure 4.8).
1.
Align the restraint bar with the string
nut with ½” spacing;
2.
Carefully drill 1/16”
starter holes.
3.
Attach restraint with supplied screws – do not
tighten until the guitar is tuned to your satisfaction.
Figure 4.8 String Retainer positioning
Tip…
Put a shim or block
between the string locking bolts and
the guitar body. This will help hold
the Bridge in place.


