background image

66

Start-up

Type 8792, 8793 REV.2

14.4 


X.TUNE

 – Automatic adjustment of the position 

controller

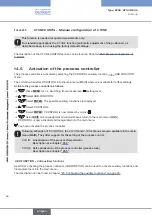
WARNING

Danger due to the valve position changing when the 

X.TUNE

 function is running!

When the 

X.TUNE

 function is run under operating pressure, there is an acute risk of injury.


Never run 

X.TUNE

 while the process is running.


Secure the device against accidental activation.

NOTE

An incorrect supply pressure or incorrectly connected operating medium pressure may cause the con-

troller to be wrongly adjusted.


Run 

X.TUNE


in each case 

at the supply pressure available in subsequent operation (= pneumatic auxil-

iary power).


Run the 

X.TUNE

 function preferably 

without

 operating medium pressure to exclude interference due to 

flow forces. 

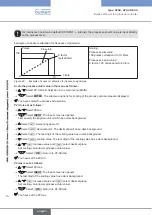
The following functions are actuated automatically:


Adjustment of the sensor signal to the (physical) stroke of the actuator used.


Determination of parameters of the PWM signals to control the solenoid valves integrated in Type 8792, 

8793.


Adjustment of the controller parameters for the position controller. Optimization occurs according to the 

criteria of the shortest possible transient time without overshoots.

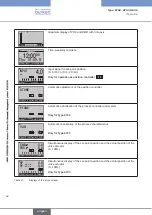
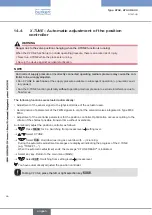
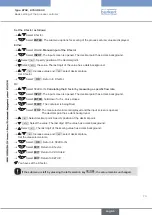
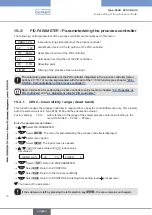
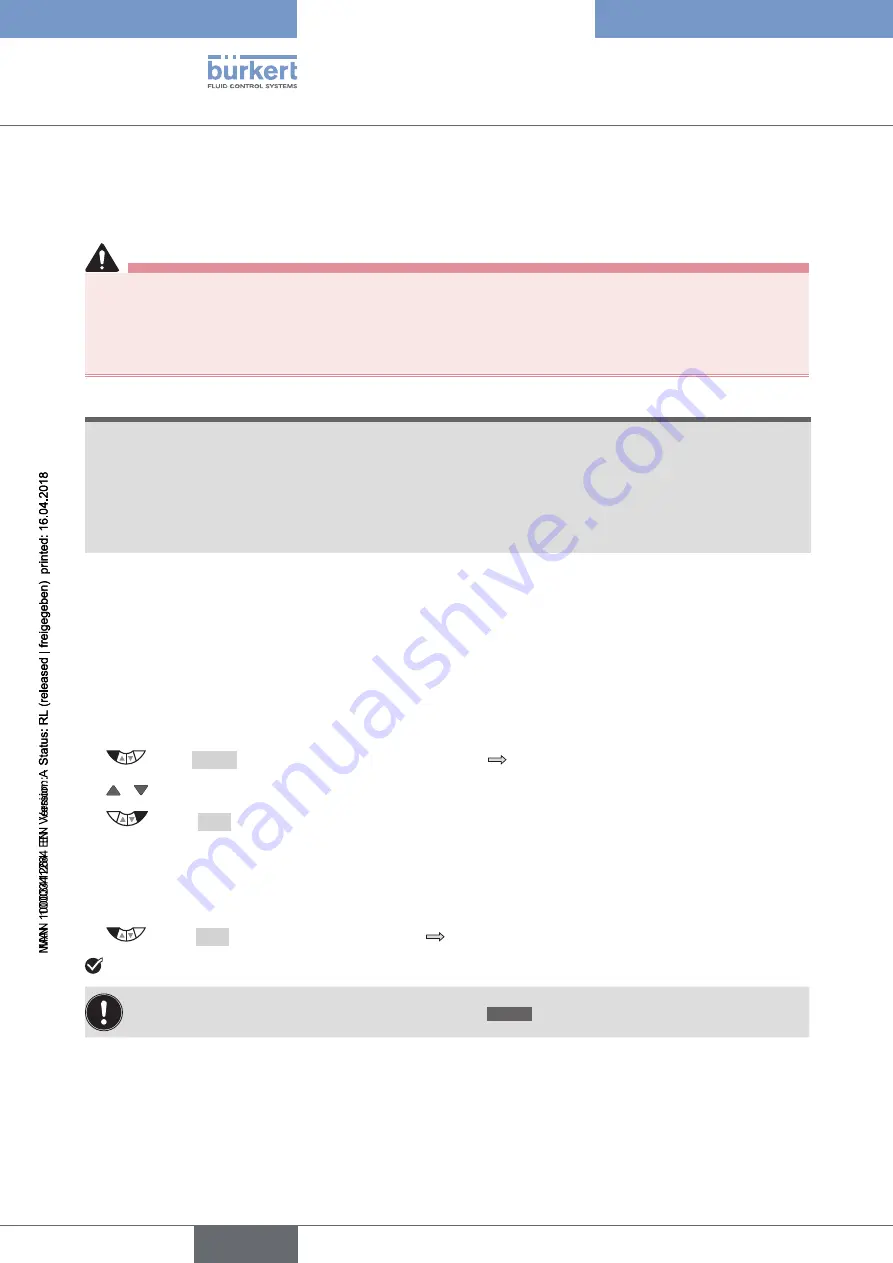
Automatically adjust the position controller as follows:


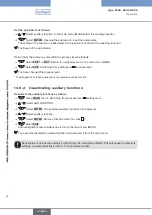
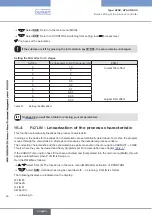
 Press 

MENU

 for 3 s. Switching from process level 

 setting level.


 /   Select

 X.TUNE

.


 Select


RUN

. Hold down as long as countdown (5 ...) is running.  

During the automatic adjustment messages are displayed indicating the progress of the 

X.TUNE


(e.g. 

“TUNE #1....”

). 

When the automatic adjustment ends, the message 

“X.TUNE READY” is indicated.


Select any key. Return to the main menu (MAIN).


 Select 

EXIT

. Switching from setting level 

 process level.

 You have automatically adjusted the position controller.

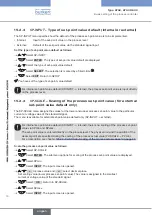
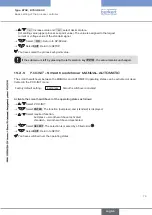
To stop 

X.TUNE

, press the left or right selection key 

STOP

.

english

Summary of Contents for 8792

Page 1: ...Operating Instructions Type 8792 8793 REV 2 Electropneumatic positioner and process controller ...

Page 2: ...the right to make technical changes without notice Technische Änderungen vorbehalten Sous resérve de modification techniques Bürkert Werke GmbH Co KG 2017 Operating Instructions 1804 00_EN en_00810648 Original DE ...

Page 3: ...PTION 13 5 1 General description 13 5 2 Properties 13 5 3 Variants 16 6 STRUCTURE AND FUNCTION 17 6 1 Representation 17 6 2 Function diagram 18 7 POSITIONER TYPE 8792 19 7 1 Schematic representation of the position control 20 7 2 The positioner software 21 8 PROCESS CONTROLLER TYPE 8793 23 8 1 Schematic representation of process control 24 8 2 The process controller software 25 9 INTERFACES 27 10 ...

Page 4: ...ctuator 38 11 4 Remote operation with external position sensor 40 11 5 Pneumatic connection 43 12 ELECTRICAL INSTALLATION 45 12 1 Electrical installation with circular plug in connector multipole version 45 12 2 Electrical installation with cable gland 50 13 OPERATION 54 13 1 Description of the operating and display elements 54 13 2 Function of the keys 56 13 3 Adjusting the display 59 13 4 Date a...

Page 5: ...8 16 2 Manual configuration of X TUNE 143 17 ACCESS TO THE BÜS SERVICE INTERFACE 147 17 1 Setting options for start up via Bürkert Communicator 147 18 OPERATING STRUCTURE AND FACTORY SETTING 149 19 ETHERNET IP PROFINET AND MODBUS TCP 164 19 1 Technical data 164 19 2 Industrial Ethernet 164 19 3 X7 M12 fieldbus connection D coded 167 19 4 X1 M12 circular plug 8 pole 167 19 5 X4 M8 socket 4 pole opt...

Page 6: ...ion software 183 22 2 Download 183 22 3 USB interface 183 23 PACKAGING TRANSPORT 184 24 STORAGE 184 25 DISPOSAL 184 26 SUPPLEMENTARY INFORMATION 185 26 1 Selection criteria for continuous valves 185 26 2 Properties of PID controllers 187 26 3 Adjustment rules for PID controllers 192 27 TABLE FOR YOUR SETTINGS ON THE POSITIONER 196 27 1 Settings of the freely programmed characteristic 196 28 TABLE ...

Page 7: ...e to observe the warning will result in fatal or serious injuries WARNING Warns of a potentially dangerous situation Failure to observe the warning may result in serious injuries or death CAUTION Warns of a possible danger Failure to observe this warning may result in a moderate or minor injury NOTE Warns of damage to property Failure to observe the warning may result in damage to the device or ot...

Page 8: ... A pulsating direct voltage rectified alternating voltage without smoothing must not be used as the operating voltage Use according to the authorized data operating conditions and conditions of use specified in the contract documents and operating instructions in chapter System description 10 Technical data in these instructions and the valve instructions for the respective pneumatically actuated ...

Page 9: ...ss is restarted in a defined or controlled manner The device may only be operated when in perfect condition and in consideration of the operating instructions Do not supply the pressure supply connection of the system with aggressive or flammable media or any liquids Do not physically stress the housing e g by placing objects on it or standing on it Do not make any external modifications to the de...

Page 10: ...if the device is used as intended in accordance with the specified condition of use 4 3 Master code Operation of the device can be locked via a freely selectable user code In addition there is a non changeable master code with which you can perform all operator actions on the device This 4 digit master code can be found on the last pages of the printed brief instructions which are enclosed with ea...

Page 11: ...aring position sensor remote Microprocessor controlled electronics for signal processing control and valve control Control module The device is operated by 4 keys The 128 x 64 dot matrix graphics display enables you to display the set point value or actual value and to configure and parameterize via menu functions Actuating system The actuating system consists of 2 solenoid valves and 4 diaphragm ...

Page 12: ...be sealed with a threaded plug For double acting actuators the chambers on both sides of the piston are pressurized In this case one chamber is aerated when the other one is deaerated and vice versa In this variant no spring is installed in the actuator Two basic device variants are available for positioner Type 8792 process controller Type 8793 They differ as to the mounting options and the posit...

Page 13: ...verview of the mounting options Attachment of NAMUR on rotary actuator Attachment of NAMUR with a mounting bracket on a linear actuator Remote mounting with mounting bracket Remote mounting with DIN rail Table 1 Overview of the mounting options english ...

Page 14: ...nt value can be specified by an external signal 5 3 3 Type 8793 remote variant Depending on the connection variant type of the position sensor Type 8793 functions as a Process controller or Positioner position controller The following connection variants are available Function Type 8793 Interface Position sensor Setting in the menu ADD FUNCTION Process controller digital serial Remote sensor Type ...

Page 15: ...rix graphics display The pneumatic actuating system for single acting and double acting actuators consists of 2 solenoid valves 6 1 Representation Mechanical position indicator Control module with display and keys Working connection 2 connection A2 Pressure supply connection 1 4 7 bar connection P Working connection 1 connection A1 Air exhaust connection air exhaust filter Internal position sensor...

Page 16: ...uating system 1 Aeration valve 2 Bleed valve Compressed air supply Position sensor Process controller Positioner Actuating system 1 2 Process set point value Process actual value Position set point value Exhaust air Types 8792 8793 Continuous valve with single acting actuator Sensor Actual position Set point position Figure 2 Structure positioner Type 8792 process controller Type 8793 The remote v...

Page 17: ...tandard signal If there is a control difference Xd1 the actuator is aerated and de aerated via the actuating system In this way the position of the actuator is changed until control difference is 0 Z1 represents a disturbance variable Valve opening Continuous valve Actuating system Solenoid valves Position sensor Positioner Position set point value CMD Xd1 B1 E1 PK Z1 POS Position control circuit ...

Page 18: ... 7 1 Schematic representation of the position control 4 20 mA 0 20 mA 0 1 0 V 0 5 V DIR CMD SPLTRNG CHARACT CUTOFF X TIME DIR ACT X LIMIT X CONTROL DBND POS CMD INP POS CMD TEMP INPUT Figure 4 Schematic representation of position control english ...

Page 19: ...ard signal range to two or more positioners Stroke limit X LIMIT Mechanical valve piston movement only within a defined stroke range Limit of the control speed X TIME Input of the opening and closing time for the total stroke Insensitivity range X CONTROL The positioner is initially actuated from a control dif ference to be defined Code protection SECURITY Code protection for settings Safety posit...

Page 20: ... variant on page 14 Simulation software SIMULATION For simulation of the device functions DIAGNOSE option Monitoring of processes Table 3 Positioner software Configurable auxiliary functions Hierarchical operating concept for easy operation on the following operating levels Process level On the process level you switch between the AUTOMATIC and MANU operating states Setting level On the setting le...

Page 21: ...ent position POS of the pneumatic actuator The positioner compares this position actual value with the set point value CMD which is specified by the process controller If there is a control difference Xd1 the actuator is aerated and de aerated via the actuating system In this way the position of the actuator is changed until control difference is 0 Z2 represents a disturbance variable Valve openin...

Page 22: ...esentation of process control 4 20 mA 0 20 mA 0 1 0 V 0 5 V DIR CMD CHARACT CUTOFF X TIME DIR ACT X LIMIT X CONTROL DBDx POS CMD PV POS CMD PV SP TEMP PV SCALE PV SP SCALE SP SP P CONTROL PARAMETER SETUP Q FILTER Figure 6 Schematic representation of process control english ...

Page 23: ...o or more positioners Stroke limit X LIMIT Mechanical valve piston movement only within a defined stroke range Limit of the control speed X TIME Input of the opening and closing time for the entire stroke Insensitivity range X CONTROL The positioner is initially actuated from a control dif ference to be defined Code protection SECURITY Code protection for settings Safety position SAFEPOS Definitio...

Page 24: ...aling of process actual value and process set point value Selection of the set point value defaults Automatic sensor detection or manual sensor setting P CONTROL SETUP PV INPUT Sensor types Pt 100 and 4 20 mA are automatically detected or can be manually set via the operating menu Selection of the set point value default P CONTROL SETUP SP INPUT Set point value default either via standard signal i...

Page 25: ...controller 2 binary outputs 24 V PNP Initiator 1 initiator 2 24 V PNP NO Analog feedback 4 20 mA 0 10 V Inputs Outputs Supply Operation Remark Optional inputs and outputs are represented as a broken line Figure 7 Interfaces of the positioner process controller Types 8792 and 8793 are 3 wire devices i e the power 24 V DC is supplied separately from the set point value signal only for process contro...

Page 26: ...rve instructions on operation in potentially explosive atmospheres See supplementary ATEX instructions 10 4 Operating conditions WARNING Solar radiation and temperature fluctuations may cause malfunctions or leaks If the device is used outdoors do not expose it unprotected to the weather conditions The permitted ambient temperature may not exceed the maximum value or drop below the minimum value A...

Page 27: ...23456 00999999 W17MA Made in Germany Serial number Order number Barcode includes order number and serial number 8792 24V DC 5W Remote PROFINET REV 2 P 1 4 7bar IP65 67 Tamb 10 60 C S N 1000 00123456 W17MA 8792 24V DC 5W Remote PROFINET REV 2 P 1 4 7bar IP65 67 Tamb 10 60 C S N 1000 00123456 W17MA Hardware revision Figure 8 Example of type label 10 6 Mechanical data Dimensions see data sheet Materi...

Page 28: ...t 1 mA Input data for set point value signal 0 4 20 mA Input resistance 70 Ω Resolution 12 bit 0 5 10 V Input resistance 20 kΩ at 0 5 V only 11 bit Resolution 12 bit Protection class III according to DIN EN 61140 VDE 0140 1 Analog feedback max current 10 mA for voltage output 0 5 10 V Load 0 560 Ω for current output 0 4 20 mA Inductive proximity switches 100 mA current limitation Binary outputs ga...

Page 29: ... min 10 degrees below the lowest operating temperature Oil content Class X max 25 mg m Temperature range of compressed air 0 60 C Pressure range 1 4 7 bar Air flow rate 95 lN min at 1 4 bar for aeration and de aeration 150 lN min at 6 bar for aeration and de aeration QNn 100 lN min according to definition for pressure drop from 7 to 6 bar absolute Connections Internal threads G1 4 Pressure specifi...

Page 30: ...function B up Connection according to Figure 9 up down Connection according to Figure 10 up down lower chamber upper chamber double acting Control function I Connection according to Figure 11 not defined up lower chamber of the actuator to A2 down upper chamber of the actuator to A2 Table 8 Safety end positions pneumatic connection Description of Table 8 Single acting actuators Control function A ...

Page 31: ...rt 11 2 Attachment to a continuous valve with linear actuator according to NAMUR The valve position is transferred to the position sensor installed in the positioner via a lever according to NAMUR 11 2 1 Attachment kit to linear actuator ident No 787 215 Can be purchased as an accessory from Bürkert Seq No Quantity Designation 1 1 NAMUR mounting bracket IEC 534 2 1 Hoop 3 2 Clamping piece 4 1 Driv...

Page 32: ...ly WARNING Risk of injury due to incorrect assembly Assembly may only be carried out by authorized specialist personnel and using the appropriate tools Risk of injury due to unintentional switching on of the plant and uncontrolled start up Secure the device against accidental activation Following assembly ensure a controlled restart Procedure Mount hoop with the aid of the clamping elements hexago...

Page 33: ...12 22 5 4 13 15 Figure 10 Assembling the lever The gap between the driver pin and the shaft should be the same as the actuator stroke As a result the lever has a swing range of 60 see Figure 11 Swing range of the lever Rotation range of the position sensor The maximum rotation range of the position sensor is 180 Swing range of the lever To ensure that the position sensor operates at a good resolut...

Page 34: ...unting bracket The selection of the M8 thread used on the positioner depends on the size of the actuator To determine the correct position hold the positioner with mounting bracket on the actuator The conical roller on the lever of the position sensor must be able to move freely in the hoop see Figure 12 Attaching the mounting bracket along the entire stroke range of the actuator The lever positio...

Page 35: ...with columnar yoke Attach mounting bracket to the columnar yoke 21 with the U bolt washers circlips and hexagon nuts see Figure 14 Key No Designation 7 U pin 10 Circlip 11 Washer 21 Hexagon nut 21 10 11 7 Figure 14 Attach positioner with mounting bracket for actuators with columnar yoke 11 2 4 Aligning the lever mechanism The lever mechanism cannot be correctly aligned until the device has been co...

Page 36: ...e order number for the assembly bridge with fastening screws as per VDI VDE 3845 please refer to the data sheet for Type 8792 8793 11 3 2 Assembly WARNING Risk of injury due to incorrect assembly Assembly may only be carried out by authorized specialist personnel and using the appropriate tools Risk of injury due to unintentional switching on of the plant and uncontrolled start up Secure the devic...

Page 37: ...on for the swing range of the flattened shaft 30 max 180 The swing movement of the flattened shaft must be within the position sensor rotation range of 180 Flattened shaft 180 maximum swing range Figure 15 Rotation range anti twist safeguard Set up the multi part assembly bridge to suit the actuator Attach the assembly bridge by 4 hexagon bolt and circlips to Type 8792 8793 see Figure 16 The assem...

Page 38: ... position sensor in the form of a rotary position sensor but an external position sensor Depending on the variant of Type 8792 8793 there are the following connection variants Device type Interface Position sensor Setting in the menu ADD FUNCTION Type 8792 Remote digital serial Remote sensor Type 8798 Type 8793 Remote digital serial Remote sensor Type 8798 POS SENSOR DIGITAL For menu description s...

Page 39: ...hing on of the plant and uncontrolled start up Secure the device against accidental activation Following assembly ensure a controlled restart Connect the 3 or 4 wires of the sensor cable to the designated screw type terminals of Type 8792 8793 Connection of screw type terminals See chapter 12 2 2 4 Terminal assignment for external position sensor for remote variant only on page 50 Connection of M8...

Page 40: ... Required minimum sensor resolution 100 mm 0 1 mm 1000 steps WARNING Risk of injury due to improper start up Start up may be carried out by authorized technicians only and with the appropriate tools Risk of injury due to unintentional switching on of the plant and uncontrolled start up Secure the device against accidental activation Following assembly ensure a controlled restart Connect the extern...

Page 41: ...tions DANGER Risk of injury from high pressure in the system Before loosening lines and valves turn off the pressure and vent the lines WARNING Risk of injury from improper installation Installation may be carried out by authorized technicians only and with the appropriate tools Risk of injury due to unintentional switching on of the plant and uncontrolled start up Secure the device against accide...

Page 42: ...nections A1 and A2 to the respective chambers of the double acting actuator See chapter 10 9 Safety end positions after failure of the electrical or pneumatic auxiliary power Important information for perfect control behavior In order to ensure that the control behavior is not negatively affected in the upper stroke range on account of too little pressure difference keep the applied supply pressur...

Page 43: ...regulations for electrical equipment WARNING Risk of injury from improper installation Installation may be carried out by authorized technicians only and with the appropriate tools Risk of injury due to unintentional switching on of the plant and uncontrolled start up Secure the device against accidental activation Following installation ensure a controlled restart Use of the set point value input...

Page 44: ...signal level Input signals from the control center e g PLC 1 white Set point value 0 4 20 mA or 0 5 10 V 1 0 4 20 mA or 0 5 10 V fully galvani cally isolated 2 brown Set point value 2 GND set point value 5 gray Binary input 0 5 V log 0 10 30 V log 1 5 6 pink Binary input GND 6 GND identical to GND operating voltage Output signals to the control center e g PLC assigned for the analog output option ...

Page 45: ...ltage is applied the positioner is operating Now make the required basic settings and actuate the automatic adjustment of the positioner The procedure is described in chapter 14 Start up on page 64 12 1 4 Type 8793 designation of the circular plug in connectors and contacts Functional earth FE X1 M12 cir cular plug 8 pole description see Table 14 Operating voltage and various signals 1 2 3 4 5 6 7...

Page 46: ...e 8793 only Input type Pin Assignment Switch On the device side External circuit 4 20 mA internally supplied 1 24 V transmitter power supply Switch on left GND 1 2 3 4 Transmitter I 2 Output from transmitter 3 GND identical to GND oper ating voltage 4 Bridge after GND GND from 3 conductor transmitter 4 20 mA externally supplied 1 Not assigned Switch on right 2 Process actual 2 4 20 mA 3 Not assign...

Page 47: ...ar plug in connectors and contacts Table 15 X5 M8 circular plug 4 pole input signals process actual value for Type 8793 only For reasons of wire compensation connect the Pt 100 sensor via 3 wires Always bridge Terminal 3 and Terminal 4 on the sensor When the operating voltage is applied the process controller is operating Now make the required basic settings and actuate the automatic adjustment of...

Page 48: ...f the set point value input 4 20 mA If several devices of Type 8792 8793 are connected in series and the power supply to a device in this series connection fails the input of the failed device becomes highly resistive As a result the 4 20 mA standard signal fails In this case please contact Bürkert Service directly 12 2 1 Terminal board Type 8792 8793 with screw type terminals 1 2 3 4 24 V GND 83 ...

Page 49: ...or analog output and or digital output option only Connect terminals according to the variant options of the positioner Terminal Assignment On the device side External circuit signal level 85 Binary output 1 83 24 V 0 V NC NO specific to operating voltage GND terminal GND 85 Binary output 2 85 24 V 0 V NC NO specific to operating voltage GND terminal GND 31 Analog feedback 31 0 4 20 mA or 0 5 10 V...

Page 50: ...green red Serial interface A cable A A cable B yellow orange Serial interface B cable B B cable Table 20 Terminal assignment digital non contacting position sensor Type 8798 Connection of a potentiometric position sensor Terminal Assignment On the device side External circuit Potentiometer 1 1 Potenti ometer Sliding contact 2 2 Sliding contact Potentiometer 3 3 Table 21 Terminal assignment potenti...

Page 51: ...signed 4 Clock input 4 GND GND from operating voltage GND Clock GND Frequency externally supplied actual value 1 Not assigned 2 Clock input 2 Clock 3 Not assigned 4 Clock input 4 Clock Pt 100 see information below actual value 1 Not assigned 2 3 4 Pt 100 2 Process actual 1 power supply 3 Process actual 3 GND 4 Process actual 2 compensation Can be adjusted via software see chapter 21 Start up seque...

Page 52: ...ng and closing of the valve Setting level The basic settings for the process are made on the setting level Inputting the operating parameters Activating auxiliary functions If the device is in the AUTOMATIC operating state when changing to the setting level the process continues running during the setting 13 1 Description of the operating and display elements The device features 4 keys for operati...

Page 53: ... the displayed process value Designation for the function of the keys Display elements of the process level Symbol for position control Symbol for process control Symbol for the AUTOMATIC operating state Other symbols are displayed according to the activated functions See Table 23 The process values which can be displayed in the AUTOMATIC operating state depend on type A detailed description can b...

Page 54: ...e I O RS232 HART SECURITY active Other symbols for Type 8793 Operation as process controller P CONTROL process controller active Bus active SIMULATION active Table 23 Symbols of the process level 13 1 2 Flashing of the display background lighting Flashing is used to localize the device in a network It is activated when selecting the device in the Bürkert Communicator or when requested via a fieldb...

Page 55: ...TOMATIC operating state MANUAL MANU Change to MANUAL operating state AUTOMATIC Key function on the setting level Key Key function Description of the function Arrow key Scroll up in the menus Maximizing numerical values Arrow key Scroll down in the menus Minimizing numerical values Change by one digit to the left when entering numerical values left selection key EXIT Return to the process level Gra...

Page 56: ...rease value When the largest possible value has been reached 0 is displayed again left selection key ESC or EXIT Return without change right selection key OK Accept the set value Table 25 Change numerical values with fixed decimal places Enter numerical values with variable decimal places Key Key function Description of the function Example Arrow key Increase value Enter PWM signal Arrow key Reduc...

Page 57: ...NU CMD POS CMD MANU POS 0 0 Actual position of the valve actuator 0 100 MENU POS TEMP MANU CMD 0 0 Set point position of the valve actuator or Set point position of the valve actuator after rescaling by possibly activated split range function or correction characteristic 0 100 MENU CMD CMD POS TEMP 0 0 C Internal temperature in the housing of the device C MENU TEMP SP MANU PV 0 0 m3 min Process ac...

Page 58: ... controller MENU X TUNE P LIN RUN P TUNE Automatic optimization of the process controller parameters Only for Type 8793 MENU P TUNE CMD POS RUN P LIN Automatic linearization of the process characteristics Only for Type 8793 MENU P LIN SP PV MANU 0 0 CMD POS 0 0 Simultaneous display of the set point position and the actual position of the valve actuator 0 100 MENU CMD POS POS MANU 0 0 SP PV 0 0 m3 ...

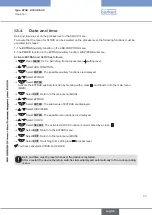
Page 59: ...re displayed Select EXTRAS Select ENTER Activate the EXTRAS auxiliary function by marking with a cross and transfer into the main menu MAIN Select EXIT Return to the main menu MAIN Select EXTRAS Select ENTER The submenus of EXTRAS are displayed Select DISP ITEMS Select ENTER The possible menu options are displayed Select CLOCK Select SELECT The activated CLOCK function is now marked by a cross Sel...

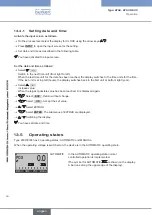
Page 60: ...op left hours the display switches back to the first unit at bottom right year Select Increase value When the largest possible value has been reached 0 is displayed again Select ESC Return without change Select OK Accept the set value Select EXTRAS Select ENTER The submenus of EXTRAS are displayed Switching the display You have set date and time 13 5 Operating states Type 8792 8793 has 2 operating...

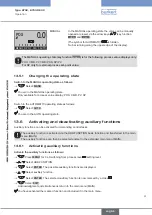
Page 61: ...rating state as follows Select AUTO You are in the AUTO operating state 13 6 Activating and deactivating auxiliary functions Auxiliary functions can be activated for demanding control tasks The auxiliary function is activated via the ADD FUNCTION basic function and transferred to the main menu MAIN The auxiliary functions can then be selected and set in the extended main menu MAIN 13 6 1 Activatin...

Page 62: ... have changed the process level The designation of the key depends on the selected auxiliary function 13 6 2 Deactivating auxiliary functions Deactivate the auxiliary functions as follows Press MENU for 3 s Switching from process level setting level Select ADD FUNCTION Select ENTER The possible auxiliary functions are displayed Select auxiliary function Select ENTER Remove function mark no cross S...

Page 63: ...point position of the valve actuator When switching to MANUAL operating state POS is displayed SP PV process set point value When switching to MANUAL operating state PV is displayed The switch is possible only for external set point value default menu P CONTROL P SETUP SP INPUT external Manually open and close as follows Select POS CMD PV or SP Select MANU Change to MANUAL operating state Select A...

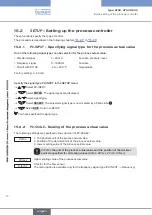
Page 64: ...he process controller P CONTROL 15 4 Setting the hardware SETUP 15 2 5 Parameter setting of the software PID PARAMETER 15 3 6 Automatic linearization of the process characteristics P Q LIN 15 4 to be per formed optionally 7 Automatic parameter setting for the process controller P TUNE 15 5 Table 28 Start up sequence The basic settings are made on the setting level To switch from the process to the...

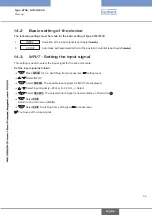
Page 65: ... input signal This setting is used to select the input signal for the set point value Set the input signal as follows Press MENU for 3 s Switching from process level setting level Select INPUT Select ENTER The possible input signals for INPUT are displayed Select input signal 4 20 mA 0 20 mA Select Select SELECT The selected input signal is now marked by a filled circle Select EXIT Return to the m...

Page 66: ... automatically Adjustment of the sensor signal to the physical stroke of the actuator used Determination of parameters of the PWM signals to control the solenoid valves integrated in Type 8792 8793 Adjustment of the controller parameters for the position controller Optimization occurs according to the criteria of the shortest possible transient time without overshoots Automatically adjust the posi...

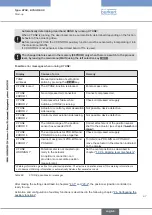
Page 67: ...ce defective X TUNE ERROR 4 Control system aeration side leaking Not possible device defective X TUNE ERROR 5 The rotation range of the position sensor has exceeded 180 Correct attachment of the position sensor shaft to the actuator see chapter 12 2 and 12 3 X TUNE ERROR 6 The end positions for POS MIN and POS MAX are too close together Check compressed air supply X TUNE ERROR 7 Incorrect assignme...

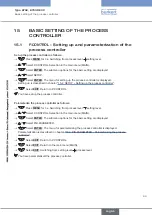
Page 68: ...g level Select ADD FUNCTION Select ENTER The possible auxiliary functions are displayed Select P CONTROL Select ENTER P CONTROL is now marked by a cross Select EXIT Acknowledgment and simultaneous return to the main menu MAIN P CONTROL is now activated and incorporated into the main menu You have activated the process controller Following activation of P CONTROL the P Q LIN and P TUNE menus are al...

Page 69: ...P Setting up the process controller Select EXIT Return to P CONTROL You have set up the process controller Parameterize the process controller as follows Press MENU for 3 s Switching from process level setting level Select P CONTROL Selection in the main menu MAIN Select ENTER The submenu options for the basic setting are displayed Select PID PARAMETER Select ENTER The menu for parameterizing the ...

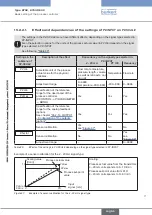
Page 70: ...NTER The signal types are displayed Select signal type Select SELECT The selected signal type is now marked by a filled circle Select EXIT Return to SETUP You have specified the signal type 15 2 2 PV SCALE Scaling of the process actual value The following settings are specified in the submenu of PV SCALE PVmin 1 The physical unit of the process actual value 2 Position of the decimal point of the p...

Page 71: ...9 temperature 200 800 200 800 0 9999 PVmin PVmax Specification of the reference range for the dead band of the process controller P CONTROL PID PARAMETER DBND Yes Yes Yes Specification of the reference range for the analog feedback option See chapter 26 2 14 OUTPUT Configuration of the outputs option Yes Yes Yes Sensor calibration Yes see Figure 37 No No K factor Sensor calibration No No Yes see F...

Page 72: ... actual value are displayed You have scaled the process actual value PVmin is set as follows Select PVmin Select INPUT The input screen is opened First specify the physical unit which has a dark background Select Select physical unit Select decimal point The decimal point has a dark background Select The last digit of the scaling value has a dark background Select scaling value The last digit of t...

Page 73: ...low rate Select INPUT The input screen is opened The decimal point has a dark background Select ENTER hold down for 5 s Valve closes Select START The container is being filled Select STOP The measured volume is displayed and the input screen is opened The decimal point has a dark background Select decimal point Specify position of the decimal point Select the value The last digit of the value has ...

Page 74: ...menu assigns the values for the lower and upper process set point value to the particular current or voltage value of the standard signal The menu is available for external set point value default only SP INPUT external For internal set point value default SP INPUT internal there is no scaling of the process set point value via SPmin and SPmax The set point value is entered directly on the process...

Page 75: ...ged 15 2 5 P CO INIT Smooth switchover MANUAL AUTOMATIC The smooth switchover between the MANUAL and AUTOMATIC operating states can be activated or deac tivated in the P CO INIT menu Factory default setting bumpless Smooth switchover activated Activate the smooth switchover of the operating states as follows Select P CO INIT Select ENTER The function bumpless and standard is displayed Select requi...

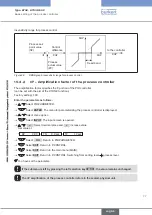
Page 76: ...r can be found in chapters 40 Properties of PID controllers and 41 Adjustment rules for PID controllers 15 3 1 DBND Insensitivity range dead band This function causes the process controller to respond from a specific control difference only This protects both the solenoid valves in Type 8792 8793 and the pneumatic actuator Factory setting 1 0 with reference to the range of the scaled process actua...

Page 77: ...ng 1 00 Enter the parameters as follows Select PID PARAMETER Select ENTER The menu for parameterizing the process controller is displayed Select menu option Select INPUT The input screen is opened Select decimal place and increase value Set value at KP X XX TN X 0 sec TV 1 0 sec Select OK Return to PID PARAMETER Select EXIT Return to P CONTROL Select EXIT Return to the main menu MAIN Select EXIT R...

Page 78: ...ONTROL Switching from setting level process level You have set the parameter If the submenu is left by pressing the left selection key ESC the value remains unchanged 15 3 4 TV Hold back time of the process controller The hold back time specifies the D portion of the PID controller can be set with the aid of the P TUNE function Factory setting 0 0 s Enter the parameters as follows Select PID PARAM...

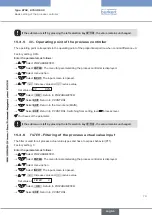
Page 79: ...Select OK Return to PID PARAMETER Select EXIT Return to P CONTROL Select EXIT Return to the main menu MAIN Select EXIT Return to P CONTROL Switching from setting level process level You have set the parameter If the submenu is left by pressing the left selection key ESC the value remains unchanged 15 3 6 FILTER Filtering of the process actual value input The filter is valid for all process actual ...

Page 80: ...y linearizes the process characteristic In doing so the nodes for the correction characteristic are automatically determined To do this the program moves through the valve stroke in 20 steps and measures the associated process variable The correction characteristic and the associated value pairs are saved in the menu option CHARACT FREE This is where they can be viewed and freely programmed For a ...

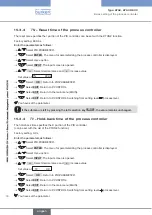
Page 81: ...imization of the process controller This function can be used to automatically parameterize the PID controller integrated in the process controller In doing so the parameters for the P I and D portion of the PID controller are automatically determined and transferred to the corresponding menus of KP TN TV This is where they can be viewed and changed Explanation of the PID controller The control sy...

Page 82: ... in the operating state which was set previously 15 5 2 1 Preparatory measure for execution of P TUNE in the MANUAL operating state Move the process actual value up to the operating point as follows Select PV The process actual value PV is indicated on the display Select MANU Change to MANUAL operating state The input screen for manually opening and closing the valve is displayed Open valve OPN or...

Page 83: ...u P CONTROL PID PARAMETER should be reduced As soon as the process actual value PV is constant the P TUNE function can be started 15 5 3 Starting the function P TUNE WARNING Risk of injury from uncontrolled process While the P TUNE function is running the control valve automatically changes the current degree of opening and intervenes in the running process Using suitable measures prevent the perm...

Page 84: ...se of error Remedy TUNE err break Manual termination of self optimization by pressing the EXIT key P TUNE ERROR 1 No supply pressure connected Connect supply pressure No change to process variable Check process and if required switch on pump or open the shut off valve Check process sensor Table 33 P TUNE possible error messages After making all the settings described in chapter Start up the proces...

Page 85: ...oke range X LIMIT Limit of the mechanical stroke range X TIME Limit of the control speed X CONTROL Parameterization of the position controller P CONTROL Parameterization of the process controller SECURITY Code protection for settings SAFEPOS Input the safety position SIG ERROR Configuration of signal level fault detection BINARY IN Activation of the digital input OUTPUT Configuration of outputs op...

Page 86: ...auxiliary function is now marked by a cross Select EXIT Acknowledgment and simultaneous return to the main menu MAIN The marked function is now activated and incorporated into the main menu You have added the auxiliary functions Set the parameters of the auxiliary functions as follows Select auxiliary function In the main menu MAIN select the auxiliary function Select ENTER Opening the submenu to ...

Page 87: ... reference to set point value set point position CMD and valve stroke POS for correction of the flow or operating characteristics Factory setting linear Each auxiliary function which is to be set must be incorporated initially into the main menu MAIN See chapter 26 1 Activating and deactivating auxiliary functions on page 102 Enter the freely programmable characteristic as follows Press MENU for 3...

Page 88: ...set point value CMD Standardized valve stroke POS Figure 31 Characteristics In the case of control tasks for closed loop control systems it is usually particular demands which are placed on the course of the operating characteristic e g linearity For this reason it is occasionally necessary to correct the course of the operating characteristic in a suitable way For this purpose Type 8792 8793 feat...

Page 89: ...or inputting values is opened SET VALUE y 0 2 ESC OK 2 This value is changed with the arrow keys Acknowledge value Return without change Previously set value as Enter value Enter value for the selected node Increase value Reduce value Select OK Acknowledge input and return to the FREE submenu Select EXIT Return to the CHARACT menu Select EXIT Return to the main menu MAIN Select EXIT Switching from...

Page 90: ...0 90 100 10 20 30 40 50 60 70 80 90 100 0 4 20 mA 0 20 mA 0 10 V 0 5 V Figure 32 Example of a programmed characteristic In the section Tables for customer specific settings in chapter 42 1 Settings of the freely pro grammed characteristic there is a table in which you can enter your settings for the freely pro grammable characteristic english ...

Page 91: ...ows Press MENU for 3 s Switching from process level setting level Select CUTOFF To do this the auxiliary function must be incorporated into the main menu Select ENTER Menu options of CUTOFF are displayed Select INPUT The Min 0 input screen for inputting values is opened Enter value Enter value for the selected node Increase value Reduce value Select INPUT The Max 100 input screen for inputting val...

Page 92: ...e memory EEPROM You have entered the CUTOFF sealing function The changed data is saved in the memory EEPROM only when there is a switch to the process level by leaving the main menu MAIN using the left selection key EXIT Valve stroke Adjustable from 75 100 Set point value CMD Adjustable from 0 25 POS Figure 33 CUTOFF graph english ...

Page 93: ...s level Select DIR CMD The effective direction is indicated on the display Select ENTER The input screen for inputting the effective direction is displayed Select SELEC Rise direct effective direction e g 4 mA or 0 V 0 20 mA or 5 10 V 100 Fall inverse effective direction e g 4 mA or 0 V 100 20 mA or 5 10 V 0 The selection is marked by a filled circle Select EXIT Acknowledge input and return to the...

Page 94: ...d Select SELEC Rise direct effective direction deaerated 0 aerated 100 Fall inverse effective direction deaerated 100 aerated 0 The selection is marked by a filled circle Select EXIT Acknowledge input and return to the display of DIR ACT You have entered the effective direction of the actuating drive If the Fall function is selected here the description of the arrow keys on the display is changed ...

Page 95: ...ously as actuators Enter the signal split range as follows Setting on the process level Select SPLTRNG The effective direction is indicated on the display Select ENTER The input screen for inputting the effective direction is displayed Select INPUT The Min 0 input screen for inputting values is opened Enter value Enter the minimum value of the input signal as Adjustment range 0 75 Increase value R...

Page 96: ...chanical stroke range as follows Setting on the process level Select X LIMIT The limit of the mechanical stroke range is indicated on the display Select ENTER The input screen for inputting the mechanical stroke range is displayed Select INPUT The Min 0 input screen for inputting values is opened Enter value Input the initial value of the stroke range as Adjustment range 0 50 of the total stroke I...

Page 97: ...ing time for the entire stroke is automatically entered for Open and Close Therefore movement can be at maximum speed Factory setting values determined at the factory by the X TUNE function If the control speed is limited values can be entered for Open and Close which are between the minimum values determined by the X TUNE and 60 s Enter the limit of the control speed as follows Setting on the pro...

Page 98: ...should only be made if it is required for the application The parameters for X CONTROL are automatically set with the exception of DBND dead band when specifying the basic settings by running X TUNE If the setting for DBND dead band depending on the friction behavior of the actuating drive is also to be automatically determined when X TUNE is running X CONTROL must be activated by incorpo rating i...

Page 99: ... have entered the parameterization of the position controller If the submenu is left by pressing the ESC key the value remains unchanged DBND Insensitivity range dead band of the positioner Input the dead band as with reference to the scaled stroke range i e X LIMIT Max X LIMIT Min see auxiliary function 26 2 6 X LIMIT Limit of the mechanical stroke range This function causes the controller to res...

Page 100: ...d increase number Enter code For the first setting Access Code 0000 factory settings For activated code protection Access Code from the user Select OK The submenu of SECURITY is opened Select CODE Select INPUT The input screen for specifying the access code Access Code is displayed Select decimal place and increase number Enter required access code Select OK Acknowledgment and return to the SECURI...

Page 101: ...s within these limits can be started This function is run in AUTOMATIC operating state only Factory setting 0 Enter the safety position as follows Setting on the process level Select SAFEPOS To do this the auxiliary function must be incorporated into the main menu Select ENTER The input screen for parameterization of the position controller is displayed Select INPUT Inputting the safety position a...

Page 102: ...oller activated See chapter 25 2 1 PV INPUT Specifying signal type for the process actual value NOTE The fault detection is only possible if the external set point value default was selected in SP INPUT See chapter 25 2 3 SP INPUT Type of set point value default internal or external Set the signal fault detection for input signal as follows Setting on the process level Select SIG ERROR To do this ...

Page 103: ...eactivated the message not available is indicated For behavior of the actuator during a signal fault detection see the following description 16 1 14 1 Behavior of the actuator when safety position deactivated or activated Selection SafePos off The actuator remains in the position which corresponds to the set point value last transferred default setting Selection SafePos on Approaching the safety p...

Page 104: ...tion controller and process controller or select BIN IN type and activate normally open or normally closed Select SELECT The selection is marked by a filled circle Select EXIT Select EXIT Switching from setting level process level You have activated the digital inputs SafePos Approaching a safety position The behavior of the actuator depends on the activation of the SAFEPOS auxiliary function See ...

Page 105: ...N if Type 8792 8793 has outputs option Type 8792 8793 which has the outputs option is available in the following variants one analog output one analog output and two binary outputs two binary outputs According to the variant of Type 8792 8793 only the possible adjustable outputs ANALOG ANALOG BIN 1 BIN 2 or BIN 1 BIN 2 are indicated in the OUTPUT menu option Configure the outputs as follows Settin...

Page 106: ... Select ENTER The input screen for configuring the analog output is displayed Select POS Output of the actual position Select SELEC The selection is marked by a filled circle Select CMD Output of the set point position Select SELEC The selection is marked by a filled circle Select PV Output of the process actual value Only for Type 8793 process control Select SELEC The selection is marked by a fil...

Page 107: ...Switching signal Description POS Dev 0 Control deviation is within the set limit 1 Control deviation is outside the set limit POS Lim 1 2 0 Actual position is above the limit position 1 Actual position is below the limit position Safepos 0 Actuator is not in the safety position 1 Actuator is in the safety position ERR SP CMD 0 No sensor break available ERR PV 1 Sensor break available Remote 0 Appl...

Page 108: ... Dev Alarm output for excessively large control deviation of the position controller Select POS Dev Select SELEC The input screen for the limit value Deviation is opened Increase value Reduce value Enter limit value for permitted control deviation Adjustment range 1 50 must not be less than the dead band Select OK Acknowledgment and simultaneous return to the OUT BIN 1 2 menu Then set the required...

Page 109: ...us Select SELEC Acknowledge submenu option as output function for the digital output The selection is marked by a filled circle Then set the required switching status in the OUT type submenu You have specified the output DIAG State 1 2 Diagnostic output option Outputting the message Diagnostic message from selected status signal For description see chapter 26 2 22 DIAGNOSE Menu for monitoring valv...

Page 110: ...filled circle Select EXIT Acknowledgment and simultaneous return to the OUT BIN 1 2 menu Select EXIT Acknowledgment and simultaneous return to the OUTPUT menu Select EXIT Acknowledgment and simultaneous return to the main menu MAIN Select EXIT Switching from setting level process level You have entered OUT type Switching signal Switching statuses normally open normally closed 0 0 V 24 V 1 24 V 0 V...

Page 111: ... or external Setting P CONTROL SETUP SP INPUT external Process actual value calibr PV 4 20 mA or C For the calibration process the signal type is displayed which was specified for the process actual value when setting up the process controller See chapter 25 2 1 PV INPUT Specifying signal type for the process actual value The frequency signal type flow rate cannot be calibrated If the frequency wa...

Page 112: ...0 mA 5V 10V The maximum value for the input signal is displayed Apply the maximum value to the input Select OK Transfer and simultaneous return to the calibr INP menu Select EXIT Acknowledgment and simultaneous return to the CAL USER menu Select EXIT Acknowledgment and simultaneous return to the main menu MAIN Select EXIT Switching from setting level process level You have calibrated CAL USER 16 1...

Page 113: ...yed Apply the minimum value to the input Select OK Transfer and simultaneous return to the calibr PV menu Select PV 20mA The maximum value for the input signal is displayed Apply the maximum value to the input Select OK Transfer and simultaneous return to the calibr PV menu Select EXIT Acknowledgment and simultaneous return to the CAL USER menu calibr PV Calibration of the process actual value for...

Page 114: ...re activated by deactivating CAL USER by removing the auxiliary function from the main menu MAIN 16 1 18 SET FACTORY Reset to factory settings This function allows all settings implemented by the user to be reset to the delivery status All EEPROM parameters with the exception of the calibration values are reset to default values Then a hardware reset is implemented Reset the settings to factory se...

Page 115: ...lect EXIT Switching from setting level process level You have set the service interface 16 1 20 EXTRAS Setting the display This function can be used to individually set the display In DISP ITEMS the display of the process level can be individually set To do this further menu options can be activated for the display of the process level POS and CMD are activated in the as delivered state In START U...

Page 116: ... or deactivate it by unchecking the box Select EXIT Return to the EXTRAS menu Select EXIT Return to the main menu MAIN Select EXIT Switching from setting level process level You have activated the menu display The activated menu options are now displayed on the process level display Use the arrow keys to switch between the displays Each menu option which can be selected can also be deactivated so ...

Page 117: ...hite font on dark background Select the type of display Select SELEC The selection is marked by a filled circle Select EXIT Return to the EXTRAS menu Select EXIT Return to the main menu MAIN Select EXIT Switching from setting level process level You have set the type of display DISP LIGHT Define background lighting for display EXTRAS DISP LIGHT Background lighting and specify with SELEC The menu o...

Page 118: ...n menu Select ENTER The submenu options are displayed Select DIGITAL Select ENTER The position signal of the external position sensor is digitally transmitted Digital interface menu option POS SENSOR DIGITAL Type 8792 8793 is connected to the path sensor Type 8798 via a digital interface see chapter Terminal assignment for external position sensor for remote variant only on page 137 or Select ANAL...

Page 119: ... into the main menu Select ENTER The submenu options are displayed Select TAN CORRECTION Select ENTER Select tan corr on Select ENTER Select EXIT Select EXIT Switching from setting level process level You have set the tangent correction Set the angle used by the position sensor as follows Press MENU for 3 s Switching from process level setting level Select POS SENSOR To do this the auxiliary funct...

Page 120: ...e set point value The settings to simulate the set point value are made in the SIGNAL sim menu Activation of the simulation In the SIGNAL form submenu by selecting one of the following waveforms Sine Sine wave Square Square wave Triangle Triangle wave Mixed Single cycle of an alternating signal sequence Then the selection is set to External set point value simulation inactive The following paramet...

Page 121: ...ecify the waveform as well as activation of the simulation Select SELEC The selection is marked by a filled circle Select EXIT Return to the SIGNAL sim menu Setting the parameters for simulation of the set point value Select offset zero offset as Select INPUT The input screen for specifying the offset is opened Increase value Select decimal place and enter value Select OK Transfer and simultaneous...

Page 122: ...rocess and process valve The settings to simulate the process and the process valve are made in the CONTROL sim menu Settings Type of simulation x SIM Simulation of the process valve p SIM Simulation of the process Parameterization of the process SIM Gain Specify amplification factor SIM Delay Specify time constant in seconds Example of a simulated process 63 1 SIM Gain Amplification factor Kp t S...

Page 123: ...ing the box or deactivate it by unchecking the box Setting the parameters for simulation of the process and or the process valve Select SIM Gain Amplification factor Select INPUT The input screen for specifying the amplification factor is opened Increase value Select decimal place and enter value Select OK Transfer and simultaneous return to the CONTROL sim menu Select SIM Delay period duration in...

Page 124: ...chapter 26 1 Activating and deactivating auxiliary functions The active diagnostics is indicated on the display of the process level with a check mark symbol See Figure 83 16 1 24 2 The DIAGNOSE main menu The DIAGNOSE main menu consists of the following submenus EXIT ENTER 29 1 DIAGNOSE D MSG ADD DIAGNOSE RESET HISTORY CONFIG MSG D MSG Diagnostic messages list of all diagnostic messages CONFIG MSG...

Page 125: ...menu In the ADD DIAGNOSE menu several diagnostic functions are activated and incorporated into the DIAGNOSE main menu Activate the diagnostic functions as follows Press MENU for 3 s Switching from process level setting level Select DIAGNOSE To do this the DIAGNOSE auxiliary function must already have been acti vated by incorporation into the main menu MAIN Select ENTER The submenus are displayed S...

Page 126: ... diagnostic messages as follows Select D MSG Select ENTER All generated diagnostic messages are displayed Select required message Select ENTER Opening the diagnostic message The description text is displayed in English Select EXIT Closing the diagnostic message and return to D MSG Or Select CLEAR Hold down as long as countdown 5 is running Deleting the diagnostic message and return to D MSG Select...

Page 127: ...y SERVICE TIME Maintenance required 4 TRAVEL ACCU Maintenance required 4 CYCLE COUNTER Maintenance required 4 TEMP CHECK Out of specification 3 STROKE CHECK Out of specification 3 PV MONITOR Out of specification 3 POS MONITOR Out of specification 3 Table 42 CONFIG MSG factory setting Default Assign the status signals as follows Select CONFIG MSG Select ENTER All activated diagnostic functions whic...

Page 128: ... entry for each diagnostic message This entry is assigned to the diagnostic function which has actuated this message and is saved there in the HISTORY submenu In the menu of some diagnostic functions there is a HISTORY submenu in which the history entries are saved RESET HISTORY is used to delete the entries of all HISTORY submenus Individual entries can be deleted in the HISTORY submenu of the pa...

Page 129: ...y the actuator 10 histogram bars each of which represents 10 of the total stroke Bar on left class 1 0 10 Bar on right class 10 91 100 POS Class STOP CLEAR DIR Class 00 13 48 72 50 Duration of histogram recording Most frequently occurring range between 2 changes in direction Number of changes in direction Histogram bar for the range between two direction reversal points Bar on left class 1 0 10 Ba...

Page 130: ...e in position class 1 0 10 of the total stroke and approx 30 of its time in position class 10 90 100 of the total stroke For the remaining time the actuator was in a position between 11 and 89 of the total stroke Figure 44 POS Class histogram of the dwell time density for sinusoidal progression of the actuator position The distribution of the histogram allows conclusions to be drawn about the desi...

Page 131: ...tes what percentage of all changes in direction is not applicable to the most frequent change in direction class Conclusion to be drawn from the histogram about the behavior of the actuator The actuator moved for all changes in direction in the change in direction class 10 91 100 Figure 47 DIR Class histogram of the dwell time density for sinusoidal progression of the actuator position The histogr...

Page 132: ... of both histograms POS Class and DIR Class is stopped Change display view Selection options POS Class Histogram for the dwell time density DIR Class Histogram for the movement range SYSTEM DATA list of the characteristic values Deleting histograms Select CLEAR Hold down as long as countdown 5 is running Both histograms POS Class and DIR Class are deleted Return to the DIAGNOSE main menu Select SY...

Page 133: ...unter Specify the interval for outputting messages as follows Select SERVICE TIME To do this the SERVICE TIME function must be incorporated into the DIAGNOSE main menu See chapter 16 1 24 3 Activation of diagnostic functions Select ENTER The menu is displayed Select LIMIT Select INPUT The preset value is displayed Increase value Changing the time unit d h m Setting interval for outputting the mess...

Page 134: ...ries of the last 3 messages can be viewed and deleted in the HISTORY submenu Table 44 TRAVEL ACCU path accumulator Specify the interval for outputting messages as follows Select TRAVEL ACCU To do this the TRAVEL ACCU function must be incorporated into the DIAGNOSE main menu See chapter 16 1 24 3 Activation of diagnostic functions Select ENTER The menu is displayed Required for analog position sens...

Page 135: ...essages can be viewed and deleted in the HISTORY submenu Table 45 SERVICE TIME operating hours counter Specify the interval for outputting messages as follows Select CYCLE COUNTER To do this the CYCLE COUNTER function must be incorporated into the DIAGNOSE main menu See chapter 16 1 24 3 Activation of diagnostic functions Select ENTER The menu is displayed Select LIMIT Select INPUT The preset valu...

Page 136: ...the HISTORY submenu EXIT ENTER 29 8 1 LIMIT HISTORY Table 46 TEMP CHECK temperature range Specify the temperature limit for outputting messages as follows Select TEMP CHECK To do this the TEMP CHECK function must be incorporated into the DIAGNOSE main menu See chapter 16 1 24 3 Activation of diagnostic functions Select ENTER The menu is displayed Select LIMIT Select ENTER The upper and lower tempe...

Page 137: ...e physical end positions can be set in the LIMIT submenu A message is output if the temperature goes outside the permitted range Example Input upper end position TOL MAX 1 If the position is less than 1 a message is output Input lower end position TOL ZERO 1 If the position is greater than 101 a message is output The history entries of the last 3 messages can be viewed and deleted in the HISTORY s...

Page 138: ...tarts recording as soon as the set point value is constant When the compensation time has elapsed monitoring starts If the control deviation DEV of the actual value is greater than the tolerance band of the set point value during monitoring a message is output To do this a history entry is made in the HISTORY submenu For a description see 26 2 22 7 History entries in the HISTORY submenu The status...

Page 139: ...c functions Select ENTER The menu is displayed DEADBAND has already been selected Select INPUT The preset value is displayed Increase value Changing the decimal place Enter tolerance band Select OK Acknowledge value Select COMP TIME Select INPUT The preset value is displayed Increase value Changing the decimal place Enter compensation time Select OK Return to the POS MONITOR menu Select EXIT Retur...

Page 140: ...down 5 is running The RESET HISTORY diagnostic menu can be used to jointly delete the histories of all diagnostic functions See chapter 26 2 22 5 Delete the histories of a diagnostic function example TRAVEL ACCU as follows Select TRAVEL ACCU Select ENTER The menu is displayed Select HISTORY Select INPUT History entries with date and value are displayed Select CLEAR Hold down as long as countdown 5...

Page 141: ...figuration of X TUNE X TUNE CONFIG Configuration of the X TUNE function Specify which functions are to be executed when X TUNE is running automatic self optimization M TUNE POS Position of the end positions Specify whether the pneumatic actuator has mechanical end positions Manual specification of the end positions If there are no mechanical end positions available these are not approached by the ...

Page 142: ...neumatic actuator has mechanical end positions or not If there are no mechanical end positions available these are not approached by the X TUNE and must be manually specified Set the end position as follows Select M TUNE POS Select ENTER The selection for ACT limit mechanical end positions available ACT nolimit mechanical end positions not available is displayed If mechanical end positions are ava...

Page 143: ...vement when the M TUNE PWM function is running When the M TUNE PWM function is running under operating pressure there is an acute risk of injury Never run X TUNE PWM while a process is running Secure the device against accidental activation Optimize the PWM signals as follows Select M TUNE PWM Select ENTER The submenu is displayed yB min aeration valve yE min bleed valve Select yB min Submenu for ...

Page 144: ... supply pressure will affect the aeration time which can be optimized in this way For the setting the effects which a change to the supply pressure has on the aeration time can be continu ously monitored via the M TUNE AIR function Continuously determine the opening and closing times as follows Select M TUNE AIR Select RUN Hold down as long as countdown 5 is running The aeration and deaeration tim...

Page 145: ...g with the Bürkert Communicator PC software on the PC This type of setting is possible for all device types and device versions To do this the device must be connected using the USB büS interface sets and the büS service interface The PC software Bürkert Communicator can be downloaded free of charge from the Bürkert homepage To do this the USB büS interface set available as an accessory is require...

Page 146: ...SPLTRNG X TIME X LIMIT SAFEPOS X CONTROL TEMP CHECK CYCLE COUNTER PV MONITOR STROKE CHECK POS MONITOR Table 50 Position controller level Inputs outputs Parameter Maintenance CAL USER INPUT SIG ERROR ADD FUNCTION BINARY IN Table 51 Inputs outputs level Industrial communication Parameter IP address DNS name MAC address Table 52 Inputs outputs level for Ethernet device only General information Mainte...

Page 147: ...Menu options activated or selected at the factory Menu options not activated or selected at the factory 2 10 sec Values set at the factory INPUT 4 20 mA 0 20 mA 0 10 V 0 5 V BUS COMM 3 BUS FAIL SafePos off SafePos on Address 4 Baud rate 4 1000 kbit s 250 kbit s 125 kbit s 500 kbit s 50 kbit s 0 127 BueS mode 4 CANopen BueS X TUNE Figure 50 Operating structure 1 3 Only for fieldbus 4 Only for BUES ...

Page 148: ...IT X TUNE ready X TUNE CONFIG X TUNE POS X TUNE PWM X TUNE AIR X TUNE DBDx ACT limit yB min time open time close POS pMIN TUNE yB TUNE yE X TUNE PARAx ACT nolimit yE min POS pMAX X TUNE LEAKAGE X TUNE Ypwm X TUNE Yfric P Q LIN Manual X TUNE Automatic X TUNE Figure 51 Operating structure 2 english ...

Page 149: ...F DIR CMD DIR ACT SPLTRNG 2 X LIMIT X TIME X CONTROL P CONTROL 1 SECURITY SAFEPOS SIG ERROR 6 BINARY IN OUTPUT 7 CAL USER SET FACTORY SERVICE BUES EXTRAS SERVICE SIMULATION Activatable auxiliary functions CHARACT DIAGNOSE Figure 52 Operating structure 3 1 Only process controller Type 8793 2 Only for position controller mode 6 Only for signal type 4 20 mA and Pt 100 7 Optional The number of outputs...

Page 150: ...er mode X CONTROL CUTOFF DIR CMD DIR ACT SPLTRNG 2 CHARACT Min 0 Rise Rise Min 0 linear Type PCO GRAPH Max 100 Fall Fall Max 100 CUT type 1 GP 1 25 Type XCO y 0 0 y 5 5 y 100 100 GP 1 33 GP 1 50 GP 25 1 GP 33 1 GP 50 1 FREE Activatable auxiliary functions Graph 0 0 100 100 X LIMIT X TIME Min 0 T open 1 0 sec Max 100 T close 1 0 sec 0 100 1 0 sec 1 0 sec english ...

Page 151: ...KDopn 0 KDcls 0 YBfric 0 YEfric 0 KP 1 00 Frequency PT 100 TN 999 9 TV 0 0 X0 0 FILTER 0 Activatable auxiliary functions 1 0 1 1 0 0 0 0 1 0 1 00 999 9 sec 0 0 sec 0 0 Teach in at work PV SCALE PVmin 0 0 PVmax 100 0 Valve closing VALUE VOLUME TEACH IN K factor 9 filling TEACH IN 0 0 l s 100 0 l s 1 0 Figure 54 Operating structure 5 1 Only process controller Type 8793 english ...

Page 152: ...UT SPmin 0 0 bumpless internal SPmax 100 0 standard zeroinit extern Activatable auxiliary functions 0 0 l s 100 0 l s 0000 Figure 55 Operating structure 6 1 Only process controller Type 8793 9 Only for signal type frequency P CONTROL SETUP PV INPUT frequency 10 Only process controller Type 8793 and for external set point value default P CONTROL SETUP SP INPUT external english ...

Page 153: ...fePos off normally open SafePos off Error on Manu Auto Error on CMD PV 1 SP 1 OUT type 0 20 mA 0 10 V 0 5 V SAFEPOS X TUNE X CO P CO 1 BIN IN type SAFEPOS SafePos on normally closed SafePos on Activatable auxiliary functions 0 Figure 56 Operating structure 7 1 Only process controller Type 8793 6 Only for signal type 4 20 mA and Pt 100 7 Optional The number of outputs varies depending on the varian...

Page 154: ...R SP CMD 11 ERR SP CMD 11 ERR PV 12 ERR PV 12 DIAG State 1 DIAG State 2 OUT type OUT type OUT SPEZ OUT SPEZ normally closed normally closed FUNC CHECK FUNC CHECK MAINTENANCE MAINTENANCE 1 0 1 0 0 100 Figure 57 Operating structure 8 11 Only if fault detection is activated for the input signal SIG ERROR SP CMD Input or PV Input Error on 12 Only process controller Type 8793 and if fault detection is ...

Page 155: ...y functions x x x x x x x x x Value is set for X TUNE automatic or manual Value is set by the manufacturer during device specific calibration EXTRAS Figure 58 Operating structure 9 1 Only process controller Type 8793 2 Only for position controller mode 10 Only process controller Type 8793 and for external set point value default P CONTROL SETUP SP INPUT external 13 The signal type is displayed whi...

Page 156: ...OS CMD POS t CLOCK INPUT 16 PV 1 SP 1 P TUNE 1 P LIN 1 SP PV 1 SP PV t 1 TEMP X TUNE POS SENSOR DIGITAL 2 ANALOG 2 TAN CORRECTION 3 ALPHA 3 30 tan corr off tan corr on Figure 59 Operating structure 10 1 Only process controller Type 8793 2 Only Type 8793 Remote 3 All devices other than Remote 16 Not for fieldbus english ...

Page 157: ...P LIN 1 TEMP X TUNE START UP ITEMS DISP MODE DISP LIGHT POS normal on CMD inverse off user active CMD POS CMD POS t PV 1 SP 1 SP PV 1 SP PV t 1 Activatable auxiliary functions SERVICE SIMULATION Figure 60 Operating structure 11 1 Only process controller Type 8793 16 Not for fieldbus english ...

Page 158: ...SIM Gain Triangle Mixed SIM Delay 50 0 80 0 5 0 sec 1 0 1 0 sec DIAGNOSE D MSG 17 CONFIG MSG 17 SERVICE TIME SERVICE TIME FAILURE TRAVEL ACCU FUNC CHECK CYCLE COUNTER OUT SPEZ MAINTENANCE TEMP CHECK STROKE CHECK PV MONITOR 1 POS MONITOR ADD DIAGNOSE TRAVEL ACCU Figure 61 Operating structure 12 1 Only process controller Type 8793 17 The submenu lists only the activated diagnostic functions english ...

Page 159: ...CYCLE COUNTER OUT SPEZ OUT SPEZ OUT SPEZ MAINTENANCE MAINTENANCE MAINTENANCE TEMP CHECK ADD DIAGNOSE FAILURE FAILURE FAILURE FUNC CHECK FUNC CHECK FUNC CHECK OUT SPEZ OUT SPEZ OUT SPEZ MAINTENANCE MAINTENANCE MAINTENANCE STROKE CHECK PV MONITOR 1 POS MONITOR Figure 62 Operating structure 13 1 Only process controller Type 8793 english ...

Page 160: ...CU CYCLE COUNTER TEMP CHECK STROKE CHECK PV MONITOR 1 POS MONITOR 90d 00h 20 0 mm 1 000 000 1 000 000 cm Activatable diagnostic functions HISTOGRAM SERVICE TIME TRAVEL ACCU CYCLE COUNTER POS Class LIMIT HUB DIR Class NEXT M LIMIT LIMIT SYSTEM DATA HISTORY NEXT M NEXT M HISTORY HISTORY TEMP CHECK Figure 63 Operating structure 14 english ...

Page 161: ...OL ZERO TEMP MIN TEMP MIN MAX TOL MAX MAX MAX MIN MIN LIMIT LIMIT LIMIT HISTORY HISTORY Activatable diagnostic functions 60 0 C 0 5 0 0 C 0 5 POS MONITOR PV MONITOR 1 DEADBAND DEADBAND COMP TIME COMP TIME HISTORY HISTORY 2 0 2 0 10 0 sec 10 0 sec Figure 64 Operating structure 15 1 Only process controller Type 8793 english ...

Page 162: ...llowing installation ensure a controlled restart Network speed 10 100 mbps Auto negotiation Yes Switch function Yes Network diagnostics Yes via error telegram MAC ID Individual identification number stored in the module and on the outside of the device see type label Device name Ethernet factory settings Positioner process controller name can be changed 19 2 Industrial Ethernet PROFINET IO specifi...

Page 163: ...pported BOOTP Supported Transfer rate 10 and 100 mbit s Duplex modes Half duplex full duplex auto negotiation MDI modes MDI MDI X Auto MDIX Data transport network Ethernet II IEEE 802 3 Address Conflict Detection ACD Supported DLR ring topology Supported CIP reset service Identity object reset service Types 0 and 1 Modbus TCP specifications Modbus function codes 1 2 3 4 6 15 16 23 Operation mode M...

Page 164: ...8 socket 4 pole optional for remote variant only 4 2 1 Figure 65 Fieldbus connection positioner Type 8792 19 2 2 Connection diagram Type 8793 4 3 1 2 X7 M12 fieldbus connection 2 port Ethernet switch X1 M12 circular plug 8 pole 1 2 3 4 5 6 7 8 X5 M8 circular plug 4 pole 2 4 3 1 X4 M8 socket 4 pole optional for remote variant only 4 2 1 3 Figure 66 Fieldbus connection process controller Type 8793 e...

Page 165: ...put 0 5 V log 0 10 30 V log 1 GND identical with pin 3 5 6 6 Binary input Output signals to the control center e g PLC assigned for the binary output option only 7 Binary output 1 referring to Pin 3 8 7 0 24 V 0 24 V 8 Binary output 2 referring to Pin 3 Table 55 X1 M12 circular plug 8 pole operating voltage 19 5 X4 M8 socket 4 pole optional Remote sensor for remote variant only Connection of the d...

Page 166: ...s actual 2 4 20 mA 3 blue Not assigned 4 black Process actual 4 GND 4 20 mA Frequency internally supplied 1 brown 24 V sensor power supply Switch on left 1 24 V 2 white Clock input 2 Clock 3 blue Clock input GND 3 Clock GND identical to GND operating voltage 4 black Not assigned Frequency exter nally supplied 1 brown Not assigned Switch on right 2 white Clock input 2 Clock 3 blue Clock input 3 Clo...

Page 167: ...on the device Display is displayed approx every 3 seconds Device state Explanation Troubleshooting BUS no connection Online no connection to the master Device is connected correctly to the bus the network access procedure has ended without errors however there is no established connection to the master New connection established by master BUS critical err Critical bus error Other device with the s...

Page 168: ... outputs option 19 7 2 BUS COMM Settings on Type 8792 8793 Set the following menu options in the BUS COMM menu for start up of the EtherNet variant BUS FAIL Activate or deactivate approach of the safety position Selection SafePos off The actuator remains in the position which corresponds to the set point value last transferred default setting Selection SafePos on If there is a fault in the bus com...

Page 169: ...nstructions DANGER Risk of injury due to electric shock Before reaching into the system switch off the power supply and secure to prevent reactivation Observe the applicable accident prevention regulations and safety regulations for electrical equipment WARNING Risk of injury from improper installation Installation may be carried out by authorized technicians only and with the appropriate tools Ri...

Page 170: ... earth 4 2 1 3 X1 M12 circular plug 8 pole 3 4 1 2 5 6 7 8 Figure 68 Connection diagram Type 8792 20 3 1 2 Connection diagram Type 8793 X5 M8 circular plug 4 pole 2 4 3 1 X3 M12 circular plug 5 pole 2 3 4 1 5 X4 M8 socket 4 pole optional for remote variant only FE functional earth 4 2 1 3 X1 M12 circular plug 8 pole 3 4 1 2 5 6 7 8 Figure 69 Connection diagram Type 8793 english ...

Page 171: ...inary output option only 7 Binary output 1 referring to Pin 3 8 7 0 24 V 0 24 V 8 Binary output 2 referring to Pin 3 Table 60 X1 M12 circular plug 8 pole operating voltage 20 4 1 X3 circular plug in connector M12x1 5 pole X3 circular plug in connector M12x1 5 pole male Pin Wire color Assignment 1 CAN shield CAN shield 2 Not assigned 3 Black Black GND CAN_GND 4 White White CAN_H 5 Blue Blue CAN_L T...

Page 172: ... 3 3 4 Not assigned Table 63 Pin assignment X4 M8 socket 4 pole analog potentiometer type position sensor 20 6 X5 M8 circular plug 4 pole Process actual value for Type 8793 Input type Pin Wire color Assignment DIP switches On the device side External circuit 4 20 mA internally supplied 1 brown 24 V transmitter power supply Switch on left 1 2 3 4 Transmitter GND 2 white Output from transmitter 3 bl...

Page 173: ... available SIM card can be used to save and transfer device specific values and user settings to a different device A SIM card which has just been inserted is checked by the device for existing data Based on this these data are accepted or overwritten The SIM card does not contain any data The existing device specific values and user settings are saved on the SIM card The SIM card contains data wh...

Page 174: ...oint value last transferred default setting Selection SafePos on If there is a fault in the bus communication the behavior of the actuator depends on the activation of the SAFEPOS auxiliary function See chapter 16 1 13 SAFEPOS Inputting the safety position SAFEPOS activated The actuator moves to the safety position which is specified in the SAFEPOS auxiliary function SAFEPOS deactivated The actuat...

Page 175: ... Select INPUT The input screen is opened Increase value or reduce value Enter a device address value between 0 and 127 Select OK Return to BUS COMM Select baud rate Select BAUD RATE Select ENTER The input screen is opened Select BAUD RATE 50 kBd 125 kBd 250 kBd 500 kBd 1000 kBd Select SELECT The selection is now marked by a filled circle Select EXIT Return to BUS COMM You have set BUS COMM With bü...

Page 176: ...intenance free 21 3 Error messages Display Causes of error Remedy min Minimum input value has been reached Do not reduce value further max Maximum input value has been reached Do not increase value further CMD error Signal fault Set point value positioner position controller Check signal SP error Signal fault Set point value process controller Check signal PV error Signal fault Actual value proces...

Page 177: ...tion range of the position sensor has exceeded 180 Correct attachment of the position sensor shaft to the actuator see chapter 12 2 and 12 3 X TUNE ERROR 6 The end positions for POS MIN and POS MAX are too close together Check compressed air supply X TUNE ERROR 7 Incorrect assignment POS MIN and POS MAX To determine POS MIN and POS MAX move the actuator in the direction indicated on the display X ...

Page 178: ...of the valve stroke was not reached as Compressed air failure during P Q LIN Autotune X TUNE was not run Check compressed air supply Run Autotune X TUNE Table 67 Error message for P Q LIN process controller Type 8793 21 3 3 Error messages while the P TUNE function is running Display Causes of error Remedy TUNE err break Manual termination of self optimization by pressing the EXIT key P TUNE ERROR ...

Page 179: ... message Ethernet IP PROFINET Modbus TCP For BUES device Display is displayed approx every 3 seconds Device state Explanation Troubleshooting BUS no connection Online no connection to the master Device is connected correctly to the bus the network access procedure has ended without errors however there is no established connection to the master New connection established by master BUS critical err...

Page 180: ... not switch Binary output Current 100 mA Short circuit Check binary output connection Applies only to devices with process controller Device is not operating as a con troller despite correctly imple mented settings P CONTROL menu option is in the main menu The device is therefore operating as a process controller and expects a process actual value at the corre sponding input Remove P CONTROL menu ...

Page 181: ...ug to M12 socket Connection cable length 1 m 772404 Connection cable length 3 m 772405 Connection cable length 5 m 772406 Connection cable length 10 m 772407 Bürkert Communicator Information at www buerkert de Table 72 Accessories 22 1 Communication software The PC operating program Bürkert Communicator is designed for communication with Bürkert devices A detailed description for installing and op...

Page 182: ...eding or dropping below the permitted storage temperature 24 STORAGE NOTE Incorrect storage may damage the device Store the device in a dry and dust free location Storage temperature 20 to 65 C 25 DISPOSAL Dispose of the device and packaging in an environmentally friendly manner NOTE Damage to the environment caused by device components contaminated with media Observe applicable disposal regulatio...

Page 183: ...bes the flow rate of water through a component in m h at a pressure difference of p 1 bar and T 20 C The kVS value is additionally used for continuous valves This indicates the kV value when the continuous valve is fully open Depending on the specified data it is necessary to differentiate between the two following cases when selecting the valve a The pressure values p1 and p2 known before and aft...

Page 184: ...ing valves may greatly impair the control behavior of continuous valves The upper limit for the kVS value of the continuous valve can be specified in practice via the so called valve authority Ψ 3 k k k p p S V a V a V 0 0 V ψ p V0 Pressure drop over the fully opened valve p 0 Pressure drop over the entire equipment If the valve authority Ψ 0 3 the continuous valve has been oversized When the cont...

Page 185: ... Xd Characteristic and step response of the P portion of a PID controller Characteristic Step response Xd X Ymax Ymin Y0 Kp Xd t t Xd Y Proportional range Xd Y Adjustment range Y Figure 71 Characteristic and step response of the P portion of a PID controller Properties In theory a pure P controller functions instantaneously i e it is quick and therefore dynamically favorable It has a constant cont...

Page 186: ...n of a PID controller Characteristic Step response X Xd Ymax Ymin Adjustment range Y Xd dY dt Figure 72 Characteristic and step response of the I portion of a PID controller Properties A pure I controller completely eliminates the effects of any malfunctions which occur It therefore has a favorable static behavior On account of its final control speed control it operates slower than the P controll...

Page 187: ...r the D effect is Characteristic and step response of the D portion of a PID controller Step response Ramp response X Xd Y Y X t t Figure 73 Characteristic and step response of the D portion of a PID controller Properties A controller with a D portion responds to changes in the control variable and may therefore reduce any control differences more quickly english ...

Page 188: ...ired to obtain an equally large change in the actuating variable by the I portion as occurs due to the P portion Tv Derivative time Time by which a certain actuating variable is reached earlier on account of the D portion than with a pure P controller Step response and ramp response of the PID controller Step response of the PID controller Ramp response of the PID controller Xd X D portion X Y I p...

Page 189: ...a delay T Function 9 t d d X d d K Y t d Y d T Superposition of P I and DT portions X Xd Y t t Xd T T Figure 75 Characteristic of superposition of P I and DT portions 26 2 5 2 Function of the real PID controller 10 t d d X d v T t d d X n T 1 d X p K Y t d Y d T Superposition of P I and DT portions X Xd Y t t Tn Kp Xd Xd T Kp Figure 76 Characteristic of step response of the real PID controller eng...

Page 190: ...26 3 1 Adjustment rules according to Ziegler and Nichols oscillation method With this method the controller parameters are adjusted on the basis of the behavior of the control circuit at the stability limit The controller parameters are first adjusted so that the control circuit starts to oscillate The occurring critical characteristic values suggest a favorable adjustment of the controller parame...

Page 191: ...s P controller Kp 0 5 Kcrit PI controller Kp 0 45 Kcrit Tn 0 85 Tcrit PID controller Kp 0 6 Kcrit Tn 0 5 Tcrit Tv 0 12 Tcrit Table 73 Setting the parameters according to Ziegler and Nichols The adjustment rules of Ziegler and Nichols have been determined for P controlled systems with a time delay of the first order and dead time However they apply only to controllers with a disturbance reaction an...

Page 192: ...ogress of the control variable actuating variable jump Procedure Switch controller to MANUAL MANU operating state Output the actuating variable jump and record control variable with a recorder If progresses are critical e g danger of overheating switch off promptly Note that in thermally slow systems the actual value of the control variable may continue to rise after the controller has been switch...

Page 193: ... Tu Ks Kp 0 3 Tg Tu Ks Kp 0 7 Tg Tu Ks Kp 0 7 Tg Tu Ks PI controller Kp 0 35 Tg Tu Ks Kp 0 6 Tg Tu Ks Kp 0 6 Tg Tu Ks Kp 0 7 Tg Tu Ks Tn 1 2 Tg Tn 4 Tu Tn Tg Tn 2 3 Tu PID controller Kp 0 6 Tg Tu Ks Kp 0 95 Tg Tu Ks Kp 0 95 Tg Tu Ks Kp 1 2 Tg Tu Ks Tn Tg Tn 2 4 Tu Tn 1 35 Tg Tn 2 Tu T v 0 5 Tu T v 0 42 Tu T v 0 47 Tu T v 0 42 Tu Table 74 Setting the parameters according to Chien Hrones and Reswick...

Page 194: ... 8792 8793 REV 2 27 TABLE FOR YOUR SETTINGS ON THE POSITIONER 27 1 Settings of the freely programmed characteristic Node position set point value as Valve stroke Date Date Date Date 0 5 10 15 20 25 30 35 40 45 50 55 60 65 70 75 80 85 90 95 100 english ...

Page 195: ... process controller Type 8792 8793 REV 2 28 TABLE FOR YOUR SETTINGS ON THE TYPE 8793 PROCESS CONTROLLER 28 1 Set parameters of the process controller Date Date Date Date KP TN TV X0 DBND DP PVmin PVmax SPmin SPmax UNIT K factor FILTER INP english ...

Page 196: ...www burkert com ...
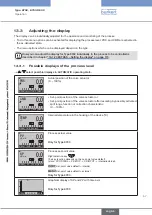
Reviews: