


Notes:
• If the migration target TeraStation contains shared folders, users, and groups that share the same name as
the transferred settings, the existing settings will be overwritten. If the users and groups meet the following
conditions, the settings will not be transferred: users that share the same name with groups already existing
on the migration target TeraStation, and groups that share the same name with users on the migration target
TeraStation.
• If the migration target TeraStations have already added some shared folders, users, and groups, the transferred
settings may exceed the maximum number of allowed shared folders, users, or groups. After migration finishes,
open Settings and verify that all settings were properly transferred.
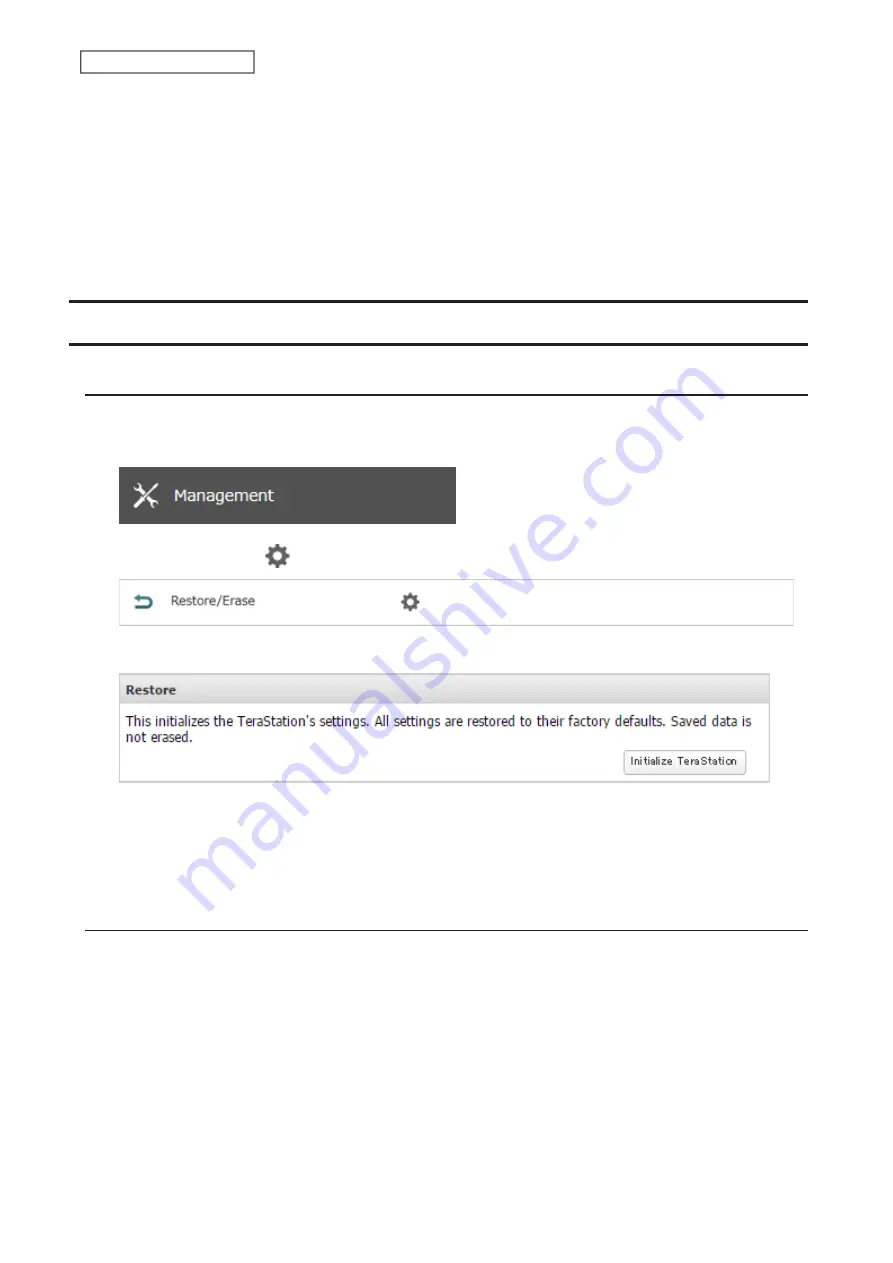
Restoring Factory Defaults
Initializing from Settings
To initialize the TeraStation to its factory defaults from Settings, follow this procedure.
1
From Settings, click
Management
.
2
Click the settings icon (
) to the right of “Restore/Erase”.
3
Click
Initialize TeraStation
.
4
The “Confirm Operation” screen will open. Enter the confirmation number, then click
OK
.
5
The TeraStation will restore its factory default settings. The I26 message will appear on the LCD panel when
restoring settings. When it disappears, the initialization is completed.
Initializing with the USB Initialization Drive
An initialization drive will restore the settings on your TeraStation to their factory defaults. You can initialize them
without logging in to Settings. Follow the procedure below to create an initialization drive.
Notes:
• Initializing settings with the USB drive is available for the same TeraStation unit that created the initialization
drive.
• Normally, making and using an initialization drive will not affect data on the TeraStation. However, always back up
your data regularly!
• This USB drive can be used to recover the system if your TeraStation doesn’t boot at all. In this case, if the data
partition is damaged, then all your data will be deleted by the recovery process.
176
Chapter 7 Advanced Features
Summary of Contents for TeraStation 6000 Series
Page 32: ...3 Click Add Group 31 Chapter 3 File Sharing...
Page 120: ...2 Click Time Machine 119 Chapter 5 Backup...
Page 121: ...3 Click Select Backup Disk 4 Select the TeraStation then click Use Disk 120 Chapter 5 Backup...
Page 123: ...7 Time Machine will count down from 120 seconds then backup will begin 122 Chapter 5 Backup...
Page 132: ...5 Click Edit 131 Chapter 6 Remote Access...
Page 144: ...4 Click the Options tab 5 Click Edit 143 Chapter 6 Remote Access...
Page 153: ...4 Click the Options tab 152 Chapter 6 Remote Access...
Page 154: ...5 Click Edit 153 Chapter 6 Remote Access...
Page 169: ...11Click the NFS Rules tab 12Click Add 168 Chapter 7 Advanced Features...


