100
Chapter 5 Backup
Before Configuring Failover
Use the same LAN ports for transferring data and configure both TeraStations with static IP addresses for the
purposes of failover.
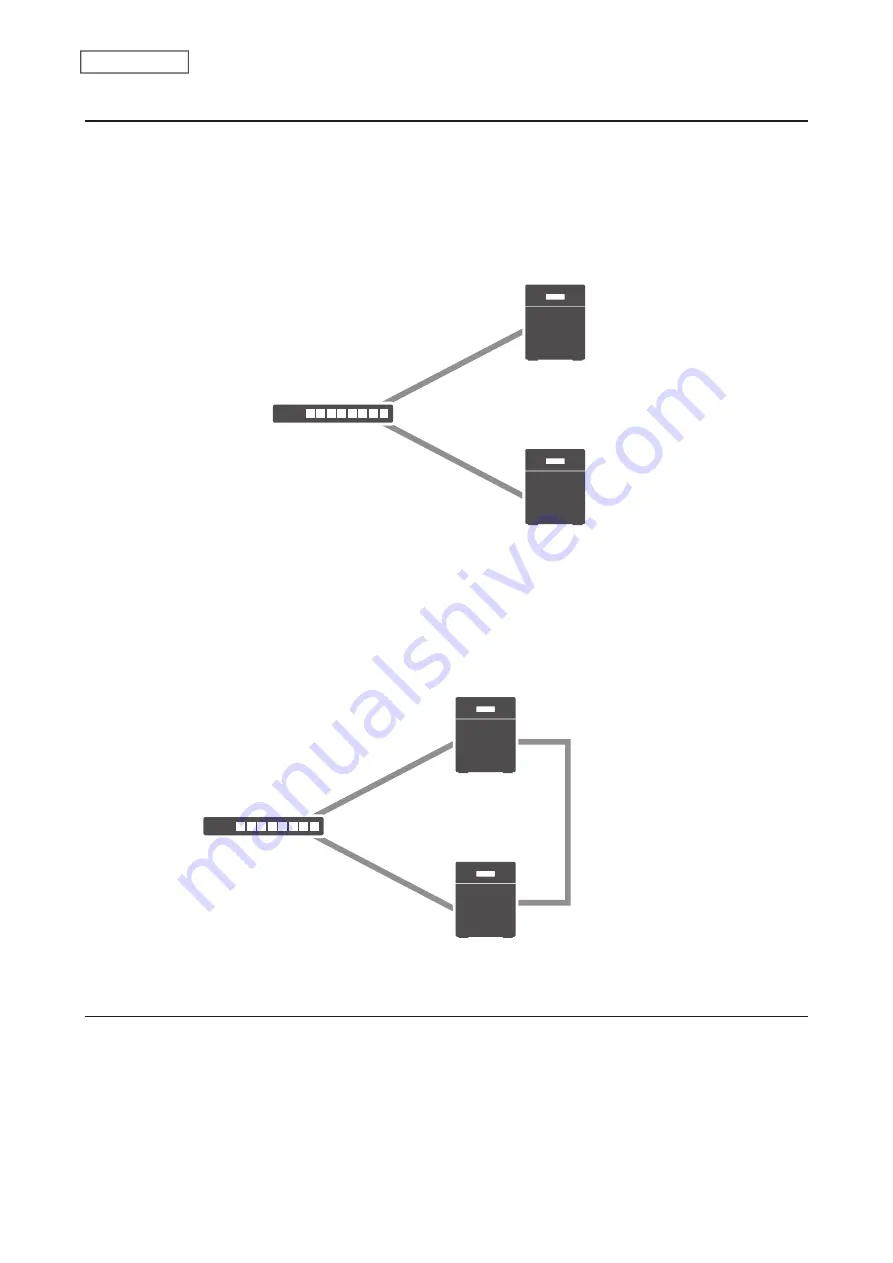
Using the Same LAN Port for Both File Sharing and Failover
Using this setup, if the main TeraStation fails, the backup TeraStation will replace it completely. The backup
TeraStation will be updated over normal network traffic.
Main
Backup
Network
LAN port 1
(Static IP)
LAN port 1
(Static IP)
Using Different LAN Ports Between File Sharing and Failover
With this setup, the backup TeraStation and main TeraStation are connected by a second Ethernet cable connecting
their LAN port 2. Updating is done over this dedicated network path, so updates are quicker and don’t interfere with
normal network traffic.
LAN port 2
(Static IP)
LAN port 2
(Static IP)
Main
Backup
Network
LAN port 1
(Static IP)
LAN port 1
(Static IP)
Usage Restrictions
Functional Restrictions
Failover is not available when any of the following functions are enabled:
Replication, sleep mode, encrypted drive volume, LVM volume, iSCSI volume, port trunking, Amazon S3
*
, Dropbox
Sync, Microsoft Azure Storage Sync, Microsoft OneDrive Sync, hot spare, access restrictions by Active Directory
domain
Summary of Contents for TeraStation 3010
Page 29: ...28 Chapter 3 File Sharing 3 Click Create User...
Page 32: ...31 Chapter 3 File Sharing 3 Click Add Group...
Page 71: ...70 Chapter 4 Storage Management 6 Click Edit under NAS Volume 7 Click Create Volume...
Page 88: ...87 Chapter 5 Backup 4 Enter the backup device access key and click OK 5 Click Add...
Page 111: ...110 Chapter 5 Backup 3 Click Select Backup Disk 4 Select the shared folder then click Use Disk...
Page 113: ...112 Chapter 5 Backup 7 Time Machine will count down from 120 seconds then backup will begin...
Page 125: ...124 Chapter 6 Cloud Services and Remote Access 5 Click Edit...
Page 137: ...136 Chapter 6 Cloud Services and Remote Access 4 Click the Options tab 5 Click Edit...
Page 147: ...146 Chapter 6 Cloud Services and Remote Access 4 Click the Options tab...
Page 148: ...147 Chapter 6 Cloud Services and Remote Access 5 Click Edit...
Page 176: ...175 Chapter 7 Advanced Features 11Click the NFS Rules tab 12Click Add...
Page 205: ...204 Chapter 7 Advanced Features 3 Click FQDN Mapping 4 Click Add...


