


Chapter 4 Backup
Backing Up Data on the LinkStation
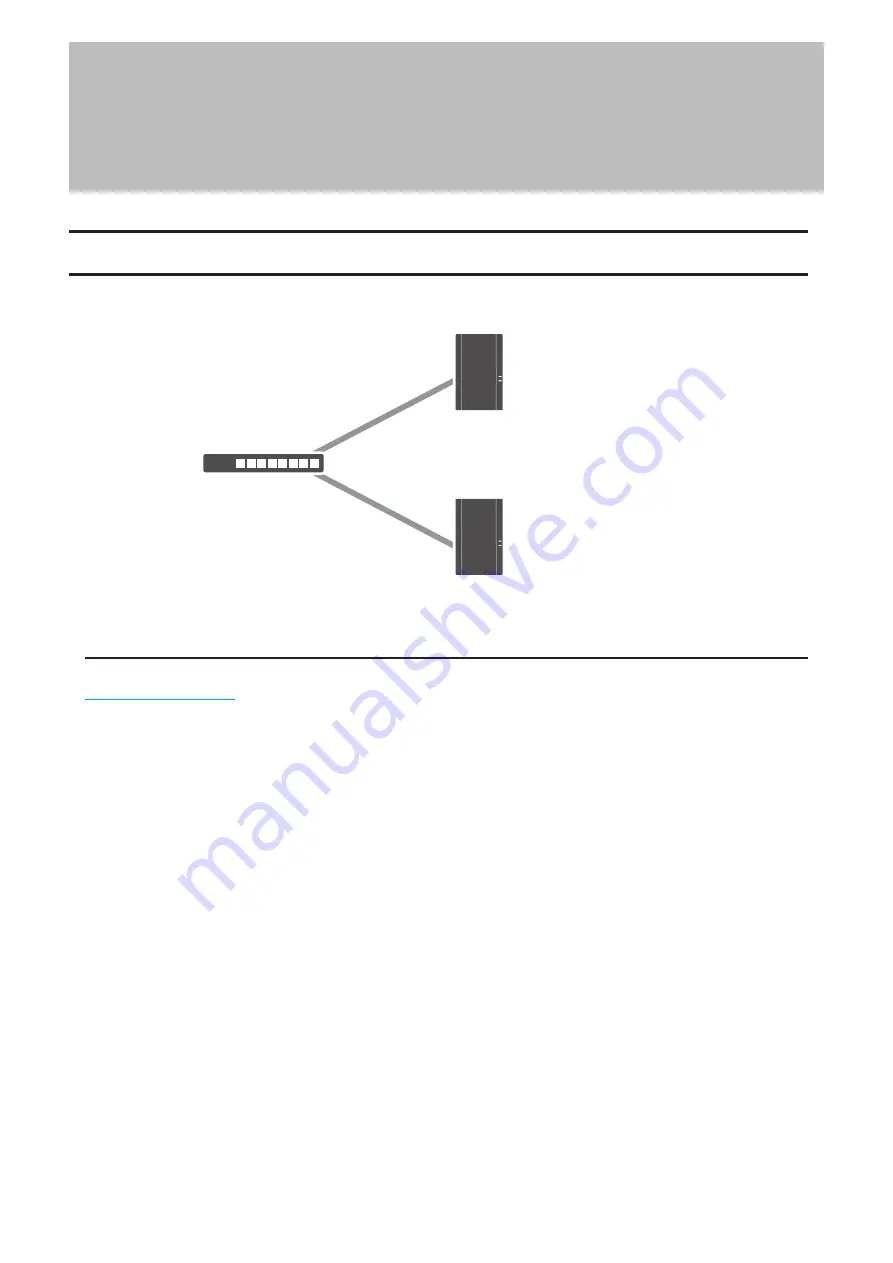
You can back up the LinkStation folders to another shared folder on the same LinkStation, a connected USB drive, or
a shared folder on another Buffalo NAS device, either on the same network or on another network.
Backup Source
Backup Destination
Network
Backup Modes
The following types of backup are available from this LinkStation. To restore data from backup, refer to the
section below.
Full Backup
All files in the source will be backed up to the destination. You can specify how many backup versions to keep from
1–400, or select “Unlimited” to keep all backups until the drive is full. If you specify a number of backup versions,
the backup destination folder should be on the same LinkStation or on an external USB drive attached to that
LinkStation.
The backup data will be stored in the folder whose name will be the backup date and time.
•
Folders available as backup sources:
◦
Shared folder on the backup source LinkStation
◦
USB drive connected to the backup source LinkStation
*
◦
Shared folder on another Buffalo NAS device
**
•
Folders available as backup destinations:
◦
Shared folder on the backup source LinkStation
**
◦
USB drive connected to the backup source LinkStation
**
◦
Shared folder on another Buffalo NAS device
**
*You can select up to the second level of folders. However, if the folder name of a second level folder contains
symbols, that folder may not appear as the target folder.
**The folder should have the “Backup” checkbox selected under “LAN Protocol Support” on the shared folder
settings.
67
Chapter 4 Backup
Summary of Contents for Link Station LS710D
Page 24: ...3 Click Create Folder 23 Chapter 2 File Sharing...
Page 31: ...2 Tap Create User 30 Chapter 2 File Sharing...
Page 34: ...3 Click Add Group 33 Chapter 2 File Sharing...
Page 73: ...5 Click Add 72 Chapter 4 Backup...
Page 79: ...3 Click Edit 4 Click Browse 5 Select the shared folder and click OK 78 Chapter 4 Backup...
Page 81: ...2 Click Time Machine 80 Chapter 4 Backup...
Page 82: ...3 Click Select Backup Disk 4 Select the shared folder then click Use Disk 81 Chapter 4 Backup...
Page 93: ...4 Click the Options tab 5 Click Edit 92 Chapter 5 Cloud Services and Remote Access...
Page 97: ...7 Enter the desired job name and click Next 96 Chapter 5 Cloud Services and Remote Access...
Page 98: ...8 Select Backup and click Next 97 Chapter 5 Cloud Services and Remote Access...
Page 100: ...10Specify the sync period and click Next 99 Chapter 5 Cloud Services and Remote Access...
Page 106: ...7 Enter the desired job name and click Next 105 Chapter 5 Cloud Services and Remote Access...
Page 107: ...8 Select Restore and click Next 106 Chapter 5 Cloud Services and Remote Access...
Page 112: ...6 Enter the desired job name and click Next 111 Chapter 5 Cloud Services and Remote Access...
Page 115: ...9 Specify the sync period and click Next 114 Chapter 5 Cloud Services and Remote Access...
Page 122: ...4 Click the Options tab 5 Click Edit 121 Chapter 5 Cloud Services and Remote Access...
Page 127: ...3 Tap NAS Setup 126 Chapter 5 Cloud Services and Remote Access...
Page 130: ...129 Chapter 5 Cloud Services and Remote Access...
Page 147: ...6 Select a file to move and click Action 7 Click Move 146 Chapter 6 Multimedia...
Page 152: ...7 Click Delete 8 Click Delete again 151 Chapter 6 Multimedia...


