Chapter 7 Settings Backup/Restoration
Saving and Applying Settings
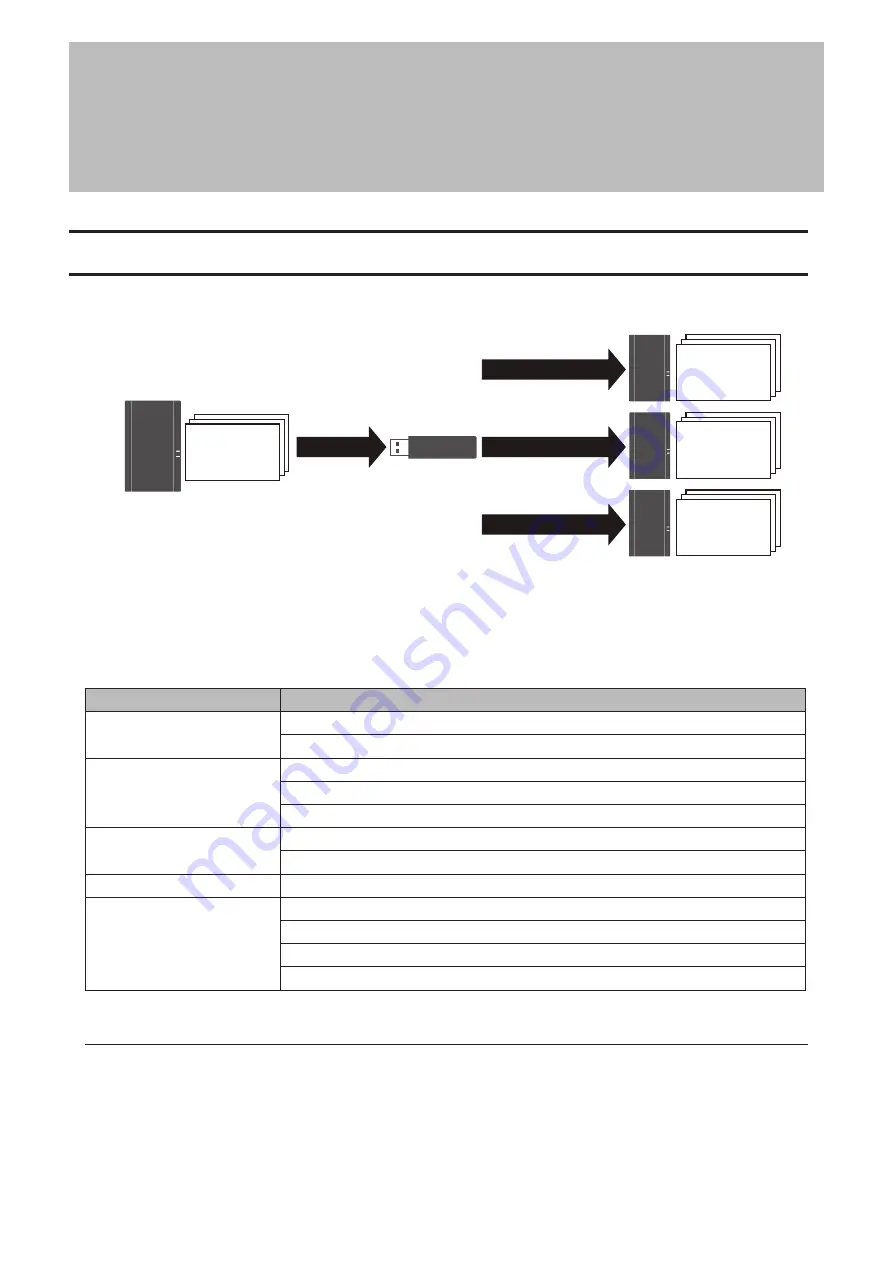
The LinkStation’s settings can be saved to a USB memory device and applied to another Buffalo NAS device of the
same series. Use this feature to back up or copy settings to a new Buffalo NAS device.
Save
Settings &
Firmware
Settings &
Firmware
Settings &
Firmware
Settings &
Firmware
Restore
Restore
Restore
Write down the drive configuration (number of drives, RAID, LVM, etc.) of the Buffalo NAS device whose settings
were saved. Make sure that any Buffalo NAS devices that you apply these settings to have the exact same drive
configuration before you apply the settings. If the drive configuration is different, you may get unexpected results.
Also, make sure the USB memory device to save settings to is compatible with USB 3.2 Gen 1/3.1 Gen 1/3.0
specifications.
The following settings are not saved or applied:
Category
Settings
File Sharing
All settings for USB drives
Shared folders created on LVM volumes
Storage
All settings in “Drives”
All settings in “LVM”
USB drive information
Cloud Storage
Job settings of Dropbox Sync
Job settings of Microsoft OneDrive Sync
Network
All settings except for Wake-on-LAN and MTU size settings in “IP Address”
Management
The LinkStation’s hostname
All settings in “Power Management”
All settings in “SSL”
Display language in Settings
Saving Settings
1
Insert a 1 GB or larger USB memory device (not included) into a USB 3.2 Gen 1 port on the LinkStation.
Note:
All data on the USB memory device will be erased!
152
Chapter 7 Settings Backup/Restoration
Summary of Contents for Link Station LS710D
Page 24: ...3 Click Create Folder 23 Chapter 2 File Sharing...
Page 31: ...2 Tap Create User 30 Chapter 2 File Sharing...
Page 34: ...3 Click Add Group 33 Chapter 2 File Sharing...
Page 73: ...5 Click Add 72 Chapter 4 Backup...
Page 79: ...3 Click Edit 4 Click Browse 5 Select the shared folder and click OK 78 Chapter 4 Backup...
Page 81: ...2 Click Time Machine 80 Chapter 4 Backup...
Page 82: ...3 Click Select Backup Disk 4 Select the shared folder then click Use Disk 81 Chapter 4 Backup...
Page 93: ...4 Click the Options tab 5 Click Edit 92 Chapter 5 Cloud Services and Remote Access...
Page 97: ...7 Enter the desired job name and click Next 96 Chapter 5 Cloud Services and Remote Access...
Page 98: ...8 Select Backup and click Next 97 Chapter 5 Cloud Services and Remote Access...
Page 100: ...10Specify the sync period and click Next 99 Chapter 5 Cloud Services and Remote Access...
Page 106: ...7 Enter the desired job name and click Next 105 Chapter 5 Cloud Services and Remote Access...
Page 107: ...8 Select Restore and click Next 106 Chapter 5 Cloud Services and Remote Access...
Page 112: ...6 Enter the desired job name and click Next 111 Chapter 5 Cloud Services and Remote Access...
Page 115: ...9 Specify the sync period and click Next 114 Chapter 5 Cloud Services and Remote Access...
Page 122: ...4 Click the Options tab 5 Click Edit 121 Chapter 5 Cloud Services and Remote Access...
Page 127: ...3 Tap NAS Setup 126 Chapter 5 Cloud Services and Remote Access...
Page 130: ...129 Chapter 5 Cloud Services and Remote Access...
Page 147: ...6 Select a file to move and click Action 7 Click Move 146 Chapter 6 Multimedia...
Page 152: ...7 Click Delete 8 Click Delete again 151 Chapter 6 Multimedia...


