Owner’s Manual
ONLY QUALIFIED ELECTRICIANS OR CONTRACTORS
SHOULD ATTEMPT INSTALLATION!!
This manual should remain with the unit.
Liquid-cooled, Prepackaged
Standby Generators
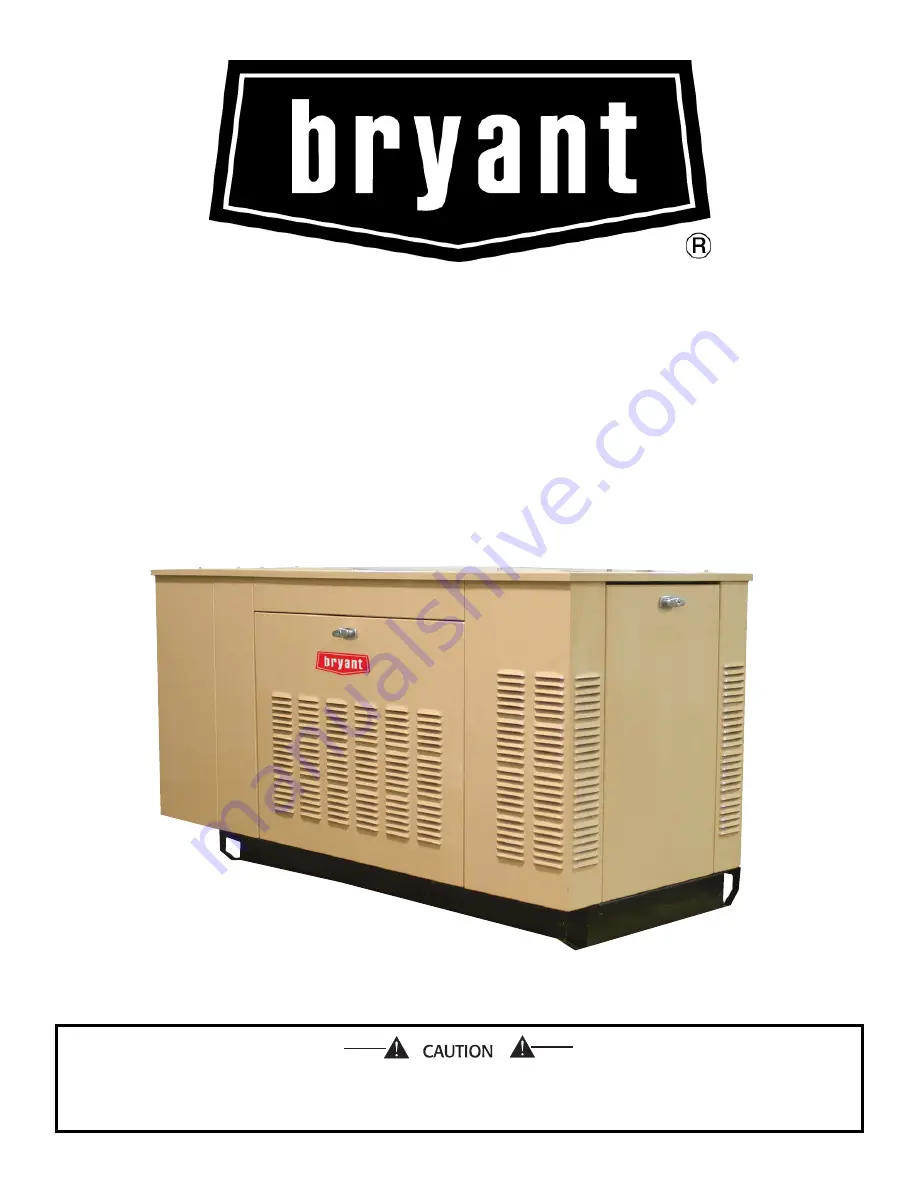
Model No. ASPAS1BBL025 (25kW)
Page 1: ...Owner s Manual ONLY QUALIFIED ELECTRICIANS OR CONTRACTORS SHOULD ATTEMPT INSTALLATION This manual should remain with the unit Liquid cooled Prepackaged Standby Generators Model No ASPAS1BBL025 25kW...
Page 2: ...out potential fire hazard This symbol points out potential electrical shock hazard The operator is responsible for proper and safe use of the equipment Bryant strongly recommends that the operator rea...
Page 3: ...6 Total Circuit Isolation Method 10 2 7 Grounding the Generator 10 2 8 Generator AC Neutral Connections 10 2 9 Transfer Switch Signal Connections 10 2 10 Battery Installation 10 2 11 Preparation Befor...
Page 4: ...must be piped safely away from any building or enclosure that houses the generator to an area where people animals etc will not be harmed This exhaust system must be installed properly in strict com...
Page 5: ...n conduct electricity resulting in electric shock or may get caught in moving components causing injury FIRE HAZARDS Keep a fire extinguisher near the generator at all times Do NOT use any carbon tetr...
Page 6: ...isture dust dirt lint construction grit and cor rosive vapors If a transfer switch is not included one may be pur chased separately from a dealer 1 3 AUTOMATIC SYSTEM OPERATION When this generator alo...
Page 7: ...ut down under the fol lowing conditions low oil pressure high coolant tem perature engine overspeed low coolant level or over crank Figure 1 3 Figure 1 3 Engine Protective Devices 1 7 1 LOW OIL PRESSU...
Page 8: ...c Store and unpack cartons with the proper side up as noted on the shipping carton 1 9 LIFTING THE GENERATOR When lifting or hoisting equipment is used be careful not to touch overhead power lines The...
Page 9: ...l brass hose fitting into Port 2 6 Install pipe plug into Port 1 7 Connect carburetor gas hose to brass fitting 8 Tighten all clamps and plugs 9 Make sure fuel supply is of the proper pressure and typ...
Page 10: ...rator is operating Failure to isolate the electric system by these means will result in damage to the generator and may also result in injury or death to utility workers due to backfeed of electrical...
Page 11: ...hor bolts Be sure the bolts are long enough to retain the compartment The slab should be at least six inches thick and should extend beyond the enclosure to a distance of at least three inches on all...
Page 12: ...vice entrance If the neutral wire is grounded and one of the phase loads becomes grounded the excessive current opens the load circuit breaker or collapses the generator field The actual result depend...
Page 13: ...ea dried Lead acid batteries present a risk of fire because they generate hydrogen gas The fol lowing procedure are to be followed DO NOT SMOKE when near batteries DO NOT cause flame or spark in batte...
Page 14: ...FF MANUAL SWITCH Use this three position switch as follows Set the switch to AUTO for fully automatic opera tion See Automatic Operation Section 3 5 Set switch to MANUAL position to crank and start th...
Page 15: ...sed to indicate the presence of utility sensing at the PCB when the switch is either in the AUTO or MANUAL modes The LED will flash at the rate of 1 2 second on 1 2 second off if the utility sensing l...
Page 16: ...ge has been restored electrical loads may be transferred back to that source and the generator can be shut down as fol lows Verify that utility power supply voltage to the trans fer switch has been po...
Page 17: ...tion is marked on the switch and the fac tory settings are also shown in Figure 3 3 Switch Position 1 Selects the generator alternator output frequency and is factory pre set for 60 Hz Switch Position...
Page 18: ...AUST MANIFOLD PROCEDURE 1 If necessary clean gasket surfaces on exhaust manifold and cylinder head 2 Install exhaust manifold and exhaust manifold gasket 3 Install fasteners NOTE Exhaust manifold fast...
Page 19: ...e oil fill cap Add the recommended oil to bring oil level up to the FULL mark DO NOT FILL ABOVE THE FULL MARK See Engine Oil Recommen dations for recommended oils 4 7 2 BATTERY FLUID Check battery ele...
Page 20: ...emove OIL DRAIN HOSE from its retaining clip 2 Loosen and remove OIL DRAIN HOSE CAP Drain oil completely into suitable container 3 When all oil has drained install and tighten OIL DRAIN HOSE CAP and r...
Page 21: ...losive hydrogen gas while charging The gas can form an explosive mixture around the battery for several hours after charging Any spark heat or flames can ignite the gas and cause an explosion which ca...
Page 22: ...tery that follows NOTE The BCI number should be located directly on the battery Section 4 Maintenance Bryant Liquid cooled 25 kW Generator BCI Group No CCA 26 525 0 deg F PERIODIC REPLACEMENT PARTS Pa...
Page 23: ...y to ATS Remove the negative battery cable The battery charger must be turned off BEFORE removing the battery cable to prevent an over current condi tion from burning out sensitive control panel compo...
Page 24: ...necessary 5 Check the natural gas delivery system on gas engine driven units Tighten connections as necessary 6 Check the air inlets and outlets for debris Clean as necessary 7 Check the battery elec...
Page 25: ...operating conditions Correct as necessary 14 Start and exercise the unit at full rated load use a load bank if the site load is not enough for at least 2 hours looking for leaks loose connections or...
Page 26: ...erheated 2 Check cooling system for leaks 3 Defective Low Oil Pressure Switch 3 Replace switch 4 Defective Coolant Temperature Switch 4 Replace switch 5 Defective Control Module circuit board 5 Replac...
Page 27: ...Bryant 25 Section 6 Notes Bryant Liquid cooled 25 kW Generator...
Page 28: ...26 Bryant Section 6 Notes Bryant Liquid cooled 25 kW Generator...
Page 29: ...Bryant 27 Section 6 Notes Bryant Liquid cooled 25 kW Generator...
Page 30: ...28 Bryant Section 7 Electrical Data Bryant Liquid cooled 25 kW Generator Wiring Diagram 2 5L Engine Drawing No 0F1411 A...
Page 31: ...Bryant 29 Section 7 Electrical Data Bryant Liquid cooled 25 kW Generator Wiring Diagram 2 5L Engine Drawing No 0F1411 A...
Page 32: ...30 Bryant Section 7 Electrical Data Bryant Liquid cooled 25 kW Generator Electrical Schematic 2 5L Engine Drawing No 0F1413 A...
Page 33: ...Bryant 31 Section 7 Electrical Data Bryant Liquid cooled 25 kW Generator Electrical Schematic 2 5L Engine Drawing No 0F1413 A...
Page 34: ...32 Bryant Section 7 Electrical Data Bryant Liquid cooled 25 kW Generator Wiring Diagram 2 5L Engine 25kW unit Drawing No 0E9982 C...
Page 35: ...Bryant 33 Section 7 Electrical Data Bryant Liquid cooled 25 kW Generator Wiring Diagram 2 5L Engine 25kW unit Drawing No 0E9982 C...
Page 36: ...34 Bryant Section 7 Electrical Data Bryant Liquid cooled 25 kW Generator Electrical Schematic 2 5L 25kW unit Drawing No 0E9983 C...
Page 37: ...Bryant 35 Section 7 Electrical Data Bryant Liquid cooled 25 kW Generator Electrical Schematic 2 5L 25kW unit Drawing No 0E9983 C...
Page 38: ...rator Mounting Base Drawing No 0E9964 E 28 ENGINE BLOCK 5 CARRIER REAR BEARING 14 15 13 3 BOTTOM PANEL 3 2 12 4 1 11 15 14 13 33 2 3 12 11 36 35 10 10 3 1 6 8 9 3 22 21 27 23 1 25 26 29 34 20 24 TO 19...
Page 39: ...WASHER FLAT M12 15 052891 4 SCREW HHC M12 1 75 X 80 G8 8 16 0536210261 1 ASSY WIRE 0 12 00 17 074906 1 SCREW HHTT M6 1 0 X 20 BP 18 077483 REF BATT 12VDC 75 AH 26 NOT SHOWN 19 0E9941 1 HOLD DOWN BATT...
Page 40: ...B 35 NUTS ITEM 26 USE LOCTITE ON PANEL FOR ACCESS COVER CABLE WELD STUD UNDER ROOF 17 GROUND WIRE FASTENER TO SECURE USE DOOR LATCH NOTE 26 38 11 25 31 7 9 24 10 4 26 25 15 8 29 11 16 14 13 10 5 32 N...
Page 41: ...TEEL 21 0F4487A 1 ASSEMBLY COVER ACCESS 22 022473 1 WASHER FLAT 1 4 ZINC 23 022097 1 WASHER LOCK M6 1 4 24 0D2023 2 GASKET CLIP ON SELF GRIPPING 89 LG 25 0F3390 1 LATCH AND CAM 26 037337 6 NUT HEX JAM...
Page 42: ...14 1 24 29 33 31 50 52 41 33 4 48 13 27 36 54 A 23 65 37 35 2 7 3 35 9 34 43 34 21 35 17 30 34 22 3 35 16 36 34 0 56 5 12 14 11 64 54 38 18 39 Section 8 Exploded Views and Parts Bryant Liquid cooled...
Page 43: ...ROL HSB 2 5L FORD 33 022097 3 WASHER LOCK M6 1 4 34 0C2212 13 SCREW PHTT M4 0 7 X 16 ZYC 35 022264 20 WASHER LOCK 8 M4 36 0C2265 5 SCREW PHTT M4 0 7 X 12 ZYC ITEM PART NO QTY DESCRIPTION 37 023965 2 S...
Page 44: ...19 FOR HARNESS GROUND 5 3 22 17 68 15 19 10 38 22 31 0 HSG 20 3 47 45 20 49 1 16 39 50 34 35 65 33 57 18 37 18 20 16 38 RADIATOR CAP 62 TO 58 39 STEPPER MOTOR UNITS ONLY 17 12 A 11 67 24 23 61 Sectio...
Page 45: ...ER FLEXPLATE HSB 33 0E9680 1 GASKET 2 5L FORD EXHAUST MAN 34 0E9609 1 MANIFOLD EXHAUST MACHINED ITEM PART NO QTY DESCRIPTION 35 0E9930 1 HEAT SHIELD EXHAUST MANIFOLD 36 049821 3 SCREW SHC M8 1 25 X 30...
Page 46: ...28 1 8 20 33 31 32 17 34 26 6 38 30 16 25 24 18 4 29 15 9 5 27 6 4 CARBURETOR ASSY 0E1028A I N 19 CONVERSION 35 41 OUT 2 PORT L P VAPOR 3 40 1 11 3 40 7 2 6 11 Section 8 Exploded Views and Parts Brya...
Page 47: ...TOR GASKET 21 091526 4 SCREW PPHM M5 0 8 X 12 ZNC 22 049226 4 WASHER LOCK M5 23 026307 1 ELBOW 90D STREET 3 4 24 062522 1 STUD TH 1 4 20 X 3 G2 ZNC FULL 25 022127 1 NUT HEX 1 4 20 STEEL 26 022259 2 NU...
Page 48: ...46 Bryant 3 LOCKTIGHT LOCKTIGHT 7 15 17 8 7 6 18 4 16 LEADS 5 2 9 13 21 19 20 14 10 11 12 30 1 31 Section 8 Exploded Views and Parts Bryant Liquid cooled 25 kW Generator Alternator Drawing No 0F5092...
Page 49: ...8 WASHER LOCK M10 8 051755 4 SCREW HHC M10 1 5 X 16 G8 8 9 04576100BK 4 STUD M14 2 0 X 490 G5 ZINC 3 0L FORD 2 5L FORD 10 043123 4 WASHER LOCK M14 11 051779 4 NUT HEX M14 2 0 G8 YEL CHR 12 0E7587 1 AS...
Page 50: ...4 SCREW HHC M6 1 0 X 16 G8 8 14 022097 4 WASHER LOCK M6 1 4 15 022473 8 WASHER FLAT 1 4 M6 ZINC 16 049813 4 NUT HEX M6 X 1 0 G8 YEL CHR 17 039253 2 SCREW HHC M8 1 25 X 20 G8 8 18 045771 2 NUT HEX M8 1...
Page 51: ...S 11 0E1326 1 ASSY CARBURETOR LINKAGE ROD 12 0A7106 1 BRACKET STEPPER MOTOR 13 074031 AR LIQUID NEOPRENE 14 029333A 1 TIE WRAP 7 4 X 19 BLK UL 15 022507 2 SCREW HHC 1 4 20 X 1 2 G5 16 022473 2 WASHER...
Page 52: ...SPACER 41 X 75 X 87 ST ZNC ITEM PART NO QTY DESCRIPTION 14 0F0127 1 HOSE UPPER RADIATOR 174MM TAL 15 0E9833 1 HOSE 2 5L FORD LOWER RADIATOR 16 035461 1 BARBED STR 1 4NPT X 3 8 17 069860C 1 HOSE OIL DR...
Page 53: ...Bryant 51 Section 9 Installation Diagram Bryant Liquid cooled 25 kW Generator Installation Diagram Drawing No 0F1020 A...
Page 54: ...deny warranty solely due to the lack of receipts or for your failure to ensure the completion of all scheduled maintenance As the engine purchaser owner you should however be aware that Generac may d...
Page 55: ...ction 4 below Any such emissions related part repaired or replaced under the ECS Warranty shall be warranted for the remainder of the ECS Warranty Period prior to the first scheduled replacement point...
Page 56: ...ed to accident misuse abuse negligence or improper installation As with all mechanical devices the Bryant engines need periodic part s service and replacement to perform well Failures caused by any ex...