background image

INTRODUCTION

EPA EMISSION REGULATIONS

Vehicles manufactured by BRP are certified to the

EPA standards as conforming to the requirements

of the regulations for the control of air pollution

emitted from new vehicle engines. This certifica-

tion is contingent on certain adjustments being

set to factory standards. For this reason, the

factory procedure for servicing the product must

be strictly followed and, whenever practicable,

returned to the original intent of the design.
The responsibilities listed above are general and

in no way a complete listing of the rules and regu-

lations pertaining to the EPA requirements on ex-

haust emissions. For more detailed information

on this subject, you may contact the following lo-

cations:

FOR ALL COURIER SERVICES:

U.S. Environmental Protection Agency

Office of Transportation and Air Quality

1310 L Street NW

Washington D.C. 20005

REGULAR US POSTAL MAIL:

1200 Pennsylvania Ave. NW

Mail Code 6403J

Washington D.C. 20460

INTERNET:

http://www.epa.gov/otaq/

E-MAIL:

[email protected]

MANUAL INFORMATION

MANUAL PROCEDURES

Many of the procedures in this manual are inter-

related. Before undertaking any task, you should

read and thoroughly understand the entire section

or subsection in which the procedure is contained.

WARNING

Unless

otherwise

specified,

the

engine

should be turned OFF and cold for all main-
tenance and repair procedures.

A number of procedures throughout the book re-

quire the use of special tools. Before starting any

procedure, be sure that you have on hand all re-

quired tools, or their approved equivalents.
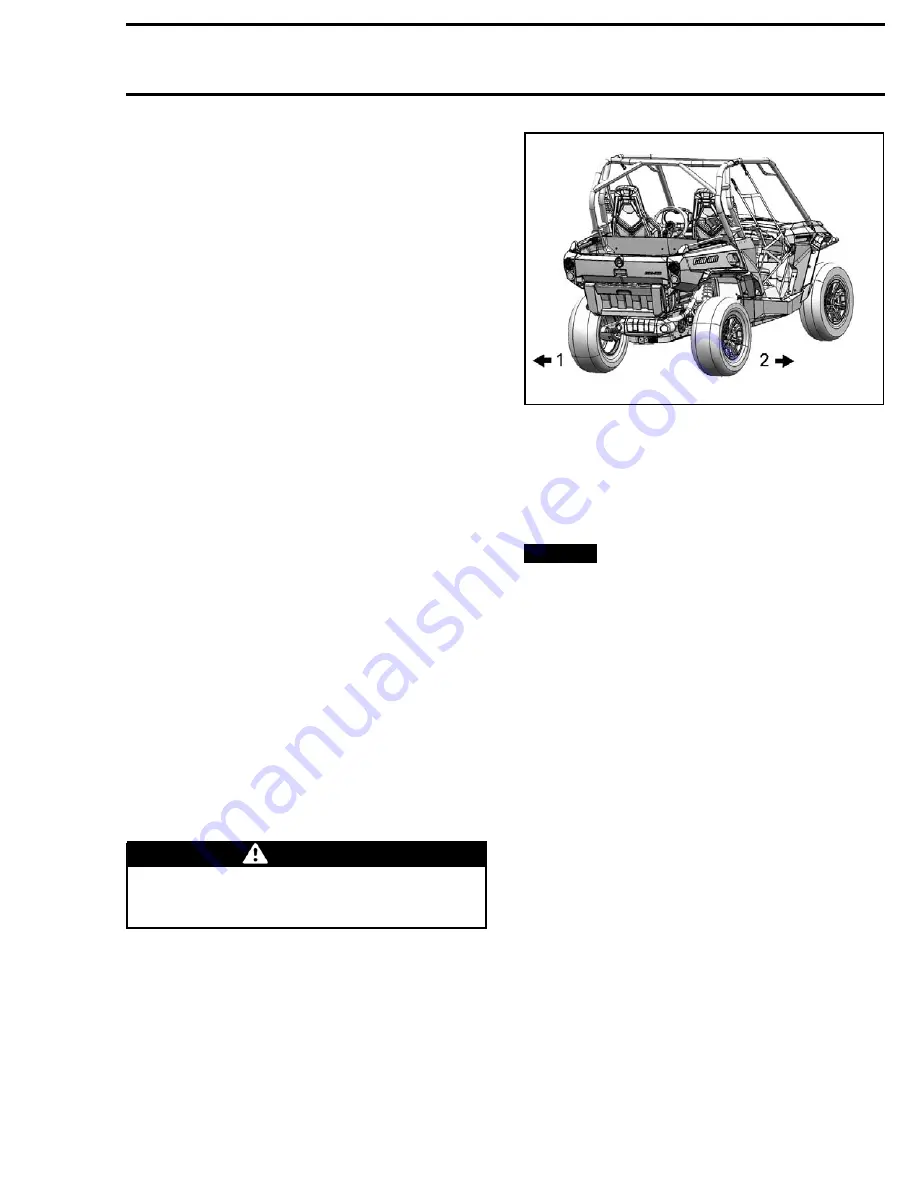
The use of RIGHT and LEFT indications in the text

are always referenced to the driving position (sit-

ting on the vehicle).

tmr2011-002-003_a

TYPICAL

1. Left

2. Right

This manual uses technical terms which may be

different from the ones of the

PARTS CATALOGS

.

When ordering parts always refer to the specific

model

PARTS CATALOGS

.

NOTICE

Most fasteners are metric, and most

components are built with parts dimensioned
using the metric system. Consult the appropri-
ate

PARTS CATALOG

to obtain and use the cor-

rect parts and fasteners. Mismatched or incor-
rect fasteners could cause damage to the vehi-
cle.

MANUAL LAYOUT

This manual is divided into many major sections as

can be seen in the main table of contents at the

beginning of the manual.
Each section is divided into various subsections,

and again, each subsection has one or more divi-

sions.
Illustrations and photos show the typical construc-

tion of various assemblies and, in all cases, may

not reproduce the full detail or exact shape of the

parts used in a particular model vehicle. However,

they represent parts which have the same or a

similar function.

tmr2013-002

XIII

www.MilitaryAtv.com

Summary of Contents for Commander 1000 Can-Am 2013

Page 1: ... discontinue or change specifications designs features mod els or equipment without incurring obligation VEHICLE INFORMATION VEHICLE IDENTIFICATION NUMBER VIN tmr2011 002 001_a TYPICAL 1 VIN Vehicle Identification Number location The VIN Vehicle Identification Number decal is lo cated under the glove box on the passenger side VIN Decal Description tmr2011 002 005_a TYPICAL VEHICLE IDENTIFICATION N...

Page 2: ...ehicle and install a jack stand on each side under frame section in front of rear wheel tmo2011 001 316_a 1 Rear of vehicle 2 Jack stand 3 Frame section 6 Lower hydraulic lift and ensure vehicle is sup ported safely onto both jack stands HOISTING THE VEHICLE The vehicle may be lifted off the ground by the cage using a hoist and a lifting strap NOTICE The lifting strap must be wrapped around the ho...

Page 3: ...t ACS suspension setting to 1 softest 6 Tie down the front wheels to the front of the trailer using tire towing straps 7 Pass a tie down strap inside each rear wheel 8 Firmly attach the rear wheels tie down straps to both sides of the rear of the trailer with ratch ets 9 Ensure that both the front and rear wheels are firmly secured to the trailer ENGINE EMISSIONS INFORMATION MANUFACTURER S RESPONS...

Page 4: ...NG Unless otherwise specified the engine should be turned OFF and cold for all main tenance and repair procedures A number of procedures throughout the book re quire the use of special tools Before starting any procedure be sure that you have on hand all re quired tools or their approved equivalents The use of RIGHT and LEFT indications in the text are always referenced to the driving position sit...

Page 5: ...ection title Indicates applicable models Document number for publishing process Bold face number is used to identify a part referred to the text Drop represents a service product to be applied Dotted box contains parts applicable to a specific model Page number NEW indicates that the part must be replaced with a new one Pay attention to torque specifications Some of these are in lbf in instead of ...

Page 6: ...lean threads before applying a threadlocker Re fer to the SELF LOCKING FASTENERS and LOC TITE APPLICATION sections at the beginning of this manual for complete procedure WARNING Torque wrench tightening specifications must be strictly adhered to Locking devices e g locking tabs elastic stop nuts self locking fasteners etc must be replaced with new ones PROCEDURES MAGNETO FLYWHEEL Magneto Flywheel ...

Page 7: ...ple fasteners are used to secure a part eg a cylinder head Some parts must be torqued according to a specific sequence and torque pattern as detailed in the installation procedure A00A8BS Property class and head markings Property class and nut markings 5 5 8 8 10 10 12 12 4 8 4 8 4 8 8 8 8 8 8 8 9 8 9 8 9 8 10 9 10 9 10 9 12 9 12 9 12 9 12 9 FASTENER GRADE TORQUE FASTENER SIZE 5 8 Grade 8 8 Grade ...

Page 8: ...N PROCEDURE The following describes common procedures used when working with Loctite products NOTE Always use proper strength Loctite prod uct as recommended in this shop manual Threadlocker Application for Uncovered Holes Bolts and Nuts A00A3LA 1 2 1 Apply here 2 Do not apply 1 Clean threads bolt and nut with solvent 2 Apply LOCTITE PRIMER N P N 293 800 041 on threads and allow to dry 3 Choose pr...

Page 9: ...6 Install cover part etc 7 Apply a few drops of proper strength Loctite on uncovered stud threads 8 Install and tighten retaining nut s as required Threadlocker Application for Pre Assembled Parts A00A3OA 1 2 1 Apply here 2 Do not apply 1 Clean bolts and nuts with solvent 2 Assemble components 3 Tighten nuts 4 Apply a few drops of proper strength Loctite on bolt nut contact surfaces 5 Avoid touchi...

Page 10: ...d Thread Repair procedure 4 Allow 30 minutes for Loctite FORM A THREAD to cure 5 Complete part assembly Gasket Compound Application 2 1 1 3 1 lmr2007 040 006_a 1 Proper strength Loctite 2 Loctite Primer N P N 293 800 041 and Gasket Eliminator 518 P N 293 800 038 on both sides of gasket 3 Loctite Primer N only 1 Remove old gasket and other contaminants us ing LOCTITE CHISEL GASKET REMOVER P N 413 7...

Page 11: ...as per previous illus tration Threadlocker Application for Case In Components Metallic Gaskets A00A3VA 1 1 Proper strength Loctite 1 Clean inner housing diameter and outer gasket diameter 2 Spray housing and gasket with LOCTITE PRIMER N P N 293 800 041 3 Apply a strip of proper strength Loctite on lead ing edge of outer metallic gasket diameter NOTE Any Loctite product can be used here A low stren...

Page 12: ...36 056 Page 77 CAMSHAFT TIMING TOOL P N 529 036 231 Page 129 130 CLUTCH HOLDER P N 529 036 238 Page 166 173 179 CLUTCH PULLER P N 529 035 746 Page 166 COUNTERSHAFT OIL SEAL PUSHER P N 529 036 222 Page 192 CRANKCASE SUPPORT MAG PTO P N 529 036 031 Page 151 CRANKSHAFT LOCKING BOLT P N 529 035 617 Page 88 117 154 CRANKSHAFT PROTECTOR P N 529 036 034 Page 88 CRANKSHAFT TDC POSITION TOOL P N 529 036 20...

Page 13: ...9 036 247 Page 373 DPS POSITIONING ADAPTOR P N 529 036 248 Page 372 DRIVE SHAFT OIL SEAL INSTALLER P N 529 036 028 Page 143 144 DRIVE SHAFT OIL SEAL PROTECTOR P N 529 036 029 Page 142 ECM ADAPTER TOOL P N 529 036 166 Page 188 247 259 261 264 277 291 297 304 416 ECM TERMINAL REMOVER 2 25 P N 529 036 175 Page 291 ECM TERMINAL REMOVER 3 36 P N 529 036 174 Page 291 ENGINE LEAK DOWN TEST KIT P N 529 03...

Page 14: ...2 DIAGNOSTIC CABLE P N 710 000 851 Page 223 MPI 2 INTERFACE CARD P N 529 036 018 Page 223 OETIKER PLIERS P N 295 000 070 Page 256 274 431 OIL SEAL INSTALLER GEARBOX P N 529 035 758 Page 192 OIL SEAL INSTALLER P N 529 036 204 Page 193 OIL SEAL PUSHER P N 529 035 757 Page 78 PISTON CIRCLIP INSTALLER P N 529 035 921 Page 121 PISTON CIRCLIP INSTALLER P N 529 036 153 Page 121 PISTON RING COMPRESSOR P N...

Page 15: ...RY SEAL PUSHER PLATE P N 529 036 130 Page 75 SEAL PUSHER P N 529 035 766 Page 75 79 SPANNER SOCKET P N 529 035 649 Page 328 342 SPRING COMPRESSOR P N 529 036 184 Page 383 STEERING ALIGNMENT TOOL P N 529 036 059 Page 352 TDC DIAL INDICATOR P N 414 104 700 Page 103 TEST CAP P N 529 035 991 Page 20 VACUUM PRESSURE PUMP P N 529 021 800 Page 20 31 270 281 VALVE GUIDE INSTALLER P N 529 036 140 Page 116 ...

Page 16: ...SERVICE TOOLS INDEX VALVE SPRING COMPRESSOR CUP P N 529 035 764 Page 112 VALVE SPRING COMPRESSOR P N 529 035 724 Page 112 5 w w w M i l i t a r y A t v c o m ...

Reviews: