


94
d
Press
OK
.
The machine starts printing the
Alignment Check Sheet.
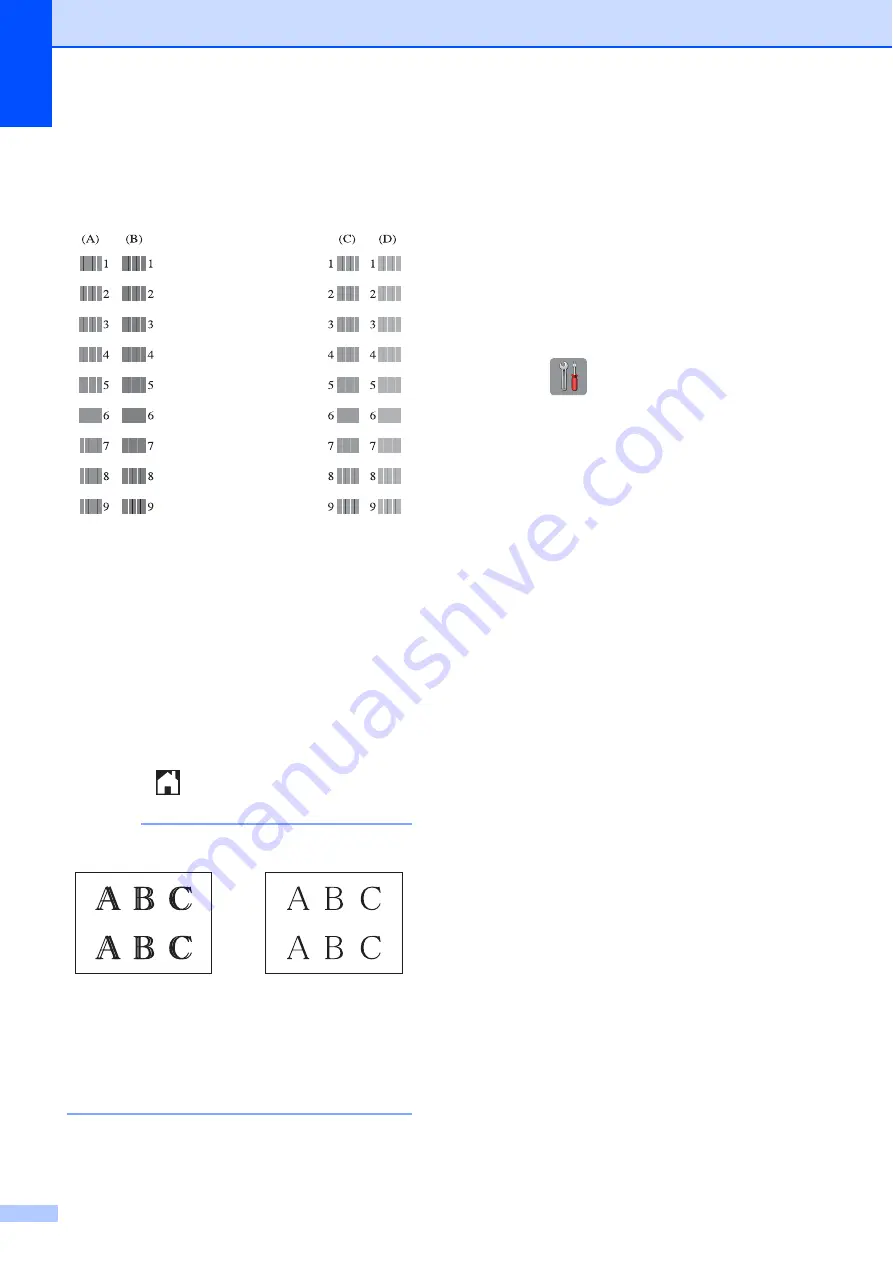
e
For the “A” pattern, press
a
or
b
to
display the number of the test print that
has the least visible vertical stripes
(1-9), and then press it.
Press
OK
.
Repeat this step for the B, C and D
patterns.
In the example number 6 is the best
choice for A, B, C and D.
f
Press .
NOTE
Setting the date and
time
A
The Touchscreen displays the date and time.
If it is not current, follow these instructions to
re-enter it.
You can add the date and time to each fax
you send by setting your Station ID.
a
Press (
Settings
).
b
Press
All Settings
.
c
Press
a
or
b
to display
Initial Setup
.
d
Press
Initial Setup
.
e
Press
a
or
b
to display
Date & Time
.
f
Press
Date & Time
.
g
Press
Date
.
h
Enter the last two digits of the year on
the Touchscreen, and then press
OK
.
i
Enter the two digits for the month on the
Touchscreen, and then press
OK
.
j
Enter the two digits for the day on the
Touchscreen, and then press
OK
.
k
Press
Clock Type
.
l
Press
12h Clock
or
24h Clock
.
m
Press
Time
.
i
When the print
alignment is not
adjusted properly,
text looks blurry
like this.
After the print
alignment is
adjusted properly,
text looks like this.


