


5-44
Confidential
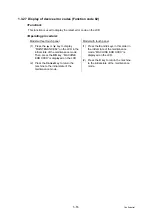
1.3.21 Sensitivity adjustment of density sensor (Function code 72)
<Function>
This function is used to print the patch data for density sensor sensitivity adjustment on the
belt unit and measure the density with the density sensor. The characteristics of the density
sensor are calculated based on the value measured by the density sensor, and the parameter
for correcting developing bias voltage is adjusted.
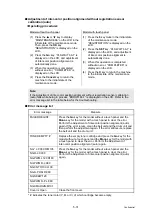
<Operating procedure>
* # indicates the toner color (Y, M, or C) of which cartridge became empty.
Model without touch panel
Model with touch panel
(1) Press the
or
key to display
“MAINTENANCE 72” on the LCD in the
initial state of the maintenance mode.
Then, press the
OK
key. “PLS WAIT
72” is displayed on the LCD and
performs the sensitivity adjustment of
the density sensor.
(2) When this operation is completed
without errors, the machine returns to the
initial state of the maintenance mode.
(1) Press the
7
and
2
keys in this order in
the initial state of the maintenance
mode. “PLS WAIT 72” is displayed on
the LCD and performs the sensitivity
adjustment of the density sensor.
(2) When this operation is completed
without errors, the machine returns to the
initial state of the maintenance mode.
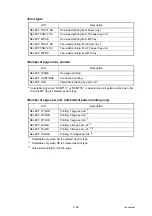
Note:
If the sensitivity adjustment of the density sensor fails, “ERROR 72” is displayed on the
LCD. Display the error message by pressing the
key, and take the following measure
that corresponds to the error message.
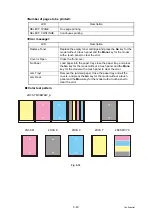
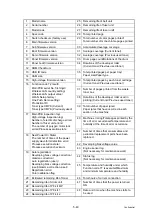
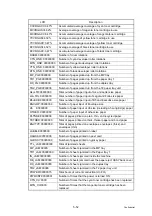
Error message
Measure
dens_l_drk_err
- Reconnect the harness of the eject sensor PCB .
- Replace the registration mark sensor unit.
- Replace the main PCB ASSY.
belt_err
- Replace the belt unit.
- Replace the waste toner box.
- Replace the registration mark sensor unit.
- Replace the main PCB ASSY.
dens_pat_err
dens_calc_err
- Check if the toner cartridges are set in the correct order of colors.
- Replace the toner cartridges and drum unit.
- Replace the registration mark sensor unit.
- Replace the main PCB ASSY.
dens_led_adj_err
- Replace the belt unit.
- Replace the waste toner box.
- Replace the registration mark sensor unit.
- Replace the main PCB ASSY.
lph_calc_err
- Replace the toner cartridges and drum unit.
- Securely close the front cover.
- Wipe the scanner window of the laser unit with a soft lint-free
cloth.
- Re-assemble the laser unit.
TONER EMPTY #
*
Replace the empty toner cartridge and press the
Go
key for the
model without a touch panel and the
Mono
key for the model with
a touch panel to clear the error. Perform the sensitivity adjustment
of the density sensor again.
Cover is Open
Close the front cover.
Replace Toner
Replace the black toner cartridge and press the
Go
key for the
model without a touch panel and the
Mono
key for the model with a
touch panel to clear the error. Perform the sensitivity adjustment of
the density sensor again.


