> Clean the Print Head from Your Computer
(Windows
®
)
Clean the Print Head from Your Computer (Windows
®
)
To maintain good print quality, the machine automatically cleans the print head when needed. If there is a print
quality problem, start the cleaning process manually.
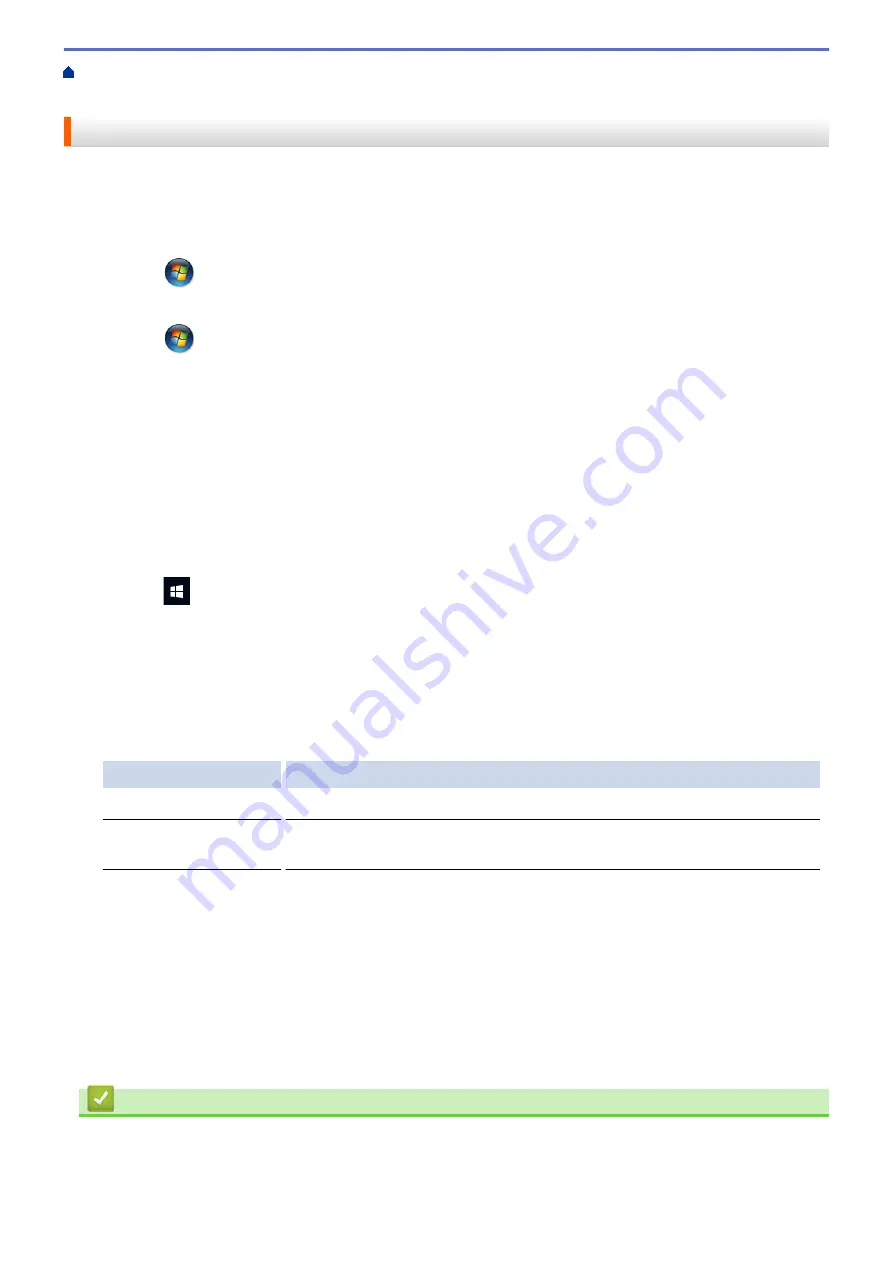
1. Do one of the following:
•
For Windows Server
®
2008
Click
(Start)
>
Control Panel
>
Hardware and Sound
>
Printers
.
•
For Windows
®
7 and Windows Server
®
2008 R2
Click
(Start)
>
Devices and Printers
.
•
For Windows
®
8
Move your mouse to the lower right corner of your desktop. When the menu bar appears, click
Settings
,
and then click
Control Panel
. In the
Hardware and Sound
group, click
View devices and printers
.
•
For Windows Server
®
2012
Move your mouse to the lower right corner of your desktop. When the menu bar appears, click
Settings
,
and then click
Control Panel
. In the
Hardware
group, click
View devices and printers
.
•
For Windows Server
®
2012 R2
Click
Control Panel
on the
Start
screen. In the
Hardware
group, click
View devices and printers
.
•
For Windows
®
10 and Windows Server
®
2016
Click
>
Windows System
>
Control Panel
. In the
Hardware and Sound
group, click
View devices
and printers
.
2. Right-click the
Brother XXX-XXXX
icon (where XXXX is your model name), and then select
Printing
preferences
. If printer driver options appear, select your printer driver.
The printer driver dialog box appears.
3. Click the
Maintenance
tab.
4. Select one of the following options:
Option
Description
Check Print Quality...
Use to print the test page and check the print quality.
Print Head Cleaning...
Use to start the cleaning process manually. Select if a line or blank spaces
appear in text or graphics on the test page.
5. Do one of the following:
•
If you selected the
Check Print Quality...
option, click
Start
.
The machine prints the test page.
•
If you selected the
Print Head Cleaning...
option, select the
Black only
,
Colour only
, or
All
option for
the cleaning type, and then click
Next
.
6. Select the
Normal
,
Strong
, or
Strongest
option for the cleaning strength, and then click
Next
.
7. Click
Start
.
The machine starts cleaning.
Related Information
•
Related Topics:
•
Paper Handling and Printing Problems
293
Summary of Contents for HL-J6000DW
Page 1: ...Online User s Guide HL J6000DW HL J6100DW 2018 Brother Industries Ltd All rights reserved ...
Page 13: ...Related Topics Near Field Communication NFC 8 ...
Page 17: ... Check the Ink Volume Page Gauge 12 ...
Page 22: ...Related Information Introduction to Your Brother Machine 17 ...
Page 23: ...Home Paper Handling Paper Handling Load Paper 18 ...
Page 38: ... Change the Paper Size and Paper Type 33 ...
Page 41: ... Paper Type and Size for Each Operation 36 ...
Page 194: ...Related Information Configure an IPsec Template Using Web Based Management 189 ...
Page 220: ...Related Information Set Up Brother Web Connect 215 ...
Page 286: ...Related Topics My Brother Machine Cannot Print over the Network 281 ...
Page 299: ... Clean the Print Head from Your Brother Machine 294 ...
Page 308: ...Related Topics Paper Handling and Printing Problems 303 ...
Page 317: ... Change the Print Setting Options When Having Printing Problems 312 ...
Page 373: ...Visit us on the World Wide Web www brother com UK Version 0 ...


