background image

1 - 11 UNIX

®

 PRINTING

SCO UNIX

®

 requires TCP/IP V1.2 or later to work with Brother print 

servers. You must first configure the 

/etc/hosts

 and 

/etc/

printcap

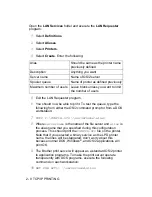
 files as described in step 2. Then run the sysadmsh 

program as follows:

1

Select Printers.

2

Select Configure.

3

Select Add.

4

Enter the name of the print queue you entered in the 

/etc/

printcap

 file as the Printer name.

5

Enter anything as the Comment, and Class name.

6

For the Use printer interface select Existing.

7

Press the F3 key to get a list of available interfaces, and select 
the desired one as the Name of interface using the cursor keys 
(

Dumb

 is a good choice).

8

Select Direct as the Connection

9

Enter the desired Device name (

/dev/lp

 generally works).

10

 Select Hardwired as the Device.

11

Select No for the Require banner field.

Older SCO UNIX

®

 Systems

The Brother print servers support the FTP protocol. Earlier SCO 
UNIX

®

 systems are often configured to print using the FTP protocol.

IBM AS/400

To use a Brother print server with an IBM AS/400 running IBM's TCP/
IP gateways services for OS/400 (the OS/400 system must be v3.1 
or later)

Use the CFGTCP command at your OS/400 prompt to add the print 
server's TCP/IP address to the AS/400 host table.

Summary of Contents for HL-6050DW

Page 1: ...y before using the printer You can print or view this manual from the CD ROM at any time please keep the CD ROM in a convenient place for quick and easy reference at all times The Brother Solutions Center http solutions brother com is your one stop resource for all your printer needs Download the latest drivers and utilities for your printers or read the FAQs and troubleshooting tips Some Brother ...

Page 2: ...tioned in this user s guide are registered trademarks or trademarks of respective companies Compilation and Publication Under the supervision of Brother Industries Ltd this manual has been compiled and published covering the latest product descriptions and specifications The contents of this manual and the specifications of this product are subject to change without notice Brother reserves the rig...

Page 3: ...t instant answers to common technical questions and information about all our products This is available 24 hours a day seven days a week You can use the system to send the information to any fax machine Call the number below and follow the recorded instructions to receive a fax about how to use the system and an Index of the subjects you can get information about In USA only 1 800 521 2846 Dealer...

Page 4: ...ipment generates uses and can radiate radio frequency energy and if not installed and used in accordance with the instructions may cause harmful interference to radio communications However there is no guarantee that interference will not occur in a particular installation If this equipment does cause harmful interference to radio or television reception which can be determined by turning the equi...

Page 5: ...right notice this list of conditions and the following disclaimer in the documentation and or other materials provided with the distribution Neither name of Intel Corporation nor the names of its contributors may be used to endorse or promote products derived from this software without specific prior written permission THIS SOFTWARE IS PROVIDED BY THE COPYRIGHT HOLDERS AND CONTRIBUTORS AS IS AND A...

Page 6: ...ve 73 23 EEC as amended by 93 68 EEC and the Electromagnetic Compatibility Directive 89 336 EEC as amended by 91 263 EEC and 92 31 EEC and 93 68 EEC Standards applied Harmonized LVD EN60950 2000 EMC EN55022 1998 Class B EN55024 1998 Year in which CE marking was first affixed 2004 Issued by Brother Industries Ltd Date 6 February 2004 Place Nagoya Japan Signature Takashi Maeda Regulations Manager Qu...

Page 7: ...nt Directive 1999 5 EC in accordance with the tests conducted to the appropriate requirements of the relevant standards as listed herewith Product Wireless LAN Card Model Type Number NC 7100 Directive and Standards used Radio EN300 328 1 V1 3 1 2001 12 EN300 328 2 V1 2 1 2001 12 EMC EN301 489 1 V1 4 1 2002 08 EN301 489 17 V1 2 1 2002 08 LVD EN60950 2000 Year of affixing CE marking 2004 Signature N...

Page 8: ...l requirements and other relevant provisions of Directive 1999 5 EC Australia This equipment complies with Austrarian EMC requirement Australian Company Number ACN 001 393 835 New Zealand This equipment complies New Zealand EMC requirement New Zealand Company Number of the supplier BINZ 13243 ...

Page 9: ... 1 8 Sun Solaris 2 x Configuration 1 9 SCO UNIX Configuration 1 10 IBM AS 400 1 11 Other Systems 1 13 Other Sources of Information 1 14 2 TCP IP Printing 2 1 Printing from Windows NT 4 0 Windows 2000 XP LAN Server and Warp Server 2 1 Overview 2 1 Windows NT 4 0 and Windows 2000 XP TCP IP Configuration 2 2 Windows 2000 XP Printing Printer Driver not yet installed 2 2 Standard TCP IP Port Printing 2...

Page 10: ...Windows NT 4 0 LAN Server and OS 2 Warp Server 4 1 Overview 4 1 Print Server Configuration 4 2 Changing the Workgroup Domain Name Using TELNET or BRCONFIG or a Web Browser 4 3 NetBIOS Port Monitor for Windows 95 98 Me 2000 XP and Windows NT 4 0 4 4 Installing the Brother NetBIOS Port Monitor 4 4 Associating the Printer 4 5 Windows 95 98 Me 4 5 Windows NT 4 0 Windows 2000 XP 4 6 Adding a Second Net...

Page 11: ...l NetWare Printing 6 1 Overview 6 1 General Information 6 2 Creating a NDPS Printer Using NWADMIN for NetWare 5 6 3 NDPS Manager 6 3 NDPS Broker 6 4 Creating a Printer Agent 6 5 Configuring NetWare 3 and NetWare 4 Systems 6 6 Creating the NetWare Print Server Bindery Queue Server Using BRAdmin Professional Utility 6 6 Creating the NetWare Print Server NDS Queue Server Using BRAdmin Professional Ut...

Page 12: ...Information 7 6 8 Web Based Management 8 1 How to use a Web Browser to Manage Your Device 8 1 Overview 8 1 How to Connect to Your Printer Using a Browser 8 2 Other Sources of Information 8 2 9 TCP IP Configuration 9 1 Assigning TCP IP Information 9 1 Overview 9 1 Using the Printer Control Panel to Allocate an IP Address Printers with LCD Panels Only 9 2 Changing the IP Address Using the BRAdmin Ap...

Page 13: ...dows 95 98 Me and Windows NT 4 0 Peer to Peer Print NetBIOS Troubleshooting 10 14 Brother Internet Print TCP IP Troubleshooting 10 14 Windows 95 98 Me 2000 XP IPP Troubleshooting 10 15 Novell NetWare Troubleshooting 10 16 AppleTalk Troubleshooting 10 17 Web Browser Troubleshooting TCP IP 10 17 Appendix A A 1 General Information A 1 BRAdmin Recommended A 1 Web BRAdmin A 1 HTTP Recommended A 2 WebJe...

Page 14: ...c Mode B 2 Authentication and Encryption B 3 Channels B 4 Configuring the Brother Wireless Print Server B 5 Using the Control Panel Menus to Configure the Wireless Print Server B 5 Using the BRAdmin Professional Utility to Configure the Wireless Print Server for Windows users B 10 Using a Web Browser to Configure the Wireless Print Server for Windows users B 12 NC 7100w Print Server Specifications...

Page 15: ...standard Berkeley UNIX systems Refer to this chapter for a typical GUI based Linux installation Quick Tips 1 The Automatic Private IP Addressing APIPA protocol automatically assigns an IP address from the range 169 254 1 0 to 169 254 254 255 If you want to disable the APIPA protocol you can turn the setting off by using control panel buttons to access APIPA in the TCP IP setting of the NETWORK men...

Page 16: ... UNIX systems The Brother print server is pre configured to run on a TCP IP network with a minimum of setup The only mandatory configuration of the print server is the allocation of an IP address which can be either automatically assigned using DHCP BOOTP etc or manually assigned using the ARP command BRAdmin Professional utility or the printer control panel General TCP IP UNIX Host Configuration ...

Page 17: ...d in linefeed and do not have carriage returns The text service can also be used for non rasterized graphics such as ASCII PostScript graphics or many types of PCL graphics Choose one of the available services a service name will be used in step 3 BINARY_P1 Binary data TEXT_P1 Text data CR added You may set up multiple print queues on your UNIX host computer for the same print server each one with...

Page 18: ...ut should also refer to the SCO UNIX Configuration section Users of RS 6000 AIX HP UX Sun Solaris 2 xx and other systems that do not use the printcap file should skip to step 4 SCO user s should also skip to step 4 SCO uses the printcap file but this file is automatically configured via the rlpconf command Make sure this information is added to the end of the printcap file Also make sure that the ...

Page 19: ...s also true for some other AT T based UNIX systems as well as many VMS based TCP IP software packages for example UCX TGV Multinet etc On SCO systems there is a printcap file but it is automatically configured by the rlpconf command Most of these systems generally use a printer setup program to define the service name remote printer the print server name remote machine or IP address and the local ...

Page 20: ...he IP address of the printer or the name from the hosts file which corresponds to the IP address of the printer 5 The Remote Queue name is the service name that the printer will use when processing the data Generally we recommend that you use the name BINARY_P1 however if you are planning to send text documents that do not have a carriage return and a line feed then use TEXT_P1 6 Select the approp...

Page 21: ... 8 Check the box next to Remote Printer is on BSD system 9 You may accept the default values for the remaining items 10 Click OK to configure the printer You should now be able to print using the lp d command with the printer name If you are using the HP distributed print service the configuration procedure is slightly different because you are sending the print jobs to a file server which in turn...

Page 22: ...1 Remote Printer is on a BSD System Yes IBM RS 6000 AIX Configuration The RS 6000 AIX operating system uses the smit program to set up the remote printer The procedure is as follows for AIX 4 0 and later 1 Enter smit and select devices 2 Select Printer Plotter 3 Select Print Spooling 4 Select Add a Print Queue 5 Select Remote 6 Enter the following Remote Printer Settings Name of queue user selecta...

Page 23: ... of queue on remote printer print server binary or text service name eg BINARY_P1 or TEXT_P1 Name of device to add user selectable for example lp0 Sun Solaris 2 x Configuration Sun Solaris 2 x uses the lpsystem and lpadmin programs for remote printer configuration lpsystem t bsd prnservername lpadmin p queue s prnservername prnserverservice accept queue not required on newer Solaris systems enable...

Page 24: ...n NIS or other name services Also note that due to a bug in the Sun lpd implementation on Solaris 2 4 and earlier releases you may experience problems printing very long print jobs If this is the case a workaround is to use the raw TCP port software as described later in this chapter SCO UNIX Configuration To configure a printer in version Version 5 x of SCO UNIX use the SCOADMIN program 1 Select ...

Page 25: ...available interfaces and select the desired one as the Name of interface using the cursor keys Dumb is a good choice 8 Select Direct as the Connection 9 Enter the desired Device name dev lp generally works 10 Select Hardwired as the Device 11 Select No for the Require banner field Older SCO UNIX Systems The Brother print servers support the FTP protocol Earlier SCO UNIX systems are often configure...

Page 26: ...ote that the IP address and description must be enclosed in single quotes For example CRTOUTQ OUTQ BR1 RMTSYS INTNETADR RMTPRTQ BINARY_P1 AUTOSTRWTR 1 CNNTYPE IP DESTTYPE OTHER MFRTYPMDL HP5SI INTNETADR 10 0 0 200 TEXT Arnes Printer If you are using A4 paper you may find that the printer page formatting is incorrect this is probably because your AS 400 system is set to Letter sized paper to resolv...

Page 27: ... UNIX host computer running the lpd line printer daemon If you have not created a spool directory for the Brother print server on your UNIX host computer you will need to do so now the printer setup utilities in HP UX AIX Solaris 2 xx and other systems will automatically create the spool directory The lpd spool directory is usually located in the usr spool directory check with your system manager ...

Page 28: ...t the daemon This is done on Berkeley compatible UNIX systems with the lpc start command as shown in the following example lpc start laser1 Other Sources of Information Refer to chapter 9 of this User s Guide to learn how to configure the IP address of the printer ...

Page 29: ...ick Tips 1 The Automatic Private IP Addressing APIPA protocol automatically assigns an IP address from the range 169 254 1 0 to 169 254 254 255 If the APIPA protocol is disabled the default IP address of a Brother print server is 192 0 0 192 To change it use the printer control panel if applicable the BRAdmin Professional Web BRAdmin software or let your DHCP server allocate an IP address to the p...

Page 30: ...on in the Control Panel window of the Windows NT 4 0 system use the Start button on Windows NT 4 0 to access the Settings Control Panel menu The default configuration of Windows 2000 XP automatically installs the TCP IP protocol Refer to the appropriate section in this chapter for more information Windows 2000 XP Printing Printer Driver not yet installed By default Windows 2000 XP systems install ...

Page 31: ... or name then you will receive an error message 10 Click the Finish button to complete the Wizard 11 Now that you have configured the port you must specify which printer driver you wish to use Select the appropriate driver from the list of supported printers If you are using a driver supplied with the printer on CD ROM then select the Have Disk option to browse to the CD ROM You can also click the...

Page 32: ...Printing If you did not install the TCP IP protocol during the installation of your Windows NT 4 0 system either workstation or server follow these steps If you have already installed the TCP IP protocol proceed to the next section 1 Go to the Start button choose Settings and then select Control Panel 2 Run the Network applet by double clicking the Network icon and then click on the Protocols tab ...

Page 33: ...dy exist on your disk 6 Enter the Port name that you wish to use and click OK The default port name is BLP1 Whichever name you choose it must be unique and it MUST begin with BLP 7 You must now enter the actual IP address of the print server in the IP Address field If you have edited the hosts file on your computer or are using Domain Name System you can also enter the name of the print server As ...

Page 34: ...his chapter and click on Next 5 Select the desired printer model If the correct model is not displayed click on the Have Disk option and insert the CD ROM supplied with your printer 6 If the driver already exists select Keep Existing Driver if it does not exist this step will be skipped and then click on Next 7 If desired change the name of the printer then click Next 8 If desired make the printer...

Page 35: ...u wish to print to and click OK And then click Close in the Printer Ports dialog You should now see the port that you have just created in the Print to the following port s setting of the printer driver LAN Server OS 2 Warp Server Configuration Brother print servers will work with IBM LAN Server OS 2 Warp Server networks that have IBM TCP IP V2 0 or later installed on the file server TCP IP is sup...

Page 36: ...ow Enter the following You may leave the other entries blank Click on the OK button The pipe should be highlighted if not click on it Click on the Create button to create the printer Early versions of Warp Server have a bug in which the named pipes do not appear the problem does not affect Warp Connect or LAN Server This problem is fixed via a patch available from IBM LPD server The Brother print ...

Page 37: ...hould print the CONFIG SYS file on the printer Note that if you selected a binary service as the LPD printer name the lines will be staggered don t worry about this because normal DOS Windows and OS 2 applications will print OK 9 The Brother print server will appear as a standard OS 2 printer to application programs To make the print server operate transparently with DOS programs execute the follo...

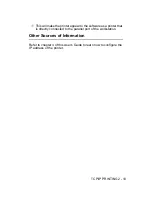
Page 38: ... the printer appear to the software as a printer that is directly connected to the parallel port of the workstation Other Sources of Information Refer to chapter 9 of this User s Guide to learn how to configure the IP address of the printer ...

Page 39: ...resources with other PCs on the network without the need for a central file server Quick Tips 1 The Automatic Private IP Addressing APIPA protocol automatically assigns an IP address from the range 169 254 1 0 to 169 254 254 255 If the APIPA protocol is disabled the default IP address of a Brother print server is 192 0 0 192 To change it use the printer control panel if applicable the BRAdmin Prof...

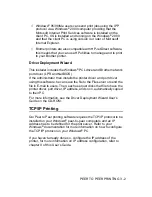
Page 40: ...istrator then installs the printer driver and port driver using this software he can save the file to the File server or send the file in E mail to users Then each user just clicks that file to have the printer driver port driver IP address and so on automatically copied to their PC For more information see the Driver Deployment Wizard User s Guide on the CD ROM TCP IP Printing Our Peer to Peer pr...

Page 41: ... name you choose it must be unique and it MUST begin with BLP 7 You must now enter the actual IP address of the print server in the Printer name or IP address field If you have edited the hosts file on your computer or are using Domain Name System you can also enter the name of the print server As the print server supports TCP IP and NetBIOS names you can also enter the NetBIOS name of the print s...

Page 42: ...ted a printer driver that is already being used you have the option of either keeping the existing driver recommended or replacing it Select the desired option and click Next 7 Select the Brother LPR port the port name you assigned in step 6 of the Installing the Brother Peer to Peer Software section and click Next 8 Enter any desired name for the Brother printer and click Next For example you cou...

Page 43: ...ighlight Brother LPR port Click OK and enter the port name The default port name is BLP1 If you have already used this name you will get an error message if you try to use it again in which case use BLP2 etc Once you have specified the port name click the OK button You will then see the Port Properties dialog Enter the IP address of the printer that you wish to print to and click OK You should now...

Page 44: ... are connected to Microsoft networks Quick Tips 1 The Automatic Private IP Addressing APIPA protocol automatically assigns an IP address from the range 169 254 1 0 to 169 254 254 255 If the APIPA protocol is disabled the default IP address of a Brother print server is 192 0 0 192 To change it use the printer control panel if applicable the BRAdmin Professional Web BRAdmin software or let your DHCP...

Page 45: ...95 98 Me is WORKGROUP however you could change this to anything you want With Windows NT 4 0 Microsoft introduced the concept of Domains A domain offers centralized security management whereas a workgroup offers distributed security management The print server does not care if your network consists of a Workgroup or a Domain the only thing you must tell it is the name of the workgroup or domain Th...

Page 46: ... you are not sure what your domain name or workgroup name is look in the Identification tab in your Windows 95 98 Me and Windows NT 4 0 network applet You can also use a standard WWW browser to change the NetBIOS name To do this connect to the print server using its IP address and then select the Configure NetBIOS option from the Network Configuration screen then enter your workgroup domain name i...

Page 47: ...nistrators Then select the Network Print Software menu to start the Brother Network Print Software installation program 3 Click the Next button in response to the Welcome message 4 Select Brother Peer to Peer Print NetBIOS installation 5 Select the desired directory to install the Brother Network Direct Print files and click Next 6 Enter the port name that you wish to use The port name must start ...

Page 48: ...of the Ethernet address and ServiceName is the service name for NetBIOS of the print server By default it is BINARY_P1 For example BRN_310107 BINARY_P1 8 Then click OK 9 Click the Finish button You must now restart your computer before you can continue Associating the Printer 1 You must now create a printer on your Windows 95 98 Me Windows NT 4 0 and Windows 2000 XP systems using the standard Wind...

Page 49: ...wish to print out a test page select Yes and then select Finish You are now ready to print If necessary you can share the printer on your PC so that all print jobs are routed through your computer Windows NT 4 0 Windows 2000 XP 2 Select Add Printer to begin the printer installation 3 Click Next when you get the Add Printer Wizard window 4 Select Local printer Windows 2000 or Local printer attached...

Page 50: ...ings and open the Printers window Click on the icon of the printer that you wish to configure select File from the menu bar and then choose Properties Windows 95 98 Me 2 Click on the Details tab and click the Add Port button In the Add Port dialog select the Other radio button and then highlight Brother NetBIOS port Click OK and enter the port name The default port name is BNT1 If you have already...

Page 51: ...tting of the printer driver LAN Server OS 2 Warp Server Configuration As Brother print servers support the SMB protocol over TCP IP via a NetBIOS interface you can easily configure your printer to work with an IBM LAN Server and OS 2 Warp Server networks that have IBM TCP IP V2 0 or later installed on the fileserver Use the following procedure to configure the LAN Server OS 2 Warp Server or OS 2 W...

Page 52: ...gits of Ethernet address and ServiceName is the service name of the print server BINARY_P1 by default For example NET USE LPT2 BRN_310107 BINARY_P1 Other Sources of Information 1 Visit http solutions brother com for more information on network printing 2 Refer chapter 9 of this User s Guide to learn how to configure the IP address of the printer You can find the NetBIOS name and MAC address by pri...

Page 53: ...operating systems Skip to the Windows 2000 IPP Printing section of this document Quick Tips 1 The Automatic Private IP Addressing APIPA protocol automatically assigns an IP address from the range 169 254 1 0 to 169 254 254 255 If the APIPA protocol is disabled the default IP address of a Brother print server is 192 0 0 192 To change it use the printer control panel if applicable the BRAdmin Profes...

Page 54: ... a standard Windows 95 98 Me 2000 XP and Windows NT 4 0 compatible printer Any Windows 95 98 Me 2000 XP and Windows NT 4 0 applications program can therefore print to this printer and hence to the virtual port without modification or operational procedure When a job is printed to the BIP virtual port it is actually MIME encoded converted to a standard Internet E mail message and sent out to a Brot...

Page 55: ... generally the mail account name will be the first part of the E mail address for example if you assign the E mail address emailprinter xyz com then the mail account name would be emailprinter 2 Make sure that the print server is installed and running with TCP IP enabled and has a valid IP address assigned to it Because access to the E mail server on most networks is usually restricted you may nee...

Page 56: ...P3 server consult your network administrator if you do not know this address 5 Enter the mailbox name for the remote Brother print server Usually this will be the first part of the E mail address for example if the E mail address of the print server is emailprinter xyz then the mailbox name would be emailprinter 6 Enter the password for the mailbox if any Skip this section if you wish to use the p...

Page 57: ...efault password is access 3 Select the Configure POP3 SMTP option and enter the information as described above Refer to Brother Internet Print Using a Web Browser to Configure the Print Server 4 You should see a Segmented Message Timeout option If a print job is separated into multiple E mail messages using the Partial E mail Print feature of the BIP this value indicates how long the print server ...

Page 58: ...lly if the E mail address is emailprinter xyz com then the mailbox name is emailprinter 3 The print server is set by default to poll the POP3 server every 30 seconds If you wish to change this value enter the command SET POP3 POLLING rate where rate is the polling rate in seconds Type EXIT to exit the console and save the changes You have now completed configuring the print server Brother Internet...

Page 59: ...in with the BIP and end with a number for example BIP1 7 You will then see a message about Partial E mail Print Partial E mail Print is the ability of the Brother Internet Print software to break down E mail Print jobs into smaller sections to prevent a mail file size limitation problem for the mail server 8 Click OK to continue 9 You will then be asked to enter the port settings for the remote pr...

Page 60: ...sked how the printer is connected to your computer and then click Next For Windows 95 98 Me users 15 Select the desired model of the remote printer for example Brother HL series If necessary click Have Disk to load the driver from the CD ROM Click Next when you are done 16 If you have selected a printer driver that is already being used you have the option of either keeping the existing driver rec...

Page 61: ...g a Second Brother Internet Port You should not re run the install program to add a new Brother Internet Port Instead click the Start button select Settings and open the Printers window Click on the icon of a printer that is using BIP select File from the menu bar and then choose Properties Click on the Details Ports on Windows NT 4 0 Windows 2000 XP tab and click the Add Port button In the Add Po...

Page 62: ...ck Next Windows 2000 XP will make a connection with the URL that you specified If the printer driver has already been installed If the appropriate printer driver is already installed on your PC Windows 2000 XP will automatically use that driver for use In this case you will simply be asked if you wish to make the driver the default driver after which the Driver installation Wizard will complete Yo...

Page 63: ... use this URL Please note the Get More Info option will not display any printer data http printer_ip_address 631 ipp port1 This is for HP JetDirect compatibility Please note the Get More Info option will not display any printer data http printer_ip_address 631 If you forget the URL details you can simply enter the above text and the printer will still receive and process data please note the Get M...

Page 64: ... information on network printing and for documents on the IPP protocol and how to configure a Windows 2000 95 98 Me System 2 Visit Microsoft s web site for the Microsoft Internet Print Services software for Windows 95 98 Me 3 Refer to chapter 9 of this User s Guide to learn how to configure the IP address of the printer ...

Page 65: ...eate a NDPS Printer for Netware 5 you have to configure the IP address of the print server in advance The Automatic Private IP Addressing APIPA protocol automatically assigns an IP address from the range 169 254 1 0 to 169 254 254 255 If the APIPA protocol is disabled the default IP address of a Brother print server is 192 0 0 192 To change it use the printer control panel if applicable the BRAdmi...

Page 66: ...itch between applications by using the BRAdmin application NetWare 5 users wishing to configure an NDPS printer must use the NWADMIN application supplied with NetWare 5 Please note that it is possible to create IPX BINDERY or NDS based queues on a NetWare 5 system using the BRAdmin application You must install the Novell NetWare Client 32 if you wish to create queue information on your NetWare ser...

Page 67: ...er within an NDS tree before creating server based printer agents If the NDPS manager controls a printer attached directly to the server you must load the manager on the server that the printer is attached to 1 In NetWare administrator navigate to the area you want the NDPS manager to reside Select Object Create NDPS Manager and click OK 2 Enter an NDPS manager name 3 Browse to a server which has ...

Page 68: ...con for the type of driver you want to add This will be a 3 1x 95 98 Me or NT4 0 driver for NetWare 5 Additionally a Windows 2000 driver is available for NetWare 5 1 If you are using NDPS version 1 with NetWare 4 x only 3 1x and 95 98 Me options will be available NDPS version 2 for NetWare 4 x will support Windows NT 4 0 drivers automatic download 6 A complete list of currently loaded resources of...

Page 69: ...utton and select a NDPS Manager Select Novell Printer Gateway for the Gateway type and click OK 5 Select None for the printer Type and Novell Port Handler for the Port Handler Type Then click OK 6 You must now specify the type of connection that you are going to use There are four possible options Select the LPR over IP option 7 Enter the relevant details of the printer and Brother recommends typi...

Page 70: ...ems Brother s BRAdmin application provides similar functionality to the NetWare PCONSOLE utility or the NWADMIN utility in NetWare 4 1x or later To use the BRAdmin application to configure a Brother print server under NetWare make sure that you are logged in as SUPERVISOR NetWare 2 xx or 3 xx or ADMIN NetWare 4 1x or later and perform the appropriate steps as detailed in the following pages Creati...

Page 71: ...pe in the queue name which you wish to create e Once you have done that highlight the queue name you created and click on the Add button f Click on Close and then OK Now exit the BRAdmin application You are ready to print You can find the node name and MAC address by printing out the Network Configuration Page See How to Print a Network Configuration Page on page A 8 for information on how to prin...

Page 72: ... you can manually enter this information or by clicking on the down arrow by the side of NDS tree and the Change button by the side of NDS Context you can let BRAdmin display your choices automatically Once you have specified this information click on the Change NDS queues button c In the NetWare Print Queues screen select the appropriate TREE and Context and then click the New Queue button d Ente...

Page 73: ...for configuration using the NWADMIN application in conjunction with the BRAdmin application 1 Make sure that you are logged in as ADMIN in NDS mode on the NetWare 4 1x or later file server and start the NWADMIN application 2 Select desired Context that will contain the Printer and then click on Object from the menu bar and then Create When you get the New Object menu select Printer and then OK 3 E...

Page 74: ...e current service name and MAC address by printing out the Network Configuration Page See How to Print a Network Configuration Page on page A 8 for information on how to print the Network Configuration Page on your print server Important Do not assign a password to the print server or it will not log in 15 Double click on the name of your print server Click on Assignments and then Add 16 If necess...

Page 75: ...e service assigned by NetWare server name cannot be used for both queue server mode and remote printer mode 21 Enter the NDS tree name note that a print server can service both NDS and bindery queues 22 Type in the name of the context where the print server resides 23 Exit the BRAdmin application making sure that you save the changes that you have made You are now ready to print If you want to ena...

Page 76: ...ter the name of the printer and select Create 5 Double click on the print server name of your PSERVER NLM Click on Assignments and then Add 6 If necessary change the directory context Select the printer you created and click OK Note the number of the printer as you will use this later then click OK 7 Select the desired Context that will contain the default print queue and then click on Object and ...

Page 77: ...e Printer as the Operating Mode select the name of your PSERVER NLM as the print server Name and select the number of the printer from step 6 as the Printer Number 17 Click OK And exit BRAdmin You can find the NetWare server name and MAC address by printing out the Network Configuration Page See How to Print a Network Configuration Page on page A 8 for information on how to print the Network Confi...

Page 78: ...bindery mode 2 Execute BRCONFIG from the Windows menu 3 Select the corresponding server name from the list of print servers 4 When you get the message that the print server is connected type the default password access in response to the prompt the password will not echo and then press the ENTER key in response to the Enter Username prompt 5 When you get the Local prompt type 6 SET NETWARE SERVER ...

Page 79: ...d then press ENTER to configure the queue 13 Select Queue Servers in NetWare 4 1x this item is called print servers and press ENTER to specify which network print servers can print jobs from this print queue The list will be empty since none have been selected yet if this is a new queue 14 Press INSERT to get a list of the queue server candidates and select the print server service name from step ...

Page 80: ...he list will be empty since none have been selected 10 Press INSERT to get a list of the queue server candidates and select the NetWare print server name from step 4 which will then be added to the list Press ENTER And then press ESCAPE several times to return to the main Available Options menu 11 Select Printers from the Available Options menu Enter the NetWare print service name of the print ser...

Page 81: ...print server that you entered in Step 4 18 Highlight the Printers option in the print server Information menu 19 Press INSERT and select the name of the printer you entered in Step 12 20 Press ESCAPE several times to return to DOS 21 Execute the BRCONFIG from the Windows menu Select the print server from the list of print servers When you get the message that the print server is connected press th...

Page 82: ...G 1 Make sure that the PSERVER NLM NetWare Loadable Module is loaded on your file server 2 Log into the file server from your PC workstation as ADMIN if you are using NetWare 4 1x if you want NDS support do not login under bindery mode If you are using NetWare 2 xx or 3 xx login as SUPERVISOR 3 Run the PCONSOLE utility from your PC workstation 4 If you are creating a new print queue select Print Q...

Page 83: ...ect Printers c Press INSERT to get Object Class menu d Press INSERT and enter the Printer Name any unique name is OK e Highlight the printer name and press ENTER twice to get to the Printer Configuration Menu f PCONSOLE will assign a Printer Number Remember this number since it will be used later g Highlight Print Queues Assigned and press ENTER and then INSERT to get a list of available queues h ...

Page 84: ...nfiguration process c If desired type in a new name for the printer d Go to Type press ENTER highlight Remote Other Unknown and press ENTER again The other settings in this menu are not required e Click ESCAPE and save the changes f Click ESCAPE and select Queues Serviced by Printer g Highlight the printer name that you just configured and press ENTER h Press INSERT choose the desired print queue ...

Page 85: ...of the service assigned by NetWare print server name where the default services are BRN_xxxxxx_P1 for the Brother printer where xxxxxx is the last six digits of the Ethernet address MAC address For example to set up remote Printer 3 for a Brother printer with the print server BRN_310107_P1 using the PSERVER NLM called BROTHER1PS you would type SET NETWARE NPRINTER BROTHER1PS 3 ON BRN_310107_P1 SET...

Page 86: ...PRINTING 6 22 Other Sources of Information 1 Visit http solutions brother com for more information on network printing 2 Refer to chapter 9 of this User s Guide to learn how to configure the IP address of the printer ...

Page 87: ...t server supports Mac OS X 10 1 to 10 3 You can use the TCP IP printing capability for any Mac OS X version This allows Macintosh users to send print jobs using the TCP IP protocol With the release of Mac OS X 10 2 Apple introduced Simple Network Configuration capabilities These Simple Network Configuration capabilities support automatic network configuration If you choose to use the the Simple Ne...

Page 88: ...ck on BRN_xxxxxx_P1_AT then on Service Name Enter the new name that you wish to appear in Print Center Then click on Submit 3 The default password for Brother print servers is access 4 See How to Print a Network Configuration Page on page A 8 for information on how to print the Network Configuration Page on your print server 5 The Automatic Private IP Addressing APIPA protocol automatically assign...

Page 89: ... Select your language and follow the on screen instructions for Install Software How to Select the Print Server AppleTalk EtherTalk After installing the PPD use the following steps to select the printer driver 1 Turn the power of the printer ON 2 From the Go menu select Applications 3 Open the Utilities folder 4 Open the Print Center Icon 5 Click the Add Printer button 6 Select AppleTalk 7 Select ...

Page 90: ... driver 1 Turn the power of the printer ON 2 From the Go menu select Applications 3 Open the Utilities folder 4 Open the Print Center Icon 5 Click the Add Printer button 6 Select LPR Printers using IP 7 Enter the TCP IP address of the printer into the LPR Printer s Address box Printing the Network Configuration Page will allow you to confirm the TCP IP address See How to Print a Network Configurat...

Page 91: ...use Mac OS X 10 2 4 or later version How to Select the Printer Driver 1 From the Go menu select Applications 2 Open the Utilities folder 3 Open the Print Center icon 4 Click the Add Printer button 5 Select Rendezvous and any available machines which are compatible with Simple Network Configuration capabilities will be displayed 6 Select Brother from the Printer Model 7 Select Model Name and then c...

Page 92: ...connect to the printer using the format http ip_address where ip_address is the address of the printer Other Sources of Information 1 Visit http solutions brother com for more information on network printing 2 Refer to chapter 9 of this User s Guide to learn how to configure the IP address of the printer 3 Refer to chapter 8 for more information on web based management ...

Page 93: ... Change network and printer settings details You must use the TCP IP protocol on your network and have a valid IP address programmed into the print server and your computer Quick Tips 1 The Automatic Private IP Addressing APIPA protocol automatically assigns an IP address from the range 169 254 1 0 to 169 254 254 255 If the APIPA protocol is disabled the default IP address of a Brother print serve...

Page 94: ... Your Printer Using a Browser Type http printer s IP Address into your browser you can also use the NetBIOS name of the print server if you are in a Microsoft Windows domain Workgroup environment Enter the DNS name of the printer if connecting to a network that uses the DNS protocol Other Sources of Information 1 Visit http solutions brother com for more information on network printing 2 Refer to ...

Page 95: ...otocol is disabled the default IP address of a Brother print server is 192 0 0 192 However you can easily change this IP address number to match with the IP address details of your network This can be done in any of the following ways From your printer s control panel settings if your printer has an LCD panel BRAdmin application for Windows 95 98 Me Windows NT 4 0 and Windows 2000 XP using the IPX...

Page 96: ...from Windows 95 98 Me Windows NT 4 0 and Windows 2000 XP The BRAdmin application can use the IPX SPX or TCP IP protocols to communicate with the Brother print server If you wish to use the TCP IP protocol to manage the print server make sure that the print server has a valid IP address There are two ways to change the IP address using the BRAdmin Professional utility Use the IPX SPX protocol Use t...

Page 97: ...ry again 3 Select the print server that you wish to configure and double click it You will be asked for a password The default password is access 4 Select the TCP IP tab and set the IP address Subnet mask and Gateway as needed 5 In the IP Config box click the Static radio button 6 Click OK Restart the print server by using BRAdmin Web Browser or TELNET If you are not sure how to restart the print ...

Page 98: ...n You can find the node name and MAC address by printing out the Network Configuration Page See How to Print a Network Configuration Page on page A 8 for information on how to print the Network Configuration Page on your print server 5 Enter the IP address Subnet mask and Gateway if needed of your print server 6 Click OK then select Close 7 With the correctly programmed IP address you will see the...

Page 99: ...ically configure an IP address and subnet mask when a DHCP server is not available The device chooses it s own IP address in the range 169 254 1 0 through to 169 254 254 255 The subnet mask is automatically set to 255 255 0 0 and the gateway address is set to 0 0 0 0 By default the APIPA protocol is enabled If you do not want your print server configured via DHCP BOOTP or RARP you must set the BOO...

Page 100: ...o use arp enter the following command at the command prompt arp s ipaddress ethernetaddress Where ethernetaddress is the Ethernet address MAC address of the print server and ipaddress is the IP address of the print server For example Windows Systems Windows systems require the hash character between each digit of the Ethernet address arp s 192 189 207 2 00 80 77 31 01 07 UNIX Linux Systems Typical...

Page 101: ... not need to use the ARP command The ARP command only works once For security reasons once you have successfully configured the IP address of a Brother print server using the ARP command you cannot use the ARP command again to change the address The print server will ignore any attempts to do this If you wish to change the IP address again use a Web Browser TELNET using the SET IP ADDRESS command ...

Page 102: ...d entry is the name of the print server the name must be the same as the one you put in the etc hosts file If the rarp daemon is not already running start it depending on the system the command can be rarpd rarpd a in rarpd a or something else type man rarpd or refer to your system documentation for additional information To verify that the rarp daemon is running on a Berkeley UNIX based system ty...

Page 103: ... would be bootp dgram udp wait usr etc bootpd bootpd i Depending on the system this entry might be called bootps instead of bootp BRN_310107 1 00 80 77 31 01 07 192 189 207 3 and BRN_310107 ht ethernet ha 008077310107 ip 192 189 207 3 In order to enable BOOTP simply use an editor to delete the if there is no then BOOTP is already enabled Then edit the BOOTP configuration file usually etc bootptab ...

Page 104: ...ich is included with every print server Execute BRCONFIG from the Windows menu Select the corresponding server name from the list of print servers When you get the message that the print server is connected type the default password access in response to the prompt You will be prompted for a user name Enter anything in response to this prompt You will then get the Local prompt Type SET IP ADDRESS ...

Page 105: ...wish to assign to the print server For example Local SET IP ROUTER 192 189 207 1 Type SET IP METHOD STATIC to set the method of IP access configuration to static To verify that you have entered the IP information correctly type SHOW IP Type EXIT or CTR D i e hold down the control key and type D to end the remote console session Changing the IP Address Settings with the TELNET Console You can also ...

Page 106: ... networks 255 255 0 0 for class B networks 255 0 0 0 for class A networks The leftmost group of digits in your IP address can identify the type of network you have The value of this group ranges from 192 through 255 for Class C networks e g 192 189 207 3 128 through 191 for Class B networks e g 128 10 1 30 and 1 through 127 for Class A networks e g 13 27 7 1 If you have a gateway router enter its ...

Page 107: ...9 13 TCP IP CONFIGURATION Other Sources of Information Visit http solutions brother com for more information on TCP IP protocol ...

Page 108: ... see NC 7100w network SETUP in the list when using Windows XP or Mac OS X 10 1 to 10 3 check the following For more information refer to the Quick Setup Guide that was supplied with this product 1 Move your printer with the print server installed closer to your PC and try again 2 Reset the print server back to its default factory setting and try again See How to Print a Network Configuration Page ...

Page 109: ...LESHOOTING For Windows XP users 1 Click Start and then Control Panel 2 Click the Network Connections icon You may need to update Windows XP and install the latest modules to show the screens shown in this section ...

Page 110: ...UBLESHOOTING 10 3 3 Select and right click Wireless Network Connection Click View Available Wireless Networks 4 Click the Advanced button 5 Make the Preferred networks filed blank by using Remove Click Add ...

Page 111: ...10 4 TROUBLESHOOTING 6 Enter SETUP Select Disabled Make sure that the check box at the bottom of the screen is selected and then click OK 7 Click OK ...

Page 112: ...OOTING 10 5 8 Check the wireless network connection status It may take a few minutes for the IP address to be displayed 9 You can now use the Brother Wireless Setup Wizard to configure your print server settings ...

Page 113: ...OTING For Mac OS X 10 1 to 10 3 users 1 Click the AirPort status icon and select Open Internet Connect 2 Select Create Network from the Network option 3 Enter SETUP select 11 from the Channel option and then click OK ...

Page 114: ...on Page See How to Print a Network Configuration Page on page A 8 for information how to print the Network Configuration Page on your print server If the test fails check If you cannot print the Network Configuration Page or the network configuration is incorrect try to restore the factory default settings of the print server by pressing the Network Test Button on the back of the printer for more ...

Page 115: ...r has two LEDs as shown in Figure 10 1 Figure 10 1 If none of the following steps are successful there is almost certainly a hardware or network problem LEDs Status POWER LED TX RX LED Status Ad hoc mode Infrastructure mode Off Off The printer s power switch is turned off On Off N A Not linked to Access Point Blinking synchronously Active Linked to Access Point TX RX LED POWER LED ...

Page 116: ...sor privileges or ADMIN for NetWare 4 or later servers go into PCONSOLE or NWADMIN select PRINT SERVER INFORMATION and select the name of the print server make sure that you have entered the print server name If you can see Print Server Status and Control in the menu then the Brother print server is visible to the network proceed to the Novell NetWare Installation Troubleshooting Section d If you ...

Page 117: ...previous steps then check the following Turning off the printer and then again Deleting and recreating the print server and creating a new print queue in order to eliminate the possibility of setup errors 1 The problem may be the result of mismatched or duplicate IP address Verify that the IP address is correctly loaded into the print server via the configuration page Make sure that no other nodes...

Page 118: ...he etc printcap file if applicable is typed in correctly In particular look for missing and characters because a small error anywhere in the file can have major consequences Also check the usr spool directory to make sure that you have created a valid spool directory 2 If you are using a Linux operating system the X Window Print tool program that is included with Linux may not properly configure t...

Page 119: ...RVICE BRN_xxxxxx_P1 EOT 3 9 If the lines of a text file are staggered make sure that you have specified a remote printer rp name of TEXT in your etc printcap file 10 If you are using Sun Solaris V2 4 or earlier there is a bug which causes long print jobs to fail when using a print server If you are having trouble printing long jobs over 1MB add the line mx 0 to your etc printcap file entry 11 If y...

Page 120: ...re the screen that prompts you for a Port name is not displayed This may happen on some Windows 95 98 Me computers Press the ALT and TAB keys to make it appear Windows 95 98 Me Peer to Peer HP JetAdmin Compatible Method Troubleshooting If you are having trouble printing on a Windows 95 98 Me Peer to Peer network check the following HP JetAdmin compatible method 1 If the print server does not show ...

Page 121: ...oting 1 The first step in troubleshooting is to make sure that you have a valid E mail connection on both the sending PC and the receiving print server Try sending an E mail message from the PC to a user at the remote site who can receive mail via the POP3 server If this does not work there may be an E mail configuration problem on the PC on the local E mail server or on the remote POP3 server Dou...

Page 122: ...figuring your Windows 2000 XP system http ip_address ipp Get More Info option in Windows 2000 not working If you are using a URL of http ip_address 631 or http ip_address 631 ipp the Get More Info option in Windows 2000 will not function If you wish to use the Get More Info option use the following URL http ip_address This will then force Windows 2000 XP to use Port 80 to communicate with the Brot...

Page 123: ...tware or by using a web browser or the BRAdmin application and in the file server using the PCONSOLE Print Server Information Change Password command 2 If you created the print queue using PCONSOLE and instead of BRAdmin make sure that you have enabled at least one NetWare file server using the SET NETWARE SERVER servername ENABLED command 3 Have you exceeded your NetWare user limit 4 Make sure th...

Page 124: ...the AppleTalk 2 Make sure that the AppleTalk protocol of the print server is enabled 3 Make sure that you can see the print server name in the Printer List when you select AppleTalk in Print Center Web Browser Troubleshooting TCP IP 1 If you can not connect to the print server using your web browser it may be worth checking the Proxy Settings of your browser Look in the Exceptions setting and if n...

Page 125: ...rade the firmware of the print server Web BRAdmin The Web BRAdmin software is designed to manage all LAN WAN Brother network connected devices By installing the Web BRAdmin software on a computer running IIS Administrators with a Web browser can connect to the Web BRAdmin server which then communicates with the device itself Unlike the BRAdmin Professional utility which is designed for Windows sys...

Page 126: ...mmand prompt for a list of supported commands BRCONFIG The Brother BRCONFIG utility runs from the DOS system prompt and is installed with BRAdmin To connect the print server using the Brother BRCONFIG NetWare utility choose the BRCONFIG utility from the Brother BRAdmin utilities menu If you have only one print server you will be immediately connected to that server If you have more than one print ...

Page 127: ...t for a list of supported commands Where xxxxxx is the last six digits of the Ethernet address for example BRN_310107_P1 Service Example Definition BINARY_P1 TCP IP binary NetBIOS service TEXT_P1 TCP IP text service adds carriage return after each line feed POSTSCRIPT_P1 PostScript service switches PJL compatible printer to PostScript mode PCL_P1 PCL service switches PJL compatible printer to PCL ...

Page 128: ...n page see How to Print a Network Configuration Page on page A 8 for information on how to print a configuration page There are three methods of upgrading the firmware in your Brother print server 1 Use the BRAdmin application Recommended 2 Use the FTP protocol Recommended if running on Macintosh or UNIX network 3 Use another system such as a Novell or UNIX system to send the new firmware file to ...

Page 129: ...led in your network many UNIX systems provide TFTP support you may wish to use this option The new firmware file must be located in the TFTP BOOT directory on your TFTP server In this case your PC makes the print server read the firmware data from the assigned TFTP server If you do not provide the correct file name then the upgrade will fail You must also ensure that the firmware file is set so th...

Page 130: ...ambridge logged in ftp bin 200 Ready command OK ftp hash Hash mark printing on ftp 2048 bytes hash mark ftp send brnt261 blf 200 Ready command OK 150 Transfer Start 226 Data Transfer OK Entering FirmWareUpdate mode ftp 1498053 bytes sent in 8 52Seconds 175 77Kbytes sec ftp close 226 Data Transfer OK ftp quit If you encounter problems upgrading the firmware and you find that the network portion of ...

Page 131: ...er will either be ignored or the printer will print garbage Reloading Using the FTP Protocol from a Web Browser Please visit the Brother Solutions Web site at http solutions brother com for more information on upgrading the print server using a web browser You must use the bin command to put the FTP client into Binary communications mode If you do not specify the bin command the upgrade process wi...

Page 132: ... Network Test Button of the printer for less than 5 seconds Figure A 1 How to Reset to Factory Default Setting If you wish to reset the print server back to its default factory settings resetting all information such as the password and IP address information use a fine ball point pen to hold down the Network Test Button for more than 5 seconds Figure A 2 ...

Page 133: ... using common Wireless Authentication and security methods Depending on the placement of the Brother NC 7100w wireless print server distances of up to 90 meters can be reached However distance and overall quality can vary depending on the environment itself and the types of device used within that environment Wireless LAN terms and concepts There are two types of Wireless networks Infrastructure m...

Page 134: ... wireless device is set in this mode it receives all print jobs via an access point Figure B 1 Ad hoc Mode Ad hoc networks also sometimes referred to as peer to peer networks do not have a central Access point Each Wireless client communicates directly with each other When the Brother wireless device is set in this mode it receives all print jobs directly from the computer sending the print data F...

Page 135: ...elow to see which authentication and encryption methods your Brother wireless device supports For more information on Wireless communication visit http solutions brother com wireless Authentication Methods The Brother Wireless Print Server supports the following methods Open System Wireless devices are allowed access to the network without any authentication Shared Key Infrastructure mode only A s...

Page 136: ...I Uses 5 text characters e g Hello this is case sensitive 64 40 bit Hexadecimal Uses 10 digits of hexadecimal data e g 71f2234aba 128 104 bit ASCII Uses 13 text characters e g Wirelesscomms this is case sensitive 128 104 bit Hexadecimal Uses 26 digits of hexadecimal data e g 71f2234ab56cd709e5412aa3ba Channels Wireless Ethernet networks use Channels There are up to 13 channels that can be used How...

Page 137: ... Menus to Configure the Wireless Print Server You can access the NETWORK menu by following steps below to configure the wireless print server See the printer User s Guide for more information on the control panel menus and control panel buttons Press any of the Menu buttons Set or Back to take the printer offline Press the button or the button to move forward or backward through the menus until NE...

Page 138: ...tings will not be used unless you switch the printer off and then on again Table B I NETWORK menu Display Shows Description TCP IP Subsetting Description TCP IP ENABLE ON OFF IP ADDRESS 0 0 0 0 255 255 255 255 SUBNET MASK 0 0 0 0 255 255 255 255 GATEWAY 0 0 0 0 255 255 255 255 IP BOOT TRIES 0 3267 IP METHOD AUTO STATIC RARP BOOTP DHCP APIPA ON OFF NETWARE NETWARE ENABLE ON OFF NETWARE FRAME AUTO 8...

Page 139: ...D KEY ENCRYPTION NONE WEP WEP KEY SELECT KEY1 KEY2 KEY3 KEY4 WEP KEY1 SIZE 40 64 BITS 104 128 BITS WEP KEY1 TYPE ASCII HEX WEP KEY1 Shows the WEP key uses a maximum of 5 or 13 digits and characters 0 9 a z and A Z in ASCII values or uses a maximum of 10 or 26 digits and characters 0 9 and A F in HEX values WEP KEY2 SIZE WEP KEY4 APPLY YES YES REPORT YES REPORT prints the Network Configuration Page...

Page 140: ...on such as the password and IP address information hold down the network test button on the NC 7100w print server for more than 5 seconds Table B II List of factory settings Submenu Factory setting TCP IP Subsetting Factory setting TCP IP ENABLE ON IP ADDRESS 1 SUBNET MASK 0 0 0 0 1 GATEWAY 0 0 0 0 IP BOOT TRIES 3 IP METHOD AUTO APIPA ON NETWARE NETWARE ENABLE ON NET FRAME AUTO APPLETALK ON NETBIO...

Page 141: ...ESS COMM MODE AD HOC LIST SSID XXX SSID SETUP CHANNEL 11 AUTHENTICATION OPEN SYSTEM ENCRYPTION NONE WEP KEY SELECT KEY1 WEP KEY1 SIZE WEP KEY2 SIZE WEP KEY3 SIZE WEP KEY4 SIZE 64 40 BITS WEP KEY1 TYPE WEP KEY2 TYPE WEP KEY3 TYPE WEP KEY4 TYPE ASCII WEP KEY1 WEP KEY2 WEP KEY3 WEP KEY4 XXX APPLY YES Table B II List of factory settings Continued Submenu Factory setting ...

Page 142: ... configure the wireless print server using the BRAdmin Professional utility is as follows 1 Start BRAdmin Professional 2 Select the node name of the Brother NC 7100w wireless print server from the list 3 From the Control menu select Configure Wireless Print Server 4 You will be prompted for a password the default password is access ...

Page 143: ...etwork Name SSID 0 to 32 bytes Channel 1 13 for Ad hoc mode The number of channels varies by country Authentication Method Open System Shared Key WPA PSK Encryption Mode NONE WEP TKIP WEP Key Shows the WEP key uses a maximum of 5 or 13 digits and characters 0 9 a z and A Z in ASCII values or uses a maximum of 10 or 26 digits and characters 0 9 and A F in HEX values Item Current status Operating Mo...

Page 144: ...eless For the wireless settings list when using a web browser see Wireless settings and status on page B 11 NC 7100w Print Server Specifications Model name NC 7100w Network types IEEE802 11b g wireless Frequency 2400 2483 5 MHz RF channels US and Canada 1 11 Europe 1 13 Australia 1 13 Communication mode Infrastructure Ad hoc 802 11 802 11b only Data rates 802 11b 11 5 5 2 1 Mbps 802 11g 54 48 36 2...

Page 145: ...DHCP APIPA Auto IP WINS NetBIOS DNS LPR LPD Raw Port Port9100 POP3 SMTP SMB Print IPP FTP mDNS SSDP TELNET SNMP HTTP TFTP Netware IPX SPX AppleTalk Dimensions W x D x H 87 x 127 x 31 6 mm 3 4 x 5 x 1 2 in Weights 0 11 Kg 2 4 lb Model name NC 7100w ...

Page 146: ...B 4 Control panel menu B 5 D DHCP 1 2 9 1 9 5 DNS 8 2 domain 2 5 3 3 4 1 4 2 4 3 8 2 10 14 DOS 4 1 E E mail 5 2 emailpassword 5 6 Encryption B 3 Encryption methods B 3 EtherTalk 7 1 7 3 F Factory settings B 8 flash memory A 4 FTP 1 2 1 11 A 4 A 6 H hosts 3 4 HP distributed print service 1 7 HP JetDirect 3 2 HP UX 1 3 HP UX 1 7 HTTP 8 1 9 1 A 1 Hyper Text Transfer Protocol 8 1 I IBM LAN Server 2 1 ...

Page 147: ...borhood 4 1 Novell 10 9 Novell Distributed Print Servic es 6 3 Novell NetWare 10 16 NWADMIN 6 2 O Open system B 3 OS 2 2 7 OS 2 Warp 4 8 OS 2 Warp Server 2 1 2 7 OS 400 1 11 P password 1 1 2 1 3 1 4 1 5 1 PCONSOLE 6 6 Peer to Peer Printing 3 1 Peer to Peer 10 13 10 14 ping 10 9 POP3 5 3 5 6 PPD 7 3 PRINTCAP 1 2 printcap 1 4 Printer Agent 6 5 PSERVER NLM 6 12 R RARP 9 8 reloading firmware A 5 RFC 1...

Page 148: ...PUT A 5 TGV Multinet 1 5 U UNIX 1 1 W Web BRAdmin A 1 web browser 9 1 WebJetAdmin A 1 WEP B 3 Windows 2000 2 1 3 2 4 1 5 1 6 4 9 1 10 15 Windows 2000 printing 2 2 2 4 Windows 95 98 Me 2 2 3 1 4 1 5 1 6 4 9 1 10 13 Windows NT 4 0 2 1 4 1 5 1 5 2 6 4 9 1 Windows NT 4 0 printing 2 4 Windows XP 2 1 4 1 5 1 9 1 10 15 Wired Equivalent Privacy B 3 Wireless network B 1 workgroup 4 2 ...

Reviews: