

Quick Setup Guide
HL-2220
HL-2240D
TWN-ENG
Version A
CD-ROM (including
Documentation)
Quick Setup Guide
Safety and Legal
Booklet
AC Power Cord
Drum Unit and Toner Cartridge Assembly
(pre-installed)
USB Interface Cable
Remove the packing material from the machine
Start Here
Before using this machine for the first time, read this Quick Setup
Guide to setup and install your machine.
To view the Quick Setup Guide in other languages, please visit
http://solutions.brother.com/.
4
Print a test page
3
Load paper in the paper tray
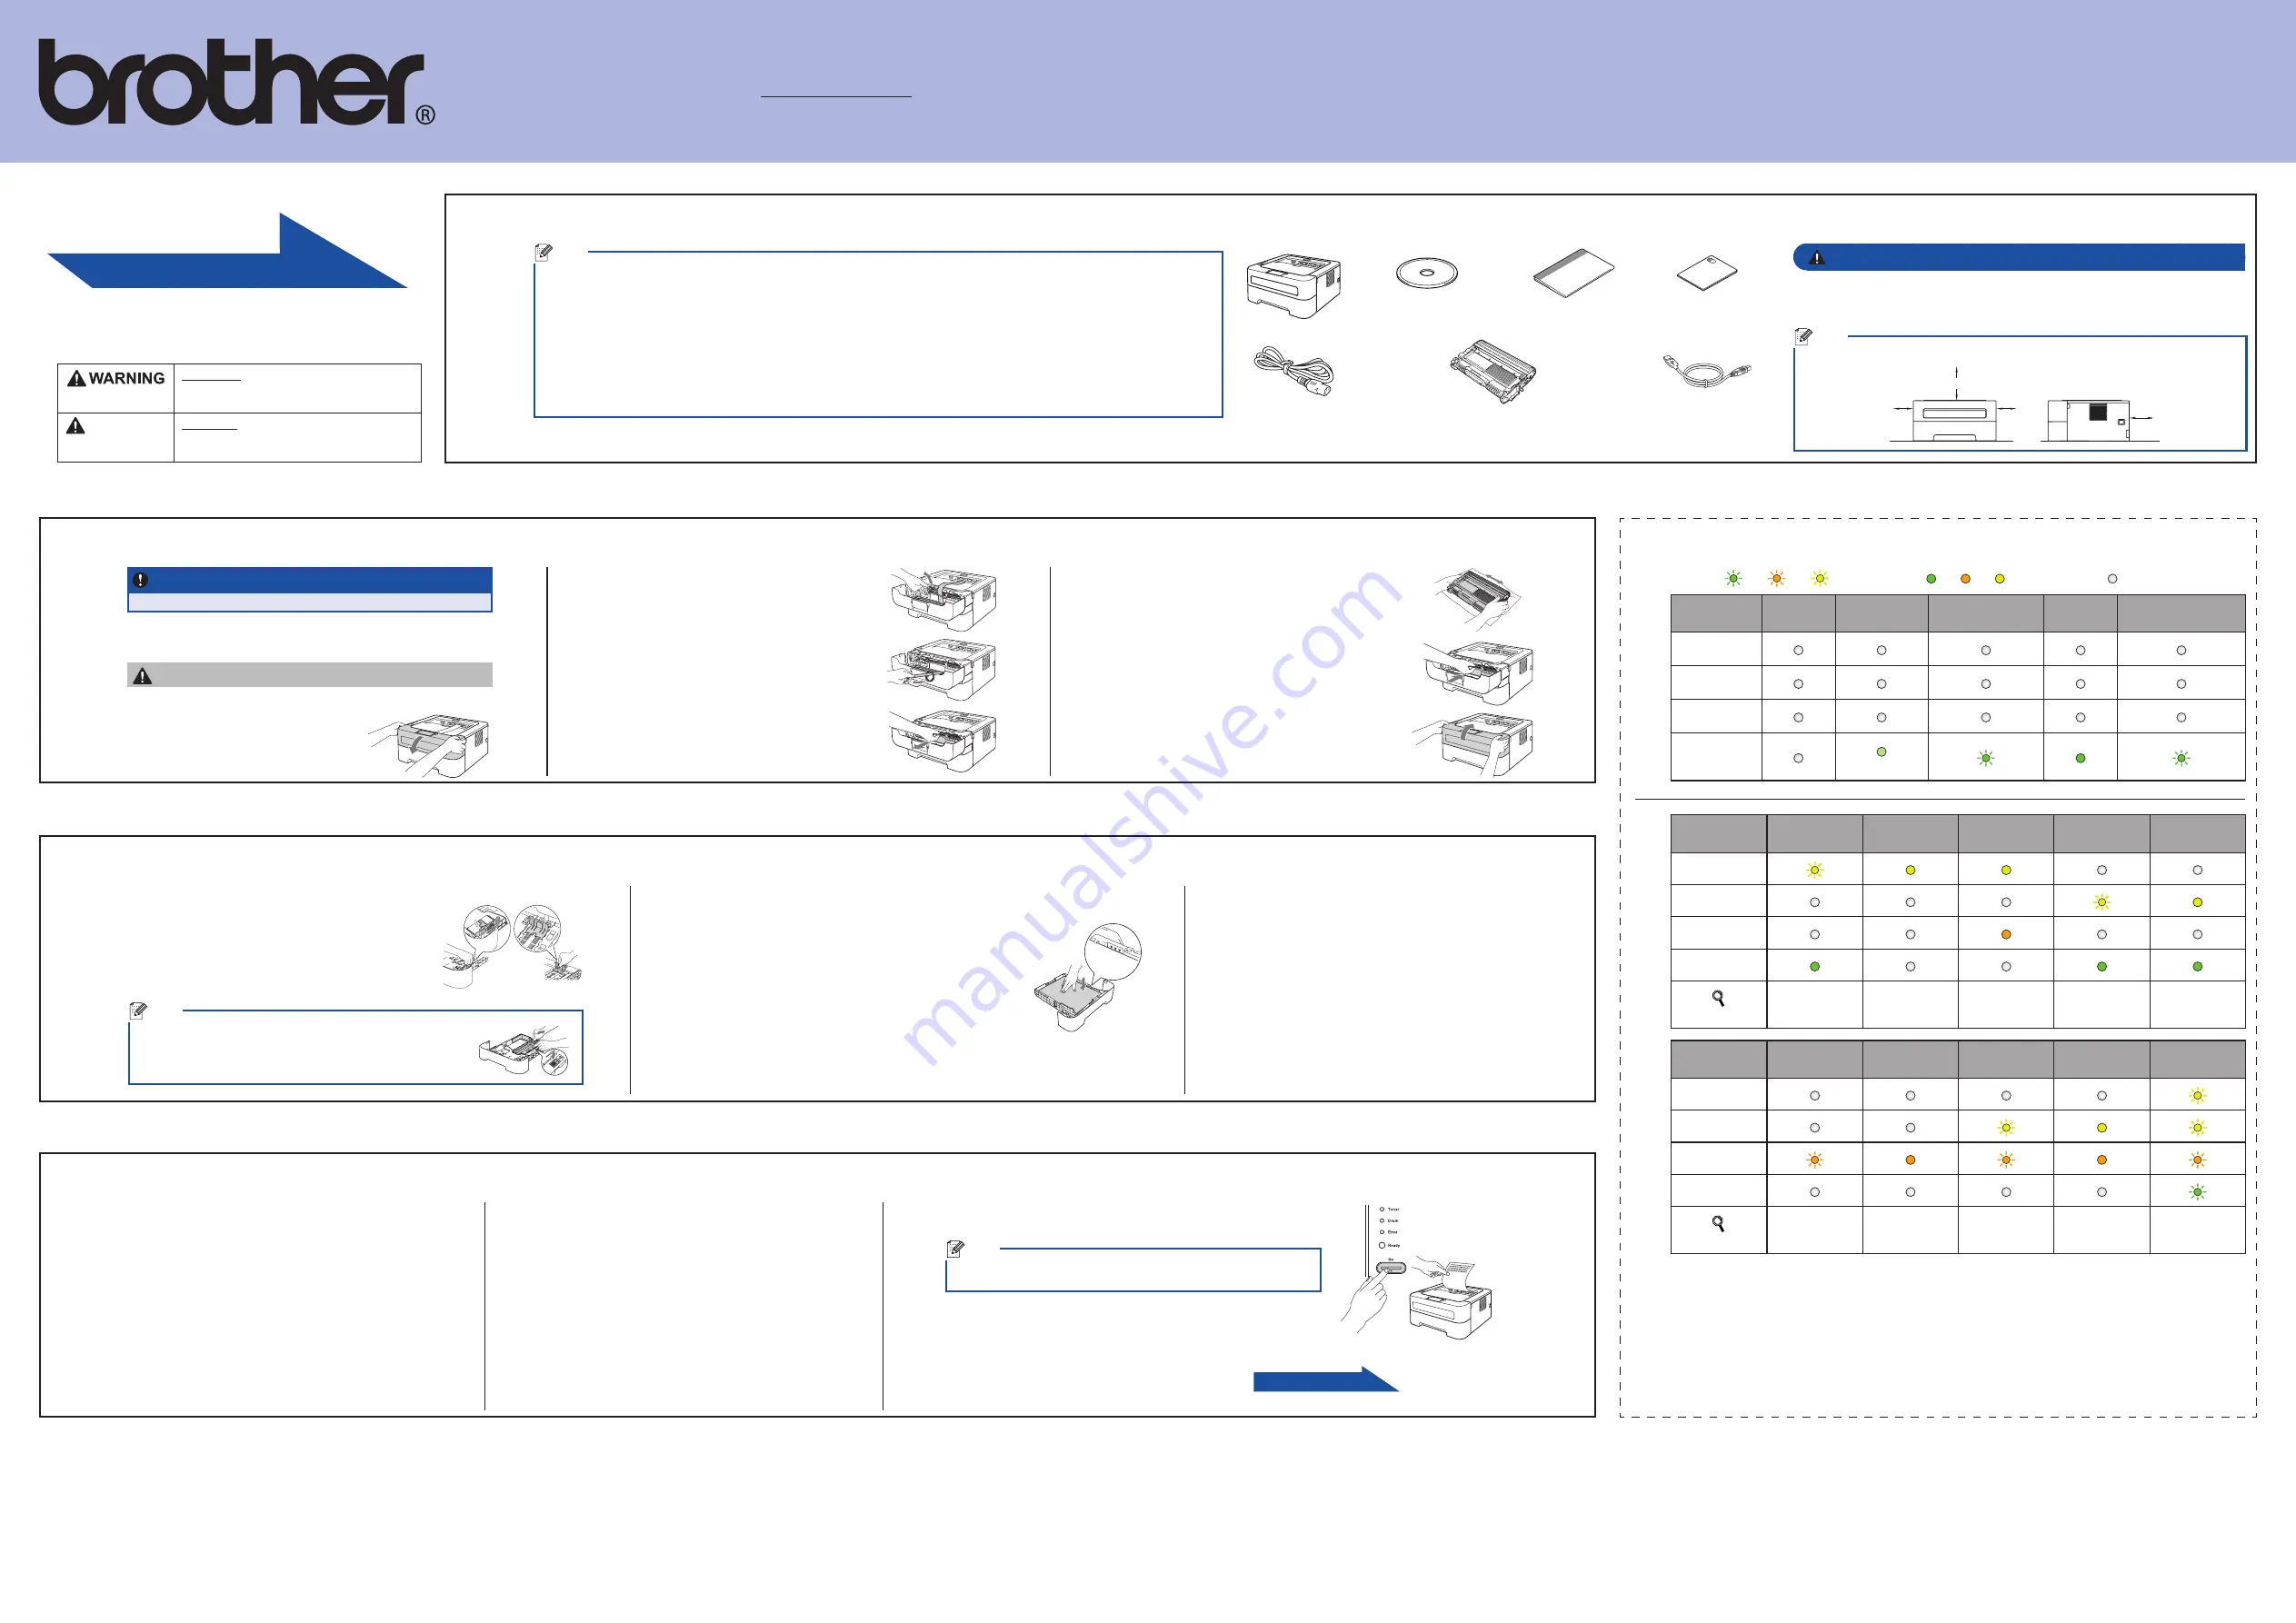
Printer LED Indications
WARNING indicates a potentially
hazardous situation which, if not avoided,
could result in death or serious injuries.
CAUTION
CAUTION indicates a potentially
hazardous situation which, if not avoided,
may result in minor or moderate injuries.
WARNING
Plastic bags are used in the packaging of your machine. Plastic bags are not toys.
To avoid danger of suffocation, please keep these bags away from babies and
children and dispose of them properly.
Note
Keep a minimum gap around the machine as shown in the illustration.
100mm(20.1 in.)
100mm
(4 in.)
100mm
(4 in.)
120mm
(4.72 in.)
Unpack the machine and check the components
Note
We recommend that you save the original packaging.
•
The components included in the box may differ depending on your country.
•
If for any reason you must ship your machine, carefully repack the machine in the original packaging to avoid any damage during transit.
•
The machine should be adequately insured with the carrier. How to repack the machine, see
Packing and shipping the machine in the
User’s Guide
.
To ensure safe operation the supplied plug must be inserted only into a standard power outlet that is properly grounded through the
•
standard electrical wiring. Non grounded equipment may cause an electrical shock hazard, and may cause excessive electrical noise
radiation.
USB cable
It is recommended to use a USB 2.0 cable (Type A/B) that is no more than 2 meters (6 feet) long.
Printer LED
TONER LOW
REPLACE
TONER
TONER
ENDED
DRUM END
REPLACE
DRUM
Toner
Drum
Error
Ready
User’s Guide
Chapter 4
Chapter 4
Chapter 4
Chapter 4
Chapter 4
Printer LED
COVER OPEN
NO PAPER
DRUM
DRUM STOP
Service call
Toner
Drum
Error
Ready
User’s Guide
Chapter 5
Chapter 5
Chapter 4
Chapter 4
Chapter 3
1
The LED will blink ON and OFF at 1 second intervals.
2
The LED will blink ON and OFF at 0.5 second intervals.
3
The yellow LED will blink in a pattern of ON for 2 seconds and then OFF for 3 seconds.
4
You can change the toner setting to the continue mode. Press
Go
seven times (all the LED flashes
twice, and then the
Ready
LED is on).
The machine continues printing until the LED indicates the toner ended message.
Gently shake it from side to side several times to
f.
distribute the toner evenly inside the assembly.
Put the drum unit and toner cartridge assembly
g.
back in the machine.
Take out the drum unit and toner cartridge
e.
assembly.
Lift the elastic band off the drum.
c.
Pull the paper strip to remove the protective
d.
material as shown in the illustration.
IMPORTANT
DO NOT connect the AC power cord yet.
Remove the packing tape from the outside of the machine and
a.
the silica gel pack from the face-down output tray.
CAUTION
CAUTION
DO NOT eat the Silica Pack. Discard immediately.
Open the front cover.
b.
Put the paper tray firmly back in the machine. Make
e.
sure that it is completely inserted into the machine.
Fan the stack of paper well to avoid paper jams and
c.
misfeeds.
Pull the paper tray completely out of the machine.
a.
While pressing the green paper-guide release lever,
b.
slide the paper guides to fit the paper size you are
loading in the tray. Make sure that the guides are
firmly in the slots.
Now go to
Turn the sheet over to install the printer driver.
Press
d.
Go
. The machine will print a test page. Check that the test
page has printed correctly.
Note
This function will not be available after the first print job you send from
your computer.
Turn on the machine power switch.
b.
After the machine has finished warming up, the
c.
Ready
LED stops blinking and stays green.
Connect the AC power cord to the machine and then
a.
connect it to an AC power outlet.
Blinking:
or
or
ON: or or OFF:
Printer LED
OFF
SLEEP
DEEP SLEEP
WARMING UP
READY
RECEIVING DATA
DATA REMAINING
Toner
Drum
Error
Ready
Dimmed
Note
For Legal or Folio size paper, press the release button in the
bottom of the paper tray and then pull out the back of the paper
tray. (Legal or Folio size paper are not available in some regions.)
Close the front cover of the machine.
h.
Put paper in the tray and make sure:
d.
The paper is below the maximum paper mark (
b
b
b
).
Over filling the paper tray will cause paper jams.
The side to be printed on must be face down.
The paper guides touch the sides of the paper so it will
feed properly.
2
1


