V –
49
3.7
Sensor Operational Check
■
Function
This function allows you to check that the six sensors (document front sensor, document rear
sensor, cover sensor, PE sensor, cutter HP sensor and hook switch sensor*) operate cor-
rectly.
(*In those versions equipped with a Binatone handset,
the hook switch sensor serves no function.)
In those versions equipped with a non-Binatone handset, the LCD shows the “FRE RC PE
CHK” when
- the document front and rear sensors detect no paper (FRE),
- the recording paper cover is closed (RC),
- the PE sensor detects paper loaded (PE), and
- the cutter HP sensor detects that the cutter is placed in the home position and the hook
switch sensor detects the on-hook state (CHK).
In those versions equipped with a Binatone handset, the LCD shows the “FRE RC PE CH”
when
- the document front and rear sensors detect no paper (FRE),
- the recording paper cover is closed (RC),
- the PE sensor detects paper loaded (PE), and
- the cutter HP sensor detects that the cutter is placed in the home position (CH).
■
Operating Procedure
(1)
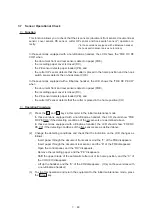
Press the 3 and 2 keys in this order in the initial maintenance mode.
In those versions equipped with a non-Binatone handset, the LCD should show “FRE
RC PE CHK” if the detecting conditions of the six sensors are as defined above.
In those versions equipped with a Binatone handset, the LCD should show “FRE RC
PE CH” if the detecting conditions of the five sensors are as defined above.
(2)
Change the detecting conditions and check that the indication on the LCD changes as
follows:
- Insert paper through the document front sensor, and the “F” of the FRE disappears.
- Insert paper through the document rear sensor, and the “E” of the FRE disappears.
- Open the control panel, and the “RC” disappears.
- Remove the recording paper, and the “PE” disappears.
- Shift the upper blade of the automatic cutter out of its home position, and the “C” of
the CHK (CH) disappears.
- Lift up the handset, and the “K” of the CHK disappears. (Only on those versions with
a non-Binatone handset)
(3)
To stop this operation and return the equipment to the initial maintenance mode, press
the Stop
key.
Summary of Contents for FAX-270MC
Page 4: ...CHAPTER I GENERAL DESCRIPTION ...
Page 11: ...CHAPTER II INSTALLATION ...
Page 12: ...CHAPTER III THEORY OF OPERATION ...
Page 49: ...CHAPTER IV DISASSEMBLY REASSEMBLY AND LUBRICATION ...
Page 86: ...IV 36 4 Cutter unit Cutter unit A A A A ...
Page 87: ...CHAPTER V MAINTENANCE MODE ...
Page 140: ...CHAPTER VI ERROR INDICATION AND TROUBLESHOOTING ...
Page 157: ...March 98 5X1S112 Printed in Japan ...
Page 173: ...D POWER SUPPLY 100 120 V U S A CANADA ...
Page 174: ...POWER SUPPLY 200 240 V EUROPE SOUTH AMERICA D ...
Page 175: ...POWER SUPPLY 200 240 V GULF ASIA CHINA D ...
Page 192: ...D POWER SUPPLY 100 120 V U S A CANADA ...
Page 193: ...POWER SUPPLY 200 240 V EUROPE SOUTH AMERICA D ...
Page 194: ...POWER SUPPLY 200 240 V GULF ASIA CHINA D ...
Page 195: ...FACSIMILE EQUIPMENT PARTS REFERENCE LIST MODEL FAX170 190 190 Plus 195 ...
Page 198: ......
Page 203: ......
Page 206: ...Remarks 8 8 8 8 8 8 9 9 8 8 8 8 8 8 0 1 0 1 Brother Technical Information FAX98250 4 ...
Page 208: ... 8 01 8 01 8 8 8 8 0 1 0 1 8 8 8 8 Brother Technical Information FAX99102 6 ...
Page 220: ......

