26
Installing and Uninstalling the Holder
Select the holder appropriate for the material, and
then install it into the machine. For details on the
holder appropriate for the material, see “Reference
Table of Mat, Blade and Material Combinations” on
page 15.
a
Press
in the operation panel to turn on the
machine.
For details, see “Turning On/Off the Machine” on
page 8.
Note
•
Be sure to turn on the machine before installing
the holder.
•
If the holder is installed while the machine is off,
the blade may break and material may not be
cut cleanly.
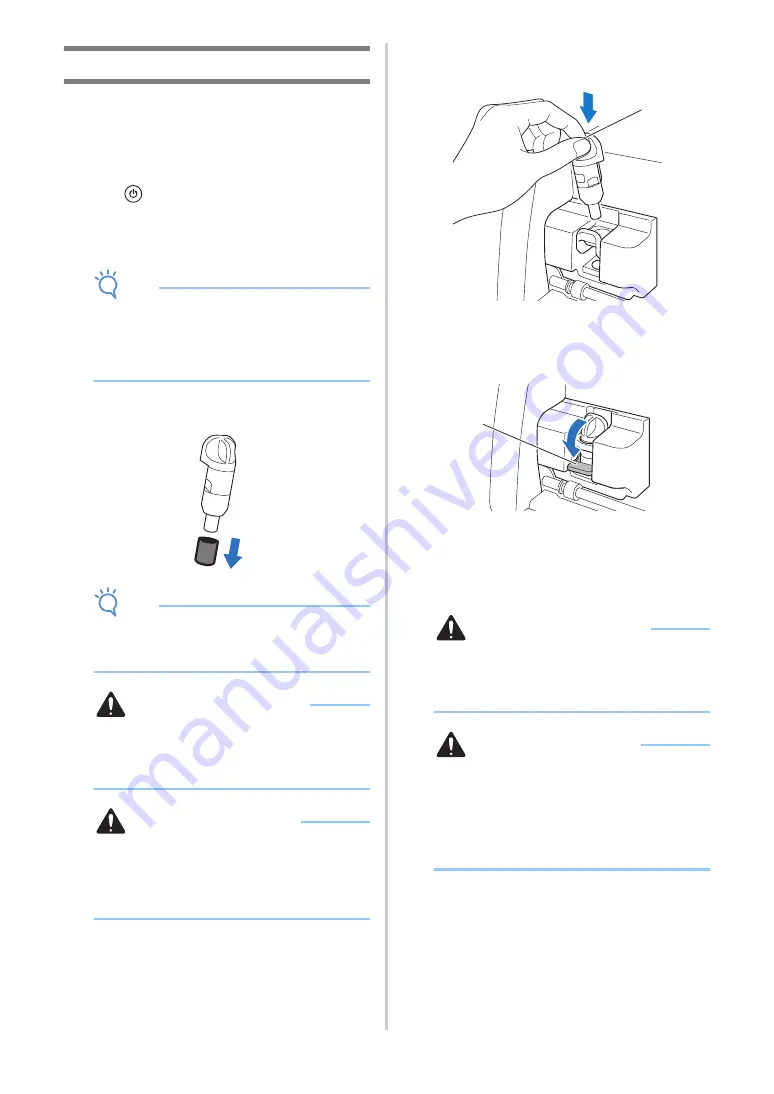
b
Remove the protective cap.
Note
•
Please remove protective cap from blade
holder before placing it into the machine
carriage.
WARNING
•
This is not a toy and is not intended to be used
by children. In order to prevent choking
hazards, do not allow infants/children to put the
protective caps in their mouths.
CAUTION
•
Do not press the tip of the holder with your
hand or fingers because the tip of the blade will
extend and may result in injuries.
•
Do not touch the tip of the blade with your
hands or fingers. There is a risk of injury.
c
Grasp the holder grip, and then insert the
holder into the carriage.
a
Grip
d
Push down on the holder lock lever.
Firmly push down until the holder is locked in place.
a
Holder lock lever
e
Reverse the installation procedure to uninstall
the holder.
WARNING
• This is not a toy and is not intended to be used
by children. In order to prevent choking
hazards, do not allow infants/children to put the
protective caps in their mouths.
CAUTION
• After removing the blade holder from the
machine, be sure to attach the protective cap.
• Do not press the tip of the holder with your
hand or fingers because the tip of the blade will
extend and may result in injuries.
• Do not touch the tip of the blade with your
hands or fingers. There is a risk of injury.
a
a
a


