


3. Set up the CP0 IP address by entering the
ipaddrset -cp 0
command:
swDir:admin> ipAddrSet -cp 0
Enter required information at the prompts. Following is example configuration for setting the CP0 IP address.
swDir:admin> ipaddrset -cp 0
DHCP [Off]:
Host Name [cp0]:
Ethernet IP Address [10.0.0.0]:192.168.1.2
Ethernet Subnetmask [255.0.0.0]:255.255.260.0
Gateway IP Address [10.0.0.0]:10.38.160.1
IP address is being changed...
Done.
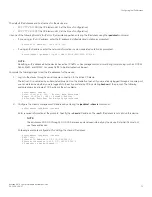
4. Set up the CP1 IP address by entering the
ipaddrset -cp 1
command:
swDir:admin> ipAddrSet -cp 1
Enter required information at the prompts. Following is example configuration for setting the CP1 IP address.
Following is sample configuration for setting the CP1 IP address:
swDir:admin> ipaddrset -cp 1
DHCP [Off]:
Host Name [cp0]:
Ethernet IP Address [10.0.0.0]:192.168.3
Ethernet Subnetmask [255.0.0.0]:255.255.230.0
Gateway IP Address [10.0.0.0]:10.38.160.1
IP address is being changed...
Done.
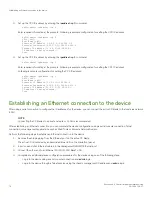
Establishing an Ethernet connection to the device
After using a serial connection to configure the IP addresses for the device, you can connect the active CP blade to the local area network
(LAN).
NOTE
Connecting the CP blades to a private network or VLAN is recommended.
After establishing an Ethernet connection, you can complete the device configuration using a serial console connection, Telnet
connection, or management applications, such as Web Tools or Brocade Network Advisor.
Perform the following steps to establish an Ethernet connection to the device.
1. Remove the shipping plug from the Ethernet port on the active CP blade.
The active CP is indicated by an illuminated blue LED on the blade front panel.
2. Insert one end of an Ethernet cable into the Management (MGMT) Ethernet port.
3. Connect the other end to an Ethernet 10/100/1000 BaseT LAN.
4. Complete any additional device configuration procedures for the device using one of the following steps:
•
Log into the device using a serial console connection and
admin
login.
•
Log into the device through a Telnet session using the chassis management IP address and
admin
login.
Establishing an Ethernet connection to the device
Brocade X6-4 Director Hardware Installation Guide
76
53-1004106-07
Summary of Contents for X6-4
Page 12: ...Brocade X6 4 Director Hardware Installation Guide 12 53 1004106 07...
Page 20: ...Brocade X6 4 Director Hardware Installation Guide 20 53 1004106 07...
Page 28: ...Brocade X6 4 Director Hardware Installation Guide 28 53 1004106 07...
Page 64: ...Brocade X6 4 Director Hardware Installation Guide 64 53 1004106 07...
Page 86: ...Brocade X6 4 Director Hardware Installation Guide 86 53 1004106 07...
Page 102: ...Brocade X6 4 Director Hardware Installation Guide 102 53 1004106 07...
Page 130: ...Brocade X6 4 Director Hardware Installation Guide 130 53 1004106 07...
Page 140: ...Brocade X6 4 Director Hardware Installation Guide 140 53 1004106 07...
Page 166: ...Brocade X6 4 Director Hardware Installation Guide 166 53 1004106 07...
Page 196: ...Brocade X6 4 Director Hardware Installation Guide 196 53 1004106 07...
Page 200: ...Brocade X6 4 Director Hardware Installation Guide 200 53 1004106 07...
Page 204: ...Brocade X6 4 Director Hardware Installation Guide 204 53 1004106 07...
Page 210: ...Brocade X6 4 Director Hardware Installation Guide 210 53 1004106 07...
Page 224: ...Brocade X6 4 Director Hardware Installation Guide 224 53 1004106 07...
Page 238: ...Brocade X6 4 Director Hardware Installation Guide 238 53 1004106 07...