background image

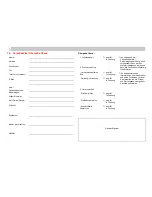
10.

Garantiekarte / Übergabe-Check

Name:

_____________________________________________

Adresse:

_____________________________________________

Postleitzahl:

_____________________________________________

Ort:

_____________________________________________

Telefon (mit Vorwahl):

_____________________________________________

E-Mail:

_____________________________________________

_____________________________________________

Auto-/
Fahrradkindersitz / 
Kinderwagen:

_____________________________________________

Artikel-Nummer:

_____________________________________________

Stoff-Farbe (Dessin):

_____________________________________________

Zubehör:

_____________________________________________

Kaufdatum:

____________________________________________

Käufer (Unterschrift):

____________________________________________

Händler:

____________________________________________

Übergabe-Check:

1. Vollständigkeit

{

   geprüft 

in Ordnung

{

 Ich habe den Auto-/

Fahrradkindersitz / 
Kinderwagen geprüft und mich 
vergewissert, dass der Sitz 
komplett übergeben wurde und 
dass alle Funktionen vollständig 
funktionieren.

{

 Ich habe ausreichend 

Informationen über das Produkt 
und seine Funktionen vor dem 
Kauf erhalten und die Pflege- 
und Wartungsanweisungen zur 
Kenntnis genommen.

2. Funktionsprüfung

- Verstellmechanismus 
Sitz

{

   geprüft 

in Ordnung

- Gurtzeug-Verstellung

{

   geprüft  

in Ordnung

3. Unversehrtheit

- Sitz überprüfen

{

   geprüft 

in Ordnung

- Stoffteile überprüfen

{

   geprüft

in Ordnung

- Kunststoffteile 
überprüfen

{

   geprüft

in Ordnung

Händler Stempel

Summary of Contents for King

Page 1: ...it GmbH Britax Excelsior Ltd Table des matières 1 Habilitation 2 2 Utilisation dans le véhicule 3 3 Montage dans le véhicule 4 3 1 Montage du siège auto 5 3 2 Démontage du siège auto 7 3 3 Comment savoir si le siège auto est bien monté 8 4 Protection de votre enfant 9 4 1 Adaptation des bretelles 10 4 2 Desserrage des sangles 12 4 3 Mise en place de la ceinture de votre enfant 12 4 4 Serrage des s...

Page 2: ...r Auto Kindersitz ist ausgelegt geprüft und zugelassen entsprechend den Anforderungen der europäischen Norm für Kindersicherheits Einrichtungen ECE R 44 04 Das Prüfzeichen E in einem Kreis und die Zulassungsnummer befinden sich auf dem Zulassungsetikett Aufkleber am Auto Kindersitz Die Zulassung erlischt sobald Sie am Auto Kindersitz etwas Brtiax RÖMER Auto Kindersitz Prüfung und Zulassung nach EC...

Page 3: ...vant regulations in your country 1 Use is permitted on a rearward facing vehicle seat e g in a van or minibus only if the vehicle seat is also approved for use by adults The seat may not be in the area of effect of an airbag 2 The safety belt must be approved to ECE R 16 or a comparable standard see test label on belt with an E or e in a circle 3 If there is a front airbag slide back all the way o...

Page 4: ...at a foldable rear seat bench latch is engaged all heavy or sharp edged objects in the vehicle e g on the parcel shelf are secured all persons in the vehicle have their seat belts fastened the child safety seat is always secured when it is in the vehicle even if no child is being transported To protect your vehicle Some vehicle seat covers of sensitive materials e g velour leather etc may develop ...

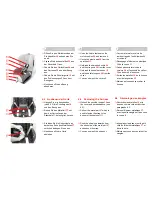
Page 5: ... direction of travel Þ Pull up on the grey release lever 1 and at the same time pull at the top in the centre of the edge of the seat shell The seat shell 11 disengages Þ Tip the seat shell 11 forward until it latches Þ Pull out the vehicle seat belt and place it between the seat shell 11 and the seat base 12 Þ Engage the buckle tongue in the vehicle seat buckle 2 with an audible CLICK Þ Place the...

Page 6: ...wn the clamping lever 6 corresponding to the dark red belt clamp 7 on the opposite side from the vehicle seat belt buckle 2 Þ Insert the diagonal seat belt section 5 into the belt clamp 7 Caution Do not twist the belt Þ Pull firmly on the diagonal seat belt section 5 at the same time pulling up on the clamping lever 6 until it engages Caution The diagonal seat belt section 5 may only be clamped us...

Page 7: ...ping mechanism as it now operates automatically Þ Push the seat shell 11 against the seat base 12 until it engages Caution The seat shell 11 must engage on both sides Pull up on the seat shell 11 to ensure that it is engaged 3 2 Removing the child safety seat Þ Open the child seat see 3 1 Þ Release the vehicle seat buckle 2 Þ Give the diagonal belt section 5 a brief jerk to pull it out of the belt...

Page 8: ...up and not twisted the lap belt section 3 runs through both light red belt guides 4 the diagonal seat belt section 5 is only clamped using the dark red belt clamp 7 on the opposite side from the vehicle seat belt buckle 2 the seat shell 11 is engaged with the seat base 12 on both sides neither the buckle tongue nor the belt buckle 2 of the vehicle seat belt is positioned in the belt guides 4 of th...

Page 9: ...ve the front seat forward far enough that you child s feet cannot hit the back rest of the front seat to prevent risk of injury The plastic parts of the child safety seat can heat up in the sun Caution Your child may get burnt Protect the child seat against intensive solar radiation when it is not actually in use Allow your child to enter and exit the vehicle only on the side away from traffic Mak...

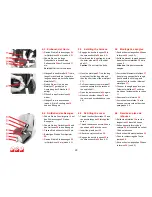
Page 10: ... than your child s shoulders To adjust the height of the shoulder straps to fit your child Þ Loosen the harness straps as far as possible see 4 2 Þ Open the child seat see 3 1 Þ Remove the clasps 21 from the strap loops of the shoulder pads 23 on the back of the seat shell Þ Unhook the shoulder straps 19 from the connecting piece 42 Caution After unhooking the connecting piece do not allow it to s...

Page 11: ... Hook the shoulder straps 19 back onto the connecting piece 42 Þ Thread the strap loops of the shoulder pads 23 into the same belt slots 34 through which you threaded the shoulder straps 19 Þ On the back of the seat shell slide the clasps 21 back into the strap loops of the shoulder pads 23 Þ Tighten the harness straps see 4 4 Þ Close the child seat see 3 1 Þ Ziehen Sie die Schultergurte 19 und di...

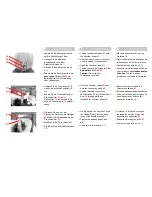
Page 12: ...r child Þ Loosen the shoulder straps see 4 2 Þ Open the harness buckle 24 press the red release button Þ Insert the buckle tongues 25 into the rubber holder 26 Þ Place your child into the safety seat Þ Unhook the buckle tongues 25 again Þ Put the shoulder straps 19 over the shoulders of your child Caution Do not twist or interchange the shoulder straps 19 Þ Put the two buckle tongues 25 together 4...

Page 13: ...mité de la sangle 36 Attention Tirez l extrémité horizontalement 4 5 Voici comment votre enfant est bien protégé Vérifiez pour la protection de votre enfant que les sangles du siège auto sont bien posées contre le corps sans le comprimer les bretelles 19 sont correctement ajustées les sangles ne sont pas torsadées les languettes 25 sont enclenchées dans le fermoir 24 les épaulières 23 sont bien en...

Page 14: ...ed Note The seat can only be opened in the upright position 6 Care instructions To retain the protective effect In an accident at a collision speed above 10 km h the child safety seat could suffer damage which is not necessarily obvious In such cases it is extremely important that you replace the child seat Please dispose of it properly see 7 Regularly check all important parts for damage Ensure t...

Page 15: ...alfunction The buckle tongues are ejected only slowly when the red release button is pressed The buckle tongues will no longer lock home are ejected again The buckle tongues engage without an audible click The buckle tongues are difficult to insert you feel resistance The buckle only opens if extreme force is applied Remedy Wash out the harness buckle so that it functions properly once again 1 Rem...

Page 16: ...s through the belt slot 31 2 Cleaning the harness buckle Þ Soak the buckle 24 in warm water with dishwashing liquid for at least an hour Rinse and dry thoroughly 3 Re fitting the harness buckle Þ Push the metal plate 30 on its side downwards through the belt slot 31 in the cover and through the seat shell Check for correct fitting by pulling firmly on the harness buckle 24 Þ Attach the crotch cush...

Page 17: ...avée en machine à 30 avec une lessive pour linge délicat Respectez les instructions de lavage figurant sur l étiquette de la housse Si vous lavez la housse à des températures supérieures à 30 le tissu risque de déteindre Ne pas essorer la housse et ne la mettre en aucun cas dans le sèche linge le tissu risque de se décoller du rembourrage Vous pouvez laver les éléments en matière plastique à l eau...

Page 18: ...the clasps 21 from the strap loops of the shoulder pads 23 on the back of the seat shell Þ Unhook the shoulder straps 19 from the connecting piece 42 Caution After unhooking the connecting piece 42 do not allow it to slip down into the seat base Þ Pull the shoulder straps 19 and the strap loops of the shoulder pads 23 out of the belt slots 34 Þ Pull the shoulder pads 23 off of the shoulder straps ...

Page 19: ...houlder straps 19 and the buckle tongues 25 from the cover Þ You can now pull the cover off 6 4 Removing the harness Þ Unhook the shoulder straps 19 and the cover as described above see 6 3 Þ Pull out the metal part 37 which is used to fasten the strap to the bottom of the seat shell 11 Þ Push the strap loop inwards from the short side of the metal part 37 and unhook the strap Þ You can now pull t...

Page 20: ...he short side of the metal part 37 Þ Pull the strap until the metal part 37 is seated squarely in the recess of the seat shell 11 Þ Open the harness buckle 24 again Þ Hook the shoulder straps 19 and the cover as described above see 6 6 6 6 Re fitting the cover Þ Thread the shoulder straps 19 and the buckle tongues 25 through the cover Þ Thread the harness buckle 24 and the strap end 36 into the co...

Page 21: ...t or interchange the straps Þ Hook the shoulder straps 19 back onto the connecting piece 42 Þ Thread the strap loops of the shoulder pads 23 into the same belt slots 34 through which you threaded the shoulder straps 19 Þ On the back of the seat shell slide the clasps 21 back into the strap loops of the shoulder pads 23 Þ Tighten the harness straps see 4 4 Þ Close the child seat see 3 1 Þ Fädeln Si...

Page 22: ...kaging carton container for paperboard polystyrene Styrofoam container for polystyrene Disposal of components cover garbage thermal utilisation plastic parts containercorresponding to the label on the part metal parts container for metals webbing container for Polyester buckle and tongue garbage Brtiax RÖMER Child safety seat Tested and certified according to ECE R 44 04 Group Body weight KID ll l...

Page 23: ...e Warranty Card must be returned together with the product The warranty covers only car bicycle child seats pushchairs which have been handled properly and which have been sent to us in a clean condition The Warranty does not cover natural signs of wear and damage resulting from excessive stress damage resulting from inappropriate or improper use What is covered by the warranty Fabrics All our mat...

Page 24: ... claim He or she will give you the advice and support you need When processing claims product specific depreciation rates will be applied Please refer to our General Terms and Conditions which are available from your retailer Use care and maintenance The car bicycle child seat pushchair must be used in accordance with the user instructions We would like to point out that it is extremely important ...

Page 25: ..._________________________________ Kaufdatum ____________________________________________ Käufer Unterschrift ____________________________________________ Händler ____________________________________________ Übergabe Check 1 Vollständigkeit geprüft in Ordnung Ich habe den Auto Fahrradkindersitz Kinderwagen geprüft und mich vergewissert dass der Sitz komplett übergeben wurde und dass alle Funktionen...

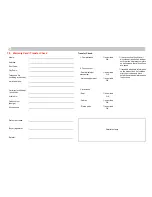
Page 26: ...our design _____________________________________________ Accessories _____________________________________________ Date of purchase ____________________________________________ Buyer signature ____________________________________________ Retailer ____________________________________________ Transfer Check 1 Completeness examined OK I have checked the child car bicycle seat pushchair and am sure th...

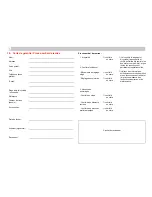
Page 27: ..._________ Date de l achat ____________________________________________ Acheteur signature ____________________________________________ Revendeur ____________________________________________ Procès verbal de remise 1 Intégralité contrôlé en ordre J ai contrôlé le siège auto bicyclette la poussette et vérifié qu il elle a été remis e en bon état et complet ète et que toutes les fonctions sont parfai...

Reviews: