background image

Model 16”

SV

4 Bruksanvisning

EN

34 User manual

DE

64 Gebrauchsanweisung

FR

94 Instructions d’utilisation

ES

124 Instrucciones de uso

IT

154 Istruzioni per l’uso

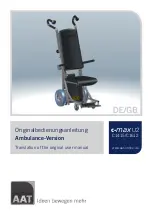
Carony

 Transfers a person between wheelchair and car

Summary of Contents for Carony 16

Page 1: ...6 SV 4 Bruksanvisning EN 34 User manual DE 64 Gebrauchsanweisung FR 94 Instructions d utilisation ES 124 Instrucciones de uso IT 154 Istruzioni per l uso Carony Transfers a person between wheelchair a...

Page 2: ......

Page 3: ...SV EN DE FR ES IT...

Page 4: ...n r ett optimalt och s kert brukande F rvara d rf r manualen s att den l tt terfinns vid behov Har du fr gor kring din anpassning v nligen kontakta din installat r Vill du veta mer om oss och v rt utb...

Page 5: ...Inneh ll Tillverkarintyg Product certificate l ngst bak i manualen Presentation 4 S kerhet 6 Funktioner 8 Handhavande 17 Sk tsel 24 Fels kare 27 Teknisk specification 29 Introduktion f r anv ndare 30...

Page 6: ...en vanlig rullstol Som anv ndare beh ver Du inte ha n gon specifik funktionell visuell eller kognitiv f rm ga Allt du beh ver g ra r egentligen att sitta kvar Som v rdgivare m ste du l sa och f rst i...

Page 7: ...bakom h ger bakhjul Product Carony 16 Date 2017 09 01 Article No 123456 Serial No 1234567 keriv 7 443 61 Stenkullen Sweden 46 302 254 00 MAX 120 KG WARNING DO NOT USE AS WHEELCHAIR DURING TRANSPORT I...

Page 8: ...En sp rrtapp p varje sida om s tet Vev f r h jd justering S kerhet 8 Carony 16...

Page 9: ...Tippskydd tillval S kerhet Anv nd tippskyddet vid behov Tryck p st dets ovansida f r att f lla ner det Tryck ner eller upp den svarta sp rren f r att f lla upp st det igen 9 Carony 16 SV...

Page 10: ...p v nster handtag och vinkla b da handtagen rakt bak t Dra hand tagen max upp och vinkla ut Ett klick h rs n r handtaget l ser sin position Dra ut respektive sp rr f r att vika in handtagen igen Vik...

Page 11: ...Bromsar Funktioner V rdarbroms Tryck ner den r da sp rren f r att l sa bromsen Parkeringsbroms B da bakhjulen bromsas d bromsspaken f lls fram t 11 Carony 16 SV...

Page 12: ...Fotst d Tryck ner sp rrtappen f r att montera demontera fotst det Se till att sp rrtappen l ser fotst det vid montering 12 Carony 16...

Page 13: ...ta plats p fotplattorna f r att flytta dessa n rmare brukaren H jdjustering Vinkeljustering Rekommendation justera fotplattan s att brukarens fotled vilar p plattan med 90 vinkel Funktioner 1 2 2 1 13...

Page 14: ...att vika upp helt utmed sidan p ryggst det n r det inte anv nds Ryggst dets lutning Vrid p ratten f r att justera lutningen av ryggst det Notera att ratten kan vara placerad p h ger eller v nster sida...

Page 15: ...Funktioner Svankst d Avl gsna svankst det vid behov Stick ner handen mellan k rhandtagen f r att ta tag i svankst det 15 Carony 16 SV...

Page 16: ...e p chassi Aktivera parkeringsbromsen Den fr mre delen av s tet ska skjutas in baktill p chassit 1 Passa in de tv hjulen samt sp rren p s tets undersida i skenorna p chassit 2 Sp rr framtill p s tet 1...

Page 17: ...om s tet Funktioner Tryck ner frig ringsspaken Skjut s tet hela v gen in och l s fast det p chassit med ett distinkt tryck 3 En utstickande sp rrtapp p varje sida om s tet indikerar att s tet r korre...

Page 18: ...fr n chassi Aktivera parkeringsbromsen Tryck ner frig ringsspaken och skjut s tet bak t tills det tar stopp 1 Lyft upp sp rren baktill p s tet 2 Sp rr baktill p s tet Skjut ut resterande del av s tet...

Page 19: ...ny Om Carony frig rs i detta l ge kan det orsaka obehag f r brukaren och skada n gon av produkterna Varf r viktkompensera C F r en optimal och s ker frig ring m ste Carony h jdjuste ras f r att linjer...

Page 20: ...kontrollera farten Tips Vid lutning pumpa upp sittdynans framkant f r b ttre sittkomfort Trappa F ll upp tippskydden Anv nd underredets bakkant som trampb ge f r att tippa Carony bak t H ll i handtag...

Page 21: ...fotst den f r att underl tta verflytt Lastning och lyft Veva ner Carony till sitt nedersta l ge f ll upp tippskydden och avl gsna fotst den f r att minimera behovet av utrym me Lyft n ra kroppen H ll...

Page 22: ...n i bilen Ett klickljud p vardera sida bekr ftar en korrekt dockning L s parkeringsbromsen och f ll upp fotst den Tryck ner spaken f r att frig ra s tet Skjut ver s tet och l s fast det p enheten i bi...

Page 23: ...ustera ner innan frig ring se kapitel om vikt kompensering Sl pp parkeringsbromsen Frig r Carony med hj lp av spakarna p varje sida Vrid in enheten i bilen igen Ner Handhavande 5 6 7 5 6 7 23 Carony 1...

Page 24: ...t dockningsplattan till sitt yttersta l ge Backa intill Carony Justera till r tt dockningsh jd med veven Docka Carony till enheten i bilen Ett klickljud p vardera sida bekr ftar en korrekt dockning L...

Page 25: ...Carony med ett distinkt tryck Sp rrtapparna bekr ftar korrekt l sning se kapitel om s kerhet H jdjustera upp innan frig ring se kapitel om vikt kompensering Sl pp parkeringsbromsen Frig r Carony med h...

Page 26: ...pmedel med ett pH v rde mellan 5 och 9 alternativt 70 procentig desinfektionssprit Reng r vid behov Anv nd kl dseltv tt avsedd f r bils ten Justera bromsvajrar vid behov se n sta uppslag D ck Framhjul...

Page 27: ...rikt linjerna i brukarmanualen Den faktiska livsl ngden kan variera d den p verkas av hur mycket och intensivt produkten anv nds Om Carony avses anv ndas efter den av BraunAbilitys specificerade livsl...

Page 28: ...mutter Om bromsarna tar d ligt lossa l smuttern och vrid justerskruven moturs f r att str cka vajern Dra t l smuttern igen f r att l sa den nya positionen L smutter V rdarbroms Parkeringsbroms en p va...

Page 29: ...t skruvar i chassit r ordentligt tdragna Kontrollera att vajern till bromsen r tillr ckligt str ckt se justering av bromsar Kontrollera att vajern till bromsen r tillr ckligt str ckt se justering av b...

Page 30: ...re hj lp och information kring Carony samt fr gor g llande garanti kontakta din installat r Som auktoriserad terf rs ljare till BraunAbility har din installat r alltid tillg ng till aktuell informatio...

Page 31: ...ter p framhjul 7 G diameter p bakhjul 16 Product data Max brukarvikt 120 kg Produktens vikt 15 5 kg exklusive fotst d och s te Produktens vikt 39 kg inklusive fotst d och s te Alla vikter och dimensio...

Page 32: ...B vill att du som anv ndare skall k nna dig trygg och bekv m med din nya produkt D rf r har din installat r till uppgift att g igenom f ljande med dig S kerhet Handhavande Om fr gor kring produkten sk...

Page 33: ...tikel nr Reservdel 401357 Crank mechanism 401358 Docking mechanism Reservdelslista F ljande reservdelar finns till Carony 16 Kontakta din terf rs ljare f r best llning och montering Kontaktuppgifter t...

Page 34: ...fe operation Keep the manual in a safe place so that you can refer to it when necessary If you have any questions about your adaptation please contact your installation engineer If you want to know mo...

Page 35: ...atures 38 Operation 47 Care instructions 54 Troubleshooting 57 Technical specification 59 Introduction for users 60 Spare parts list 61 35 EN Index Manufacturer certificate Product certificate at the...

Page 36: ...rsatile and easy to use as a normal wheelchair As a user you do not have to have any specific functional visual or cognitive ability All you really need to do is stay seated As a carer you must read a...

Page 37: ...OT USE AS WHEELCHAIR DURING TRANSPORT IN VEHICLE On the pillar behind the rear right wheel Product Carony 16 Date 2017 09 01 Article No 123456 Serial No 1234567 keriv 7 443 61 Stenkullen Sweden 46 302...

Page 38: ...One locking pin on each side of the seat Crank for height adjustment Safety 38 Carony 16...

Page 39: ...Anti tipping device option Use the anti tipping device if necessary Press the top of the support to fold it down Press the black catch up or down to fold the support up again 39 EN Carony 16 Safety...

Page 40: ...ft handle and angle both handles straight backwards Pull the handle all the way up and angle out A click is heard when the handle locks into position Pull the relevant catch out to fold the handles in...

Page 41: ...ress down the red catch to lock the brake Parking brake The brakes are applied against both rear wheels when the brake lever is folded forward Pull the lever backward to release the brakes again 41 EN...

Page 42: ...Foot rests Press down the locking pin to attach remove the footrest Ensure the locking pin secures the footrest when fitting 42 Carony 16...

Page 43: ...position of the foot plates so that they are closer to the user Height adjustment Angle adjustment Recommendation Adjust the foot plate so the user s ankle rests on the plate at a 90 angle 1 2 2 1 43...

Page 44: ...olded up fully along the side of the backrest when not in use Backrest tilt Turn the knob to adjust the backrest tilt Note that the knob may be located on either the right or left hand side of the sea...

Page 45: ...Lumbar support Remove the lumbar support if necessary Insert a hand between the push handles to grip the lumbar support 45 EN Carony 16 Features...

Page 46: ...chassis Engage the parking brake The front part of the seat slides into the back of the chassis 1 Fit the two wheels and the catch underneath the seat into the rails on the chassis 2 Catch on front of...

Page 47: ...seat A protruding locking pin on each side of the seat indicates that the seat is correctly locked 4 Press down the release lever Slide the seat all the way in and secure it on the chassis with a fir...

Page 48: ...assis Engage the parking brake Press down the release lever and slide the seat back until it stops 1 Lift up the catch on the back of the seat 2 Catch on back of seat Slide out the remaining part of t...

Page 49: ...this position can cause discomfort for the user and damage some of the products Compensating for weight C For optimum and safe release Carony must be adjusted for height to align with the turntable s...

Page 50: ...he speed Tip On inclines pump up the front edge of the seat cushion for better seating comfort Stairs Fold up the anti tipping device Use the rear edge of the chassis as a push bar to tip Carony backw...

Page 51: ...itate transfer Loading and lifting Crank Carony down to its lowest position fold up the anti tipping device and remove the footrests to minimise the space requirement Lift close to the body Keep your...

Page 52: ...o the unit in the car A clicking noise on each side confirms correct docking Apply the parking brake and fold up the footrests Depress the lever to release the seat Slide the seat over and lock it to...

Page 53: ...ght downwards before releasing see weight compensation chapter Disengage the parking brake Release Carony using the levers on each side Swivel the unit into the car again Down 5 6 7 5 6 7 53 EN Carony...

Page 54: ...ing plate to its outermost position Reverse adjacent to Carony Adjust to the correct docking height using the crank Dock Carony to the unit in the car A clicking noise on each side confirms correct d...

Page 55: ...press The locking pins confirm correct engagement see safety chapter Adjust the height upwards before releasing see weight compensation chapter Disengage the parking brake Release Carony using the le...

Page 56: ...ith a pH value between 5 and 9 percent alternatively 70 disinfectant Clean as necessary Use upholstery cleaner intended for car seats Adjust the brake wires as necessary see next spread Tyres Front ax...

Page 57: ...n the user manual The actual service life may vary as it depends on how much and how intensely the product is used If it is intended to use Carony after BraunAbility s specified service life the produ...

Page 58: ...s are not engaging properly slacken the locking nut and turn the adjustment screw anticlockwise to tension the cable Tighten the locking nut again to lock the new position Locking nut Carer brake Park...

Page 59: ...n the chassis are properly tightened Check that the cable to the brakes is sufficiently tensioned see Adjusting the brakes Check that the cable to the brakes is sufficiently tensioned see Adjusting th...

Page 60: ...r installer for further assistance and information concerning Carony plus questions regarding the guarantee As an authorised dealer of BraunAbility your installer is always in possession of current in...

Page 61: ...heel diameter 16 Product data Max user weight 120 kg Unit weight 15 5 kg excluding footrest and seat Unit weight 39 kg including footrest and seat All weights and dimensions are for reference only A B...

Page 62: ...u as a user to feel secure and comfortable with your new product For that reason it is your installer s duty to go through the following with you Safety Operation If any questions about the product sh...

Page 63: ...t no Spare part 401357 Crank mechanism 401358 Docking mechanism Spare parts list The following spare parts are available for the Carony 16 Contact your dealer for ordering and assembly Contact details...

Page 64: ...bitte stets so auf dass es bei Bedarf leicht auffindbar ist Sollten Sie Fragen zu Ihrer Umr stung haben dann setzen Sie sich bitte mit Ihrem Fachh ndler Monteur in Verbindung Wenn Sie mehr ber uns un...

Page 65: ...erheit 66 Funktionen 68 Bedienung 77 Pflegeanleitung 84 Fehlersuche 87 Technische Daten 89 Einweisung des Benutzers 90 Ersatzteilliste 91 DE Inhalt 65 Herstellersertifikat Product certificate hinten i...

Page 66: ...rmaler Rollstuhl Als Benutzer m ssen Sie keine speziellen funktionalen visuellen oder kognitiven F higkeiten haben Das Einzige was Sie tun m ssen ist im Grunde sitzen zu bleiben Als Pflegekraft m ssen...

Page 67: ...S WHEELCHAIR DURING TRANSPORT IN VEHICLE Befindet sich an der S ule hinter dem rech ten Hinterrad Product Carony 16 Date 2017 09 01 Article No 123456 Serial No 1234567 keriv 7 443 61 Stenkullen Sweden...

Page 68: ...Ein Sperrzapfen auf jeder Seite des Sitzes Kurbel zur H hen verstellung Sicherheit 68 Carony 16...

Page 69: ...erwenden Sie bei Bedarf den Kippschutz Dr cken Sie auf die Oberseite der St tze um sie herunterzuklappen Dr cken Sie die schwarze Sperre hinunter oder herauf um die St tze wieder hochzuklappen DE 69 C...

Page 70: ...inten neigen Ziehen Sie die Handgriffe maximal weit hoch und neigen Sie sie nach au en Wenn der Handgriff in seiner Position verriegelt wird ist ein Klick zu h ren Die jeweilige Sperre herausziehen um...

Page 71: ...n Sie die rote Sperre nach unten um die Bremse zu verriegeln Parkbremse Beide Hinterr der werden gebremst wenn der Bremshebel nach vorne ge klappt wird Ziehen Sie den Hebel nach hinten um die Bremsen...

Page 72: ...Fu st tzen Dr cken Sie die Sperrzapfen herunter um die Fu st tze zu montieren bzw abzu montieren Achten Sie bei der Montage darauf dass die Sperrzapfen die Fu st tze verriegeln 72 Carony 16...

Page 73: ...er Fu rasten um damit diese n her zum Benutzer kommen H henverstellung Winkelverstellung Empfehlung stellen Sie die Fu platte so ein dass das Fu gelenk des Benutzers in einem 90 Winkel zur Fu platte r...

Page 74: ...nz nach oben gestellt werden seitlich an der R ckenlehne entlang wenn sie nicht benutzt wird Neigung der R ckenlehne Das Rad drehen um die Neigung der R ckenlehne einzustellen Beachten Sie dass sich d...

Page 75: ...Lordosenst tze Entfernen Sie bei Bedarf die Lordosenst tze Greifen Sie mit der Hand zwischen den Schiebegriffen hinein um die Lordosenst tze zu fassen DE 75 Carony 16 Funktionen...

Page 76: ...arkbremse Der vordere Teil des Sitzes muss auf dem Fahrgestell nach hinten hineingescho ben werden 1 Passen Sie die beiden R der sowie die Sperre auf der Unterseite des Sitzes in die Schienen auf dem...

Page 77: ...perrzapfen auf jeder Seite des Sitzes zeigt an dass der Sitz korrekt verriegelt ist 4 Dr cken Sie den Verriegelungshebel nach unten Schieben Sie den Sitz ganz hinein und verriegeln Sie ihn mit einem k...

Page 78: ...emse Dr cken Sie den Verriegelungshebel her unter und schieben Sie den Sitz nach hinten bis es nicht mehr weiter geht 1 Heben Sie die Sperre hinten am Sitz nach oben 2 Sperre hinten am Sitz Schieben S...

Page 79: ...gel st wird kann dies f r den Benutzer unangenehm sein und eines der Produkte besch digen Zweck des Gewichtsausgleichs C F r ein optimales und sicheres Losmachen muss der Carony in der H he justiert...

Page 80: ...lle die Vorderkante des Sitzkissens aufpum pen um den Sitzkomfort zu verbessern Treppe Klappen Sie den Kippschutz hoch Nutzen Sie die Hinter kante des Untergestells als Tretb gel um den Carony nach hi...

Page 81: ...leichtern Einladen und Heben Kurbeln Sie den Carony in seine nied rigste Stellung hinunter klappen Sie den Kippschutz hoch und entfernen Sie die Fu st tzen um den Platzbedarf zu minimieren Heben Sie n...

Page 82: ...sch auf jeder Seite best tigt dass das Ando cken korrekt erfolgt ist Verriegeln Sie die Parkbremse und klappen Sie die Fu st tzen hoch Dr cken Sie den Hebel herunter um den Sitz zu l sen Den Sitz hin...

Page 83: ...unten justieren siehe das Kapitel ber Gewichtsausgleich L sen Sie die Parkbremse L sen Sie den Carony mit Hilfe der Hebel auf jeder Seite Schwenken Sie die Einheit wieder ins Auto Herunter 5 6 7 5 6 7...

Page 84: ...n Sie nach hinten an den Carony Stellen Sie mit der Kurbel die richtige Andockh he ein Docken Sie den Carony an die Einheit im Auto an Ein Klickger usch auf jeder Seite best tigt dass das Ando cken ko...

Page 85: ...n Die Sperrzap fen best tigen die korrekte Verriegelung siehe das Kapitel ber Sicherheit Vor dem L sen die H he nach oben justieren siehe das Kapitel ber Gewichtsausgleich L sen Sie die Parkbremse L s...

Page 86: ...ert zwi schen 5 und 9 oder 70 prozentigen Desinfektionsalkohol verwenden Bei Bedarf reinigen Verwenden Sie Polsterreiniger f r Autositze Stellen Sie die Bremsdr hte bei Bedarf ein siehe n chste Seite...

Page 87: ...eitung gepflegt wird Die tats chliche Lebensdauer kann unterschiedlich sein weil sie davon beeinflusst wird wie viel und wie stark das Produkt genutzt wird Wenn beabsichtigt wird den Carony nach der v...

Page 88: ...die Verschlussmutter l sen und die Verstellschraube im Gegenuhrzeigersinn drehen um das Drahtseil zu spannen Die Verschlussmutter wieder anziehen um die neue Stellung zu fixieren Kontermutter Bremse...

Page 89: ...l ordentlich angezogen sind berpr fen dass das Drahtseil zur Bremse ausreichend gespannt ist siehe Einstellung von Bremsen berpr fen dass das Drahtseil zur Bremse ausreichend gespannt ist siehe Einste...

Page 90: ...ergehende Hilfe und Informationen zum Carony sowie bei Fragen zur Garantie Ihren Monteur Als autorisierter H ndler f r BraunAbility hat Ihr Monteur immer Zugriff auf aktuelle Informationen und sachkun...

Page 91: ...messer 16 Produktdaten Max Benutzergewicht 120 kg Gewicht des Produktes 15 5 kg ohne Fu st tze und Sitz Gewicht des Produktes 39 kg mit Fu st tze und Sitz S mtliche Gewichte und Abmessungen sind unver...

Page 92: ...r sich sicher und bequem mit Ihrem neuen Produkt f hlen Deshalb ist Ihr Monteur verp flichtet Sie ber folgende Punkte zu informieren Sicherheit Handhabung Sollten zu einem sp teren Zeitpunkt Fragen zu...

Page 93: ...satzteil 401357 Kurbel Mechanismus 401358 Andock Mechanismus Ersatzteilliste Die folgenden Ersatzteile sind f r den Carony 16 erh ltlich Kontaktieren Sie Ihren H ndler zur Bestellung und f r die Monta...

Page 94: ...e Conservez ce manuel dans un endroit s r afin de pouvoir le consulter au besoin Si vous avez des questions concernant votre adaptation n h sitez pas contacter votre installateur Si vous souhaitez en...

Page 95: ...certificate la fin du manuel FR Carony 16 Pr sentation 96 S curit 98 Fonctions 100 Utilisation 109 Instructions de maintenance 116 Recherche de pannes 119 Fiche technique 121 Introduction pour l utili...

Page 96: ...il roulant ordinaire Comme usager vous n avez pas besoin de capacit s fonction nelles visuelles ou cognitives particuli res Vous restez confor tablement assis Comme auxiliaire vous devez lire et compr...

Page 97: ...S WHEELCHAIR DURING TRANSPORT IN VEHICLE Situ sur la colonne derri re la roue arri re du c t droit Product Carony 16 Date 2017 09 01 Article No 123456 Serial No 1234567 keriv 7 443 61 Stenkullen Swede...

Page 98: ...Une goupille de verrouillage de chaque c t du si ge Manivelle de r glage de la hauteur S curit 98 Carony 16...

Page 99: ...i bascule option Utilisez le dispositif anti bascule si n cessaire Appuyez sur le dessus de la b quille pour l abaisser Enfoncez ou relevez l l ment de blocage noir pour relever la b quille 99 FR Caro...

Page 100: ...linez les deux poign es tout droit en arri re Remontez les poign es au maximum et pivotez les vers l ext rieur Un clic se fait entendre lorsque la poign e se verrouille Tirez chacun des l ments de blo...

Page 101: ...foncez le blocage rouge pour serrer le frein Frein de stationnement Les deux roues arri re sont bloqu es lorsque le levier de frein est rabattu en avant Tirez le levier en arri re pour desserrer les f...

Page 102: ...Repose pieds Appuyez sur la goupille de verrouillage pour mettre en place ou retirer le re pose pied V rifiez que la goupille de verrouillage bloque le repose pied lorsqu il est en place 102 Carony 16...

Page 103: ...z les appuis de pied afin de les rapprocher de l utilisateur R glage de la hauteur R glage de l angle Recommandation r glez l appui en sorte que le pied repose en faisant en angle de 90 1 2 2 1 103 FR...

Page 104: ...st pas utilis il est possible de le relever compl tement le long du dossier Inclinaison du dossier Tournez la poign e pour r gler l inclinaison du dossier Il est noter que la poign e peut se trouver s...

Page 105: ...Appui lombaire Au besoin vous pouvez enlever l appui lombaire Enfoncez la main entre les poi gn es de conduite pour saisir l appui lombaire 105 FR Carony 16 Fonctions...

Page 106: ...ssis Serrez le frein de stationnement La partie avant du si ge s ins re l arri re du ch ssis 1 Introduisez les deux galets et le verrou situ s en dessous du si ge dans les glissi res du ch ssis 2 Ver...

Page 107: ...illes de verrouillage res sortent de chaque c t du si ge ceci indique que le si ge correctement verrouill 4 Appuyez sur le levier de lib ration Poussez le si ge jusqu au bout et verrouillez le au ch s...

Page 108: ...errez le frein de stationnement Appuyez sur le levier de lib ration et poussez le si ge en arri re jusqu but e 1 Soulevez le verrou l arri re du si ge 2 Verrou l arri re du si ge D gagez la partie res...

Page 109: ...osition cela peut tre inconfortable pour l utilisateur et endommager certains produits Pour compenser le poids figure C Pour une lib ration optimale et sans danger le Carony doit tre r gl en hauteur p...

Page 110: ...Astuce En pente gonflez le bord avant du coussin d assise pour un meilleur confort Escaliers Rentrez les protections anti bascule Servez vous du bord arri re du ch ssis comme d un trier pour basculer...

Page 111: ...t Chargement et levage l aide la manivelle abaissez le Carony jusqu la position la plus basse rentrez les protections anti bascule et enlevez les repose pieds pour r duire au maximum l encombrement Po...

Page 112: ...chaque c t l accostage a t correctement r alis Serrez le frein de stationnement et relevez les re pose pieds Appuyez sur le levier pour lib rer le si ge Faites glis ser le si ge et verrouillez le au...

Page 113: ...le bas voir le chapitre sur la compensation de poids Desserrez le frein de stationnement Lib rez le Carony l aide des leviers de chaque c t Repliez le dispositif dans la voiture Bas 5 6 7 5 6 7 113 F...

Page 114: ...squ en fin de course Reculez le Carony R glez la hauteur d accostage l aide de la manivelle Accostez le Carony au dispositif de la voiture Si un clic se fait entendre de chaque c t l accostage a t cor...

Page 115: ...e est indiqu par les tiges de blocage Pour plus de d tails reportez vous au chapitre sur la s curit Ajustez la hauteur vers le haut voir le chapitre sur la compensation de poids Desserrez le frein de...

Page 116: ...asif pH compris entre 5 et 70 ou de l alcool d sinfectant 9 Nettoyer si n cessaire Utilisez un produit nettoyant pr vu pour les si ges de voiture Au besoin ajustez les c bles des freins en vous report...

Page 117: ...tenu d apr s les instructions du manuel d utilisation La dur e de vie effective peut varier en fonction de la fr quence et de l intensit de l utilisation Si le Carony est utilis au del de la dur e de...

Page 118: ...es desserrez l crou de blocage et tournez la vis de r glage dans le sens antihoraire pour tendre le c ble Resserrez l crou de blocage pour fixer la nouvelle position crou de blocage Frein d accompagna...

Page 119: ...s vis du ch ssis sont bien serr es V rifiez que le c ble du frein est bien tendu en vous rapportant au chapitre sur le r glage des freins V rifiez que le c ble du frein est bien tendu en vous rapporta...

Page 120: ...formation sur le Carony et toutes questions concernant la garantie contactez l installateur En tant que revendeur agr BraunAbility l installateur a toujours acc s aux informa tions les plus r centes e...

Page 121: ...t ristiques Poids maximal de l utilisateur 120 kg Poids du produit 15 5 kg sans repose pieds ni assise Poids du produit 39 kg avec repose pieds et assise Les poids et les dimensions sont donn s seulem...

Page 122: ...aite que vous vous sentiez en tant qu utilisateur en s curit et l aise avec votre nouveau produit Votre installateur va donc parcourir les chapitres suivants avec vous S curit Utilisation Si vous devi...

Page 123: ...hange 401357 M canisme manivelle 401358 M canisme d accostage Liste des pi ces de rechange Les pi ces de rechange suivantes sont disponibles pour le Carony 16 Contactez votre revendeur pour passer com...

Page 124: ...guarde el manual de modo que sea f cilmente accesible en caso de necesidad Si tiene alguna pregunta sobre su adaptaci n le pedimos que se ponga en contacto con el instalador local Si desea saber m s s...

Page 125: ...Uso 139 Instrucciones de mantenimiento 146 Localizaci n de fallos 149 Especificaciones t cnicas 151 Introducci n para usuarios 152 Lista de repuestos 153 ES Indice 125 Certificato de fabricaci n Produ...

Page 126: ...l de usar como una silla de ruedas Como usuario no requiere tener ninguna capacidad funcional visual o cognitiva en particular Lo nico que debe hacer es permanecer sentado Como cuidador debe leer y en...

Page 127: ...WHEELCHAIR DURING TRANSPORT IN VEHICLE Situado en la columna detr s de la rueda tras era derecha Product Carony 16 Date 2017 09 01 Article No 123456 Serial No 1234567 keriv 7 443 61 Stenkullen Sweden...

Page 128: ...Un pasador de bloqueo a cada lado del asiento Manivela para reg ulaci n de altura Seguridad 128 Carony 16...

Page 129: ...opcional Utilizar la protecci n antivuelco si es necesario Presionar el lado superior del soporte para bajarlo Presionar hacia abajo o hacia arriba el fiador negro para volver a subir el soporte ES 12...

Page 130: ...lar las dos empu aduras de forma recta hacia atr s Levantar las empu aduras hasta el m ximo y doblarlas hacia fuera Se oye un clic cuando la empu adura se bloquea en su posici n Extraer el fiador de c...

Page 131: ...jo el fiador rojo para bloquear el freno Freno de estacionamiento Las dos ruedas traseras se frenan al desplazar hacia delante la palanca de fre no Para liberar nuevamente los frenos empujar la palanc...

Page 132: ...Reposapi s Presionar el pasador de bloqueo para montar desmontar el reposapi s Asegurarse de que el pasador de bloqueo fije el reposapi s en el montaje 132 Carony 16...

Page 133: ...s placas de lugar para que queden m s cerca del usuario Regulaci n de altura Ajuste del ngulo Consejo ajustar la placa para que el tobillo del usuario se apoye en la placa con un ngulo de 90 1 2 2 1 F...

Page 134: ...s puede levantarse por completo y quedar alineado con el respaldo Inclinaci n del respaldo Para regular la inclinaci n del respaldo girar el bot n Tener en cuenta que el bot n puede estar situado en e...

Page 135: ...Funciones Soporte lumbar Retirar el soporte lumbar si es necesario Introducir la mano entre las empu a duras de tracci n para coger el soporte lumbar ES 135 Carony 16...

Page 136: ...stacionamien to La parte delantera del asiento se deber introducir en la parte trasera del chasis 1 Introducir las dos ruedas y el fiador en la parte inferior del asiento en los carriles del chasis 2...

Page 137: ...sobresaliente a cada lado del asiento indica que el asiento est correctamente bloqueado 4 Presionar hacia abajo la palanca de lib eraci n Introducir el asiento comple tamente y fijarlo en el chasis c...

Page 138: ...cionamiento Presionar hacia abajo la palanca de liberaci n y deslizar el asiento hacia atr s hasta el tope 1 Levantar el fiador en la parte trasera del asiento 2 Fiador en la parte trasera del asiento...

Page 139: ...i n esto puede causar molestias al usuario y da ar algunos de los productos Por qu es importante compensar el peso C Para un desacoplamiento ptimo y seguro es necesario ajus tar la altura de la Carony...

Page 140: ...unciada bombear el borde delantero del coj n del asiento para proporcionar mayor comodidad al usuario Escaleras Levantar las protecciones antivuelco Utilizar el borde trasero del bastidor como arco de...

Page 141: ...rga y elevaci n Con la manivela bajar la Carony a la posici n m s baja levantar las protec ciones antivuelco y retirar los reposapi s para reducir la necesidad de espacio al m nimo Levantar cerca del...

Page 142: ...autom vil Un clic a cada lado confirma un acoplamiento correcto Bloquear el freno de estacionamiento y levantar las protecciones antivuelco Presionar hacia abajo la palanca para liberar el asiento Tr...

Page 143: ...esacoplamien to v ase el cap tulo sobre compensaci n de peso Liberar el freno de estacionamiento Desacoplar la Carony con las palancas de cada lado Girar y volver a introducir la unidad en el autom vi...

Page 144: ...ici n m s retirada Retroceder con la Carony y colocarla al lado Con la manivela ajustar la altura de acoplamiento adecuada Acoplar la Carony a la unidad del autom vil Un clic a cada lado confirma un a...

Page 145: ...es confirman un blo queo correcto v ase el cap tulo sobre seguridad Ajustar la altura hacia arriba antes del desacoplamien to ver el cap tulo sobre compensaci n de peso Liberar el freno de estacionami...

Page 146: ...esinfectante de alcohol al 70 Limpiar si es necesario Usar un limpia tapicer as adecuado para el asiento del veh culo Ajustar los cables de freno si es necesario v ase el siguiente punto Neum ticos Ej...

Page 147: ...nto de acuerdo con las instrucciones del manual del usuario La vida til efectiva puede variar ya que depende de la intensidad y frecuencia de uso del producto Si se prev utilizar la Carony despu s de...

Page 148: ...e aflojar la tuerca de seguridad y girar el tornillo de ajuste en sentido antihorario para tensar el cable Apretar nuevamente la tuerca de seguridad para bloquear la nueva posici n Tuerca de seguridad...

Page 149: ...m ticos sea correcta los tornillos del chasis est n bien apretados Controlar que el cable del freno est suficientemente tenso ver la p gina siguiente Controlar que el cable del freno est suficientemen...

Page 150: ...ci n sobre la Carony y para consultas sobre la garant a contactar con el t cnico Como distribuidor autorizado de BraunAbility el t cnico tiene siempre acceso a informaci n actualizada y soporte compet...

Page 151: ...el producto Peso m ximo del usuario 120 kg Peso del producto 15 5 kg sin el reposapi s ni el asiento Peso del producto 39 kg con el reposapi s ni el asiento Todos los pesos y dimensiones son solamente...

Page 152: ...re que usted como usuario se sienta seguro y c modo con su nuevo producto Por eso el instalador local debe repasar lo siguiente con el usuario Seguridad Uso Si en una etapa posterior surgiesen pregunt...

Page 153: ...Nro ref Repuesto 401357 Mecanismo de leva 401358 Mecanismo de acoplamiento Lista de repuestos Para la Carony 16 existen los siguientes repuestos Contactar con el distribuidor para el pedido y montaje...

Page 154: ...uro Conservare quindi il manuale a portata di mano per qualsiasi evenienza Per qualsiasi domanda sulla vostra soluzione personalizzata rivolgetevi all installatore Se vuoi saperne di pi su di noi e su...

Page 155: ...160 Uso 169 Istruzioni di manutenzione 176 Ricerca dei guasti 179 Specifiche tecniche 181 Introduzione per utenti 182 Elenco dei ricambi 183 IT Introduzioni 155 Certificato di fabbricazione Product ce...

Page 156: ...e come una normale carrozzina Agli utenti non sono richieste competenze funzionali visive o cognitive specifiche Tutto ci che dovete fare rimanere seduti Gli assistenti devono leggere e comprendere il...

Page 157: ...SE AS WHEELCHAIR DURING TRANSPORT IN VEHICLE Sul montante dietro la ruota posteriore destra Product Carony 16 Date 2017 09 01 Article No 123456 Serial No 1234567 keriv 7 443 61 Stenkullen Sweden 46 30...

Page 158: ...Un perno di bloccaggio su entrambi i lati del sedile Manovella di rego lazione in altezza Sicurezza 158 Carony 16...

Page 159: ...onale Utilizzare la protezione antiribaltamento all occorrenza Premere il lato superiore del supporto per abbassarlo Premere verso il basso o verso l alto il fermo nero per sollevare nuovamente il sup...

Page 160: ...inare entrambe le impugnature all in dietro Sollevare completamente le impugnature e inclinarle verso l esterno Quan do l impugnatura si blocca in posizione si sente un clic Estrarre il fermo per ritr...

Page 161: ...re il fermo rosso verso il basso per bloccare il freno Freno di stazionamento Portando in avanti la leva dei freni si frenano entrambe le ruote posteriori Tirare la leva all indietro per disinserire i...

Page 162: ...Pedana Premere il perno di bloccaggio verso il basso per montare smontare la pedana Verificare che il perno di bloccaggio fissi la pedana in sede di montaggio 162 Carony 16...

Page 163: ...ne delle pedane per avvicinarle all utente Regolazione in altezza Regolazione dell inclinazione Raccomandazione regolare la pedana in modo che le caviglie dell utente formino un angolo di 90 rispetto...

Page 164: ...hiuso completamente lungo il lato dello schienale quando non viene utilizzato Inclinazione dello schienale Girare la manopola per regolare l inclinazione dello schienale La manopola pu trovarsi sul la...

Page 165: ...Funzioni Supporto lombare Rimuovere il supporto lombare all occorrenza Infilare la mano fra le impugnature di guida per afferrare il supporto lombare IT 165 Carony 16...

Page 166: ...il freno di stazionamento Premere la parte anteriore del sedile verso la parte posteriore del telaio 1 Inserire le due ruote e il fermo sul lato inferiore del sedile nelle guide sul telaio 2 Fermo sul...

Page 167: ...di bloccaggio sporgente su entrambi i lati del sedile indica che il sedile fissato correttamente 4 Premere verso il basso la leva di sbloc caggio Premere il sedile a fondo verso l interno e bloccarlo...

Page 168: ...tazionamento Pre mere verso il basso la leva di sbloccag gio quindi portare il sedile al finecorsa posteriore 1 Sollevare il perno sul lato posteriore del sedile 2 Fermo sul lato posteriore del sedile...

Page 169: ...sta posizione l operazione potrebbe risultare pi scomoda per l utente e i prodotti potrebbero danneggiarsi Perch compensare il peso C Per uno sbloccaggio ottimale e sicuro regolare sempre l altezza di...

Page 170: ...a pompetta e solle vare il bordo anteriore del cuscino del sedile per aumentare il comfort di seduta Scale Sollevare le protezioni antiribaltamento Utilizzare il bordo posteriore della piastra inferio...

Page 171: ...sferimento Carico e sollevamento Abbassare completamente Carony con la manovella sollevare le protezioni anti ribaltamento e rimuovere le pedane per ridurre al minimo l ingombro Sollevare vicino al co...

Page 172: ...orretto an coraggio confermato da un clic su entrambi i lati Bloccare il freno di stazionamento e sollevare le pedane Abbassare la leva per sbloccare il sedile Spostare il sedile e bloccarlo sull unit...

Page 173: ...ccare vedere il capitolo sulla compensazione del peso Disinserire il freno di stazionamento Sbloccare Carony con le leve su ogni lato Ruotare nuovamente l unit nel veicolo verso l interno Gi 5 6 7 5 6...

Page 174: ...ente la piastra di ancoraggio Avvicinare Carony all indietro Regolare l altezza di ancoraggio con la manovella Ancorare Carony all unit nel veicolo Il corretto an coraggio confermato da un clic su ent...

Page 175: ...ermano se il bloccaggio stato effettuato correttamente vedere il capitolo sulla sicurezza Sollevare prima di sbloccare vedere il capitolo sulla compensazione del peso Disinserire il freno di stazionam...

Page 176: ...col disinfettante al 70 Pulire all occorrenza Utilizzare un prodotto per la pulizia dei tessuti adatto ai sedili dei veicoli Regolare i cavi dei freni all occorrenza vedere alle pagine seguenti Pneuma...

Page 177: ...come indicato nel manuale dell utente La durata effettiva pu variare a seconda della frequenza e dell intensit di utilizzo del prodotto Se Carony viene utilizzato oltre la durata specifi cata da Braun...

Page 178: ...mente svitare il dado di bloccaggio e girare la vite di regolazione in senso antiorario per tendere il cavo Riserrare il dado di bloccaggio per bloccare la nuova posizione Dado di bloccaggio Freno del...

Page 179: ...ione dei pneumatici sia corretta le viti nel telaio siano serrate correttamente Controllare che il cavo del freno sia teso a sufficienza vedere Regolazione dei freni Controllare che il cavo del freno...

Page 180: ...u Carony e per qualsiasi domanda relativa alla garanzia contattare l instal latore In qualit di rivenditore autorizzato BraunAbility l installatore pu sempre contare su informa zioni aggiornate e supp...

Page 181: ...i 16 Dati del prodotto Peso max dell utente 120 kg Peso del prodotto 15 5 kg pedana e sedile esclusi Peso del prodotto 39 kg pedana e sedile compresi Tutti i pesi e le dimensioni sono puramente indica...

Page 182: ...aunAbility Europe AB che l utente si senta sicuro e a suo agio con il prodotto a questo scopo l installatore ha il compito di esaminare i seguenti capitoli con voi Sicurezza Uso Se sorgessero eventual...

Page 183: ...freno Codice Ricambio 401357 Meccanismo manovella 401358 Meccanismo di ancoraggio Elenco dei ricambi Per Carony 16 sono disponibili i seguenti ricambi Per ordinazione e montaggio rivolgersi al rivendi...

Page 184: ......

Page 185: ......

Page 186: ...183 ISO 3795 ISO 7176 1 18 ISO 1021 1 ISO 1021 2 BraunAbility Europe AB Stenkullen 2019 04 02 Jan M Jensen Managing Director Manufacturer BraunAbility Europe AB keriv gen 7 443 61 Stenkullen Sweden Ph...

Page 187: ...dance with ISO 9001 2015 Illustrations descriptions and specifications in the user manual are based on current product information BraunAbility Europe AB reserves the right to make alterations without...

Page 188: ...427206 5 2019 04 BraunAbility Europe AB keriv gen 7 Phone 46 302 254 00 443 61 Stenkullen E mail info braunability eu Sweden www braunability eu...

Reviews: