BRAILLO
l
B 650 SW2.1
31
4.
If you can choose any settings for the new printer, just leave everything as default
5.
Give the printer a identifiable Name and Location, for example ‘Braillo_<model number>’
6.
Your new printer is now configured and ready to use
Note!
If you use the default ‘Generic Text-only printer’ driver for USB printing on Linux you might run into is
-
sues where the driver will strip certain control characters and just print the text. It could also refuse to
print certain documents which contain more than just printable text characters.
Also make note that this driver will add margins around the text by default, which might interfere
with the document formatting. The recommended driver on Linux is ‘Generic Raw Queue’ or similar
raw forwarding driver.
3.4 Ethernet on Windows
Before starting, make sure the printer is powered on and connected to the network.
You will need the printer’s IP address which can be found in menu
Main Menu - Warning - Service/
diagnostic - Status / Software upgrade.
‘Status / Software upgrade:’ on page 55
1.
Open ‘Printers & Scanners’ settings. (Via the Windows menu or via Settings - Devices)
2. Click ‘Add a printer or scanner’
3.
After Windows has scanned, click ‘The printer that I want isn’t listed’
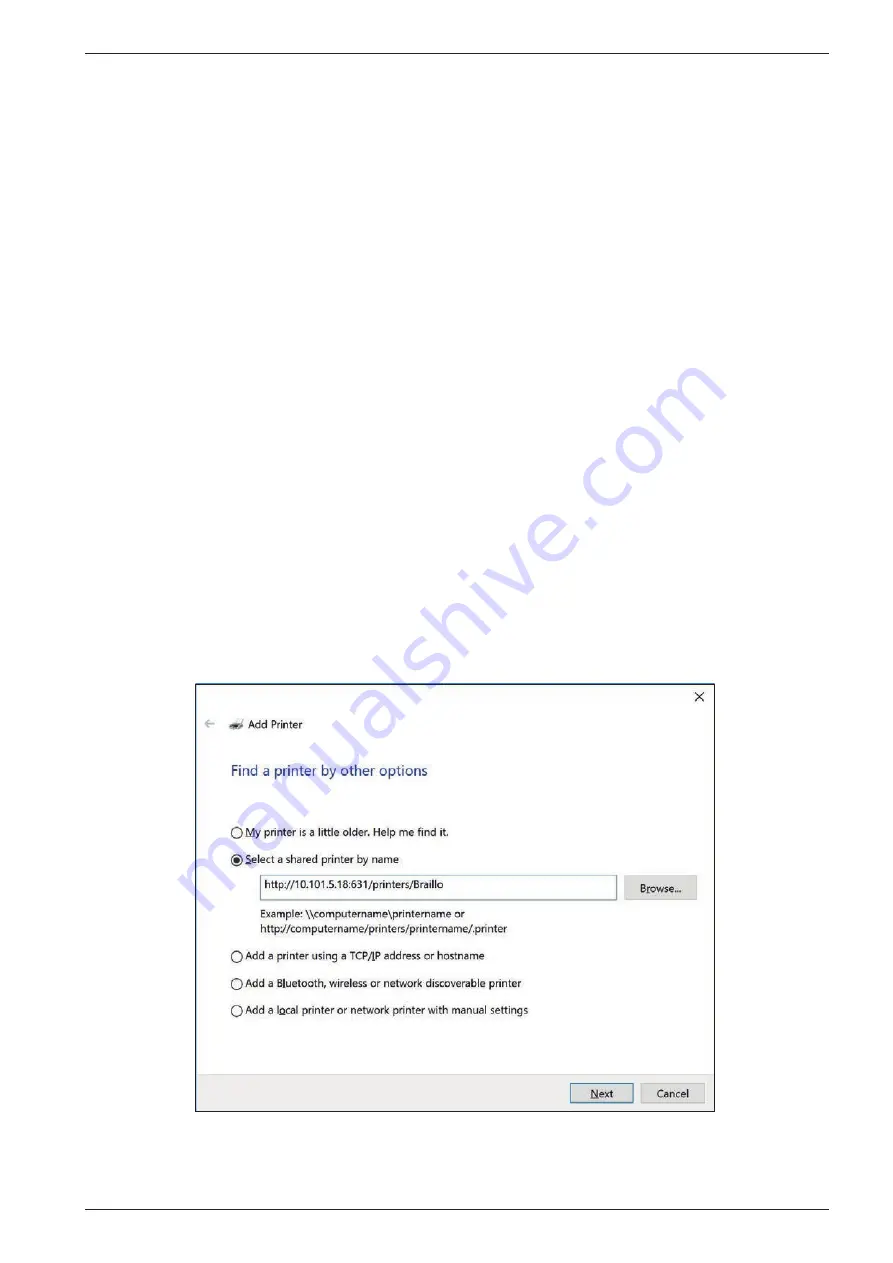
4. In the ‘Add Printer’ dialogue select ‘Select a shared printer by name’
5.
Enter the following in the field: http://<IP-address>:631/printers/Braillo


