


15
User Manual
4
5
2
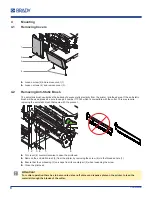
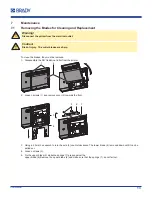
Press the upper blade (2) inwardly and slide the lower blade (5) over the upper blade (2) by turning the axle (4)
clockwise to the maximum top.
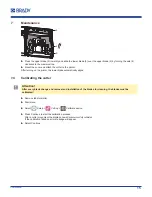
Mount the cover and attach the cutter to the printer.
After turning on the printer, the lower blade automatically aligns.
7.4
Calibrating the cutter
!
Attention!
After every blade change and removal and installation of the blades for cleaning, the blades must be
calibrated!
Remove label material.
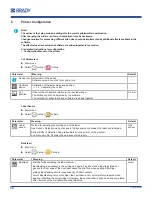
Start menu.
Select
Setup >
Cutting >
Calibrate device.
Press Continue to start the calibration process.
After a cutter movement the display shows
Device successfully calibrated
.
If the calibration failed an error message will appear.
Select Continue.