background image


64


Section 3. Using effects


6.


Use VALUE [-] [+] to select the patch 
number into which you want to write your 
edited patch.


7.


Press [TR4] (YES).


The display will ask “Are you sure?”


8.


If you are sure you want to write to the 
patch, press [TR4] (EXE). If you decide 
not to erase the song, press [EXIT].


When writing is completed, you’re returned 
to the effect screen.

By default, the insert effects are connected 
(inserted) directly after the input source. This 
means that you’ll be able to hear and record the 
sound processed by the effect.
However, in some cases, you may wish to change 
this method of connection.
The MICRO BR lets you change the location 
where the insert effects are connected, thus 
allowing you to use the effect in a variety of 
ways.
To change how the insert effects are connected, 
proceed as follows.


1.


Press [EFFECTS] and then press 

CURSOR [

].


2.


Press [TR1] (LOC).


fig.Disp-FX-loc-norm.eps


3.


Use VALUE [-] [+] to specify the location 
where the insert effects are to be 
connected.


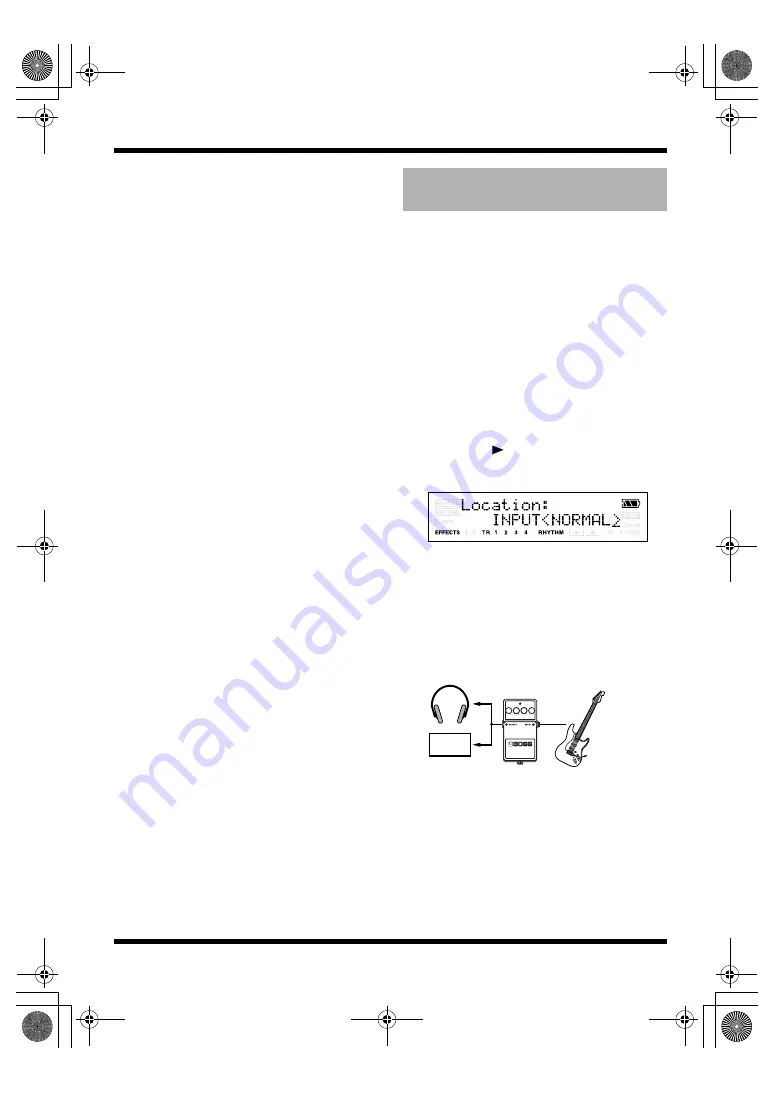
INPUT <NORMAL>


This lets you monitor and record the sound that 
is processed through the insert effects. Normally, 
you should use this setting.


fig.03-110


Changing how the insert 

effects are used

TRACK 1

(REC)

MICRO-BR_e.book 64 ページ 2007年12月6日 木曜日 午後4時8分

Summary of Contents for MICRO BR

Page 1: ... Indicates information that you should be aware of when using the MICRO BR Indicates a convenient operation or useful music production technique Indicates supplementary information about an operation Indicates a reference page Indicates an explanation of a term 04455301 3MP Owner s Manual To resize thickness move all items on the front cover and center registration marks to left or right 204 Micro...

Page 2: ...uctions or warnings The specific meaning of the symbol is determined by the design contained within the triangle In the case of the symbol at left it is used for general cautions warnings or alerts to danger The symbol alerts the user to items that must never be carried out are forbidden The specific thing that must not be done is indicated by the design contained within the circle In the case of ...

Page 3: ...ing into or unplugging from an outlet or this unit 03b At regular intervals you should unplug the AC adaptor and clean it by using a dry cloth to wipe all dust and other accumulations away from its prongs Also disconnect the power plug from the power outlet whenever the unit is to remain unused for an extended period of time Any accumulation of dust between the power plug and the power outlet can ...

Page 4: ...l phones are operated in the vicinity of this unit Such noise could occur when receiving or initiating a call or while conversing Should you experience such problems you should relocate such wireless devices so they are at a greater distance from this unit or switch them off 354a Do not expose the unit to direct sunlight place it near devices that radiate heat leave it inside an enclosed vehicle o...

Page 5: ... connection cables contain resistors Do not use cables that incorporate resistors for connecting to this unit The use of such cables can cause the sound level to be extremely low or impossible to hear For information on cable specifications contact the manufacturer of the cable Before Using Cards Using DATA Cards 704 Carefully insert the DATA card all the way in until it is firmly in place fig M51...

Page 6: ... Turning the power off 24 Listening to the demo song 26 Playing the demo song 26 Changing the current position 27 Creating a new song 28 Creating a new song Song New 28 Selecting the input 29 Using effects Insert Effects 30 Selecting an effect patch 30 Recording without the insert effects 30 Using rhythm 31 Playing patterns 31 Changing the tempo of the pattern 31 Recording 32 Playing back 33 Playi...

Page 7: ...3 The edit region and the number of copies 54 Moving data Track Move 55 Erasing data Track Erase 56 Exchanging data Track Exchange 57 Managing the songs you ve recorded 58 Copying a song Song Copy 58 Erasing a song Song Erase 58 Saving space on the memory card Song Optimize 59 Naming a song Song Name 59 Protecting a song Song Protect 60 Saving the current settings to the song Song Save 60 Section ...

Page 8: ...n 5 Using MP3 player 91 What is MP3 91 Audio formats supported by the MICRO BR 91 Audio formats not supported by the MICRO BR 91 Files downloaded from music distribution sites 91 Handling audio files imported from a music CD 91 Copyright 92 About the License Agreement 92 Regarding MP3 mode 92 Switching to MP3 Mode 93 Playing the MP3 WAV file 93 Playing back repeatedly Repeat 94 Practicing along wi...

Page 9: ...n audio file Track Export 112 Converting audio files to track data Track Import 113 Using plug in powered microphone 114 Initializing the Memory Card 115 Initializing All the MICRO BR s Settings 115 Saving Battery Power Power Save 116 Powering off automatically Auto Power Off 116 Section 8 Appendices 117 Arrangement Pattern List 117 Preset Arrangement List 117 Preset Pattern List 118 Effect Patch ...

Page 10: ...1 Using Reverb Effect p 74 Multitrack recording You can record your performance on separate tracks There are four tracks that can be played back simultaneously and each track has eight virtual tracks V tracks For example you can record several takes of a guitar solo on different V tracks and choose the best one later Section 1 Recording and playing back p 38 You can also play back the four tracks ...

Page 11: ...the sound localized at the center of the sound field great features when you want to practice along on your instrument Extended duration MP3 recording is also supported so the MICRO BR is ideal for outdoor recording using a commercially available stereo microphone or the onboard microphone Section 5 Using MP3 player p 91 The built in chromatic tuner lets you tune while your guitar or bass is conne...

Page 12: ... of the resulting song will be approximately 1 4 of the above The memory capacity recording time decreases when the MP3 file etc exist in the memory Recording Time conversion in MP3 mode Stereo The above listed recording times are approximate Times may be slightly shorter depending on the number of MP3 WAV files that were created The memory capacity recording time decreases when the track data Son...

Page 13: ...m various settings TUNER Hold down EFFECT and press RHYTHM Turns the built in tuner on off 7 MP3 TRAINER Switches you to a mode in which you can play or record MP3 WAV data In this mode you can also use the Phrase Trainer function 8 TR1 TR4 Select the track you want to record or access a screen where you can control the track volume In some screens these serve as function buttons which offer quick...

Page 14: ...ural microphone built into the MICRO BR If you want to record using the onboard microphone refer to p 39 18 Display Shows various information such as song time volume level or menu screens for the function you re using If you find the display screen difficult to read refer to p 110 If you hold down and press move to the beginning of the song 00 00 00 00 0 If you hold down and press move to the end...

Page 15: ...mode or Mastering mode this indicates the respective recording level bounce level or mastering level 9 TR 1 2 3 4 These will light when tracks 1 4 contain recorded data Also the track number that you ve specified as the recording track will blink In the level meter screen the level meters indicate the output from each track 10 RHYTHM Lights when rhythm p 82 is on In the level meter screen the leve...

Page 16: ...Lights if auto punch in is enabled About the Play screen The basic screen that appears immediately after you switch on the MICRO BR s power see below is called the Play screen Indication Remaining battery capacity The batteries are in good condition The batteries are approximately half full The batteries are low Replace the batteries early The batteries are empty Please install new batteries unlit...

Page 17: ...evel meter Here s how to view the volume of each track 1 In the Play screen press CURSOR several times To return to the Play screen press CURSOR or EXIT fig Disp LevelMeter eps Normal Mode Bounce Mode Mastering Mode L R The level meter indicates the output after passing through VOLUME However during bouncing or mastering this will show the respective recording lev el mastering level or bounce leve...

Page 18: ...jack for analog audio signals The output of your portable audio player other audio device or microphone can be connected to this jack If you re using a miniature condenser microphone that supports plug in power turn the MICRO BR s PlugInPower setting on Using plug in powered microphone p 114 If you connect the other device dynamic microphone etc you must turn off the PlugInPower Side panel left 2 ...

Page 19: ...tch ON to disable the operation of all buttons However even if HOLD is ON you will still be able to adjust VOLUME and INPUT LEVEL If you turn the HOLD switch ON while the power is off pressing the POWER will no longer turn on the power A voltage of approximately 2 5 V can be supplied from the LINE IN MIC jack Unlike phantom power this cannot supply 48 V If PlugInPower is turned ON you must connect...

Page 20: ...m the battery compartment 4 Push the memory card inward fig batt cover2 eps 5 Install two AA batteries making sure to observe the correct polarity fig batt cover3 eps fig batt cover4 eps 6 Reattach the battery cover fig batt cover5 eps Inserting batteries and a memory card When the MICRO BR is shipped from the factory a SD card containing a demo song is installed MICRO BR_e book 20 ページ 2007年12月6日 ...

Page 21: ... memory card out of reach of small children to prevent it from being swallowed accidentally For more about the memory cards SD cards recommended for use with the MICRO BR refer to the separate leaflet About memory cards Insert memory cards all the way into the slot being careful to observe the correct direction and orientation Do not insert them forcibly Don t touch the contacts of a memory card o...

Page 22: ...making connections fig side panel L eps fig side panel R eps Plug in powered microphone p 18 Connecting other equipment Headphones Computer ACAdaptor PSA series Side Panel Left Electric Guitar Electric Bass Dynamic Mic or Plug in powered Condenser Mic CD MD Player etc Side Panel Right MICRO BR_e book 22 ページ 2007年12月6日 木曜日 午後4時8分 ...

Page 23: ...ng could be produced depending on the location of microphones relative to speakers This can be remedied by 1 Changing the orientation of the microphone s 2 Relocating microphone s at a greater distance from speakers 3 Lowering volume levels fig stereo plug j eps The LINE IN MIC jack is a stereo mini type 1 8 The illustration shows the wiring of the LINE IN MIC jack Before making connections check ...

Page 24: ...er from which you turned them on 5 Press and hold down POWER until the display indicates Shutting down Turning the power on To prevent malfunction and or damage to speakers or other devices always turn down the volume and turn off the power on all devices before making any connections Once the connections have been completed p 22 turn on power to your various devices in the order specified By turn...

Page 25: ... sound levels that could cause permanent hearing loss Do not operate for a long period of time at a high volume level or at a level that is uncomfortable If you experience any hearing loss or ringing in the ears you should immediately stop using the unit and consult an audiologist MICRO BR_e book 25 ページ 2007年12月6日 木曜日 午後4時8分 ...

Page 26: ... operate for a long period of time at a high volume level or at a level that is un comfortable If you experience any hearing loss or ringing in the ears you should immediately stop using the unit and consult an audiologist The MICRO BR comes with a demo song in MICRO BR song format data and a demo song of this data mastered into MP3 file When you turn on the power for the first time the demo song ...

Page 27: ...n steps of hours minutes seconds frames sub frames Use CURSOR to move the cursor to the hours minutes seconds frames sub frames indication and use VALUE to change the time Move in steps of measures beats Use CURSOR to move the cursor to the measure beat indi cation and use VALUE to change the measure beat About the display indicates the time location The time see below shown in the lower line of t...

Page 28: ...her equipment p 22 and connect your equipment before you continue Make sure that the display does not indicate Press UTILITY Press TR1 SNG Press TR2 NEW The display will indicate Type fig Disp eps Use VALUE to select HiFi For more about the data type refer to Recording p 38 Press TR4 EXE The new song will be created and you will return to the Play screen Creating a new song Song New 2 3 5 1 4 1 2 ...

Page 29: ...value Use the INPUT LEVEL dial to adjust the input level For more about adjusting the level refer to Adjusting the recording level p 39 Use the VOLUME dial to adjust the listening volume Selecting the input 2 1 4 3 5 3 1 2 About the Input Indication Pressing one of the TR1 TR4 buttons toggles the indication for the corresponding input between uppercase and lowercase Uppercase indication The input ...

Page 30: ...ICRO BR contains some insert effects but for this example we ll select 01 SuperCln fig Disp FX GT P01 eps For details refer to Section 3 Using effects p 61 Press EFFECTS The currently selected effect patch is displayed Press TR1 several times to make OFF indication appear fig Disp FX GT P01off eps Make sure that the TR1 indication has changed from ON to OFF MICRO BR is set to output sound without ...

Page 31: ... to make the RHYTHM indication appear Use VALUE to select the pattern that you want to play Use CURSOR to make the Rhy Level indication appear and use VALUE to set the level to 100 fig Disp RHY LEVEL100 eps Press EXIT to return to the Play screen Press The recorder will begin playing and the pattern will also play When the Play screen is displayed you can perform the following steps to temporarily...

Page 32: ...recording standby condition Press the TR1 TR4 button of the track that you want to record The indication will change to for the track you re recording fig Disp RecTrack 1 eps Press Recording will begin The Play screen will appear and the indication in the screen will change from blinking to lit fig Disp Recording eps Press Recording will stop For details on stereo recording refer to Selecting the ...

Page 33: ...ttons Use CURSOR to make the screen indicate Track Level fig Disp TR1 LEVEL eps Either by using CURSOR or by pressing the corresponding TR1 TR4 select the track whose volume you want to change From the left they are tracks 1 2 3 and 4 Use VALUE to adjust the volume Playing back Playing back a recorded performance 2 1 1 2 Adjusting the volume of a track 3 1 3 2 4 1 2 3 4 If this is set to 0 you won...

Page 34: ... Press The MP3 demo file will begin playing Slowly turn the VOLUME dial to adjust the volume When you finished MP3 mode press MP3 TRAINER again Playing the demo MP3 file 1 6 5 2 4 3 1 Playback speed File Number 2 3 4 5 You can use the following operations when the MP3 mode Action Operation Fast forward The file will fast forward while you hold down Rewind The file will rewind while you hold down M...

Page 35: ...ay Use CURSOR to move the cursor to the playback speed indication and use VALUE to specify the playback speed fig Disp mp3 mode2 eps Range 25 200 A setting of 100 initial value will play the song at its original speed a setting of 50 at half speed and a setting of 25 at quarter speed The play speed doubles if the parameter is set to 200 Turn the VOLUME dial to lower the volume Press The audio file...

Page 36: ...owly turn the VOLUME dial to adjust the volume The guitar etc are connected and it is possible to play while listening the MP3 WAV file If you want to eliminate a sound that is located in a position other than the center Press TR4 EDT The CenterAdjst screen will appear fig Disp CENTER ADJ eps Use VALUE to adjust When you finished MP3 mode press MP3 TRAINER again Canceling the center sound Center C...

Page 37: ...g sound levels that could cause permanent hearing loss Do not operate for a long period of time at a high volume level or at a level that is uncomfortable If you experience any hearing loss or ringing in the ears you should immediately stop using the unit and consult an audiologist MICRO BR_e book 37 ページ 2007年12月6日 木曜日 午後4時8分 ...

Page 38: ... You can t change the sample rate You can t change the data type of a song after it s been created The recording times shown above are approximate They will decrease slightly depending on the number of songs you ve created The recording times shown in the above table are for when you use only one track For example if you record using all four tracks each track can be one quarter of the time length...

Page 39: ...shown below when the loudest sounds are input fig Disp INPUT LEVEL2 eps Selecting an instrument to record Source Input jack and audio source GTR Choose this if you want to record a guitar or bass connected to the GUITAR IN jack MIC Choose this if you want to use the built in monaural mic LIN Choose this if you want to record from a por table audio player etc connected to the LINE IN MIC jack EXT C...

Page 40: ...R4 2 Use CURSOR to access the V track select screen fig Disp TR1 V1 eps The screen shows the number of the V track that is selected for each track V tracks containing data V tracks that don t contain data 3 Use CURSOR or press one of the TR1 TR4 button to select the track whose V track you want to switch 4 Use VALUE to switch the V track 5 Press EXIT You will return to the Play screen If you lower...

Page 41: ...specify a different track as the recording destination In some cases you may wish to adjust the parameters of two tracks simultaneously such as when you re using two tracks to record or play back a stereo source You can do this using the Stereo Link function Enabling disabling stereo link 1 Press one of the TR1 TR4 buttons 2 Use CURSOR to select the parameter for which you want to enable or disabl...

Page 42: ...you choose 4 Press and will light and recording will begin fig Disp recording eps 5 To stop recording press will go dark You can t play back audio whose recording time was shorter than one second The following operations cannot be performed or will be invalid while the recorder is operating i e during recording or playback Editing the SONG arrangement Selecting a drum kit Switching to the USB scre...

Page 43: ...nd point B pressing A B at a point that is earlier than the repeat start point A will cause that point to be reassigned as the repeat start point A There must be at least one second between the repeat start point A and end point B You can t specify an end point that s less than one second away from the start point 3 Press TR1 REP The region you specified will be assigned as the repeat region and w...

Page 44: ... Track Pan screen fig Disp TR1 PAN eps 3 Use CURSOR or press one of the TR1 TR4 button to select the track whose pan setting you want to change 4 Use VALUE to change the pan setting Range L50 C00 R50 5 Press EXIT You will return to the Play screen Adjusting the left right position pan of the playback MICRO BR_e book 44 ページ 2007年12月6日 木曜日 午後4時8分 ...

Page 45: ...ttons 2 Use CURSOR to access the Rec Track screen 3 Press TR1 several times to make REC appear for track 1 fig Disp RecTrack 1 eps Track 1 will be the recording track 4 Press CURSOR to access the Track Level screen and set the Tr1 Level to 100 p 33 fig Disp TR1 LEVEL eps 5 Press EXIT You will return to the Play screen 6 Play back the song and use the INPUT LEVEL dial to adjust the volume of the in...

Page 46: ... can concentrate on your playing In the following example we ll re record a portion of track 1 which you recorded earlier When using auto punch in out you must set the punch in and punch out points at least 1 0 seconds apart 1 Specify the punch in and punch out points as described in steps 1 2 of Playing back repeatedly Repeat p 43 2 Press TR2 AUT The region you specified will be the auto punch in...

Page 47: ...t the recorded result will be played back immediately If you re not happy with your recording you can continue re recording simply by pressing Loop recording refers to the method of using the Repeat function in conjunction with auto punch in out to record repeatedly In the following example we ll re record a portion of track 1 which you recorded earlier For details on how to specify the region to ...

Page 48: ...ack to be re recorded and adjust the INPUT LEVEL dial so that there is no difference in volume 9 Move to a point slightly earlier than the point at which you want to begin re recording 10 Press and then press to begin recording When you press you ll be able to record the region between punch in and punch out Re record your performance After the repeat playback will begin from one measure ahead of ...

Page 49: ...e to execute Redo Undo applies only to the audio data recorded on the tracks Parameters such as track settings rhythm settings and effect settings cannot be restored to their original state If you execute Song Optimize p 59 the operating history for all data will be cleared This means that you won t be able to execute Undo immediately after executing Song Optimize 1 Press UTILITY 2 Press TR3 UND f...

Page 50: ...rack p 33 3 Press 4 Simultaneously press EXIT and UTILITY several times to make the display indicate The Bounce screen will appear fig Disp bounce mode2 eps The input source will automatically be turned off If you want to mix the input source along with your bounce recording you can use INPUT to select the input source 5 Use CURSOR and VALUE to select the recording destination tracks and V track I...

Page 51: ...track 3 and V track 2 of track 4 fig Disp TR1 V1 eps Switching V tracks p 40 3 Use CURSOR VALUE to set the Tr1 and Tr2 Level to 0 p 33 and Tr1 and Tr2 Reverb Level to 0 fig Disp TR1 V1 eps fig Disp TR1 V1 eps 4 Press EXIT You will return to the Play screen 5 Press to hear the audio that was bounce recorded to tracks 3 and 4 The pan of the bounce destination tracks 3 and 4 is set to far left and fa...

Page 52: ...s For more about the Type refer to About the data types p 38 When you re in the recording screens you can display the remaining recordable time as follows 1 Press UTILITY 2 Use CURSOR to make the display indicate Remain Info 3 Press VALUE to turn this setting ON 4 Press EXIT You will return to the Play screen 5 Press and then press The recording will begin The remaining recordable time hours minut...

Page 53: ...ears Specify the source and destination tracks for the Copy operation fig Disp Copy TR1 V1 eps 4 Specify the edit region as described in The edit region and the number of copies p 54 Specify the region that you want to copy Start End the copy destination time or measure To and the number of times Repeat the data is to be copied The display will ask Copy OK fig Disp COPY eps 5 If you re sure you wa...

Page 54: ...he Repeat parameter to specify the number of times that the specified region will be copied The edit region and the number of copies Button Edit region TR1 TIM The edit region will be specified in terms of time The time setting screen appears TR2 MEA The edit region will be specified in terms of measures The measure setting screen appears TR3 ALL The edit region will be the entire track you specif...

Page 55: ...rack setting screen appears Specify the source and destination tracks for the Move operation fig Disp Move TR1 V1 eps You can also specify the time by using or to move or by setting it with time 00 00 00 or end of song The parameters you need to set will depend on the type of track edit operation you select and on the edit region you specify You ll need to set the parameters marked by If you want ...

Page 56: ...n other words this operation is comparable to recording silence over an unwanted portion of recording tape Don t leave sounds shorter than 1 0 seconds before or after the erased region Any remaining sound that is shorter than 1 0 seconds cannot be played fig 02 350 1 Press UTILITY 2 Press TR2 TRK The TRACK EDIT screen appears fig Disp TRACK EDIT eps 3 Press TR3 ERS The track setting screen appears...

Page 57: ...acks 1 and 2 fig 02 590 1 Press UTILITY 2 Press TR2 TRK The TRACK EDIT screen appears fig Disp TRACK EDIT eps 3 Press TR4 XCH The track setting screen appears fig Disp XCG TR1 V1 eps 4 Specify the tracks that you want to exchange and press TR4 EXE The display will ask Exchange OK fig Disp EXCHANGE OK eps 5 To execute the Exchange operation press TR4 YES If you decide not to execute press EXIT or U...

Page 58: ...ess TR4 YES If you decide not to erase the song press EXIT or UTILITY 7 Press UTILITY or press EXIT several times to return to the Play screen If you erase the song that you re currently using another song on the memory card will be selected automatically If no other song exists a new song will be created Managing the songs you ve recorded Copying a song Song Copy If the message Card Full appears ...

Page 59: ... to be completed This is not a malfunction Don t turn off the power before optimization has ended If you ve executed the optimize operation you won t be able to return to the state prior to optimization by executing Undo When you create a new song it will automatically be given a name such as SONG0001 When you ve finished your song we recommend that you give it a descriptive name so that you ll be...

Page 60: ... eps 3 Press TR3 PTC The display will ask Protect Song fig Disp SONG PROTECT eps 4 Press TR4 EXE If a song is protected the song protect indicator is shown in the screen fig Disp SONG PROTECT eps On the MICRO BR the following content is saved as song data Recording data Mixer status pan etc Insert effects song patch Mastering Tool Kit song patch Song arrangement Reverb Plug in Power parameter To s...

Page 61: ... other hand are effects connected to the send return jack of mixers and other similar devices The MICRO BR comes with onboard reverb effects p 74 You can use the insert effects not only while recording but also apply it to the sound when mixing the tracks For details refer to Changing how the insert effects are used p 64 Effect patches and banks Guitar Bank GT MC LN EX Preset Patch P01 P80 Mic Ban...

Page 62: ... a new effect sound start by selecting an existing patch that s close to the sound you want then modify edit the patch settings If you want to save the effect settings you ve edited save the patch as a user patch or song patch 1 Press EFFECTS The effect screen appears fig Disp GT P01 eps 2 Use CURSOR and VALUE to select either P preset S song or U user 3 Use CURSOR and VALUE to select an effect nu...

Page 63: ...ALUE to enter the desired patch name You can use the following functions when editing text 4 Press EXIT Return to the effect screen 5 Press TR3 WRT The Write screen appears fig Disp WRITE U01 eps Changes you make to the effect settings are temporary If you exit the effect edit screen without saving your edited effect patch the indication will appear in the area that indicates the bank Please be aw...

Page 64: ...y the effect However in some cases you may wish to change this method of connection The MICRO BR lets you change the location where the insert effects are connected thus allowing you to use the effect in a variety of ways To change how the insert effects are connected proceed as follows 1 Press EFFECTS and then press CURSOR 2 Press TR1 LOC fig Disp FX loc norm eps 3 Use VALUE to specify the locati...

Page 65: ... Use this setting if you want to try out effects after recording the dry sound or if you want to apply the effect only to a specific track fig 03 130 RHYTHM This lets you apply the insert effects to the rhythm sound fig 03 140 MASTER Use this setting if you want to apply the effect to the overall sound such as when using the effect to modify the sound during bounce recording or using the effect to...

Page 66: ...OMPRESSOR CHORUS FLANGER PHASER TREMOLO PAN DELAY This is a multi effect designed for vocals It provides the basic effects needed for vocals 3BAND COMP ENHANCER 4BAND EQ NOISE SUPPRESSR DELAY These effects are for stereo line input or an external mic The LINE EXT bank uses the same effects as the mastering tool kit However the effect parameters are saved individually in each bank INPUT 3BAND COMP ...

Page 67: ...his sets the time it takes for the midrange compressor effect to stop once the input level falls below the Middle threshold level Hi Threshold 24 0 dB This sets the volume level at which the upper range compressor goes into effect Hi Ratio 1 1 00 1 16 0 1 INF This sets the ratio of suppression of the upper range output when the input level exceeds the Hi threshold level Hi Attack 0 100 ms This set...

Page 68: ...ith a subtly shifted pitch is added to the direct sound making the final output sound thicker and broader This effect can be used when the FX Type parameter is set to CHORUS On Off OFF ON This parameter turns the chorus effect on off Rate 0 100 Adjusts the rate of the Chorus effect Depth 0 100 Adjusts the depth of the Chorus effect E Level 0 100 Adjusts the volume of the effect sound This corrects...

Page 69: ...pparent in the frequencies above the frequency set here Mix Level 0 100 Adjusts the amount of phase shifted sound of the range set by Frequency that is to be mixed with the input Lo Mix Lvl 0 100 Adjusts the amount of phase shifted sound of the lower range that is to be mixed with the input The frequency range in which the effect is applied is fixed Level 0 100 Adjusts the volume of the enhanced s...

Page 70: ...al passes through the compressor Mid Level 80 6 dB Sets the volume level of the midrange after the signal passes through the compressor Hi Level 80 6 dB Sets the volume level of the upper range after the signal passes through the compressor This effect reduces the noise and hum Since it suppresses the noise in synchronization with the envelope of the sound the way in which the sound decays over ti...

Page 71: ...0 100 Adjusts the tone for the ultra high frequency range If you have selected MATCH or VO DRV as the type raising presence will cut the high range the value will change from 0 to 100 Master 0 100 Adjusts the volume of the entire preamp PHASER FX PREAMP AMP Type Explanation JC 120 The sound of the Roland JC 120 a favorite of pro musicians around the world CLEAN The sound of a conventional built in...

Page 72: ...switched on to create a lighter and crisper tone SPEAKER SIM SP Type Cabinet Speaker Unit Microphone Setting Comments SMALL Small open back enclosure 10 inch On Mic MIDDLE Open back enclosure 12 inch On Mic JC 120 Open back enclosure 12 inch two units On Mic Roland JC 120 Simulation TWIN Open back enclosure 12 inch two units On Mic A setting suitable for CLEAN twin Open back enclosure 12 inch two ...

Page 73: ...N TRI and PAN SQR are obtained with stereo recording using two tracks Rate 0 100 Adjust the rate at which the effect will operate Depth 0 100 Adjusts the depth of the effect TREMOLO PAN FX Parameter Explanation TRM TRI The volume will change cyclically Smooth change will be produced TRM SQR The volume will change cyclically Abrupt change will be produced PAN TRI The sound will be moved cyclically ...

Page 74: ...e reverb parameters refer to Reverb Parameters p 75 4 When you ve finished making settings press EXIT to return to the Play screen You can adjust the amount of reverb for each track by changing the amount of audio signal sent from each track to the reverb processor the send level 1 Press one of the TR1 TR4 buttons 2 Using CURSOR get Track Reverb to appear in the display then use VALUE to edit the ...

Page 75: ... a digital simulation thereof This decay occurs because sound waves bounce off many walls ceilings objects etc in a very complex way These reflections coupled with absorption by various objects dissipate the acoustic energy over a certain period of time called the decay time The ear perceives this phenomenon as a continuous wash of sound Type This selects the Reverb Type Time 0 1 10 0 s This param...

Page 76: ... sound to distort fig Disp mst standby eps Mastering What is Mastering Tool Kit When creating an audio CD from your recorded songs or recording to a similar media the overall volume needs to be restrained so that even the loudest portions of the songs are handled appropriately on the CD However this often results in an overall lowering of the volume resulting in a CD that lacks excitement and impa...

Page 77: ...ired filename You can use the following functions when editing text If you finished naming press EXIT 15 Use CURSOR and VALUE to set the Type parameter to the desired type of file fig 06 020 You can choose either WAV or MP3 as the file type Range MP3 64kbps MP3 128kbps MP3 192kbps WAV 16 Press TR4 EXE The display will ask OK stands for the filename and the file extension 17 If you want to convert ...

Page 78: ... turned on are shown in uppercase and blocks that are turned off are shown in lowercase Press one of the TR1 TR4 buttons to access the parameter editing screen for the corresponding effect block fig Disp PREAMP OnOff eps 6 Use CURSOR to move the cursor to the parameter that you want to edit and use VALUE to edit the values If there are other parameters that you want to edit use CURSOR to move the ...

Page 79: ...screen 5 Press TR3 WRT The Write screen appears fig Disp WRITE MT U01 eps 6 Use VALUE to select the write destination patch number 7 Press TR4 YES The display will ask Are you sure 8 If you are sure you want to write to the patch press TR4 YES If you decide not to write the patch press EXIT Once the data has been written you re returned to the mastering tool kit screen Saving the mastering tool ki...

Page 80: ...ts the time it takes for the lower range compressor effect to stop once the input level falls below the Lo threshold level Mid Threshold 24 0 dB This sets the volume level at which the midrange compressor goes into effect Mid Ratio 1 1 00 1 16 0 1 INF This sets the ratio of suppression of the midrange output when the input level exceeds the Middle threshold level Mid Attack 0 100 ms This sets the ...

Page 81: ...miter to ON or OFF Threshold 24 0 dB Adjust this parameter to match the signal Limiting will be applied to input levels in excess of this level Attack 0 100 ms This sets the time it takes for the limiter to go into effect once the input level exceeds the threshold level Release 50 5000 ms Adjusts the time until when the limiter will turn off after the input level falls below the threshold level Ad...

Page 82: ...reated for use in the introduction verse fill and ending The pattern type is indicated by the letters at the end of the pattern name Ex ROCK1 IN Intro ROCK1 V1 Verse 1 ROCK1 F1 Fill 1 ROCK1 V2 Verse 2 ROCK1 F2 Fill 2 ROCK1 E Ending IN intro A performance pattern for use during an introduction V verse 1 2 These are the main performance patterns 1 is the basic pattern and 2 is a more advanced variat...

Page 83: ...verse 1 Preset Arrangement List p 117 Song arrangements S01 S05 For each song you can store up to five arrangements For details refer to Playing an arrangement p 90 The MICRO BR has two modes in which you can play rhythms Pattern mode and Arrangement mode Pattern mode In this mode you can play patterns The selected pattern will play repeatedly from the beginning of the song to the end You cannot h...

Page 84: ... Kit 1 Kick Snare Closed Hi hat Open Hi hat The selected drum kit will return to the default ROOM drum kit if you turn off the power or select another song However when you create song arrangements the drum kit selected for each song arrangement will be remembered Switching the kit in Pattern mode simultaneously switches the kits in Arrangement mode Drum kit selections made for a preset arrangemen...

Page 85: ...the ending You can create an arrangement of up to 999 measures in length After creating an arrangement you can save it as a song arrangement Playing a pattern Changing the tempo of the pattern Creating an original arrangement About Steps Actually creating a song arrangement is accomplished by arranging steps A step is the data combining a pattern number and the measure at which that pattern is to ...

Page 86: ...to move the cursor to the song arrangement number 6 Use VALUE to select the number of the song arrangement S01 S05 that you want to create fig Disp ar S01 eps If you select a preset arrangement number P01 P50 you won t be able to perform the following steps 7 Press TR4 EDT You ll be in Song Arrangement Edit mode fig Disp ar S01 edt eps 8 Press TR1 STP 9 Use CURSOR and VALUE to select a pattern num...

Page 87: ... the Play screen the arrangement plays all the way to the end and then the performance of the pattern set in the last step is repeated Thus by setting the preset pattern P327 BREAK for the last step you can have a rest be played repeatedly which makes it seem as if the performance of the arrangement has stopped fig 04 540 Intro Verse Step 1 Step 2 Ending P327 BREAK Step Step Starting measure This ...

Page 88: ...ng the pattern for the first measure p 86 to select the song arrange you want to edit 2 Use CURSOR and VALUE to select the step number that you want to erase fig Disp ar ins eps 3 Press CURSOR several times fig Disp step ins ers eps 4 Press TR2 ERS The display will indicate Erase and the selected step will be erased If only step 1 remains no further steps can be erased Inserting a step Intro Verse...

Page 89: ... You can use the following functions when editing text You can t edit the name of a preset arrangement Naming an arrangement Button Function TR1 INS Inserts a space at the cursor location TR2 DEL Deletes the character at the cursor loca tion and moves the subsequent charac ters toward the left TR3 A a Switches the character at the cursor loca tion between uppercase and lowercase TR4 0 A Switches t...

Page 90: ...u want to create a variation of an existing arrangement you can copy that arrangement to a song arrangement and then edit it freely 1 Perform steps 1 through 6 of Specifying the pattern for the first measure p 86 to select the song arrange you want to copy 2 Press TR3 CPY 3 Use VALUE to select the copy destination arrangement number 4 Press TR4 EXE The message Copy S S OK will appear stands for th...

Page 91: ...Tunes song files are normally downloaded from the iTunes Music Store music distribution website in AAC format In the case of SonicStage song files are normally downloaded from the Sony CONNECT music store distribution website in ATRAC3 format or MP3 format If you want to download music files make sure that the format is either MP3 or WAV If you have audio files on your computer that were imported ...

Page 92: ...out permission from the copyright holder except for purposes of personal enjoyment and any such infringement may be punished as a violation of copyright law Consult a copyright specialist or special publications for more detailed information on obtaining such permission from copyright holders In addition to operating as a multi track recorder the MICRO BR can be switched to MP3 mode and used as an...

Page 93: ...ter the playback is stopped the playback is restarted from the current time location Switching to MP3 Mode Playing the MP3 WAV file Action Operation Fast forward The MP3 WAV file will fast forward while you hold down Rewind The MP3 WAV file will rewind while you hold down Move to the beginning of the current file Hold down and press Move to the ending of the cur rent file Hold down and press Move ...

Page 94: ...ant to stop repeating point B The MP3 screen will appear That location will be registered as the ending point B of the repeated region and and will lit fig 5 Press The file begins playing 6 If you want to cancel the repeat press A B once again The repeat settings will be cancelled and the and will be lit Playing back repeatedly Repeat Repeat Repeat start point A Repeat end point B Time There must ...

Page 95: ... want to play 3 Press The file begins playing 4 Use CURSOR to move the cursor to the playback speed indication and use VALUE to specify the playback speed The guitar etc are connected and it is possible to play while listening the MP3 WAV file fig Disp mp3 mode2 eps Range 25 200 A setting of 100 initial value will play the song at its original speed a setting of 50 at half speed and a setting of 2...

Page 96: ... guitar etc are connected and it is possible to play while listening the MP3 WAV file Each time you press TR1 the setting will alternate between ON and OFF 6 Press TR4 EDT The CenterAdjst screen will appear fig Disp CENTER ADJ eps 7 Use VALUE to adjust the value of the sound that you want to remove to decrease its volume Range L10 C00 R10 8 To emphasize the bass sound press CURSOR to select Low Bo...

Page 97: ...au dio quality in MP3 format WAV Record in WAV format When recording in the WAVE format 44 1 kHz 16 bit recordings are produced This setting cannot be changed As for both MP3 and WAV format the sound is recorded with the stereo You cannot use reverb in MP3 mode If you press the MICRO BR s buttons while recording via the internal mic clicking sounds resulting from the operation of the buttons may a...

Page 98: ... 5 Press TR4 YES The display will ask Are you sure 6 If you are sure you want to erase the MP3 WAV file press TR4 EXE If you decide not to erase the MP3 WAV file press EXIT or UTILITY 7 Press UTILITY or EXIT several times to return to the Play screen Recording time Memory Card Capacity MP3 WAV 64 kbps 128 kbps 192 kbps 32 MB 65 min 32 min 21 min 2 min 64 MB 131 min 65 min 43 min 5 min 128 MB 265 m...

Page 99: ...number and use VALUE to select the file whose information you want to view 3 Press UTILITY The MP3 UTILITY screen will appear fig Disp util song2 eps 4 Press TR1 SNG and then press TR3 INF The MP3 WAV INFO screen will appear fig Disp ERS eps 5 Press CURSOR Information about the MP3 WAV file will be displayed fig Disp ERS eps 6 Press UTILITY or EXIT several times to return to the Play screen Naming...

Page 100: ...nd folders inside the ROLAND folder contain important data regarding song playback and the MICRO BR s system If you delete or modify the files inside the ROLAND folder the system may stop working correctly If you wish to backup or recover your songs you must copy the entire ROLAND folder Realtime audio signals and MIDI messages cannot be handled via the MICRO BR s USB connector Compatible OS What ...

Page 101: ...ur computer ROLAND Folder The song data and various settings used by the MICRO BR are saved in this folder If you want to back up your song data or exchange song data with a BR 900CD or BR 600 copy this folder Connecting to your computer USB cable mini B type To USB connector of your computer Composition of Data on Memory Cards Root folder ROLAND folder MP3 folder MP3 WAV files 123MUSIC MP3 BIGDAN...

Page 102: ... Mastering Tool Kit song patches Song Arrangements Loop Effects Utility Master Level PlugIn Power Input Sns parameter MP3 mode Checking the folders and files saved on a memory card Windows XP Windows 2000 Macintosh MICRO_BR F Removable Disk Ex Ex Ex MICRO_BR MICRO_BR Regarding the backed up data The MICRO BR does not support long filenames Such filenames will not be displayed correctly Assign file...

Page 103: ...ing Then when the computer has detected the connection the MICRO BR will display a message of USB idling 2 Double click the My Computer icon The MICRO_BR or Removable disk icon is added to the computer fig 05 060 3 Inside My Computer double click the MICRO_BR icon or the Removable Disk icon The root folder p 101 of the MICRO BR memory card will be displayed 4 Transfer audio files using the followi...

Page 104: ...wing procedure with the recorder stopped 1 Use a USB cable to connect the MICRO BR to your computer When communication with your computer begins the MICRO BR will display a message of USB connecting Then when the computer has detected the connection the MICRO BR will display a message of USB idling 2 Double click the My Computer icon The MICRO_BR or Removable disk icon is displayed fig 05 060 3 Do...

Page 105: ...able from the MICRO BR and your computer If this procedure fails to eject the disk 1 Close the all windows in your computer 2 Click the icon in the task tray fig 05 080 3 Click the Stop USB Disk drive message displayed there 4 Click OK in the Safe To Remove Hardware dialog box that appears When you have finished USB connecting the message OK to disconnect will appear In this state you may safely d...

Page 106: ...BR and your computer After a time the Play screen will reappear You must perform the following procedure with the recorder stopped 1 Use a USB cable to connect the MICRO BR to your computer When communication with your computer begins the MICRO BR will display a message of USB connecting Then when the computer has detected the connection the MICRO BR will display a message of USB idling The MICRO_...

Page 107: ...mputer p 108 You must perform the following procedure with the recorder stopped 1 Use a USB cable to connect the MICRO BR to your computer When communication with your computer begins the MICRO BR will display a message of USB connecting Then when the computer has detected the connection the MICRO BR will display a message of USB idling The MICRO_BR icon is added to the computer fig 05 060 2 Doubl...

Page 108: ... 1 Close the all windows in your computer 2 Drag the MICRO_BR icon into the trash When you have finished USB connecting the message OK to disconnect will appear In this state you may safely disconnect the USB cable from the MICRO BR and from your computer 3 Disconnect the USB cable from the MICRO BR and your computer After a time the Play screen will reappear If you delete the MICRO BR s ROLAND fo...

Page 109: ...details on how to back up the BR 900CD song data to your computer refer to BR 900CD Owner s Manual Section 7 Backing Up the BR 900CD s Data 2 Connect the MICRO BR to your computer via USB See MICRO BR Owner s Manual p 103 p 106 3 If you re using Windows double click My Computer and then double click the MICRO_BR icon inside My Computer If you re using Macintosh double click the MICRO_BR icon on th...

Page 110: ...ilt in tuner supports both guitar and bass guitar As an example here we will explain how to use the tuner to tune your guitar It is not possible to play back or record while using the tuner Check the following points before you begin Your guitar is connected to the GUITAR IN jack GTR is selected as the input source p 39 The Sns parameter is at the highest value possible without causing the OVER ic...

Page 111: ... the display Normal tuning 5 While viewing the tuning guide adjust the tuning so that is positioned midway between the two sides If the pitch of the string is within 50 cents of the correct pitch the tuning guide will indicate the discrepancy between the actual and the correct pitches Your instrument is tuned above the displayed note fig 06 020 Your instrument is tuned the displayed note fig 06 02...

Page 112: ...r the desired patch name You can use the following functions when editing text If you finished naming press EXIT Converting between track data and audio files Converting track data to an audio file Track Export The data in the following formats can be exported WAV format Sampling Frequency 44 1 kHz 16 bit MP3 format Sampling Frequency 44 1 kHz 64 128 192 kbps Button Function TR1 INS Inserts an und...

Page 113: ...ress TR2 TRK 3 Press CURSOR 4 Press TR1 IMP 5 Use CURSOR and VALUE to select the audio file you want to convert to track data fig 06 020 About the file name Files created using the Track Export procedure are named as follows Ex T1_V1_01 MP3 T34V8_99 WAV The file name will be the source track and V track number plus a sequential number and the extension MP3 or WAV If an identically named file alrea...

Page 114: ...INE IN MIC jack 2 Turn the power on as described in Turning the power on p 24 3 Press INPUT and then press TR4 EXT 4 Press UTILITY 5 Use CURSOR to access the PlugInPower screen fig 06 020 6 Use VALUE to turn value ON If you want to turn value OFF press 7 Press UTILITY or EXIT to return to the Play screen If you select TR1 TR4 the data will be imported in monaural and if you select TR12 or TR34 the...

Page 115: ...ay will ask Are you sure 4 To continue the initialization press TR4 YES to cancel press EXIT When TR4 YES is pressed initialization begins Initializing the Memory Card Be aware that when initialized any existing data on the card will be erased If you initialize the memory card supplied with the MICRO BR the demo songs on the card will be lost Before you insert or remove a memory card always turn o...

Page 116: ...l buttons brightness of the display returns to the origin The Auto Power Off function automatically turns off the power if the buttons or VOLUME dial have not been operated for a certain length of time 1 Press UTILITY 2 Use CURSOR to access the AutPowOff screen fig 06 020 3 Use VALUE to set the value Set the time until the Auto Power Off function is activated Range 5 min 10 min 30 min OFF If you s...

Page 117: ... P21 POP5 140 4 4 1 3 6 7 10 11 13 15 18 ROOM P22 POP6 96 4 4 1 3 6 7 10 11 13 15 18 STD 1 P23 POP7 66 4 4 1 4 7 8 11 12 14 16 19 STD 2 P24 POP8 151 4 4 1 5 8 9 16 17 21 24 27 STD 1 P25 BALLAD1 70 4 4 1 5 8 9 12 13 15 18 21 ROOM P26 BALLAD2 89 4 4 1 2 5 6 9 10 12 14 17 STD 2 P27 BLUES1 124 4 4 1 2 5 6 9 10 13 16 19 STD 2 P28 BLUES2 192 4 4 1 5 12 13 20 21 25 29 32 STD 1 P29 BLUES3 124 4 4 1 3 10 1...

Page 118: ...18 4 4 2 1 1 1 1 4 POP5 140 4 4 2 1 1 1 1 2 POP6 96 4 4 2 2 1 2 1 2 POP7 66 4 4 3 2 1 2 1 2 POP8 151 4 4 4 2 1 4 1 3 BALLAD1 BALD1 70 4 4 4 2 1 2 1 3 BALLAD2 BALD2 89 4 4 1 2 1 2 1 2 BLUES1 BLUS1 124 4 4 1 4 1 4 1 3 BLUES2 BLUS2 192 4 4 4 4 1 4 1 4 BLUES3 BLUS3 124 4 4 2 2 1 2 1 3 BLUES4 BLUS4 148 4 4 4 2 1 2 1 2 R B1 110 4 4 4 2 1 2 1 3 R B2 154 4 4 2 2 1 2 1 5 R B3 108 4 4 4 2 1 2 1 3 R B4 96 4 ...

Page 119: ...M GTR AMP 37 MonstMtl COSM GTR AMP 38 PlxiStrt COSM GTR AMP 39 ComboDrv COSM GTR AMP 40 Tubesock COSM GTR AMP No Patch Name Algorithm 41 Thunnk COSM GTR AMP 42 St Metal COSM GTR AMP 43 Lesfilln COSM GTR AMP 44 Thirdz COSM GTR AMP 45 GRUNGER COSM GTR AMP 46 PUNK COSM GTR AMP 47 2 Bular COSM GTR AMP 48 SmoothLd COSM GTR AMP 49 Metal Ld COSM GTR AMP 50 CtryLead COSM GTR AMP 51 BigRecto COSM GTR AMP 5...

Page 120: ...ixdown MSTR TOOL KIT 03 PreMastr MSTR TOOL KIT 04 Live Mix MSTR TOOL KIT 05 Pop Mix MSTR TOOL KIT 06 DanceMix MSTR TOOL KIT 07 JinglMix MSTR TOOL KIT 08 HardComp MSTR TOOL KIT 09 SoftComp MSTR TOOL KIT 10 DanceCmp MSTR TOOL KIT No Patch Name Algorithm 01 Flat MSTR TOOL KIT 02 Mixdown MSTR TOOL KIT 03 PreMastr MSTR TOOL KIT 04 Live Mix MSTR TOOL KIT 05 Pop Mix MSTR TOOL KIT 06 DanceMix MSTR TOOL KI...

Page 121: ...Pan Track Pan C00 L50 C00 R50 Track Reverb Track Reverb 0 0 100 Recording Mode Normal Normal BOUNCE MASTERING 3 Parameter Name 1 Display Initial Value Valid Settings Location Location INPUT NORMAL INPUT NORMAL INPUT REC DRY TRACK 1 4 1 2 3 4 RHYTHM MASTER Parameter Name 1 Display Initial Value Valid Settings Reverb Type Type HALL ROOM HALL Reverb Time Rev Time 2 0 0 1 10 0 s Tone Tone 0 12 0 12 dB...

Page 122: ...ast 12 1 20 Plug in Power 1 PlugInPower OFF OFF ON Power Save 2 PowerSave 30 sec 10 sec 30 sec 1 min 3 min 5 min 10 min OFF Auto Power Off 2 AutPowOff 10 min 5 min 10 min 30 min OFF Remain Information 2 Remain Info OFF OFF ON Parameter Name 1 Display Initial Value Valid Settings Rhythm On Off OFF OFF ON Rhythm Mode PT PT AR Rhythm Level Rhy Level 100 0 120 Rhythm Reverb Rhy Reverb 10 0 100 Pattern...

Page 123: ...y Cards included Are you attempting to play back a short phrase of less than 1 0 seconds Phrases of 1 0 seconds or less cannot be played Are the audio formats supported by the MICRO BR p 91 Does the MICRO BR supported the sampling frequency and bit rate of MP3 WAV file Are the audio formats supported by the MICRO BR p 91 Does the MICRO BR supported the sampling frequency and bit rate of MP3 WAV fi...

Page 124: ...ound will be distorted If it is too low the input sound will be buried in noise Adjust the Sns parameter so that the level meter moves as much as possible without causing the OVER indicator to light Is the data type or MP3 bit rate low Choose this if you don t have much space on the memory card However The sound contains noise or distortion Are the track output levels appropriate If you hear noise...

Page 125: ...se the batteries The power might cut because the contact of the batteries come off when the strong physical shock applied to the MICRO BR Was the card initialized on a PC or digital camera Idling screen not displayed or Icon not displayed on your PC Is the USB cable properly connected Is the power of your PC turned on Is your computer s operating system compatible with the MICRO BR Windows Windows...

Page 126: ... Lock switch to OFF p 21 Card Read Error Cause Memory card data cannot be loaded correctly Solution 1 Turn off the MICRO BR properly insert the memory card then turn the MICRO BR back on Solution 2 Initialize the card p 115 If the same message appears after you have taken the above steps it is possible that the memory card is malfunctioning Card Write Error Cause An error occurred while writing da...

Page 127: ...rect data is in the song folder or the necessary data is not present Solution Restore the data backed up on the computer to the MICRO BR In this case restore each ROLAND folder to the MICRO BR p 104 p 107 Power Down Cause Internal power source voltage is below than guaranteed workable range Solution In case of using PSA adaptor Cable might be broken or adaptor itself might be malfunctioning Please...

Page 128: ... the memory card then turn the MICRO BR back on Solution 2 Initialize the card p 115 Unsupported Card Cause The memory card SD memory card inserted is not compatible with the MICRO BR Solution Use a memory card compatible with the MICRO BR see About Memory Cards Unsupported Format Cause 1 The MICRO BR cannot recognize or use the format of the inserted memory card Solution 1 Insert a memory card in...

Page 129: ...Times may be slightly shorter depending on the number of songs that were created The above number is the total for all the tracks that are used If each of the four tracks contain an equal amount of data the length of the resulting song will be approximately 1 4 of the above The memory capacity recording time decreases when the MP3 file etc exist in the memory Recording Time conversion in MP3 mode ...

Page 130: ...lkaline batteries recommended DC 9 V Supply AC Adaptor PSA series sold separately Current Draw 9 V 140 mA when you use the PSA series 3 V 320 mA when you use the dry batteries May vary according to usage conditions batteries used and type of SD memory card used 961 Expected battery life under continuous use Alkaline dry cell batteries Approximately 6 hours with power save function Dimensions 136 0...

Page 131: ...AN TRACK 1 TRACK 2 TRACK 3 TRACK 4 EFFECTS COMMENTS Track Sheet REV Send REV Send PAN REV Send REV Send RHYTHM Project Song Name Date Artist Client ARRANGE Tempo PATTERN Tempo Track Sheet MICRO BR_e book 131 ページ 2007年12月6日 木曜日 午後4時8分 ...

Page 132: ...132 MEMO MICRO BR_e book 132 ページ 2007年12月6日 木曜日 午後4時8分 ...

Page 133: ...g in mono 51 BR 900CD 600 song data 109 Breaking the connection 105 108 Bright 72 C Cannot Edit This is a Preset 126 Cannot Erase 126 Cannot Insert 126 Cannot Program Rhythm Off 126 Cannot Undo 126 Card Full 126 Card Locked 126 Card Read Error 126 Card Write Error 126 Center Cancel 36 96 CenterAdjst 36 CHORUS 66 68 CLEAN 71 CMP 67 COMPRESSOR 66 68 Connecting 101 Connectors 130 Contrast 110 Convert...

Page 134: ...ttack 67 81 Hi Level 70 81 Hi Ratio 67 81 Hi Release 67 81 Hi Thres 67 80 HiFi 12 38 High Gain 68 Hi M F 68 Hi M Gain 68 Hi M Q 68 HOLD Switch 19 I IMP 113 Import 113 IN 15 70 INI 115 Initialize All Setting 115 Memory Card 115 Initializing 115 INPUT 14 64 66 70 81 input 29 Input Impedance 130 INPUT LEVEL 19 39 INS 59 63 77 88 89 98 112 Insert Effects 30 61 Inserting 88 Interface 130 J JC 120 71 K ...

Page 135: ...ASTERING Bank 120 MT2 12 38 music distribution sites 91 N NAM 59 89 97 112 name 59 63 77 79 89 97 Naming a song 59 Naming an arrangement 89 new song 28 38 No Card 127 No Data 127 No File 127 No Song 127 NOISE SUPPRESSR 66 70 Nominal Input Level Variable 130 Nominal Output Level 130 Normal mode 42 NS 70 number of copies 54 O Onboard Microphone 14 OPT 59 Optimize 59 Options 130 OS 100 OUT 70 OUTPUT ...

Page 136: ...ting the track 41 Sens 69 Signal Processing 129 SLDN 71 Sns 29 39 Song arrangement 83 Song Copy 58 Song Erase 58 song information 52 Song Name 59 Song New 28 Song Optimize 59 Song Parameter 122 Song patches 62 Song Protect 60 Song Save 60 song size 52 Source 39 SP 72 SPEAKER SIM 66 72 SplitH 70 81 SplitL 70 81 Starting measure 87 STD 12 38 Steps 85 Stereo Link 41 stereo tracks 41 Stop 14 Stop Reco...

Page 137: ...ed Format 128 USB 100 USB Connector 18 Useful Capacity 129 User patches 62 UTILITY 13 V VALUE 14 VO DRV 71 VOCAL MULTI 66 Volume 18 71 V track 11 40 W Weight 130 Windows 100 103 Write 63 79 write protect 21 X XCH 57 MICRO BR_e book 137 ページ 2007年12月6日 木曜日 午後4時8分 ...

Page 138: ...GR SK CZ SI LV LT EE PL HU FI SE NO DK NL PT ES IT DE FR UK For EU Countries MICRO BR_e book 138 ページ 2007年12月6日 木曜日 午後4時8分 ...

Page 139: ...uctions or warnings The specific meaning of the symbol is determined by the design contained within the triangle In the case of the symbol at left it is used for general cautions warnings or alerts to danger The symbol alerts the user to items that must never be carried out are forbidden The specific thing that must not be done is indicated by the design contained within the circle In the case of ...

Page 140: ... Indicates information that you should be aware of when using the MICRO BR Indicates a convenient operation or useful music production technique Indicates supplementary information about an operation Indicates a reference page Indicates an explanation of a term 04455301 3MP Owner s Manual To resize thickness move all items on the front cover and center registration marks to left or right 204 Micro...

Reviews: