83
Using insert effects
Section 2
About insert effect connections
You can select any of the following connection patterns for
the insert effects.
INPUT 1–INPUT 8, INPUT 1/2–INPUT 7/8,
INPUT 1-8, INPUT MIX (NORMAL):
This setting inserts the effect into the corresponding input channel(s).
This is the standard connection pattern, and it allows you to monitor and
record performances after they have passed through the insert effects.
INPUT 1–INPUT 8, INPUT 1/2–INPUT 7/8,
INPUT 1-8, INPUT MIX (REC DRY):
This setting also inserts the effect into the corresponding input
channel(s). Although you’ll be able to monitor your input
sources after they’ve passed through the insert effects with this
type of connection, the corresponding performances will be
recorded dry—in other words, without the insert effects being
applied. After recording these dry performances, you will then
be able to experiment with different effects on your tracks to
find out which ones best suit the overall sound of your song.
TRACK 1–TRACK 8, TRACK 1/2–TRACK 15/16,
TRACK 1-8, TRACK 9-16:
This setting inserts the effect into the corresponding tracks.
You can use this type of connection to apply insert effects to
the playback from the selected tracks.
MASTER:
This setting inserts the effect in the Master output. With this
type of connection, you can adjust the sound of the complete
song during mix-down, apply special acoustic effects, and
process the final output sound in many other ways.
The available types of connection will depend on the current
Input Select condition and on the algorithm that is used in
the currently selected effect patch.
When connecting to inputs:
If the Input Select condition is changed immediately after
Song New is performed, the underlined connections will be
automatically selected.
When connecting to the Track output:
When connecting to the Master channel output:
Although the Master channel output is always available for
selection, in the case of the 8CH COMP EQ algorithm, only
CH1 and CH2 are connected to the corresponding left
channel and right channel, respectively.
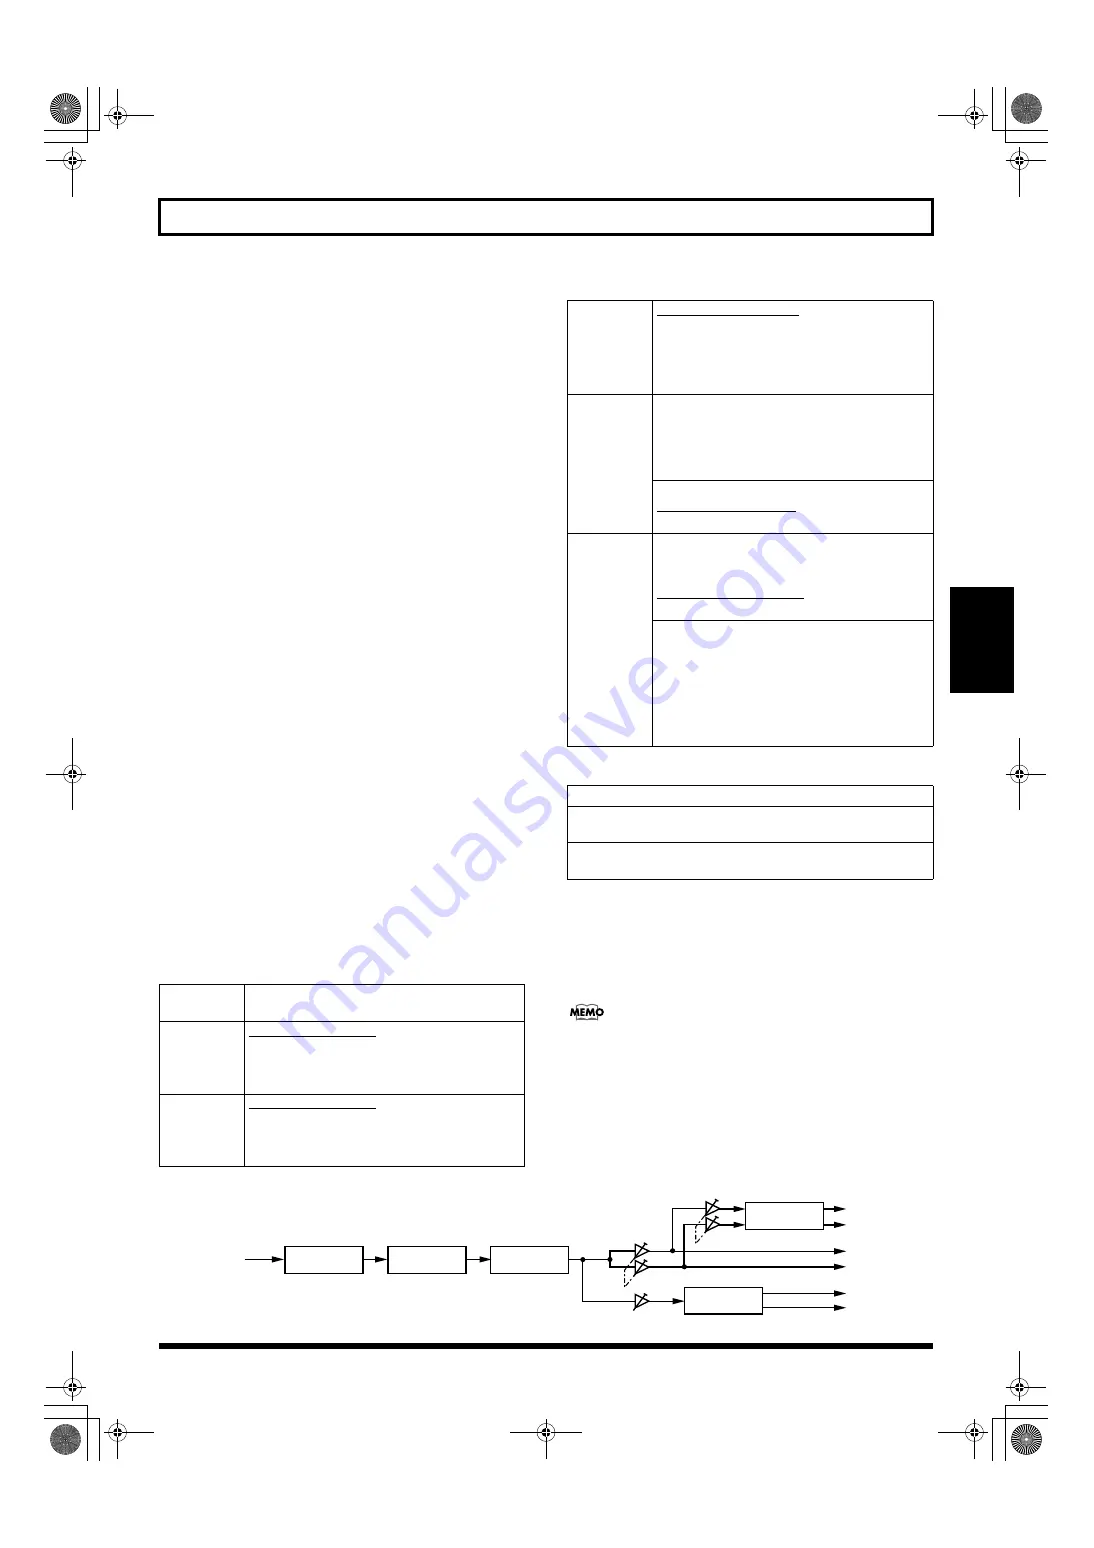
Whenever you insert effects into Track 1 through 8 or Track
1/2 through 15/16, the audio will pass through these
effects between the compressors and equalizers (p. 108).
Input Select
condition
Available connections
[GUITAR/
BASS]
INPUT 1 (NORMAL)
INPUT 1 (REC DRY)
*
Only CH1 is connected to INPUT 1 in the case of
the 8CH COMP EQ algorithm.
[VOCAL]
INPUT 2 (NORMAL)
INPUT 2 (REC DRY)
*
Only CH1 is connected to INPUT 1 in the case of
the 8CH COMP EQ algorithm.
[SIMUL]
INPUT 1/2 (NORMAL)
INPUT 1/2 (REC DRY)
*
Only CH1 and CH2 are connected to INPUT 1
and INPUT 2, respectively, in the case of the 8CH
COMP EQ algorithm.
[MULTI-
TRACK]
When algorithm other than “8CH COMP EQ” is selected
INPUT 1 (NORMAL)–INPUT 8 (NORMAL)
INPUT 1/2 (NORMAL)–INPUT 7/8 (NORMAL)
INPUT 1 (REC DRY) –INPUT 8 (REC DRY)
INPUT 1/2 (REC DRY)–INPUT 7/8 (REC DRY)
When algorithm “8CH COMP EQ” is selected
INPUT 1-8 (NORMAL)
INPUT 1-8 (REC DRY)
[STEREO
TRACKS]
When algorithm other than “8CH COMP EQ” is selected
INPUT 1 (NORMAL)–INPUT 8 (NORMAL)
INPUT 1/2 (NORMAL)–INPUT 7/8 (NORMAL)
INPUT MIX (NORMAL)
INPUT MIX (REC DRY)
When algorithm “8CH COMP EQ” is selected
INPUT 1-8 (NORMAL)
INPUT MIX (NORMAL)*
INPUT MIX (REC DRY)*
*
CH1 and CH2 from the 8CH COMP EQ
algorithm are connected to the left channel and
right channel, respectively, after stereo mixing.
Available connections
When algorithm other than “8CH COMP EQ” is selected
TRACK 1–8, TRACK 1/2–15/16
When algorithm “8CH COMP EQ” is selected
TRACK 1–8, TRACK 9–16
Track
REVERB
CHORUS/
DELAY
EQUALIZER
COMPRESSOR
L
MIX
MIX
MIX
R
L
R
L
R
Chorus/Delay
Send
Reverb Send
Track Pan
INSERT
EFFECTS
BR-1600_R_e.book 83 ページ 2007年12月6日 木曜日 午前9時52分
Summary of Contents for Digital Recording Studio BR-1600 CD
Page 41: ...41 Section 1 Advanced Use Section 1 Advanced Use BR 1600_R_e book 41...
Page 73: ...73 Section 2 Using Effects Section 2 Using Effects BR 1600_R_e book 73...
Page 145: ...145 Section 3 Using Rhythm Section 3 Using Rhythm BR 1600_R_e book 145...
Page 203: ...203 Section 4 Using the CD R RW Drive Section 4 Using the CD R RW Drive BR 1600_R_e book 203...
Page 220: ...220 MEMO BR 1600_R_e book 220...
Page 221: ...221 Section 5 Using MIDI Section 5 Using MIDI BR 1600_R_e book 221...
Page 239: ...239 Section 6 Using USB Section 6 Using USB BR 1600_R_e book 239...
Page 272: ...272 MEMO BR 1600_R_e book 272...
Page 273: ...273 Appendices Appendices BR 1600_R_e book 273...
Page 309: ...309 MEMO BR 1600_R_e book 309...


