190
Creating rhythm arrangements
Inserting patterns
Use the following procedure in the screen for assembling
drum or bass patterns into rhythm arrangements to insert a
new pattern between two that have already been positioned.
1.
Move the cursor to “MEASURE” and select the
measure for insertion using the TIME/VALUE dial.
2.
Press [F1] (INSERT).
An empty pattern of one measure in length will be inserted.
3.
Move the cursor to “PATTERN” or “NAME” and select
a pattern using the TIME/VALUE dial.
Inputting chords
Simply assembling bass patterns into rhythm arrangements
will result in the same bass line being repeated over and
over. By also inputting chords at the correct positions, you
can have you BR-1600CD automatically adjust the bass
performance to notes that match the chord progression.
1.
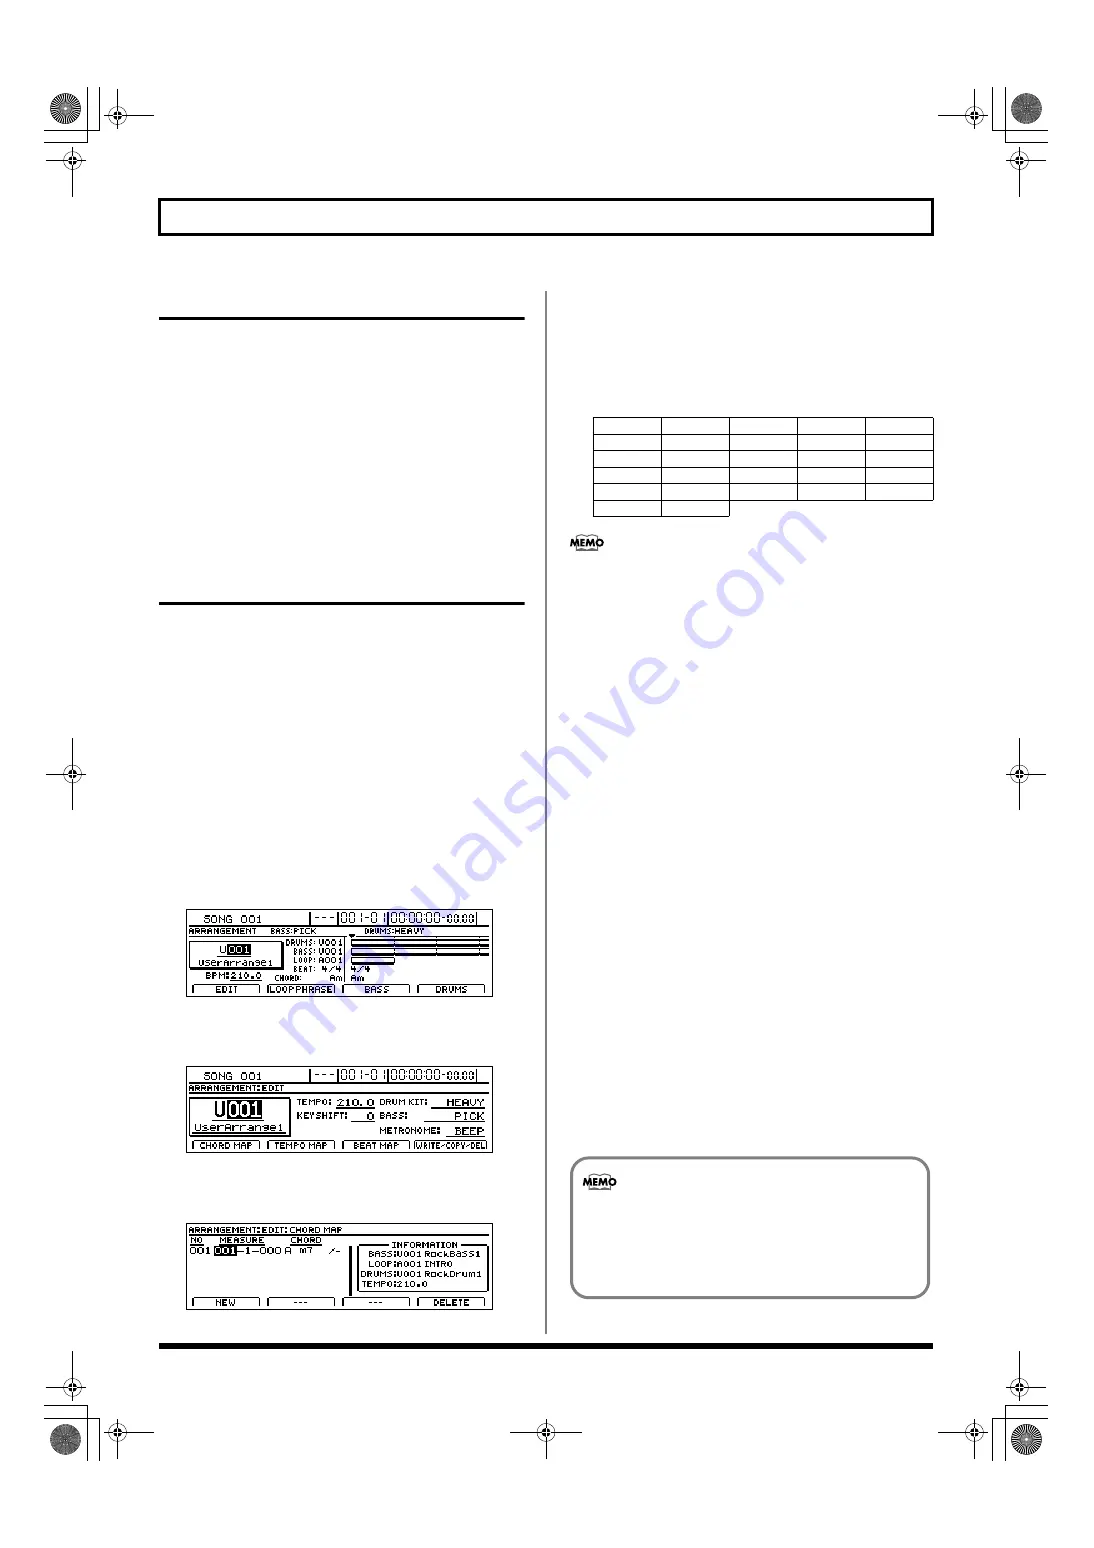
Make sure that PROGRAMMABLE RHYTHM
[ARRANGEMENT/PATTERN] is lighted (you’re in
Arrangement mode).
If this button’s indicator is off (meaning that you’re in
Pattern mode), press PROGRAMMABLE RHYTHM
[ARRANGEMENT/PATTERN] so it is lighted.
2.
Press PROGRAMMABLE RHYTHM [EDIT].
The Rhythm Arrangement Selection screen will appear.
fig.21-33d
3.
Press [F1] (EDIT).
The Rhythm Arrangement Edit screen will appear.
fig.21-11d_arrangeedit.bmp
4.
Press [F1] (CHORD MAP).
The chord input screen will appear.
fig.21-12d
5.
Use track buttons 1 through 15/16 to input the note
names for chords.
In addition, you can also turn the TIME/VALUE dial
while a track button is being held to select different types
of chords.
Selectable chord types
•
- - - - (N.C., non-chord)
Select this type of chord if you want the original Bass
Pattern to be played without a chord setting.
Normally, when a chord type of root “C” is set to “- - -,”
the original performance data is played as is.
However, when the root is any note other than “C” and
non-chord is selected, the original performance data will
be adjusted according. For example, if the root is “D,”
the Bass Pattern will be adjusted up one tone for
playback.
• If you release a track button without making a chord
type selection, “- - - (N.C.)” will be selected
automatically.
Each time you release a track button, the chord input
position will be automatically moved forward by a
single measure.
This function allows you to conveniently enter chord
progressions.
6.
When you have input all of the desired chords, press
[EXIT/NO] to return to the Rhythm Arrangement Edit
screen.
7.
Start playback on the BR-1600CD.
If the current rhythm arrangement contains a bass
pattern, the bass part will be automatically adjusted to
follow the chord progression.
8.
To save your chord progression, carry out the
procedure described below in “Modifying all of the
loop phrases in the current rhythm arrangement
(Arrangement Modify)” (p. 195).
- - - (N.C)
Maj
m
7
sus4
dim
aug
M7
M9
add9
6
6(9)
7sus4
7
b
5
7(13)
9
7b9
7#9
m7
m7
b
5
m6
m6(9)
madd9
m9
mM7
mM9
aug7
• Only one chord progression can be saved per
rhythm arrangement.
• Chord sequences input as described above will also
be used for the Vocal Tool Box’s harmony sequence
(p. 119).
BR-1600_R_e.book 190 ページ 2007年12月6日 木曜日 午前9時52分
Summary of Contents for Digital Recording Studio BR-1600 CD
Page 41: ...41 Section 1 Advanced Use Section 1 Advanced Use BR 1600_R_e book 41...
Page 73: ...73 Section 2 Using Effects Section 2 Using Effects BR 1600_R_e book 73...
Page 145: ...145 Section 3 Using Rhythm Section 3 Using Rhythm BR 1600_R_e book 145...
Page 203: ...203 Section 4 Using the CD R RW Drive Section 4 Using the CD R RW Drive BR 1600_R_e book 203...
Page 220: ...220 MEMO BR 1600_R_e book 220...
Page 221: ...221 Section 5 Using MIDI Section 5 Using MIDI BR 1600_R_e book 221...
Page 239: ...239 Section 6 Using USB Section 6 Using USB BR 1600_R_e book 239...
Page 272: ...272 MEMO BR 1600_R_e book 272...
Page 273: ...273 Appendices Appendices BR 1600_R_e book 273...
Page 309: ...309 MEMO BR 1600_R_e book 309...


