155
Creating drum patterns
Section 3
Creating drum patterns
using step recording
1.
After carrying out the steps described in “Preparing for
recording,” press [F2] (STEP).
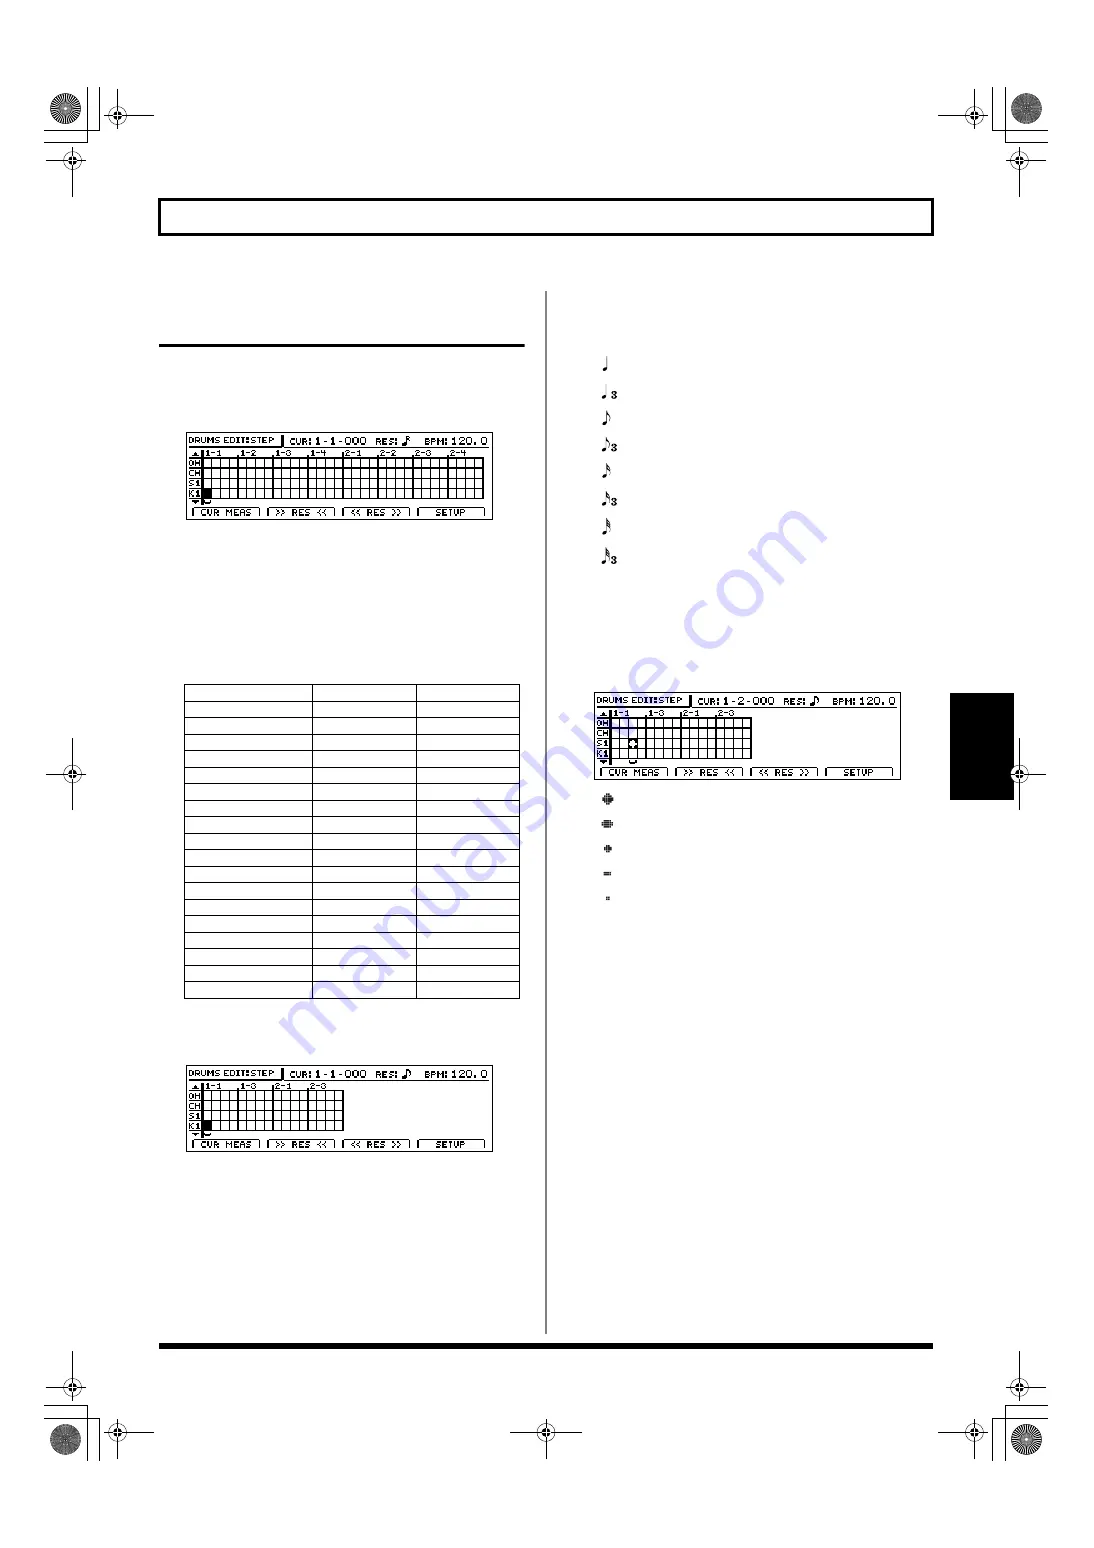
The Step Recording screen will appear.
fig.20-016d
“CUR” indicates the current input position (in measures,
beats, and clock units). This value will change whenever
you move the input position using [CURSOR].
In addition, the abbreviated names of the various drum
sounds are displayed on the left-hand side of this screen.
The actual names corresponding to these abbreviations
are as follows.
2.
Press [F2] (>>RES<<) or [F3] (<<RES>>) as many times
as necessary to change the step recording resolution.
fig.20-016aa
[F2] (>>RES<<)
Each time this button is pressed, magnification of the
step recording grid is decreased.
[F3] (<<RES>>)
Each time this button is pressed, magnification of the
step recording grid is increased.
As the degree of grid magnification changes, the
resolution indicated by “RES” changes as follows.
RES:
(
)
Allows input in quarter-note units.
(
)
Allows input in quarter-note triplet units.
(
)
Allows input in eighth-note units.
(
)
Allows input in eighth-note triplet units.
(
)
Allows input in sixteenth-note units.
(
)
Allows input in sixteenth-note triplet units.
(
)
Allows input in thirty-second-note units.
(
)
Allows input in thirty-second-note triplet units.
OFF
Allows input at the finest resolution—i.e., 96
clock units per quarter note.
3.
Move the cursor to the position where a drum sound is
to be input, and then use the TIME/VALUE dial to
insert a “
●
” at that position.
fig.020-016bd
(
)
The drum will be played at a high volume.
(
)
The drum will be played at a moderately high volume.
(
)
The drum will be played at a medium volume.
(
)
The drum will be played at a moderately low volume.
(
)
The drum will be played at a low volume.
Nothing (empty)
No drum sound will be played.
The following buttons can also be used to move the
input position at this time.
[ZERO] Moves the input position to the start of the song.
[FF]
Moves the input position forward by one
resolution unit as set using “RES.”
[REW]
Moves the input position backward by one
resolution unit as set using “RES.”
When working with long patterns or high resolutions, it is
likely that all of the step recording data will not fit into a
single screen. In such a case, you can press one of the PAGE
SCROLL buttons to scroll the display to the left or the right.
In addition, if you want to program a drum not currently
shown on the left of the screen, move the cursor up or down
accordingly. This action will cause the step-recording grid to
scroll up or down, displaying other drum sounds.
Drum name
Note number
Abbreviation
High tom
D 3 (50)
T4
Hi- Mid Tom
C 3 (48)
T3
Mid tom
A 2 (45)
T2
Low tom
F 2 (41)
T1
Crash cymbal
C#3 (49)
CY
Ride cymbal
D#3 (51)
RC
Open hi-hat
A#2 (46)
OH
Closed hi-hat
F#2 (42)
CH
Snare 1
D 2 (38)
S1
Kick 1
C 2 (36)
K1
Kick 2
B 1 (35)
K2
Cow bell
G#3 (56)
CB
Claves
D#5 (75)
CL
Stick
G 1 (31)
ST
Snare 2
E 2 (40)
S2
High Q
D#1 (27)
HQ
Metronome (click)
A 1 (33)
M1
Metronome (bell)
A#1 (34)
M2
BR-1600_R_e.book 155 ページ 2007年12月6日 木曜日 午前9時52分
Summary of Contents for Digital Recording Studio BR-1600 CD
Page 41: ...41 Section 1 Advanced Use Section 1 Advanced Use BR 1600_R_e book 41...
Page 73: ...73 Section 2 Using Effects Section 2 Using Effects BR 1600_R_e book 73...
Page 145: ...145 Section 3 Using Rhythm Section 3 Using Rhythm BR 1600_R_e book 145...
Page 203: ...203 Section 4 Using the CD R RW Drive Section 4 Using the CD R RW Drive BR 1600_R_e book 203...
Page 220: ...220 MEMO BR 1600_R_e book 220...
Page 221: ...221 Section 5 Using MIDI Section 5 Using MIDI BR 1600_R_e book 221...
Page 239: ...239 Section 6 Using USB Section 6 Using USB BR 1600_R_e book 239...
Page 272: ...272 MEMO BR 1600_R_e book 272...
Page 273: ...273 Appendices Appendices BR 1600_R_e book 273...
Page 309: ...309 MEMO BR 1600_R_e book 309...


