125
Recreating the characteristics of different monitor speakers (Speaker Modeling)
Section 2
4.
If you also want to edit other effect blocks, press [F2]
(BLOCK<=) to move the cursor to the left of the screen,
and then repeat Steps 2 and 3.
Note that you can press CURSOR [
] or [
] to jump
to the parameter setting screen for the next effect block to
the left or right.
5.
Press [EXIT/NO] to return to the Speaker Modeling
patch screen.
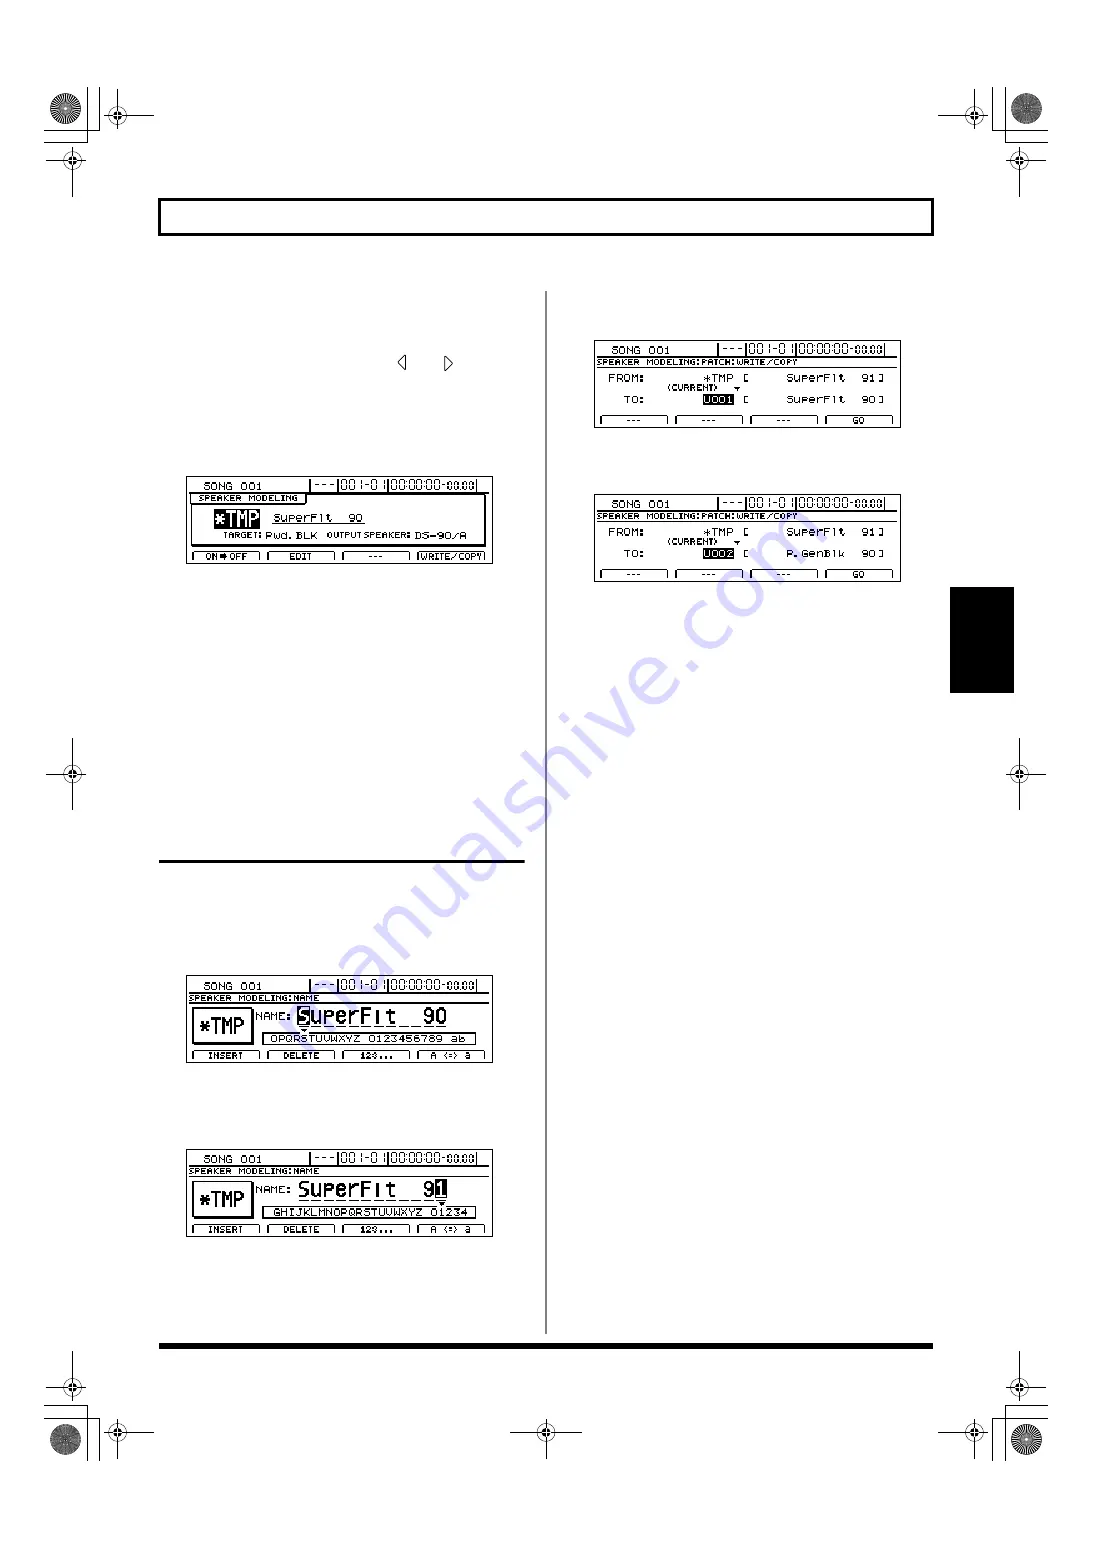
fig.37-08d
In order to indicate that the Speaker Modeling settings
have been temporarily changed, the patch number will
be displayed as “*TMP.” If you select a different patch,
load a different song, or turn off the BR-1600CD while
“*TMP” is being displayed, all of the patch settings will
return to their original condition. As it may not be
possible to restore these settings, due caution should be
observed.
To save your modified settings, carry out the procedure
described below in “Saving Speaker Modeling settings.”
Saving Speaker Modeling
settings (Patch Write)
Modified Speaker Modeling settings are saved by writing
them together under a new patch name.
1.
Press [F1] (NAME) on the Speaker Modeling edit
screen.
fig.37-09d
2.
Move the cursor to the characters in the patch name you
want to change and select new characters using the
TIME/VALUE dial.
fig.37-09d
3.
Press [EXIT/NO] to return to the Speaker Modeling
edit screen.
4.
Press [F4] (WRITE/COPY).
The Speaker Modeling Patch Write/Copy screen will
appear.
fig.37-10d
5.
Move the cursor to the “TO:” field and select a
destination patch using the TIME/VALUE dial.
fig.37-11d
FROM:
This field should be left unchanged at
“*TMP(CURRENT).” If a different message is displayed,
however, move the cursor to this field and turn the
TIME/VALUE dial counterclockwise to restore
“*TMP(CURRENT).”
TO:
This field sets the patch to which your new settings are
to be written. Whenever you call up the Patch Write/
Copy screen, the cursor will be automatically positioned
here.
6.
Press [F4] (GO).
The Speaker Modeling patch will be written. When the
message “Complete!” appears, it indicates that writing
has been completed.
7.
Press [EXIT/NO] several times to return to the top
screen.
BR-1600_R_e.book 125 ページ 2007年12月6日 木曜日 午前9時52分
Summary of Contents for Digital Recording Studio BR-1600 CD
Page 41: ...41 Section 1 Advanced Use Section 1 Advanced Use BR 1600_R_e book 41...
Page 73: ...73 Section 2 Using Effects Section 2 Using Effects BR 1600_R_e book 73...
Page 145: ...145 Section 3 Using Rhythm Section 3 Using Rhythm BR 1600_R_e book 145...
Page 203: ...203 Section 4 Using the CD R RW Drive Section 4 Using the CD R RW Drive BR 1600_R_e book 203...
Page 220: ...220 MEMO BR 1600_R_e book 220...
Page 221: ...221 Section 5 Using MIDI Section 5 Using MIDI BR 1600_R_e book 221...
Page 239: ...239 Section 6 Using USB Section 6 Using USB BR 1600_R_e book 239...
Page 272: ...272 MEMO BR 1600_R_e book 272...
Page 273: ...273 Appendices Appendices BR 1600_R_e book 273...
Page 309: ...309 MEMO BR 1600_R_e book 309...


