22
en | Hardware configuration
CIP5000 series storage
2019-10 | V01 | F.01U.380.030
User manual
Bosch Security Systems B.V.
–
Use the attaching screws and flange nuts from your rack system. Tighten the screws
and nuts according to instructions for your rack system.
3.
Place the enclosure hardware onto the rails.
4.
Secure the enclosure hardware to the rack.
–
The unit attaches to the rack posts using the included screws and flange nuts.
–
One screw each side, in the upper hole only.
5.2.2
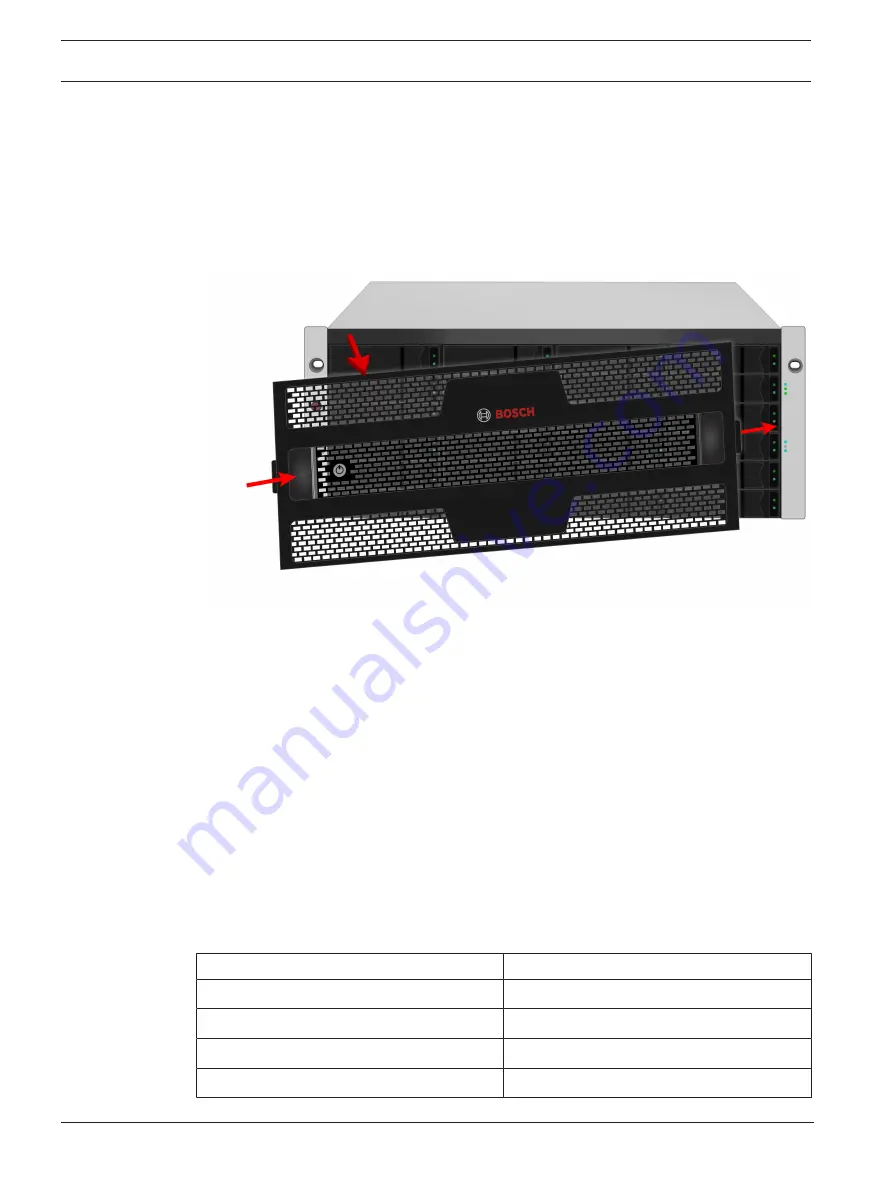
Install or remove the secure cover
Figure
5.6: Installing or removing secure cover
To attach the secure cover:
1.
Make sure the lock is in the unlocked position. To unlock, insert the key into the lock and
turn counter clockwise.
2.
Insert the tab on the right side of the cover into the slot receptacle on the right handle.
3.
Place the cover in position and push in the latch release (to the left of the keyhole).
4.
Push the cover into position so that the tab on the right side inserts into the receptacle
on the right handle when releasing the latch.
5.
Insert the key and turn clockwise to lock.
To remove the cover, unlock it, press the latch release on the left side and pull the left end out
first, holding it with both hands.
5.3
Install disk drives
The CIP-5316W-00N and CIP-5424W-00N support SATA/SAS 3.5-inch hard disks.
Number of drives required
The table below shows the number of drives required for each RAID level.
RAID level
Number of drives
RAID 0
1 or more
RAID 1
2 only
RAID 1E
2 or more
RAID 3
3 to 32
Summary of Contents for CIP-5316-JBOD
Page 1: ...CIP5000 series storage CIP 5316W 00N CIP 5424W 00N CIP 5316 JBOD en User manual ...
Page 2: ......
Page 67: ......


