Notice!
Ensure the graphics card is set to 16-bit or 32-bit color. If you need further assistance,
contact your PC system administrator.
Connecting the AutoDome Junior HD to the PC
1.
Install the AutoDome Junior HD according to the instructions detailed earlier in this
manual.
2.
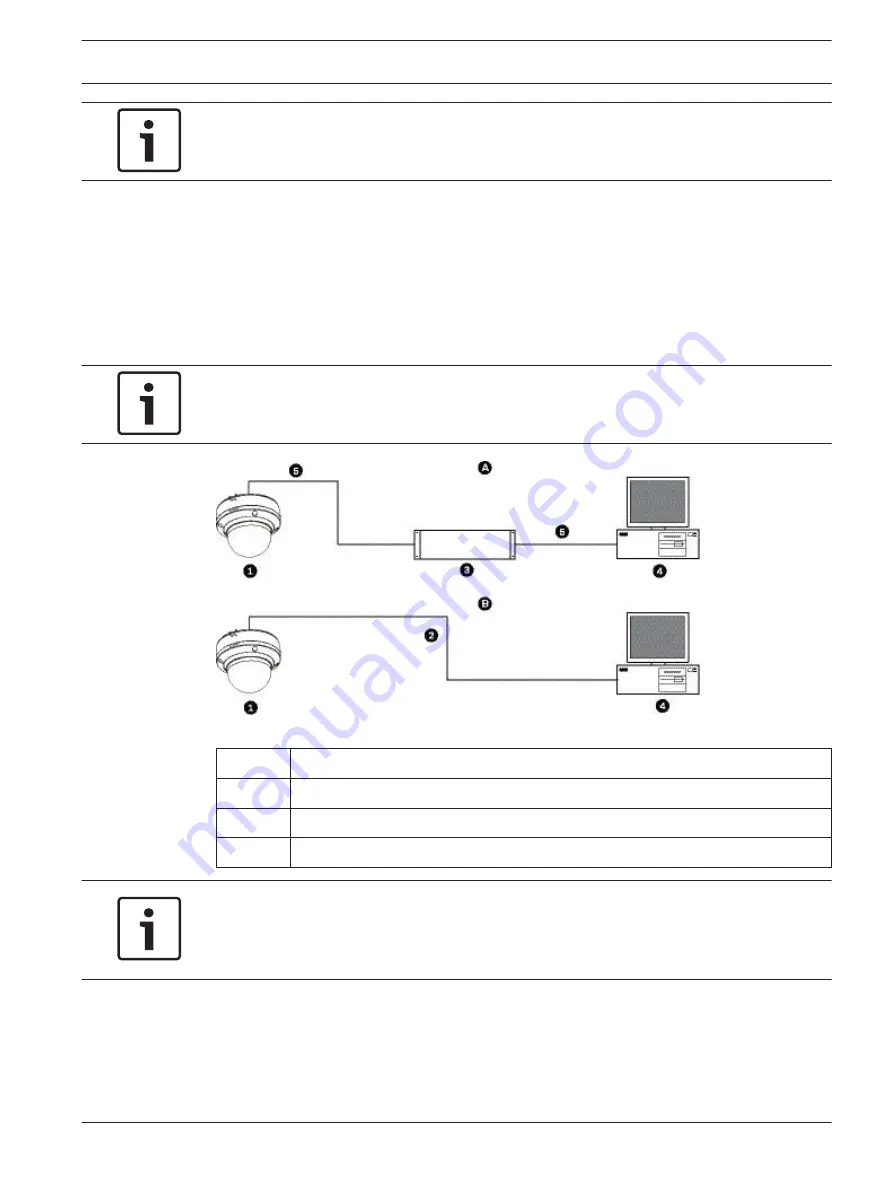
Connect an Ethernet cable from the AutoDome Junior HD RJ45 connector to a dedicated
network switch to bypass the Local Area Network (LAN).
3.
Connect the dedicated network switch to the RJ45 connector on the PC (see option A
below).
Notice!
The AutoDome Junior HD can also be connected directly to a PC using an Ethernet crossover
cable with RJ45 connectors (see option B below).
Figure 11.1: AutoDome Junior HD System Configuration
1
AutoDome Junior HD
2
IP Connection
3
Network Switch
4
Computer
Notice!
You can also use the Bosch Configuration Manager utility to configure the network settings
for an AutoDome Junior IP or HD camera. Go to www.boschsecurity.com to download the
Configuration Manager software and Operating Manual.
Configuring the AutoDome Junior HD Camera
To operate the camera in your network you must assign it a valid network IP address. The
default IP address is 192.168.0.1, but you may have to change this address if it conflicts with
another device on your network. Refer to Basic Mode: Network, page 63 for more information.
To properly configure the camera for your network, you need the following information:
11.3
11.4
AutoDome Junior HD Series
Using the IP Interface | en
49
Bosch Security Systems, Inc.
Operation Manual
2014.11 | 6.1 | F.01U.275.803
Summary of Contents for AutoDome Junior HD VJR Series
Page 1: ...AutoDome Junior HD Series VJR Series en Operation Manual ...
Page 2: ......
Page 112: ......
Page 113: ......


