


Boly Trail Camera BG710 Series
4
2.1 Batteries / Power Supply
Battery
The camera is powered by 2*18650 batteries.
(Button top,18650 battery, length: 67~69mm)
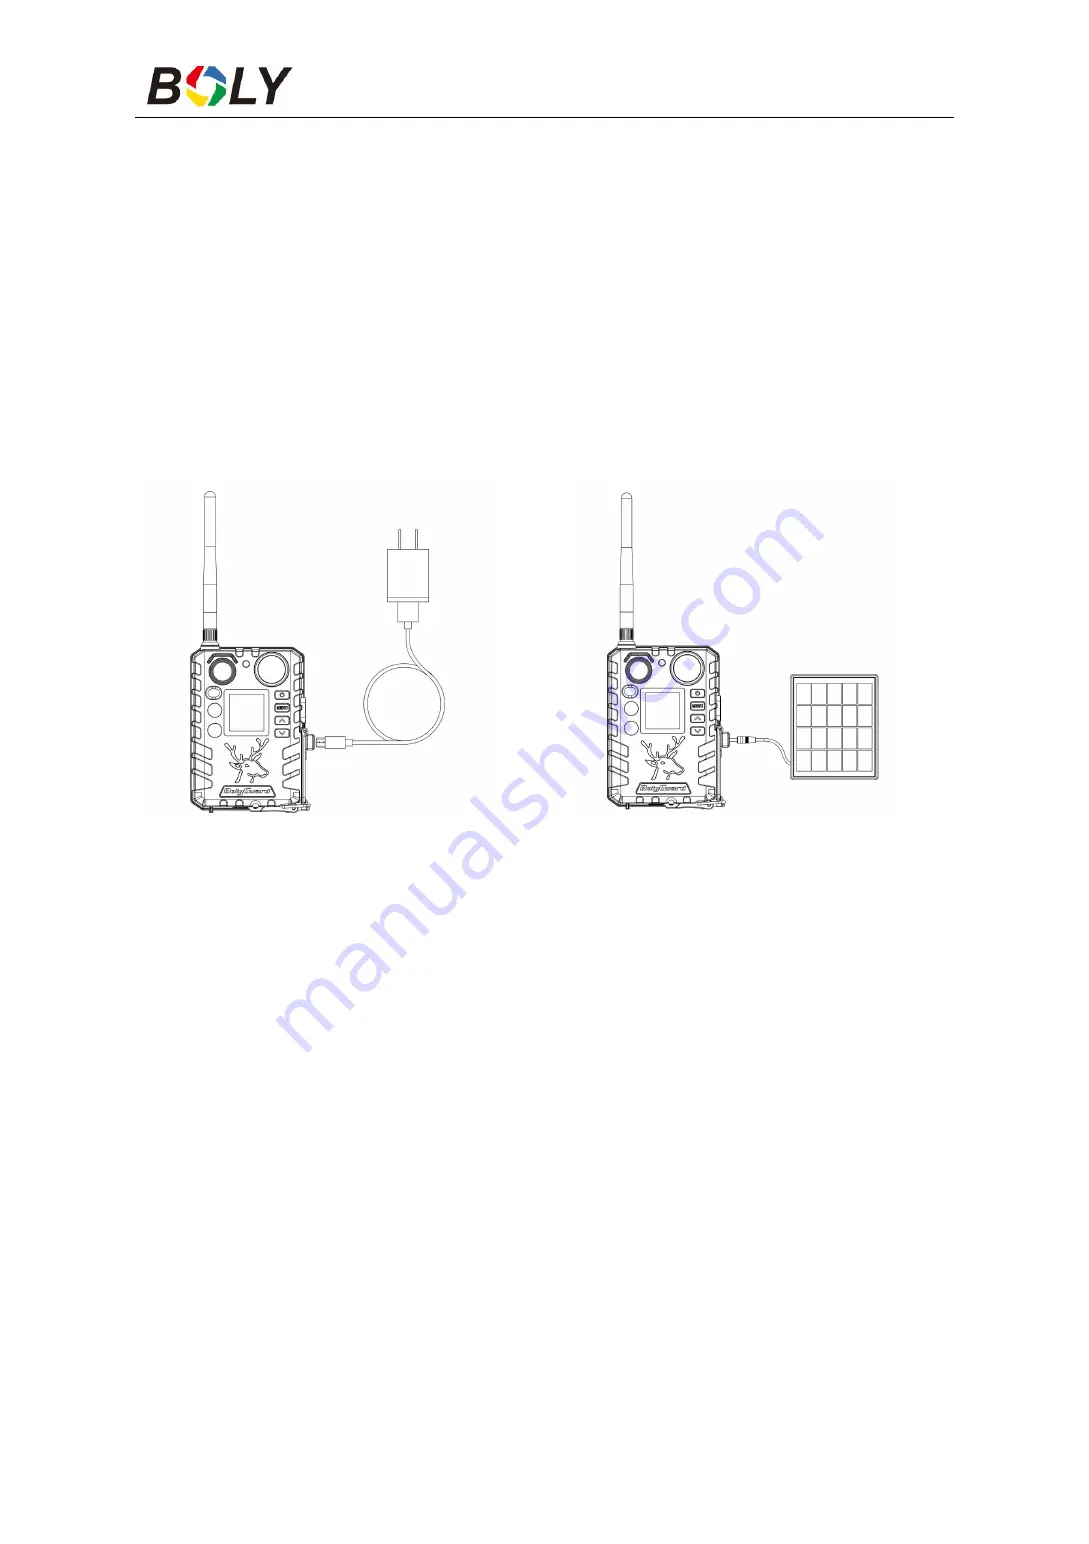
External power supply
It is also possible to power the device or charge the 18650 battery in
the device via an external USB power supply adapter(5V/2A) or
solar panel. (External power supply not included)
Charging by USB power supply
Charging by solar panel
USB port function:
(
Auto detected by Camera
)
►
Power charging
In this mode, USB will charge the camera's 18650 battery.
►
Mass Storage
In this mode, the camera will act as a storage device. You can read or
copy the photos or videos in the TF card.