Infrared Mobile Digital Scouting Camera
User’s Manual
MG582-8M
Page 1: ...Infrared Mobile Digital Scouting Camera User s Manual MG582 8M...
Page 2: ...ring 9 3 4 3View Images or Videos 9 3 4 4Send MMS 10 3 5 Power Off 10 4 Advanced Operations 11 4 1 Settings Menu 11 4 1 1 Default Setting 15 4 1 2 Set Camera Mode 16 4 1 3 Format SD Card 17 4 1 4 Set...
Page 3: ...4 2 2Delete Photo or Video 27 4 2 3Send MMS Manually 28 4 3 Laser Pointer 28 4 4 File Numbering 29 Appendix I PIR Detection Zone 30 Appendix Technical Specifications 32 Appendix Parts List 33...
Page 4: ...ings It takes color pictures or videos under sufficient daylight While at night the built in infrared LED s take clear pictures or videos monochrome And this model has a new design of PIR and this new...
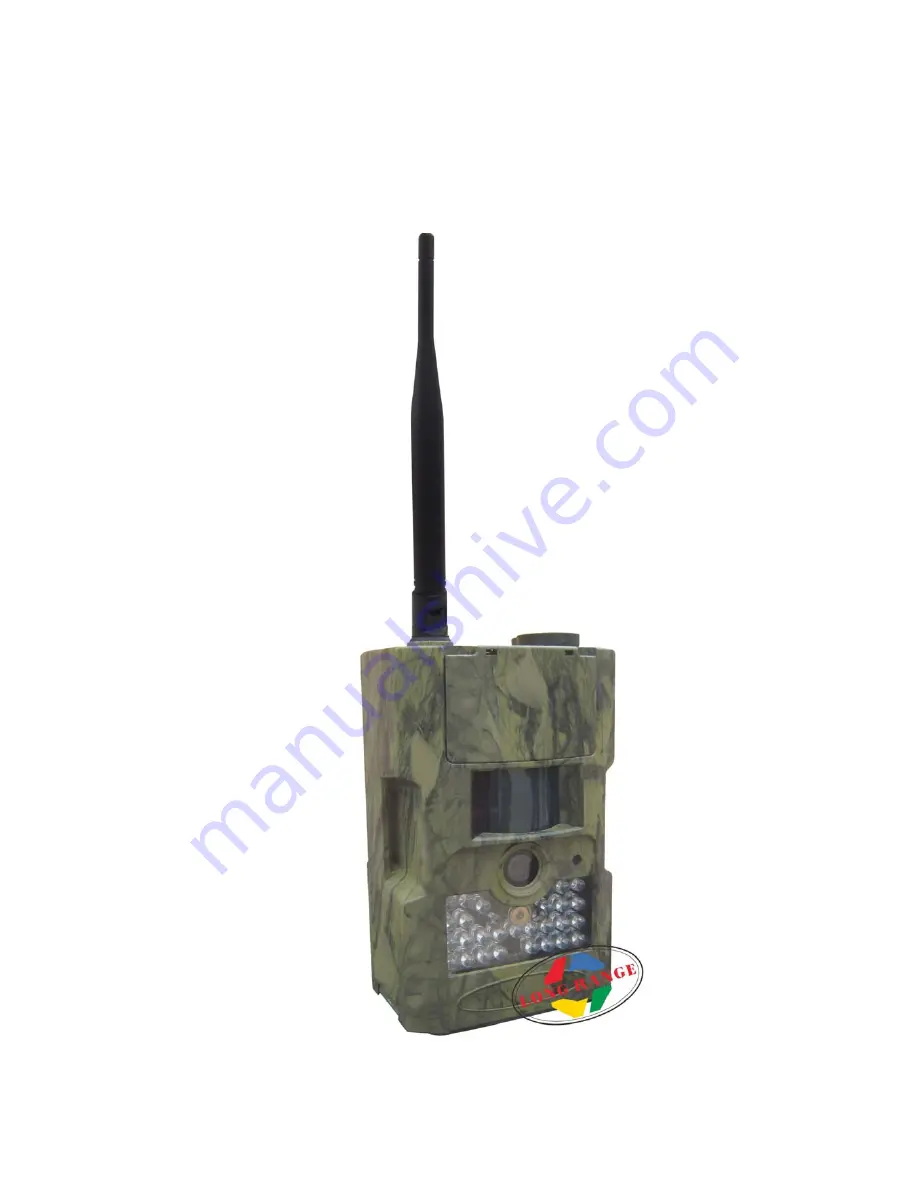
Page 5: ...ounting on an irregular interface e g tree Take a few moments to familiarize yourself with the camera controls and displays It is helpful to bookmark this section and refer to it when reading through...
Page 6: ...select or highlight the menu item Press LEFT or RIGHT to select the option of each item and press OK to make a selection Menu Cancel OK 1 2abc 3def 4 ghi 5 jkl 6 mno 7 pqrs 8 tuv 9 wxyz 0 Menu Cancel...
Page 7: ...this function you need to open GPRS service from your service provider It supports four band 850MHz 900MHz 1800MHz and 1900MHz For related information please refer to section 4 1 14 MMS settings SIM c...
Page 8: ...setting parameters according to your network Send to means to input the phone number or email address which you want to send to All 3 submenus must be correctly set up 1 6Supported Format Item Format...
Page 9: ...ease do not insert or take out the SD card when the power switch is in the ON position It is recommended to format the SD card by the camera when used for the first time The camera will be in USB mode...
Page 10: ...h 1 5V output can be used 1 High density and high performance alkaline batteries Recommended 2 Rechargeable alkaline batteries 3 Rechargeable NiMH batteries There are four battery slots Slot 1 and 2 f...
Page 11: ...other heat sources to prevent from false triggering 2 The height from the ground for placing the camera should vary with the object size appropriately In general three to six feet is preferred Slide t...
Page 12: ...djusted to manually customize the camera settings which display on the LCD screen on the camera or external TV monitor The detailed operations will be described in the Advanced Operations chapter 3 4...
Page 13: ...u can send the selected photo to the preset address in TEST mode Daily Report and Instant mode are used in the ON mode 3 5 Power Off Slide the power switch to the OFF position to power off the camera...
Page 14: ...the camera This chapter explains the advanced operations for customizing the camera settings The settings can only be customized in TEST mode and the wireless remote is needed 4 1Settings Menu To vie...
Page 15: ...nterval Sense Level Choose sensitivity of the PIR The camera PIR is strongly related to the temperature On high the camera will trigger more easily Therefore we recommend the High setting for temperat...
Page 16: ...you are not familiar with the settings GPRS Set The camera sends image through GPRS network with SMTP protocol to a Email address Use this way the communication cost will be much cheaper in many coun...
Page 17: ...me The MMS will show you the latest photo and the total qty of the pictures get taken If it is on Video mode the camera will send a SMS at the preset time The SMS will show you how many video clips th...
Page 18: ...mail MMS Send the image to Email address via WAP 3 Email GPRS Send the image to Email address via SMTP Use this way the communication cost will be much cheaper in many countries Password For safety pu...
Page 19: ...Off Interval 1 Min 5 60 seconds 1 60 min Sense Level Normal High Low Timer Off On Start Stop 00 00 23 59 MMS Set Enter URL APN IP Port GPRS Set Enter Server APN Port Send Mode Manual Manual Daily Repo...
Page 20: ...to cancel setting and return to info display 4 1 3 Format SD Card The system will delete all images or videos stored in the SD card after formatting so make sure that you have made a backup of importa...
Page 21: ...to select Photo Size c Press LEFT or RIGHT to select 8M Pixel d Press OK to save the current setting and un highlighted Press MENU to Set Video Size This parameter als 0 240 The default value is 640x4...
Page 22: ...enter into submenu d Press LEFT or RIGHT to select change the value Press OK to save a Press MENU to cancel setting and return to info display Set Photo Burst This parameter affe gering in the camera...
Page 23: ...ideo Leng c Press LEFT or RIGHT to decrease or increase d Press OK to save the current setting and the option will un highlighted Press MENU to Set Video Sound The following shows h tion is on e Press...
Page 24: ...t PIR Sensitivity This parameter defines t meters High Normal and Low The default value is Normal The higher degree indicates that the Camera is more easily to be triggered by motion taking more pictu...
Page 25: ...T to select Low d Press OK to save the current setting un highlighted Press MENU to Set Timer This parameter mera can be triggered The rest of the time the device is shut off The effective value for t...
Page 26: ...ey in the digits letters or punctuations Press UP Cancel to delete Press OK to save all current setting and return to info display Press MENU to cancel setting and to return to previous menu Easy Acce...
Page 27: ...dited do not change other parameters expect these 4 parameters to avoid operation failure 4 1 14 GPRS settings in profile ini file Below is the deta server name for example smtp 163 cn operators need...
Page 28: ...tion pleas refer to 4 1 settings menu The following shows how t the previous option is Off a Press MENU to display th b Press UP or DOWN to select MMS Mode c Press LEFT or RIGHT to select Instant d Pr...
Page 29: ...ed using the following steps a Press MENU to display the setting menu b Press UP or DOWN to select Password c Press LEFT or RIGHT to select On d Press OK to enter into submenu e There are three inputs...
Page 30: ...ect to the camera with a TV cable the videos can only be viewed on a TV monitor For simplicity operations with PC won t be introduced here 4 2 1 View Photo or Vide a Switch to TEST mode an b Press OK...
Page 31: ...All Press OK No and Yes are prompted No is highlighted f Press LEFT or RIGHT to highlight Yes g Press OK to delete the image or video Press MENU to cancel and return to pl s can t be restored Furtherm...
Page 32: ...or a certain region of interested ROI Pres uster on the back of camera to adjust the angle of capturing direction NOT Please n pointed at another person File Numbering Images and videos mbering contin...
Page 33: ...erent detection angle When the detection angle is 35 the detection range is 50ft When the detection angle is 52 the detection range is 30ft Figure 4 The PIR detection angle is just barely larger than...
Page 34: ...e Figure 5 MG582 8M has a new design of PIR and this new PIR is patented The new patented PIR s detection range can reach to 22m The figure 6 shows the compared detection zone between normal PIR and t...
Page 35: ...e PIR Sensitivity Adjustable High Normal Low Trigger Time 1 2s Weight 0 30 kg Operation Storage Tem 20 60 C 30 70 C Interval 1s 60 min Photo Burst 1 3 Video Length 1 60s Power Supply 8 AA or 4 AA Stan...
Page 36: ...MG582 8M Appendix Parts List Page 33 Appendix Parts List Part Name Quantity Digital Camera One Wireless Remote Control One USB Cable One TV cable One Belt One User Manual One Enhanced Antenna One...