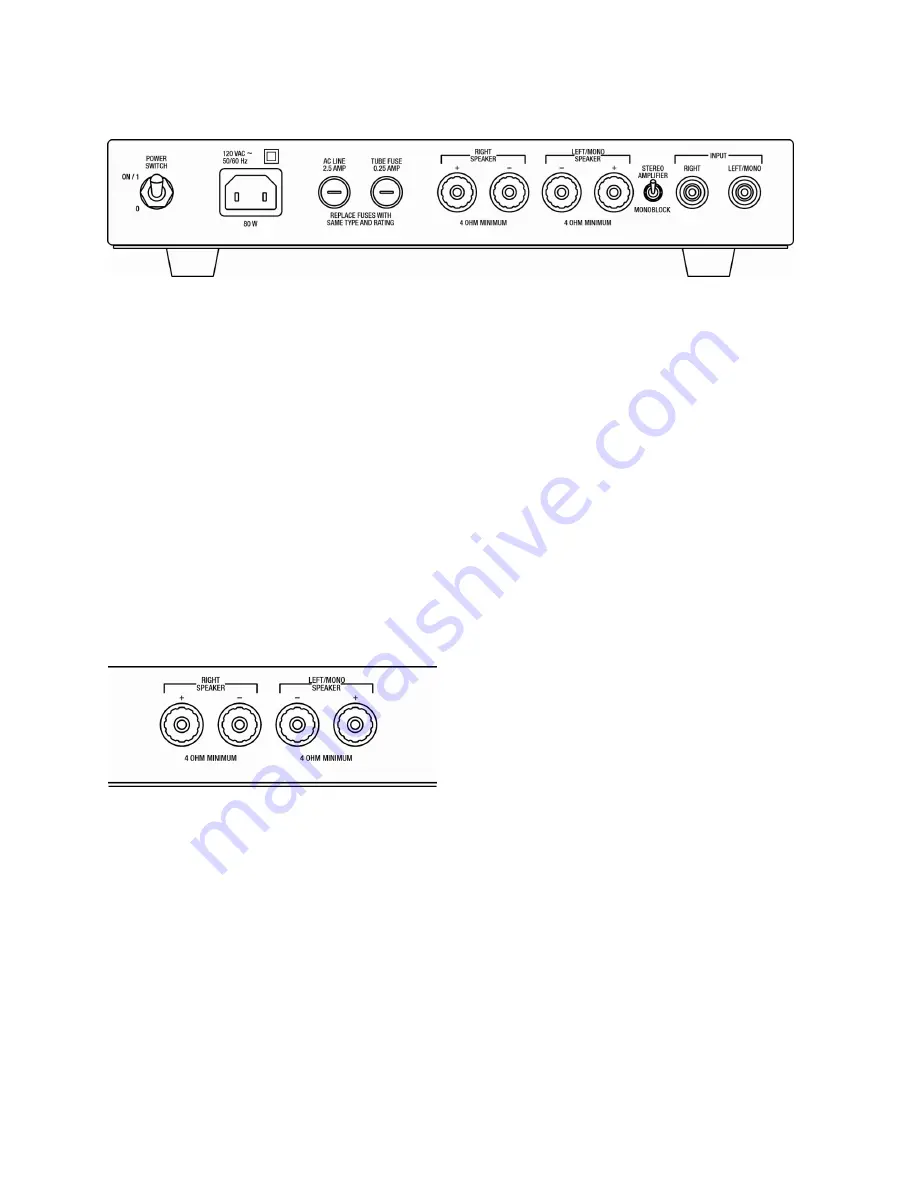
REAR PANEL CONNECTIONS
POWER SWITCH
Up is on, down is off. There is no power-on indicator except for the glow of the tubes; you will have to
remember whether you turned it on until you can see the tubes glow. It is safe to switch the amplifier on
and off at will. We recommend that you turn the amplifier off when not in use to extend the life of the
tubes.
LINE VOLTAGE
This amplifier is configured for operation with 120V 50/60 Hz.
FUSES
The rear panel main fuse is a 2.5 amp fast blow fuse, and should be replaced with the same type and
rating if it ever needs replacing. The vacuum “tube fuse” is a 0.25 amp fast blow and should be replaced
with the same type.
Do not under any circumstances use "slow-blo" fuses. Both fuses are fast blow
fuses.
SPEAKER CONNECTIONS
From the rear view, the there are 2 pair of red and black binding posts for each channel. The black bind-
ing posts are common; red posts carry the audio output signals. This amplifier is “officially” rated for 4
ohms minimum.
To connect the speaker first check the impedance of the speaker which is usually identified on the
speaker itself or in the owner's manual. Connect one lead from the common terminal of the speaker to
the common terminal on the back of the amplifier. Connect the positive lead on the red terminal on the
back of the speaker. When multiple speakers are to be connected to an output, the combined load im-
pedance must not go below 4 ohms. Connecting a speaker rated below 4 ohms may result in reduced
power and possible distortion.
If you wish to use this amplifier in mono mode make sure the power is turned off, and then throw the
stereo / mono switch located on the read panel to “monoblock” or down position. Connect a single RCA
jack to the Left / Mono Input connector. Connect a single speaker to the Left / Mono speaker binding
posts. The right speaker output terminals are disabled.
Page 3


