Radio / CD
Miami Beach CD51
Operating and installation instructions
Page 1: ...Radio CD Miami Beach CD51 Operating and installation instructions...
Page 2: ...2 Open here...
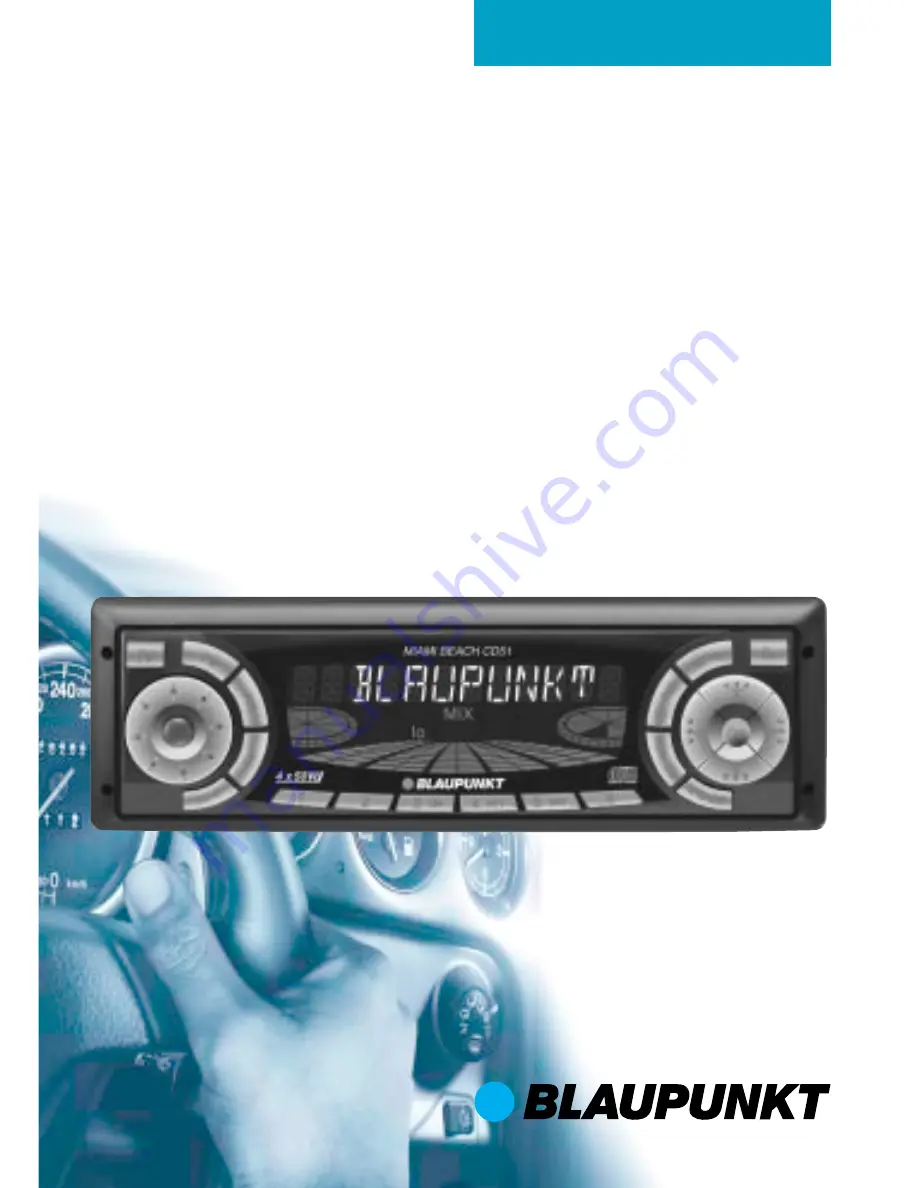
Page 3: ...3 FRAN AIS ENGLISH ESPA OL PORTUGU S 3 2 10 1 4 5 11 6 7 9 8 12 13 14 15 16...
Page 4: ...ge 6 Display 7 button displays the time DIS changes the display con tent 8 MENU button opens the basic settings menu 9 button opens the flip release panel Arrow buttons CONTROLS OK button confirms men...
Page 5: ...y 13 CD mode 13 Switching to CD mode 13 Selecting tracks 14 Quick track selection 14 Fast searching audible 14 Random play MIX 14 Scanning tracks SCAN 14 Repeating tracks REPEAT 14 Pausing playback PA...
Page 6: ...tever you are listen ing to to a reasonable level Installation If you want to install your car radio your self please read the installation and connection instructions that follow these operating inst...
Page 7: ...el s contacts If necessary clean the contacts with a lint free cloth soaked in cleaning spirits Removing the control panel 1 Press the button 1 The control panel locking mechanism opens First pull the...
Page 8: ...ing on off using the vehicle ignition If the unit is correctly connected to the vehicle s ignition and it was not switched off using button 3 it will switch on off simultaneously with the ignition You...
Page 9: ...ve finished making your changes press the MENU button 8 or OK twice Instantaneous volume reduction mute This feature allows you to instanta neously reduce mute the volume to a level preset by you Brie...
Page 10: ...ou can directly adjust the volume of telephone calls and navigation voice output whilst they are being heard Setting the volume of the confirmation beep For some functions you will hear a con firmatio...
Page 11: ...tton The unit tunes into the next receivable station Setting the sensitivity for station seek tuning You can configure the radio to only tune into stations with a strong reception or to also tune into...
Page 12: ...OK button pressed until the scan process starts SCAN appears briefly in the display followed by the current frequency which flashes Stopping SCAN and continuing listening to a station Press the OK but...
Page 13: ...a diameter of 3 inch es and contoured CDs shape CDs are not suitable for playback in this unit We accept no liability for any dam age to the CD drive that may occur as a result of the use of unsuitab...
Page 14: ...ning tracks SCAN You can briefly play all the tracks on a CD Press the OK button for longer than two seconds The next track will then be played briefly Note You can set the scantime For fur ther detai...
Page 15: ...s supplied with your CD changer Switching to CD changer mode Keep pressing the CD C button until CHANGER appears in the display Playback begins with the first CD that the CD changer detects Selecting...
Page 16: ...andom order briefly press button 5 MIX MIX CD appears briefly and MIX lights up in the display To play the tracks on all the insert ed CDs in random order press but ton 5 MIX again MIXALL appears brie...
Page 17: ...utton 7 Setting the time Setting the time manually To set the time press the MENU button 8 Keep pressing the or button until CLOCKSET appears in the display Press the button The time appears in the di...
Page 18: ...unit is off and the ignition is on To display the time when the unit is off and the vehicle ignition is on press the MENU button 8 Keep pressing the or button until CLK DISP OFF or CLK DISP ON appear...
Page 19: ...you have finished making your changes press the AUDIO button Setting the left right volume distribution balance To set the left right volume distribu tion balance press the AUDIO button BASS appears...
Page 20: ...ter level display briefly provides a symbolic display of the vol ume and the audio control settings whilst you are adjusting them When you are not changing any set tings the spectrometer displays the...
Page 21: ...IN 1 OFF or AUX IN 1 ON appears in the display Press the or button to switch AUX on off When you have finished making your changes press the MENU button 8 or OK Note If the AUX input is switched on i...
Page 22: ...t LF 10 FB 12V RC 12V 16 12V 5 Line Out RF 11 Fernbedienung Remote Control 17 Bus Masse GND 6 12V Amplifier 12 FB Masse RC GND 18 AF Masse GND 19 Line In L 20 Line In R Equalizer Amplifier CD Changer...
Page 23: ...23 ENGLISH This information is subject to change without notice Radio Mute low 12V max 150 mA Kl 15 12V G I H Relais 12V 1 3 5 7 2 4 6 8 RR RF LF LR 4 Ohm 4 Ohm 4 Ohm 4 Ohm 10A...
Page 24: ...10 02 CM PSS 8 622 403 472 Blaupunkt GmbH...