background image

16

MP3 mode

You can also use this car radio for
playing CD-Rs and CD-RWs containing
MP3 music files.

MP3 is a process developed by the
Fraunhofer Institute for compressing CD
audio data. Compression allows data to
be reduced to around 10% of their
original size without a noticeable loss
in quality (at a bit rate of 128 kbit/s). If a
lower bit rate is used to convert CD
audio data to MP3, you can create
smaller files but there will be a loss in
quality.

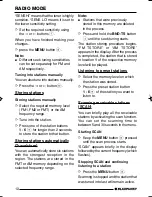
Preparing the MP3-CD

The various combinations of CD
burners, CD burning software and CD
blanks may lead to problems arising with
the ability to play certain CDs. If
problems occur with your own burned
CDs, you should try another brand of
CD blank or choose another blank
colour.

The format of the CD must be ISO 9660
Level 1 / Level 2 or Joliet. Other formats
cannot be played reliably.

You can create a maximum of 253
directories on a CD. Each of these
directories can be accessed using this
device.

Regardless of the number of directories
on a CD, a total of 65535 files can be
supported, even in one single directory.
This device can support as many
directory-nesting levels as your writing
software allows, even though the
maximum nesting level is standardized
as 8 levels in ISO9660.

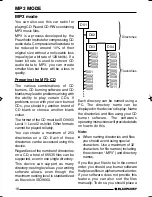
Each directory can be named using a
PC. The directory name can be
displayed in the device’s display. Name
the directories and files using your CD
burner software. The software’s
operating instructions will provide details
on how to do this.

Note:

When naming directories and files
you should avoid using special
characters. Use a maximum of 32
characters for file names (including
the extension “.MP3”) and directory
names.

If you like your files to be in the correct
order, you should use burner software
that places files in alphanumerical order.
If your software does not provide this
feature, you can also sort the files
manually. To do so, you should place a

MP3 MODE

Directories

Tracks/files

D01

D02

T001

T005

T004

T003

T002

D03

T001

T006

T005

T004

T003

T002

T011

T007
T008
T009
T010

D04

T001

T006

T005

T004

T003

T002

BA Bahamas/Monte Carlo MP34_EN

13/11/03, 8:59

16

Summary of Contents for Bahamas MP34

Page 1: ...Radio CD http www blaupunkt com Radio CD MP3 Monte Carlo MP34 Bahamas MP34 Operating and installation instructions http www blaupunkt com ...

Page 2: ...2 Open here ...

Page 3: ...3 FRANÇAIS ENGLISH ESPAÑOL PORTUGUÊS 1 1 1 1 1 3 3 3 3 3 2 2 2 2 2 5 5 5 5 5 6 6 6 6 6 7 7 7 7 7 8 8 8 8 8 9 9 9 9 9 4 4 4 4 4 ...

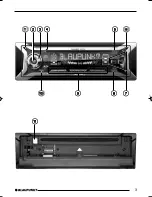
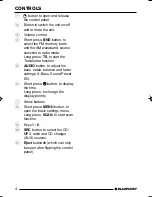
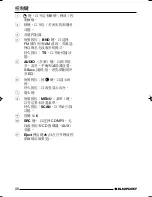
Page 4: ... the Travelstore function 5 AUDIO button to adjust the bass treble balance and fader settings X Bass Sound Preset EQ 6 Short press button to display the time Long press to change the display priority 7 Arrow buttons 8 Short press MENU button to open the basic settings menu Long press SCAN to start scan function 9 Keys 1 6 SRC button to select the CD MP3 radio and CD changer AUX sources Eject butto...

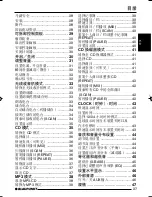
Page 5: ...6 Switching to MP3 mode 17 Selecting a directory 17 Selecting tracks files 17 Fast searching 17 Random track file play MIX 17 Scanning tracks files SCAN 18 Repeating individual tracks files or whole directories REPEAT 18 Pausing playback PAUSE 18 Setting the display 18 CD changer mode 19 Switching to CD changer mode 19 Selecting a CD 19 Selecting tracks 19 Fast searching audible 19 Changing the di...

Page 6: ...w these operating instructions Accessories Only use accessories approved by Blaupunkt NOTES AND ACCESSORIES Remote control RC 12H is included You can conveniently access the most important functions of your car radio from the steering wheel via the optional RC08 or RC10 Amplifier All Blaupunkt and Velocity amplifiers can be used CD changer You can connect the following Blaupunkt CD changers CDCA08...

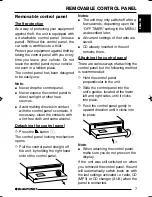
Page 7: ...ng mechanism opens Pull the control panel straight off the unit by holding the right hand side of the control panel Notes The unit may only switch off after a few seconds depending upon the OFF TIMER setting in the MENU as described later All current settings of the radio are saved CD already inserted in the unit remains there Attaching the control panel There are various ways of attaching the con...

Page 8: ...ctivated Switching on off using button 2 To switch the unit on press button 2 To switch the unit off press button 2 for longer than two seconds The unit switches off Note If you switch on the unit when the ignition is off the unit will switch off automatically after one hour to prevent draining of the vehicle battery Off timer After opening the control panel the unit will switch off after a pre ad...

Page 9: ...e volume turn the volume control 3 to the right To decrease the volume turn the volume control 3 to the left Setting the power on volume You can set the unit s default power on volume Press the MENU button 8 Keep pressing the fi or button 7 until ON VOLUME appears in the display Set the power on volume using the and buttons 7 To help you adjusting the volume more easily the audible volume level wil...

Page 10: ...connected to a mobile telephone the car radio s volume will be muted as soon as you pick up the telephone PHONE shows in the display This requires the mobile telephone be connected to the car radio as described in the installation instructions Confirmation beep For some functions you will hear a confirmation beep if you keep a button pressed for longer than two seconds For instance after storing a...

Page 11: ...esired region appears in the display When you have finished making your changes press the MENU button 8 twice Selecting the frequency range memory This unit can receive programmes broadcast over the FM and AM frequency ranges There are three preset memory levels for the FM range and one for the AM range Six stations can be stored on each memory level Selecting the FM memory level or the AM frequen...

Page 12: ...elected frequency range Note Stations that were previously stored in this memory are deleted in the process Press and hold the BND TS button 4 until the seek tuning starts The station storing procedure begins FM TSTORE or AM TSTORE appears in the display After the process is completed the station that is stored in location 1 of the respective memory level will be played Listening to preset station...

Page 13: ...e button 1 The release panel opens Gently insert CD with the printed side uppermost into the drive until you feel some resistance The CD is drawn into the drive automatically You must not hinder or assist the drive as it draws in the CD Gently close the control panel whilst exerting a little pressure until you feel it clicks into place CD playback begins Setting the scantime Press the MENU button ...

Page 14: ... track will then be played Stopping MIX Press button 5 MIX 9 again MIX OFF appears briefly in the display and the MIX symbol disappears Scanning tracks SCAN You can briefly play all the tracks on a CD Press the MENU button 8 for longer than two seconds The next track will then be played for scantime as set in the Setting the scantime Note You can set the scantime For fur ther details please read t...

Page 15: ...of track After the CD text has been displayed once the standard display as described in the Changing the display section will be shown Switching CD text on off Press the MENU button 8 Press the fi or button 7 repeatedly until CD TEXT appears on the display Switch on TEXT ON or off TEXT OFF the CD text function by pressing the or button 7 When you have finished making your changes press the MENU but...

Page 16: ...ccessed using this device Regardless of the number of directories on a CD a total of 65535 files can be supported even in one single directory This device can support as many directory nesting levels as your writing software allows even though the maximum nesting level is standardized as 8 levels in ISO9660 Each directory can be named using a PC The directory name can be displayed in the device s ...

Page 17: ...ack such CDs only audio tracks will be selected Switching to MP3 mode MP3 mode is activated in the same way as normal CD mode For further details please read the Switching to CD mode section in the CD mode chapter Selecting a directory To move up or down to another directory press the fi or button 7 once or several times Note Any directories not containing MP3 files will be skipped automatically Th...

Page 18: ...to be played normally Repeating individual track file or whole directories REPEAT To play the current track file repeatedly briefly press button 4 RPT 9 RPT TRCK appears briefly in the display and RPT lights up To repeat the whole directory press button 4 RPT 9 longer than 2 seconds RPT DIR appears briefly in the display Cancelling REPEAT To stop the current track or current directory from being r...

Page 19: ...Press or fi button 7 repeatedly until MP3 DISP appears on the display Select the preferred option via the or button 7 Press the MENU button 8 twice to complete the setting CD CHANGER MODE CD changer mode Note Information on handling CDs inserting CDs and operating the CD changer can be found in the operating instructions supplied with your CD changer Switching to CD changer mode Keep pressing the S...

Page 20: ...om order briefly press button 5 MIX 9 MIX CD appears briefly and MIX lights up in the display To play the tracks on all the inserted CDs in random order CD CHANGER MODE press button 5 MIX 9 longer than two seconds MIXALL appears briefly and MIX lights up in the display Stopping MIX Press button 5 MIX 9 briefly and MIX OFF appears briefly in the display and MIX disappears Scanning all tracks on all...

Page 21: ... mode Press the MENU button 8 Keep pressing the or fi button 7 until 12H MODE or 24H MODE appears in the display Press the or button 7 to switch between the modes When you have finished making your changes press the MENU button 8 Displaying the time continuously when the unit is off and the ignition is on CLOCK ON setting in the menu allows you to display the time when the unit is off and the vehic...

Page 22: ...ust the treble When you have finished making your changes press the AUDIO button 5 Setting the left right volume distribution balance To set the left right volume distribution balance press the AUDIO button 5 BASS appears in the display Keep pressing the button 7 until BAL appears in the display Press the fi or button 7 to adjust the balance right left When you have finished making your changes pre...

Page 23: ...eted the setting Selecting preset sound effect EQ You can select preset sound effect for the following styles of music ROCK POP CLASSIC The settings for these music styles have already been programmed To select one of the sound presets press the AUDIO 5 button BASS appears on the display Press the button 7 repeatedly until one of sound effect options appears on the display Press the fi or button 7 ...

Page 24: ...ting a CD changer you can connect another audio source equipped with a line output The audio source for example can be a portable CD player MiniDisc player or MP3 player The AUX input must be activated in the menu If you want to connect an external audio source you will need an adapter cable You can obtain this adapter cable BP no 7 607 897 093 from your authorised Blaupunkt dealer Switching the A...

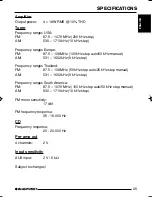
Page 25: ...M 531 1602 kHz 9 kHz step Frequency ranges Thailand FM 87 5 108 MHz 50 kHz step auto 25 kHz step manual AM 531 1602 kHz 9 kHz step Frequency ranges South America FM 87 5 107 9 MHz 100 kHz step auto 50 kHz step manual AM 530 1710 kHz 10 kHz step FM mono sensitivity 17 dbf FM frequency response 35 16 000 Hz CD Frequency response 20 20 000 Hz Pre amp out 4 channels 2 V Input sensitivity AUX input 2 V...

Page 26: ...26 1 2 3 4 BND FM AM TS 5 AUDIO X Bass E F EQ 6 7 8 MENU SCAN 9 1 6 SRC CD MP3 CD AUX Eject 0 E F ...

Page 27: ...K 35 KKKKKKKKKKKKKKKKKKKKKKKKKKKKKKKKKKKKKKKKKKKKKK 36 KKKKKKKKKKKKKKKKKKKKKKKKK 36 MIX 36 SCAN 36 REPEAT 36 PAUSE 36 KKKKKKKKKKKKKKKKKKKKKKKKKKKKKKKKKKKKKKKKKK 37 CD KKKKKKKKKKKKKKKKKKKKKKKKKKKKKKKKKKKKKK 37 CD 37 MP3 KKKKKKKKKKKKKKKKKKKKKKKKKKKKKKKK 38 MP3 CD 38 MP3 KKKKKKKKKKKKKKKKKKKKKKKKKKKKKKK 39 KKKKKKKKKKKKKKKKKKKKKKKKKKKKKKKKKKKKKKKKKK 39 KKKKKKKKKKKKKKKKKKKKKKKKKKKKKKKKKKKKK 39 KKKKKKKKK...

Page 28: ...28 Blaupunkt Blaupunkt Blaupunkt RC 12H RC08 RC10 Blaupunkt Velocity CD Blaupunkt CD CDCA 08I IDCA09 CDCA03 MP3 CD MP3 MP3 MP3 MP3 MP3 Micro driveTM MP3 CD MP3 CD CD MP3 ...

Page 29: ...29 ENGLISH ESPAÑOL PORTUGUÊS 1 OFF TIMER MENU CD CD MP3 CD AUX 1 2 ...

Page 30: ...30 ON OFF 2 L L OFF TIMER 0 C D M P 3 C D AUX 2 L 2 2 0 30 MENU 8 fi 7 OFF TIMER 7 MENU 8 OFF TIMER 0 ...

Page 31: ...31 ENGLISH ESPAÑOL PORTUGUÊS CD CD 1 CD CD CD CD 2 0 66 3 3 J MENU 8 fi 7 ON VOLUME 7 LAST VOL J LAST VOL 38 LAST VOL 38 MENU 8 ...

Page 32: ...32 2 MUTE 2 MENU 8 fi 7 MUTE LVL 7 MENU 8 PHONE L MENU 8 fi 7 BEEP 7 OFF ON MENU 8 ...

Page 33: ...OL PORTUGUÊS CD MP3 CD AUX BND TS 4 SRC FM AM E MW F EUROPE USA THAI S AMERICA USA MENU 8 fi 7 TUNER 7 MENU 8 L FM AM FM AM FM AM BND TS 4 FM FM1 FM2 FMT AM fi 7 MENU 8 fi 7 SENS HI SENS LO SENS HI SENS LO 7 MENU 8 FM AM ...

Page 34: ...34 FM1 FM2 FMT AM 1 6 9 FMT AM BND TS 4 FM TSTORE AM TSTORE 1 1 6 9 SCAN 5 30 SCAN MENU 8 SCAN SCAN MENU 8 MENU 8 fi 7 SCAN TIME 7 MENU 8 CD MP3 CD ...

Page 35: ...35 ENGLISH ESPAÑOL PORTUGUÊS CD 5 3 CD CD R C D RW CD MP3 CD MP3 CD CD CD CD CD CD CD CD AUX 1 CD CD CD CD CD 2 6 CD ...

Page 36: ...36 CD CD AUX SRC CD 7 fi 7 7 MIX 5 MIX 9 MIX CD MIX MIX 5 MIX 9 MIX OFF MIX SCAN CD MENU 8 scantime SCAN MENU 8 REPEAT 4 RPT 9 RPT TRCK RPT RPT 4 RPT 9 RPT OFF RPT PAUSE 3 E 9 PAUSE 3 E 9 CD ...

Page 37: ...37 ENGLISH ESPAÑOL PORTUGUÊS 6 CD CD CD CD CD CD I CD L MENU 8 fi 7 CD TEXT 7 TEXT ON TEXT OFF MENU 8 CD 1 CD 0 CD 10 CD CD CD CD CD ...

Page 38: ...D 1 0 1 2 8 kbit CD MP3 MP3 CD CD CD CD CD CD CD CD ISO 9660 Joliet 253 CD CD 65535 J ISO9660 8 PC CD 32 MP3 0 0 1 002 MP3 L D01 D02 T001 T005 T004 T003 T002 D03 T001 T006 T005 T004 T003 T002 T011 T007 T008 T009 T010 D04 T001 T006 T005 T004 T003 T002 ...

Page 39: ...39 ENGLISH ESPAÑOL PORTUGUÊS MP3 ID3 1 ID3 MP3 256 kbit sec MP3 MP3 MP3 MP3 MP3 MP3 CD MP3 MP3 MP3 CD MP3 CD MP3 MP3 CD CD CD fi 7 MP3 7 7 7 EMIXF 5 MIX 9 MIX DIR MIX MP3 CD 5 MIX 9 MP3 ...

Page 40: ...40 MIX CD MIX MIX MIX 5 MIX 9 MIX OFF MIX SCAN C D MENU 8 SCAN L SCAN MENU 8 EREPEATF 4 RPT 9 RPT TRCK RPT 4 RPT 9 RPT DIR REPEAT 4 RPT 9 RPT OFF RPT PAUSE 3 E 9 PAUSE 3 E 9 MP3 MP3 ...

Page 41: ...41 ENGLISH ESPAÑOL PORTUGUÊS MP3 6 MP3 MP3 ID3 1 MP3 MP3 MENU 8 fi 7 MP3 DISP 7 MENU 8 CD CD CD CD CD CD CD SRC CHANGER CD CD fi 7 CD CD CD CD 7 7 MP3 ...

Page 42: ...REPEAT 4 RPT 9 RPT TRCK RPT CD 4 RPT 9 RPT DISC RPT CD 4 RPT 9 RPT OFF RPT MIX CD 5 MIX 9 MIX CD MIX CD 5 MIX 9 CD MIX ALL MIX MIX 5 MIX 9 MIX OFF MIX CD SCAN CD 2 MENU 8 TRK SCAN CD SCAN MENU 8 PAUSE 3 E 9 PAUSE 3 E 9 ...

Page 43: ...43 ENGLISH ESPAÑOL PORTUGUÊS CLOCK J CLOCK J 6 MENU 8 fi 7 CLOCK SET 7 fi 7 7 fi 7 MENU 8 12 24 MENU 8 fi 7 12H MODE 24H MODE 7 MENU 8 CLOCK ON MENU 8 fi 7 CLOCK OFF CLOCK ON 7 L MENU 8 6 ...

Page 44: ...44 CD MP3 CD AUX AUDIO 5 BASS fi 7 AUDIO 5 AUDIO 5 BASS 7 TREB fi 7 AUDIO 5 L E F E F AUDIO 5 BASS 7 BAL fi 7 L AUDIO 5 L L AUDIO 5 BASS 7 FADER fi 7 AUDIO 5 ...

Page 45: ...45 ENGLISH ESPAÑOL PORTUGUÊS X BASS CD MP3 CD AUX AUDIO 5 BASS 7 XBASS ON XBASS OFF fi 7 XBASS ON XBASS OFF AUDIO 5 EQ AUDIO 5 BASS 7 fi 7 EQ OFF AUDIO 5 ...

Page 46: ...46 MENU 8 MENU fi 7 PEAK LVL 7 PEAK ON PEAK OFF MENU 8 CD I CD MP3 AUX BP no 7 607 897 093 AUX MENU 8 MENU fi 7 AUX OFF AUX ON 7 L AUX MENU 8 SRC AUX AUX INPUT ...

Page 47: ...00 E F F AM 530 1710 E F E10 E F F FM 87 5 108 E F E100 E F 50 E F F AM 531 1602 E F E9 E F F FM 87 5 108 E F E50 E F 25 E F F AM 531 1602 E F E9 E F F FM 87 5 107 9 E F E100 E F 50 E F F AM 530 1710 E F E10 E F F FM 17 dbf FM 35 16 000 CD 20 20 000 4 2 V AUX 2 V 6 kΩ ...

Page 48: ...48 1 W K 2 L K 3 4 W BND J FM AM K W TS J K 5 AUDIO W I I I X BassI EQ K 6 W J K W K 7 8 W MENU J K W SCAN J K 9 1 6 SRC W CD MP3I CD AUX K Eject E F 0 E FK ...

Page 49: ...KKKKKKK 59 CD KKKKKKKKKKKKKKKKKKKKKKKKKKKKK 59 MP3 KKKKKKKKKKKKKKKKKKKKKKKKKK KKKKKKKKKKKKKKKKKKKKKKKKKK KKKKKKKKKKKKKKKKKKKKKKKKKK KKKKKKKKKKKKKKKKKKKKKKKKKK KKKKKKKKKKKKKKKKKKKKKKKKKK 60 MP3 CD KKKKKKKKKKKKKKKKKKKKK 60 MP3 KKKKKKKKKKKKKKKKK 61 KKKKKKKKKKKKKKKKKK 61 L KKKKKKKKKKKKKKKKKKK 61 KKKKKKKKKKKKKKKKKKKKKKKKKKKKKK 61 L EMIXF KKKKKK 61 L ESCANF KKKKKKKKK 62 L EREPEATF KKKKKKKKK 62 EPAUSEF K...

Page 50: ...unkt K K K Blaupunkt K I K K K K K K K I K Blaupunkt K RC 12H K RC08 RC10 K Blaupunkt Velocity K CD Blaupunkt CD W CDC A 08I IDC A 09 CDC A03K MP3 CD MP3 MP3 K MP3 I MP3 TM MP3 K MP3 I CD K MP3 CD K CD MP3 K K ...

Page 51: ...51 ENGLISH W W W W W MENU OFF TIMER K K CD K I W K K K W W W W W K I W I CD MP3 CD EAUXF K I E F K K K K K W W W W W K K K I K 1 K K K 1 2 ...

Page 52: ... L L W L L L L L ON OFF 2 I L K L L L L L K K OFF TIMER 0 K K K E I CD MP3I CD AUXF K 2 L L L L L I 2 K I 2 2 K K W W W W W I K I 0 30 K MENU 8 K fi 7 OFF TIMER K 7 K I MENU 8 K W W W W W OFF TIMER 0 I K L L L L L ...

Page 53: ...53 ENGLISH CD CD I 1 K K CD K CD K CD K K I CD K W W W W W K I 2 K 0 E F 66 E F K I 3 K I 3 K K MENU 8 K ON VOLUME fi 7 K 7 K I K LAST VOL I K W W W W W LAST VOL 38 K I LAST VOL 38 K I MENU 8 K L L L L L ...

Page 54: ...54 E E E E E F F F F F E FK 2 K MUTE K I 2 K K MENU 8 K MUTE LVL fi 7 K 7 K I MENU 8 K I K PHONE K K 2 K I K L K MENU 8 K BEEP fi 7 K 7 K OFF I ON K MENU 8 K ...

Page 55: ...BND TS 4 FM AM E MW F SRC K I K EEUROPEFI EUSAFI ETHAIF ES AMERICAF K K I K USA K MENU 8 K TUNER fi 7 K 7 K I MENU 8 K L L L L L FM AM K FM I AM K K FM AM BND TS 4 FM EFM1IFM2 FMTF AM K K fi 7 K K I K MENU 8 K SENS HI SENS LO fi 7 K ...

Page 56: ...HI K SENS LO K 7 K I MENU 8 K W W W W W FM AM K K K EFM1I FM2 FMTF AM K K 1 6 9 2 K E E E E E F F F F F K FMT AM K W W W W W K BND TS 4 K I FM TSTORE AM TSTORE K I 1 K K 1 6 9 K SCAN K 5 30 K MENU 8 K SCAN E FK ...

Page 57: ... ENGLISH CD 5 3 CDI CD R CD RW K CD I MP3 CD K MP3 K CD CDE CDF K CD CD CD K CD CD CD EAUXF K 1 K K CD K CD K CD K K CD K MENU 8 K K MENU 8 K SCAN TIME fi 7 K 7 K I MENU 8 K W W W W W CD MP3 CD K K 6 K CD ...

Page 58: ...CD SRC K K 7 K fi 7 I K E E E E E F F F F F I L 7 K MIX 5 MIX 9 K MIX CD MIX K K MIX 5 MIX 9 K MIX OFF MIX K SCAN CD K MENU 8 2 K K W W W W W K I K SCAN I MENU 8 K K REPEAT I 4 RPT 9 K RPT TRCK RPT K ERPTF K I 4 RPT 9 K RPT OFF RPT K K CD ...

Page 59: ...LISH PAUSE 3 E 9 K PAUSE K 3 E 9 K K W K K 6 2 K CD CD CD K CD K CD K CD I E F K CD L L L L L MENU 8 K CD TEXT fi 7 K CD 7 CD E TEXT ON F E TEXT OFF FK I MENU 8 K CD 1 K K CD 0 K CD K W W W W W CD 10 K CD CD K ...

Page 60: ... CD CD CD CD K CD I CD K CD ISO 9660 1L 2 Joliet K K CD 253 K K CD I 65535 K ISO9660 8 I K PC K K CD K K W W W W W K E KMP3 F 32 K I K I K 0 E W 001 I 002 FK MP3 L D01 D02 T001 T005 T004 T003 T002 D03 T001 T006 T005 T004 T003 T002 T011 T007 T008 T009 T010 D04 T001 T006 T005 T004 T003 T002 ...

Page 61: ... FI 256 kbit sec K MP3 MP3 K W W W W W I MP3 MP3 MP3 K MP3 MP3 CD K MP3 K MP3 CD K CD I K MP3 MP3 CD K I CD CD K I fi 7 K W W W W W MP3 K I K L L L L L L I 7 K 7 I L K I 7 K L L L L L MIX L I 5 MIX 9 K MIX DIR MIX K MP3 CD L I 5 MIX 9 2 K MP3 ...

Page 62: ... L L L SCAN CD L K MENU 8 2 K L SCAN K W W W W W E FK I K SCAN MENU 8 K L K L L L L L REPEAT L I 4 RPT 9 K RPT TRCK RPT K I 4 RPT 9 2 K RPT DIR K REPEAT I 4 RPT 9 K RPT OFF RPT K PAUSE 3 E E E E E 9 K PAUSE K 3 E E E E E 9 K K MP3 L I W L L L L MP3 K MP3 ...

Page 63: ...H I 6 2 K MP3 MP3 L K E F K W W W W W W I ID3 N MP3 K MP3 I MENU 8 K MP3 DISP fi 7 K 7 K MENU 8 K MP3 CD W W W W W CD CD CD CD K CD CHANGER SRC K CD K CD CD I fi 7 K CD CD K CD I 7 K E E E E E F F F F F I L 7 K CD ...

Page 64: ...PT K CD I 4 RPT 9 2 K RPT DISC RPT K CD 4 RPT 9 I RPT OFF RPT K MIX CD I 5 MIX 9 K MIX CD MIX K CD I 5 MIX 9 2 K MIX ALL MIX K MIX 5 MIX 9 I MIX OFF MIX K CD SCAN CD I MENU 8 2 K TRK SCAN CD K I MENU 8 K K W W W W W K I K PAUSE 3 E 9 K PAUSE K 3 E 9 K K CD ...

Page 65: ... I 6 K I MENU 8 K CLOCK SET fi 7 K 7 K K K fi 7 K I 7 K K fi 7 K I MENU 8 K 12 24J J J J J MENU 8 K 12H MODE 24H MODE fi 7 K 7 K I MENU 8 K CLOCK ON I MENU 8 K CLOCK OFF CLOCK ON fi 7 K 7 ON OFF K I MENU 8 K I 6 K 8 K CLOCK ...

Page 66: ...K BASS K fi 7 K I AUDIO 5 K AUDIO 5 K BASS K TREB 7 K fi 7 K I AUDIO 5 K L L L L L E E E E E F F F F F L E FI AUDIO 5 K BASS K BAL 7 K fi 7 E L F K I AUDIO 5 K L L L L L E E E E E F F F F F L E FI AUDIO 5 K BASS K FADER 7 K fi 7 E L F K I AUDIO 5 K ...

Page 67: ...K W W W W W X BASS E I CD MP3I CDJ AUXFK X BASS I AUDIO 5 K BASS K XBASS ON XBASS OFF 7 K fi 7 XBASS ON XBASS OFF K I AUDIO 5 K X BASS EQ W ROCK E F POP E F CLASSIC E F K I AUDIO 5 K BASS K 7 K fi 7 K I EQ OFF K I AUDIO 5 K W W W W W K ...

Page 68: ...K MENU K PEAK LVL fi 7 K 7 PEAK ON PEAK OFF K I MENU 8 K CD x z K CD MP3 K AUX K I K EBP W 7 607 897 093F Blau punkt K AUX L L L L L MENU 8 K MENU K AUX OFF AUX ON fi 7 K 7 AUX L K I MENU 8 K W W W W W AUX SRC I AUX INPUT K ...

Page 69: ... E10 kHz F W FM 87 5 108 MHz E100 kHz L50 kHz F AM 531 1602 kHz E9 kHz F W FM 87 5 108 MHz E50 kHz L25 kHz F AM 531 1602 kHz E9 kHz F W FM 87 5 107 9 MHz E100 kHz L50 kHz F AM 530 1710 kHz E10 kHz F FM W 17 dbf FM W 35 16 000 Hz CD W 20 20 000 Hz J J J J J 4 W 2 V AUX 2 V 6 kΩ ...

Page 70: ...an obtain the adapter cable re quired for your vehicle type from any BLAUPUNKT dealer Depending on the model your vehi cle may differ from the description provided here We accept no respon sibility for any damages due to incor rect installation or connection or for any consequential damages If the information provided here is not suitable for your specific installation requirements please contact ...

Page 71: ...EA ENGLISH W W W W W I K K 1 5 mm2 K BLAUPUNKT K I K K I Blaupunkt K I I I I I J J J J J J J J J J K K K K K ...

Page 72: ...EA D C A H G E F 1 2 12V B I C D A 53 182 165 1 20 RC 12H Supplied Mounting Hardware ...


Page 73: ...EA ENGLISH 4 5 A 7 607 621 3 Car specific adapter cable which is available at your dealer K 12V 1 2 3 3 2 B 8 601 910 003 B Removal ...

Page 74: ...eaker out LR 1 2 3 4 5 6 7 8 1 2 3 4 5 6 7 8 C B A 1 4 7 10 13 16 19 3 6 9 12 15 18 2 5 8 11 14 17 20 C 1 C 2 C 3 C C1 C2 C3 1 Line Out LR 7 nc 13 CDC Data In 2 Line Out RR 8 nc 14 CDC Data Out 3 Line Out Ground 9 nc 15 Permanent 12V 4 Line Out LF 10 RC 12V 16 12V 5 Line Out RF 11 Remote Control 17 Bus GND 6 12V Amplifier 12 RC GND 18 AF GND 19 Line In L 20 Line In R Equalizer Amplifier CD Changer...

Page 75: ...EA ENGLISH Relais 12V 1 3 5 7 2 4 6 8 RR RF LF LR 4 Ohm 4 Ohm 4 Ohm 4 Ohm 10A Radio Tel mute low L L E F 12V max 150 mA This information is subject to change without notice 7 Kl 15 12V G F E ...

Page 76: ...10 57 69 473 Ireland IRL 01 4149400 01 4598830 Italy I 02 369 6331 02 369 6464 Luxembourg L 40 4078 40 2085 Netherlands NL 023 565 6348 023 565 6331 Norway N 66 817 000 66 817 157 Portugal P 01 2185 00144 01 2185 11111 Spain E 902 120234 916 467952 Sweden S 08 7501500 08 7501810 Switzerland CH 01 8471644 01 8471650 Czech Rep CZ 02 6130 0441 02 6130 0514 Hungary H 01 333 9575 01 324 8756 Poland PL ...

Reviews: