Getting Started
7
REC
ZOOM
DISP
PGM
1
CFAST
IRIS
FOCUS
REC
IRIS
FOCUS
PEAK
DISP
MENU
SLATE
2
IRIS
SDI OUT
0
-6
-12
-18
-24
-30
-36
-42
-48
L
R
SDI IN
REF IN
TIMECODE IN
TIMECODE OUT
12V
CH1
SOLO
CH1
MUTE
CH2
MUTE
CH2
SOLO
FOCUS
PEAK
DISP
MENU
SLATE
PUSH
PUSH
PUSH
Powering Your Camera
Now that you've attached a lens, you'll need to supply power. The quickest way to power Blackmagic
URSA is to connect external power using the supplied 12V AC adaptor.
To plug in External Power:
Step 1.
Connect the 12V AC adaptor plug to your mains power socket.
Step 2.
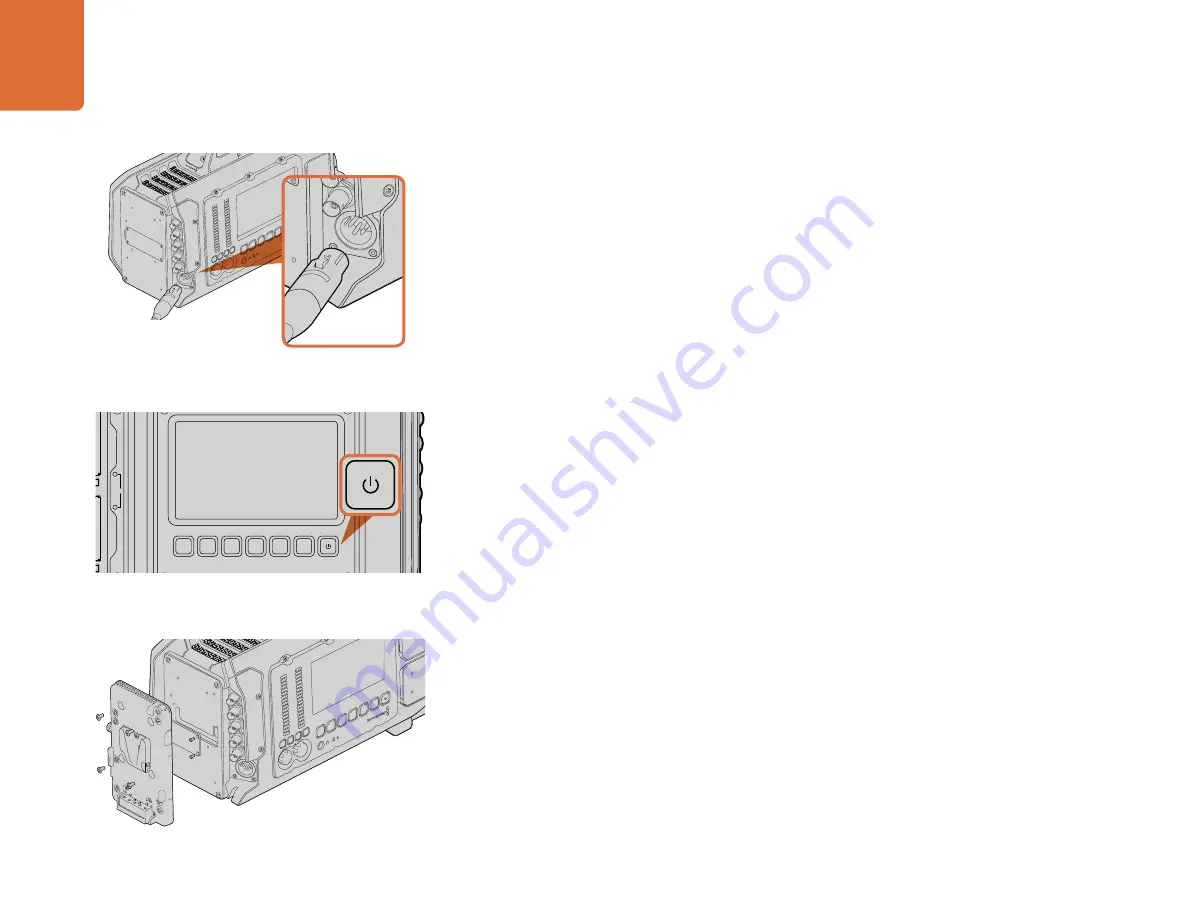
Connect the 12V AC adaptor’s 4 pin XLR connector to the 12-20V Power connector on the camera.
If you have both external and battery power connected, only external power will be used. If you remove
external power while a charged battery is connected, Blackmagic URSA will switch to battery power
without interruption.
To turn your camera on:
Step 1.
Press the Power button on Blackmagic URSA’s DOP or Camera Assist and Audio Stations.
The touch screens and fold out monitor will now activate and the status strip will appear along
the bottom of each touch screen.
Step 2.
Press and hold the Power button to turn your camera off.
Mounting Batteries
You can easily mount industry standard V-Mount or Gold Mount batteries to Blackmagic URSA. To mount
a battery, you'll need to attach a third party V-Mount or Gold Mount battery plate to Blackmagic URSA's
plate mount. Battery manufacturers such as IDX and Switronix provide battery plates with the correct
molex 51353-1200 connector for plugging into URSA's molex power connector. You can purchase these
battery plates from professional digital cinema and video equipment suppliers.
Step 1.
Remove Blackmagic URSA's molex power cover from the rear plate by unscrewing the 4 corner
screws. You'll now see Blackmagic URSA's 12 way molex 55959-1230 power connector.
Step 2.
Connect Blackmagic URSA's 12 way molex 55959-1230 power connector to your third party
battery plate.
Step 3.
Screw the third party battery plate onto Blackmagic URSA's plate mounting points using 4 x
M3 screws. Make sure the connector cable is tucked safely into the cable slot and not crushed
between the plates when tightening.
With the third party plate connected to your Blackmagic URSA, you can now mount a V-Mount or Gold
Mount battery.
Congratulations! You are now ready to insert CFast 2.0 cards and start recording!
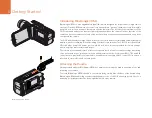
Press the power button on Blackmagic URSA's work stations
to turn the camera on. Press and hold to turn the camera off.
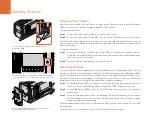
Use the supplied 12V AC adapter to power your
Blackmagic URSA.
REC
ZOOM
DISP
PGM
1
CFAST
IRIS
FOCUS
REC
IRIS
FOCUS
PEAK
DISP
MENU
SLATE
2
IRIS
SDI OUT
0
-6
-12
-18
-24
-30
-36
-42
-48
L
R
SDI IN
REF IN
TIMECODE IN
TIMECODE OUT
12V
CH1
SOLO
CH1
MUTE
CH2
MUTE
CH2
SOLO
FOCUS
PEAK
DISP
MENU
SLATE
PUSH
PUSH
PUSH
IRIS
SDI OUT
SDI IN
REF IN
TIMECODE IN
L
R
TIMECODE OUT
+12V
CH1
SOLO
CH1
MUTE
CH2
SOLO
CH2
MUTE
FOCUS
PEAK
DISP
AUDIO IN
12V OUT
SDI OUT
MENU
SLA
TE
0
-6
-12
-18
-24
-30
-36
-42
-48
IRIS
SDI OUT
SDI IN
REF IN
TIMECODE IN
L
R
TIMECODE OUT
+12V
CH1
SOLO
CH1
MUTE
CH2
SOLO
CH1
MUTE
FOCUS
PEAK
DISP
AUDIO IN
12V OUT
SDI OUT
MENU
SLA
TE
0
-6
-12
-18
-24
-30
-36
-42
-48
Connecting a third party battery plate lets you mount
V-Mount or Gold Mount batteries.
IRIS
SDI OUT
SDI IN
REF IN
TIMECODE IN
L
R
TIMECODE OUT
+12V
CH1
SOLO
CH1
MUTE
CH2
SOLO
CH2
MUTE
FOCUS
PEAK
DISP
AUDIO IN
12V OUT
SDI OUT
MENU
SLA
TE
0
-6
-12
-18
-24
-30
-36
-42
-48


