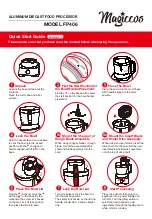
1. To assemble, place the unit on
a counter or other flat work sur-
face. Place the Bowl onto the
Base, lining up the Bowl Locking
Tabs to the Locking Slots.
2. Turn clockwise until the Bowl
locks. (Figure A)
3. Slide the Knife Blade down over
the shaft. Be careful not to touch
the Blade as it is extremely sharp.
4. Place the Cover on the Bowl,
with the Extended Tab on the
same side as the Base Slot. Turn
the Cover clockwise into the Base
Slot as far as it will go. The Cover
Handle will line up with the
Pulse/On Switch. (Figure B)
NOTE:
For your protection, this
unit has a Cover Interlock
System. The unit will not operate
unless the Extended Tab is cor-
rectly located inside the Base
Slot. Do not attempt to operate
the unit without the Cover being
correctly placed.
4
ASSEMBLING THE UNIT
1. To use, remove the Cover and place up to 1 cup of dry foodin the
bowl. (See “Guide To Use.”
2. Place the Cover on the Bowl and turnto lock into place.
3. Depress and hold the Pulse/On Button to proces.
NOTE:
The longer the continuous pulse, the finer the texture. For
coarsely chopped foods, use short pulses.
4. If the Chopper does not operate, be sure the Bowl Locking Tabs are
properly positioned, and the Cover properly aligned. The parts are
designed to “lock” into position.
5. Be sure the Blade stops turning completely before removing the
Cover. Unplug the unit. remove the cover and grasp the plastic blade
hub. Carefully pull the Knife Blade straight up. Remove the Bowl and
empty the processed food. Do not use Bowl for storing food.
CHOPPING / MINCING


