background image

Vendor: S000369

Page1 of 11

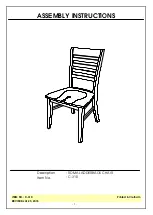
ASSEMBLY INSTRUCTIONS

CONRAD 3 DRAWER CHEST SILVER OAK

IMPORTANT: READ THESE INSTRUCTIONS CAREFULLY BEFORE 

ASSEMBLING OR USING YOUR CONRAD

3 DRAWER CHEST SILVER OAK

PLEASE KEEP THESE INSTRUCTIONS FOR FUTURE REFERENCE.

HEALTH & SAFETY:

DO NOT use this 

chest

 if any parts are missing , damaged or worn.

DO NOT use this 

chest

 unless all

fixing

s are secured.

Always use on a level, even surface.

WARNING: If this item is placed on a non-carpeted

floor you must place some protection under all legs to stop

CARE & MAINTENANCE:

DO NOT push the 

chest

 as this will damage the legs.

Always lift the 

chest

 with two people to reposition.

Keep any sharp objects away from the 

chest

.

www.birlea.com

the 

chest

 from moving. If this is not adhered to there is no guarantee if the wardrobe collapses.

Periodically check all screws &

fixi

ngs to ensure they are secure.

Summary of Contents for CONRAD

Page 1: ...T use this chest unless all fixings are secured Always use on a level even surface WARNING If this item is placed on a non carpeted floor you must place some protection under all legs to stop CARE MAINTENANCE DO NOT push the chest as this will damage the legs Always lift the chest with two people to reposition Keep any sharp objects away from the chest www birlea com the chest from moving If this is...

Page 2: ...40mm 1 x K Bracket 1 x L Screw 4x12mm 8 x M Screw 3x14mm 1 x N Wall Plug 6 x O Bolt 6x35mm 29 x A Cam Lock 29 x B Quickfit Screw 22 x C Screw 4x30mm 42 x G Screw 3x12mm 3 x E Handle 6 x F Bolt 6x30mm 8 x D Wedge 1 1pc 2 1pc 5 1pc 6 1pc 3 1pc 4 1pc 7 1pc 8 1pc 11 3pcs 12 3pcs 9 3pcs 10 3pcs 13 3pcs 14 3pcs 17 1pc 18 1pc 15 2pcs 16 2pcs 1 x S Joining Piece Hardware Parts ...

Page 3: ...3 to panel 10 using screws C Fit quickfit screws B and wooden dowel I to front panel 12 Fix handle E to front of drawer using bolts F Turn drawer over and fix inner drawer runners H and P to underside of drawer using screws G Repeat for all three drawers x3 Insert cam locks A to panels 9 11 and 13 Fit panel 12 to front of drawer and turn cam locks clockwise to tighten Fit base panel 14 into groove...

Page 4: ... 11 G x 12 Q x 3 G R G G G Q R x 3 G x 12 2 Q G G G G G G G G G G G G Q Q R G G G G G G G G G G G G R R Step 2 Fix outer drawer runners Q to panel 2 using screws G Step 3 Fix outer drawer runners R to panel 3 using screws G 3 ...

Page 5: ...n dowels I to panel 2 Insert cam locks A to panels 6 7 8 and 18 Step 5 Slide joining piece S onto back panel 5 Slide back panel 5 into slot in panel 6 behind panel 7 as shown Fit panels 6 7 8 and 18 to panel 2 Turn cam locks clockwise to tighten I B A A A I I I B B B 6 2 7 18 8 A 7 6 5 18 8 S ...

Page 6: ...A x 4 B x 4 I x 4 I B B B B I I I A A 3 18 6 8 7 A A Step 6 Insert quickfit screws B and wooden dowels I to panel 3 Insert cam locks A to panels 6 7 8 and 18 Fit panel 3 to panels 6 7 8 and 18 Turn cam locks clockwise to tighten ...

Page 7: ...f 11 L x 1 B x 6 I x 4 K x 1 4 2 3 Step 7 Fit quickfit screws B and wooden dowels I to panel 1 Fix bracket K to panel 1 using screw L Step 8 Slide back panel 4 into slots between panels 2 and 3 L K I 1 B K L B B B B B I I I ...

Page 8: ...D D D D D D D M M M M M M M M D 1 1 4 2 3 D x 8 M x8 3 18 Step 9 Insert cam locks A to panels 2 3 and 18 Fit panel 1 to assembled unit Turn cam locks clockwise to tighten Step 10 Fit wedges D to back of unit to secure back panels Secure with screws M ...

Page 9: ... 11 C x 4 J x 4 O x 6 O O O O O O 15 15 16 16 17 2 J J C C J J C C 15 Step 11 Fix parts 15 16 and 17 together using bolts O as shown Step 12 Fix joined leg parts Step 11 to base of assembled unit using screws C and J as shown ...

Page 10: ...rawers to the wall using the additional hardware J N as shown Screws J are fixed from inside the unit through the bracket and into the wall plug N Should you choose not to affix the product to the wall serious injury may be caused if the product tips over Please consider the wall mounting fixing guide when securing your drawers ...

Page 11: ...urchased it from who will be able to resolve any issues with Birlea shared in our birleahome feature on Instagram Why don t you send us photos of your assembled furniture to info birlea com to be 15kg 10kg Step 14 Once the unit is in its final location and secured to the wall fit the drawers onto runners in unit as shown Please note the maximum recommended weight for this cabinet is 10kg per drawe...

Reviews: