


SignalHawk™ PC and Rack Mount Models
19
Connecting a Remote Computer to the Host Computer
To connect your home computer, which is the client (or remote) computer to
the Rack Mount, follow these steps:
1.
On your home computer, click
Start
, point to
All Programs
, and then point
to
Accessories
.
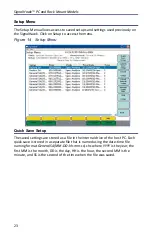
2.
In the Accessories menu, point to Communications, and then click Remote
Desktop Connection.
3.
In the Computer box, type the computer name of your host computer.
Note:
The default computer name of the Rack Mount is 'SH-36S-
RM' and the default IP address and Subnet mask is 192.168.1.10
and 255.255.255.0
4.
Click Connect.
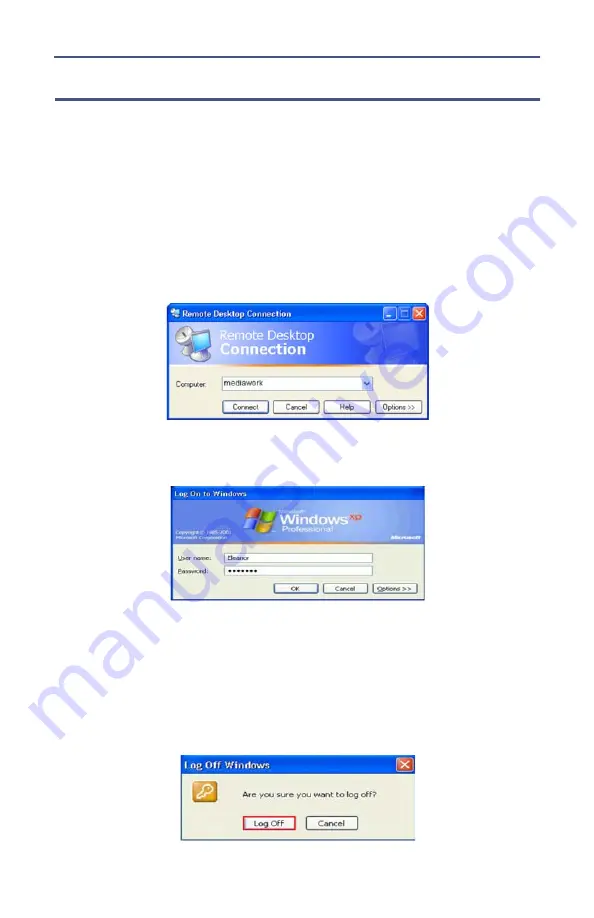
5.
When the Log On to Windows dialog box appears, type your user name,
password, and domain (if required), and then click OK.
6.
The Remote Desktop window opens, and you see the desktop settings, files,
and programs that are on your host computer, which in this example is the
Rack Mount. Your host computer remains locked, and nobody can access it
without a password. In addition, no one will be able to see the work you are
doing remotely.
To end your Remote Desktop session:
1.
Click Start, and then click Log Off at the bottom of the Start menu.
2.
When prompted, click Log Off.
Summary of Contents for SignalHawk SH-36S-PC
Page 26: ...SignalHawk PC and Rack Mount Models 11 Figure 7 Select DSP Device List ...
Page 67: ...Measurements 52 Figure 41 Example Channel Power Integration Bandwidth STEP 2 STEP 3 ...
Page 116: ...SignalHawk PC and Rack Mount Models 101 Figure 75 Menu Map BW Sweep Menu All Measurements ...
Page 117: ...Menu Maps 102 Figure 76 Menu Map Amplitude All Measurements ...
Page 118: ...SignalHawk PC and Rack Mount Models 103 Figure 77 Menu Map Measurement All Measurements ...
Page 119: ...Menu Maps 104 Figure 78 Menu Map Mark Limit Menu All Measurements ...
Page 120: ...SignalHawk PC and Rack Mount Models 105 Figure 79 Menu Map File Help All Measurements ...
Page 121: ...Menu Maps 106 Setup Function Menu Maps Figure 80 Map Setup Mode Main Screen ...


