22.
CAUTION:
In order to avoid a hazard due to
inadvertent resetting of the thermal cutout, this
appliance must not be supplied through an
external switching device, such as a timer, or
connected to a circuit that is regularly switched
on and off by the utility.
PLEASE SAVE THESE INSTRUCTIONS
Please note that this is an electrical
appliance, and requires attention when
in use.
PRE-OPERATING INSTRUCTIONS
1. Be sure the humidifier is disconnected from
the wall outlet and humidity control switch
(C) is in the off position ( ).
2. Remove the tank lid and fill with cool,
fresh tap water.
3. Replace the lid.
4. Place the water tank (E) on the base (D).
5. Ensure humidifier is level. If the humidifier is
not level always turn the power off before
handling it.
OPERATING INSTRUCTIONS
1. Plug the power cord into a convenient
electrical outlet.
2.
Power/Night light (B) will illuminate when the
unit is operating. When the unit is out of water
or when the unit is switched off, the
Power/Night light will not be working.
3. Turn your humidifier on by rotating the
humidity control switch (C) to the high position
It will take a few minutes before full moist
air output is obtained.
Please note the mist will
only be visible and humidifying between the
moisture droplet marks shown on your
humidifier (Min
- Max
).
4. Power/night light (B) will illuminate when
humidifier is connected to main electrical
power and the humidifier is switched on.
5. To reduce the speed at which the vapor is
emitted, turn the humidity control switch
towards the low position ( ).
6. Rotate the humidity control switch from low to
high to regulate the mist output.
7. Rotate the mist nozzle (A) to the desired mist
direction.
8. When the unit runs out of water, the
transducer will automatically shut off.
9. Turn the humidity control switch anti-clockwise
to the off ( ) position, then unplug the unit.
10. Before refilling the tank, empty any residual
water and follow the Daily maintenance
instructions.
11. Refill the water tank with cool tap water and
replace onto the base.
12. Plug power cord into the electrical outlet and
turn the humidity control switch clockwise to
the desired humidity level.
13. DO NOT move the humidifier with water in
the tank on the humidifier base. This may
cause the humidifier to function
intermittently, or stop emitting mist
altogether. Should this occur, simply remove
excess water from the humidifier base.
IMPORTANT:
If you do not plan to use your
humidifier for two or more days, make sure any
residual water is drained from the tank and base
to prevent any bacteria growth in stagnant water.
CARE AND CLEANING
Humidifiers provide comfort by adding moisture
to dry, heated indoor air. To get the most benefit
from the humidifier and to avoid product misuse,
follow all instructions carefully, specifically the
operation, care and maintenance guidelines.
Please note this is an electrical appliance and
requires attention when in use.
Cleaning your humidifier every one or two
weeks, depending on the water conditions is
important in order to maintain efficient, healthy,
odor-free operation. Water quality varies widely
and, combined with build-up of mineral scale in
your humidifier, may under certain conditions
promote the growth of micro-organisms in the
water tank.
Before cleaning, Please note the
following:
• DO NOT use soap, detergents, abrasives,
gasoline, glass or furniture polish, or boiling
water to clean any part of your Ultrasonic
Humidifier. These will interfere with the
proper operation of your unit and may affect
its appearance.
• DO NOT use sharp or metal objects to clean
mineral deposits in the reservoir. Contact
with sharp objects can result in damage to
the plastic.
• Mineral deposits should be soaked for up to
20 minutes in Bionaire™ “Clean-Away”
solution or in plain vinegar and water to help
with their removal.
• NEVER mix “Clean-Away” solution with any
other fluid!
• DO NOT clean any part of your humidifier in
the dishwasher.
Daily maintenance:
1. Before cleaning, set the humidity control
switch to the Off position ( ) and unplug
the unit from the electrical outlet.
2. Lift off the tank of the humidifier.
3. Carry the base and the tank to the sink, then
drain and rinse the base and tank thoroughly
3
CONGRATULATIONS
By choosing a Bionaire™ humidifier, you have
chosen one of the finest humidifiers on the
market today
READ AND RETAIN THE FOLLOWING
FOR FUTURE REFERENCE. NOTE:
Before reading these instructions,
please review the corresponding
illustrations.
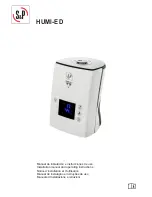
GENERAL DESCRIPTION
(SEE FIG. 1)
A Mist Nozzle
B Power/Night Light
C Humidity Control Switch
D Base
E Water Tank
SAFETY PRECAUTIONS
When using electrical appliances, basic safety
precautions should always be followed to reduce
the risk of fire, electric shock, and injury to
persons, including the following:
1. Read all instructions before using the
appliance.
2. To avoid fire or shock hazard, plug the
appliance directly into an electrical outlet
and fully insert the plug.
3. Keep the cord out of heavy traffic areas. To
avoid fire hazard, NEVER put the cord under
rugs, or near radiators, stoves, or heaters.
4. DO NOT place humidifier near heat sources
such as stoves, radiators, and heaters. Do locate
your humidifier on an inside wall near an
electrical outlet. The humidifier should be at least
10cm/4" away from the wall for best results.
5.
WARNING:
Close supervision is necessary
when any appliance is used near children.
Appliance must be kept out of the reach of
children. Never use a humidifier in a closed
room. (i.e: doors and windows closed) as it
may result in excessive humidity.
6.
WARNING:
Do not attempt to refill humidifier
without first unplugging the unit from it's
electrical outlet. Be sure to pull by the plug and
not the cord.
7. NEVER drop or insert any object into any
openings. DO NOT place hands, face, or body
directly over or near Moisture Outlet while unit
is in operation. DO NOT cover Moisture Outlet
or place anything over it while the unit is
operating.
8. DO NOT operate any appliance with a
damaged cord or plug, after the appliance
malfunctions, or if it has been dropped or
damaged in any manner. Return appliance to
manufacturer for examination, electrical or
mechanical adjustment, or repair.
9. Use appliance only for intended household
use as described in this manual. Any other use
not recommended by the manufacturer may
cause fire, electric shock, or injury to persons.
The use of attachments not recommended or
sold by Holmes Products (Europe) Ltd. may
cause hazards.
10. DO NOT use outdoors.
11. Always place humidifier on a firm, flat, level
surface. A waterproof mat or pad is
recommended for under the humidifier.
NEVER place it on a surface that may become
damaged by exposure to water and moisture
(i.e. finished floor).
12. DO NOT allow the Moisture Outlet to directly
face the wall. Moisture could cause damage,
particularly to wallpaper.
13. Humidifier should be unplugged when not in use.
14. NEVER tilt, move, or attempt to empty unit
while it is operating. Shut off and unplug
before removing the water tank and moving
the unit. DO NOT attempt to remove the water
tank within 15 minutes after the humidifier is
turned off and unplugged. Serious injury may
result.
15. This humidifier requires regular maintenance
to operate appropriately. Refer to cleaning and
maintenance procedures.
16. NEVER use detergents, petrol, glass cleaner,
furniture polish, paint thinner, or other
household solvents to clean any part of the
humidifier.
17. Excessive humidity in a room can cause water
condensation on windows and some furniture.
If this happens, turn the humidifier OFF
18. Do not use humidifier in an area where
humidity level is in excess of 55%.
19. DO NOT attempt to repair or adjust any
electrical or mechanical functions on this unit.
The inside of the unit contains no user
serviceable parts. All servicing should be
performed by qualified personnel only.
20. If the supply cord is damaged, it must be
replaced by the manufacturer or its service
agent or a similarly qualified person.
21. This appliance is not intended for use by
persons (including children) with reduced
physical, sensory or mental capabilities, or
lack of experience and knowledge, unless they
have been given supervision or instruction
concerning use of the appliance by a person
responsible for their safety. Children should be
supervised to ensure that they do not play with
the appliance.
ENGLISH
2
BU1300W
Fig. 1
A
B
C
D
E
BU1300W_I_IM.qxd:BU1300WI05MLM3 .qxd 6/24/10 12:00 PM Page 4


