Installation and User Guide
Before commencing work always isolate the power at the consumer unit / fuse box.
1. Unscrew the socket from the wall/mounting box.
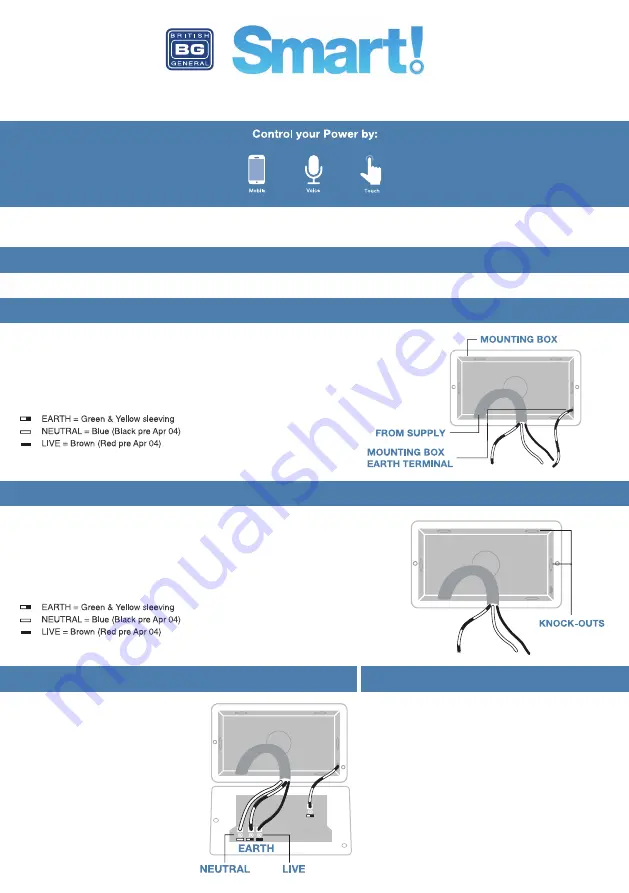
2. Note the cable connections: There will generally be three different wiring configurations, this
illustration shows a single wire of each colour connected to each terminal (there could be two or
three wires of each colour connected to each terminal) + an additional connection between the
mounting box earth terminal and the socket earth terminal.
3. Unscrew each terminal to release the wires.
1. Carefully position the accessory into the mounting box,
ensuring that no wires are trapped between the plate and
the wall and secure with screws (do not over tighten) then
set screw covers in place (optional).
2. Once the installation has been completed correctly,
replace the fuse for the circuit, switch the power back on at
the consumer unit and test.
1. Install mounting box (metal or pattress) for either flush or surface mounting, ensuring
appropriate size of product. (Mounting box to be purchased separately)
2. Select the most suitable entry point of the mounting box (knock-out) and route the supply
cable through.
3. Cables should be prepared so a sufficient conductor length reaches the terminals. Strip
the ends of the individual conductors leaving an adequate length bare to enter terminals.
1. Line up the new socket to mounting box and
take note of where each terminal is located.
2. Connect each wire to the matching terminal.
(Refer to key in step 2).
An earth connection should always be made
between the mounting box earth terminal and
the socket earth terminal.
Make sure no copper wire is exposed & that
only the bare end enters the terminal.
3. Tighten terminal screws securely.
(Do not over tighten).
Wiring Instructions
1. Power Off
2a. Replacing an Existing Socket (Removal)
2b. New Installation
3. Wire Up Your Socket
4. Complete The Installation


