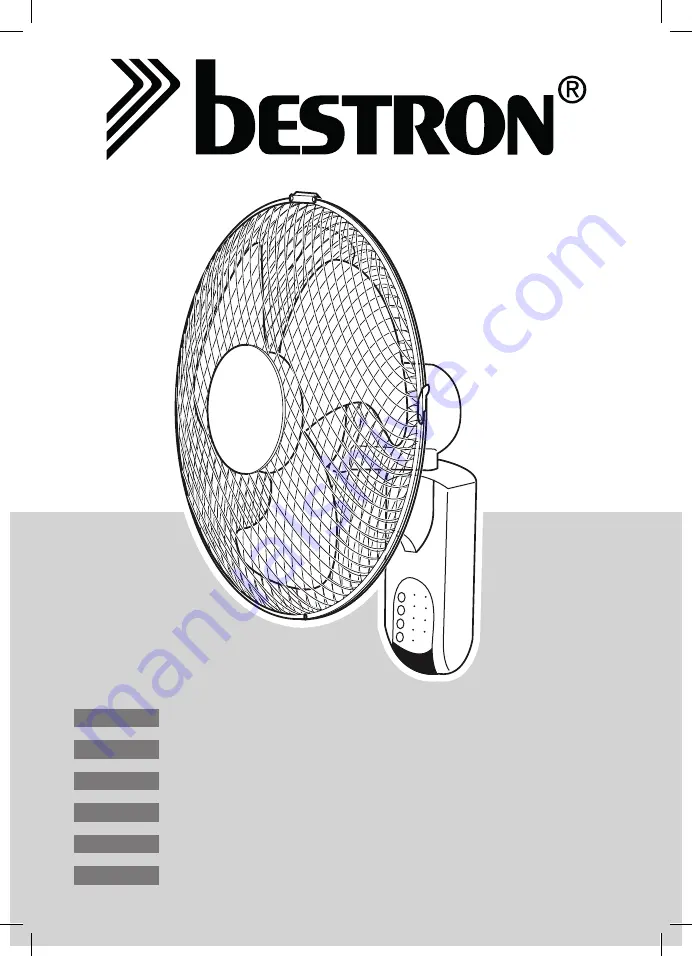
background image

DWF40REM(Z)

 v 060314-08

Handleiding muurventilator 

Gebrauchsanweisung Wandventilator  

Mode d'emploi ventilateur mural

Instruction manual wall fan 

Istruzioni per l'uso muro dei tifosi 

Manual del usuario la pared del ventilador

Nederlands 

Deutsch 

Français

English

Italiano 

Español 

Summary of Contents for DWF40REM

Page 1: ...urventilator Gebrauchsanweisung Wandventilator Mode d emploi ventilateur mural Instruction manual wall fan Istruzioni per l uso muro dei tifosi Manual del usuario la pared del ventilador Nederlands Deutsch Français English Italiano Español ...

Page 2: ......

Page 3: ...verlengsnoer Voorkom struikelen over het verleng snoer Zorg ervoor dat het apparaat en het snoer niet in aanraking komen met hittebronnen zoals een hete kookplaat of open vuur Zorg ervoor dat de schakelaar het snoer en de stekker niet in aanraking komen met water Veiligheidsvoorschriften Tijdens het gebruik Gebruik het apparaat nooit buitenshuis Gebruik het apparaat nooit in vochtige ruimten Plaat...

Page 4: ...latorvinnen 3 op de as met de uitsparingen precies over de twee nokken van de as 6 Plaats de bevestigingsknop 2 terug op de as en draai deze vast linksom terwijl u de ventilatorvinnen vasthoudt 7 Op de korfrand zitten vijf klemmen Leg de bovenste klem zorgvuldig om de buitenste ring van de korf zodat u de korfdelen met de schroef en het moertje 14 aan elkaar kunt bevestigen Draai de schroef met ee...

Page 5: ... motorhuis af 5 Verwijder de achterkant van de ventilatorkorf door de witte bevestigingsring in het midden van de korf tegen de klok in los te draaien en de korf van het motorhuis af te pakken 6 Reinig de verwijderde onderdelen en de standaard met een vochtige doek Droog goed na met een droge doek 7 Reinig het motorhuis met een droge doek Zorg ervoor dat het apparaat niet is aangesloten op de netv...

Page 6: ...k te maken op garantie kunt u zich wenden tot uw winkelier Bestron biedt ook de mogelijkheid om het apparaat rechtstreeks ter reparatie aan te bieden aan de Bestron Service Dienst Stuur echter nooit zomaar iets op Het pakket kan dan namelijk geweigerd worden en eventuele kosten zijn voor uw rekening Neem contact op met de Service Dienst en zij zullen u vertellen hoe u het apparaat moet inpakken en...

Page 7: ...dafür dass niemand über das Verlängerungs Kabel stolpern kann Sorgen Sie dafür dass das Gerät und das Kabel nicht mit Hitzequellen wie heißen Kochplatten oder offenem Feuer in Berührung kommen Sorgen Sie dafür dass der Schalter das Kabel und der Stecker nicht mit Wasser in Berührung kommen Sicherheitsbestimmungen Während der Benutzung Benutzen Sie das Gerät nie im Freien Benutzen Sie das Gerät nie...

Page 8: ...ses und der Schaft 6 an der Oberseite befinden 4 Bringen Sie den Befestigungsring 4 wieder auf der Achse an und ziehen Sie ihn richtig fest an Im Uhrzeigersinn 5 Schieben Sie die Ventilatorflügel 3 auf die Achse die Aussparungen müssen sich genau über den zwei Nocken der Achse befinden 6 Bringen Sie den Befestigungsknopf 2 wieder auf der Achse an und ziehen Sie ihn fest an links herum während Sie ...

Page 9: ... Sie für einen Richtungswinkel von weniger als 30 Grad siehe Abbildung 3 Abbildung 3 reinigung und wartung Nach einiger Zeit kann sich Staub zwischen den Speichen des Ventilatorkorbs und auf den Ventilatorflügeln festsetzen Versuchen Sie den Staub erst mit einem Handfeger und oder einem Staubsauger zu entfernen Sollte dies nicht gelingen dann können Sie den Ventilator auseinanderbauen und säubern ...

Page 10: ... a Verlusten die während des Transports auftreten b Entfernung oder Änderung der Geräteseriennummer 8 Ausgenommen von der Garantie sind Kabel Lampen und Glasteile 9 Außer einem Ersatz bzw einer Reparatur der schadhaften Teile räumt die Garantie kein Recht auf Erstattung eines eventuellen Schadens ein Der Importeur kann in keinem Fall für eventuelle Folgeschäden oder irgendwelche anderen Folgen haf...

Page 11: ... rallonge agréée Évitez de vous prendre les pieds dans le cordon ou la rallonge électrique Assurez vous que ni l appareil ni le cordon n entre en contact avec une source de chaleur telle qu une plaque électrique chaude ou une flamme Assurez vous que ni l interrupteur ni le cordon ni la fiche n entre en contact avec de l eau Consignes de sécurité Durant l utilisation N utilisez jamais l appareil à ...

Page 12: ...eur sur l arbre les encoches passant exactement par dessus les cames de l arbre 6 Remontez le bouton de fixation sur l arbre et fixez le fermement tournez vers la gauche pendant que vous immobilisez les pales du ventilateur 7 Il y a cinq agrafes dans la corbeille Placez soigneusement la agrafe supérieure de la bride autour de l anneau extérieur de la partie déjà fixée de la corbeille de telle sort...

Page 13: ... pales du ventilateur du bloc moteur 5 Retirez la partie arrière de la corbeille du ventilateur pour ce faire vous faites tourner l anneau de fixation blanc au milieu de la corbeille vers la gauche contre le sens des aiguilles d une montre puis vous retirez du bloc moteur l anneau et la corbeille 6 Nettoyez avec un chiffon humide les pièces démontées ainsi que le pied Séchez bien avec un chiffon s...

Page 14: ...a fourni 10 Pour pouvoir faire appel à la garantie vous pouvez vous adresser à votre revendeur Bestron offre aussi la possibilité de faire réparer l appareil directement par le service après vente de Bestron Toutefois n envoyez jamais rien sans avoir reçu d instructions au préalable Le colis pourrait en effet être refusé et les frais éventuels seraient à votre charge Prenez contact avec le service...

Page 15: ... Avoid stumbling over the extension lead or power cord Make sure that the appliance and the power cord do not come in contact with sources of heat such as a hot hob or naked flame Make sure that the switch the power cord and plug do not come in contact with water Safety instructions During use Never use the appliance outdoors Never use the appliance in a humid room Set the fan on a level surface s...

Page 16: ... making sure that the notches are aligned precisely with the two keys on the shaft 6 Fit the spinner 2 onto the shaft and tighten it anticlockwise whilst preventing the fan blades from moving 7 The rim has five clamps Carefully fit the rim around the rear half of the fan housing making sure that the housing falls into the upper clamp of the rim so that you can connect the two halfs of the fan hous...

Page 17: ...r half of the fan housing by turning the white locking ring at the centre of the housing anticlockwise Remove the ring and the housing from the motor housing 6 Clean the dismantled parts and the base with a damp cloth Dry thoroughly with a dry cloth 7 Clean the motor housing with a dry cloth Verify that the appliance is not connected to the power supply before you clean it Never use corrosive or s...

Page 18: ...you can contact your dealer where the appliance is purchased Bestron offers you also the possibility to send the appliance directly to our Service Department Do not send your appliance without consulting us The package may be refused and any any costs will be for your account Please contact the Service Department and they will tell you how to pack and send the appliance 11 This appliance is not su...

Page 19: ...temare il cavo di alimentazione o la prolunga in modo tale da evitare di inciamparvi Assicurarsi che l apparecchio e il cavo non vengano in contatto con sorgenti di calore quali per es piani di cottura caldi o fiamme libere Accertarsi che l interruttore il cavo e la spina non entrino a contatto con acqua Norme di sicurezza Durante l uso Non utilizzare mai l apparecchio in ambienti esterni Non util...

Page 20: ...rmo il blocco pale del ventilatore 5 Nella modanatura sono presenti cinque morsetti A Inserire accuratamente la morsetto superiore della modanatura attorno al perimetro esterno della griglia di protezione in modo tale da potere serrare assieme gli parti della modanatura mediante il dado e la vite in dotazione C Serrare la vite servendosi di un cacciavite per viti con intaglio a croce 7 Chiudere l ...

Page 21: ...n senso orario la manopola di fissaggio bianca seguendo la direzione indicata dalla freccia LOOSEN Estrarre il blocco pale dal gruppo motore 5 Rimuovere la parte posteriore della griglia di protezione del ventilatore ruotando in senso antiorario l anello di fissaggio bianco presente al centro della griglia estrarre quindi la griglia dal gruppo motore 6 Pulire le parti rimosse e la base con l ausil...

Page 22: ...ose In nessun caso l importatore potrà essere ritenuto responsabile per eventuali danni consequenziali o per conseguenze di altro tipo verificatesi a causa delle apparecchiature da questi fornite o a esse correlate 10 Per reclamare la garanzia potete rivolgervi al vostro negoziante Bestron offre anche la possibilità di far riparare l apparecchio direttamente dal Centro assistenza Bestron Tuttavia ...

Page 23: ...pezar con el cable de extensión Asegúrese de que ni el aparato ni el cable están en contacto con fuentes de calor por ejemplo con una placa caliente de la estufa o con fuego abierto Asegúrese de que ni el interruptor ni el cable ni el enchufe están en contacto con el agua Normas de seguridad Durante el uso No use nunca este aparato fuera del hogar No utilice el aparato nunca en lugares húmedos Col...

Page 24: ...i montaggio 4 sull albero 6 e stringere verso il basso in senso orario 5 Far scorrere le alette della ventola 3 sull albero con i fori esattamente sulle due alette del perno 6 Fit pulsante 2 sull albero e stringere in senso orario mentre si tiene le alette della ventola 7 Sul bordo paniere sono cinque terminali Mettere l artiglio superiore attentamente il bordo esterno del cestello in modo da pote...

Page 25: ... la flecha LOOSEN Retire las aspas del ventilador 5 Gire el anillo de fijación blanco que se encuentra en el centro de la parte posterior de la rejilla en dirección opuesta a las agujas del reloj y retire la rejilla del alojamiento del motor 6 Limpie las partes y el soporte con un paño húmedo Séquelas a continuación con un paño seco 7 Limpie el alojamiento del motor con un paño seco Asegúrese de q...

Page 26: ... de efectos causados por el aparato suministrado por él o que guarden relación con el mismo 10 Para hacer valer la garantía Puede acudir a la tienda donde compró el producto Bestron también ofrece la posibilidad de entregar el aparato directamente al servicio técnico Bestron para su reparación Pero no podrá enviarlo de cualquier manera El paquete podría ser rechazado y los costes asociados correrí...

Page 27: ......

Page 28: ...DWF40REM Z v 060314 08 ...

Reviews: