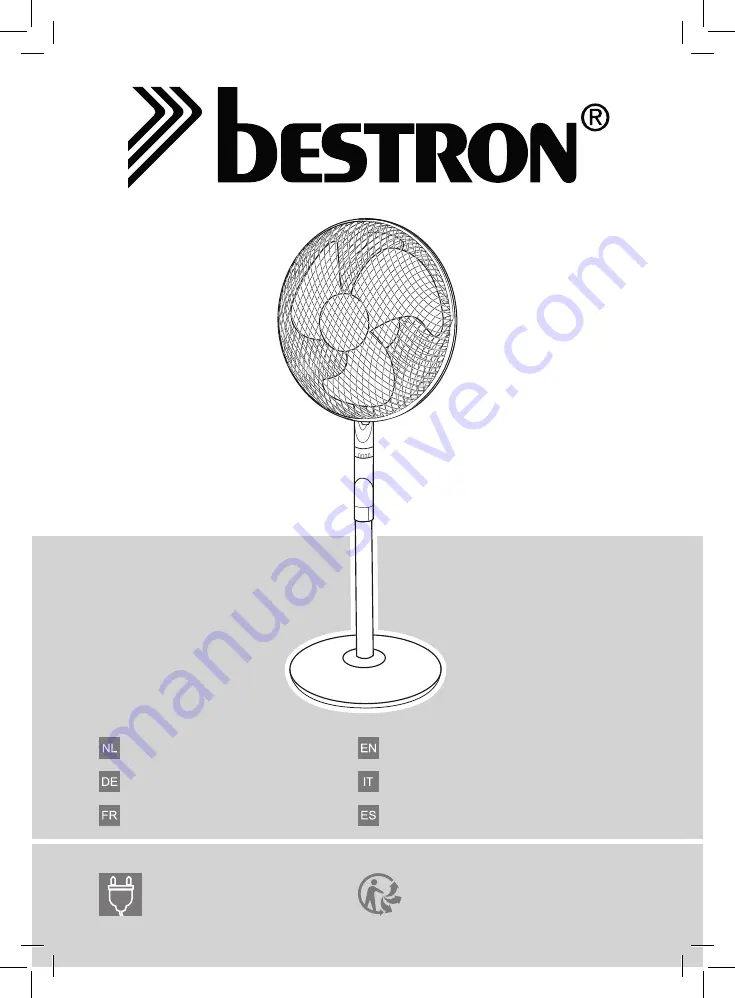
background image

ADV45S

Handleiding statiefventilator

Gebrauchsanweisung Standventilator

Mode d’emploi ventilator sur pied

Instruction manual stand fan

Istruzioni per l’uso del ventilatore a piantana

Manual del usuario del ventilador de pedestal

55W, 220-240V ~ 50Hz

v171009-03

3 2 1 0

3 2 1 0

3 2 1 0

3 2 1 0

Summary of Contents for ADV45S

Page 1: ...hsanweisung Standventilator Mode d emploi ventilator sur pied Instruction manual stand fan Istruzioni per l uso del ventilatore a piantana Manual del usuario del ventilador de pedestal 55W 220 240V 50Hz v171009 03 3 2 1 0 3 2 1 0 3 2 1 0 3 2 1 0 ...

Page 2: ...warmte Controleer of de netspanning overeenkomt met de aangegeven netspanning op het typeplaatje van het apparaat voordat u het apparaat gebruikt Haal altijd de stekker uit het stopcontact wanneer u het apparaat niet gebruikt Als u de stekker uit het stopcontact neemt trek dan aan de stekker zelf niet aan het snoer Controleer regelmatig of het snoer van het apparaat nog intact is Gebruik het appar...

Page 3: ...e stekker uit het stopcontact wanneer het apparaat in het water is gevallen Gebruik het apparaat niet meer Dompel het apparaat het snoer en de stekker nooit onder in water of een andere vloeistof Werking Algemeen Het apparaat is alleen bedoeld voor huishoudelijke doeleinden niet voor professioneel gebruik 1 Ventilatorvinnen 2 Ventilatorkorf 3 Motorhuis 4 Zwenkvergrendeling 5 Bedieningskast 6 Snelh...

Page 4: ...huif de ventilatorvinnen 2H op de as met de uitsparing precies over de nok van de as 5 Plaats de bevestigingsknop 2I terug op de as en draai deze vast linksom terwijl u de ventilatorvinnen vasthoudt 6 Plaats de korfring 2K over de achterste ventilatorkorf 2F Plaats vervolgens de voorste korf 2J in de korfring en draai de korfring strak door de schroef 2L aan te draaien met een kruiskopschroevendra...

Page 5: ...orhuis af 5 Verwijder de achterkant van de ventilatorkorf door de bevestigings ring in het midden van de korf tegen de klok in los te draaien en de korf van het motorhuis af te pakken 6 Reinig de verwijderde onderdelen en het statief met een vochtige doek Droog goed na met een droge doek 7 Reinig het motorhuis met een droge doek Zorg ervoor dat het apparaat niet is aangesloten op de netvoeding als...

Page 6: ...ijk bescherming 7 Op deze garantiebepalingen zal geen aanspraak gemaakt kunnen worden bij a verliezen die zich tijdens het transport voordoen b het verwijderen of wijzigen van het serienummer van het apparaat 8 Uitgezonderd van garantie zijn snoeren lampen en glazen onderdelen 9 De garantie geeft geen enkel recht op vergoeding van eventuele schade buiten de vervanging respectievelijk reparatie van...

Page 7: ...ektrizität und Wärme Bevor Sie das Gerät verwenden prüfen Sie ob die Netzspannung mit der aufdemTypenschilddesGerätsangegebenenStromstärkeubereinstimmt Ziehen Sie immer den Stecker aus der Steckdose wenn Sie das Gerät nicht benutzen Ziehen Sie beim Entfernen des Steckers aus der Steckdose am Stecker und nicht am Kabel Überprüfen Sie regelmäßig ob das Gerätekabel noch intakt ist Benutzen Sie das Ge...

Page 8: ...ht mehr benutzen Ziehen Sie sofort den Stecker aus der Steckdose wenn das Gerät ins Wasser gefallen ist Benutzen Sie das Gerät nicht mehr Tauchen Sie das Gerät das Kabel und den Stecker nie in Wasser oder andere Flüssigkeiten Funktion Allgemein Das Gerät ist nur für den Hausgebrauch vorgesehen und nicht für die professionelle Verwendung 1 Ventilatorflügel 2 Ventilatorkorb 3 Motorgehäuse Stativ 4 S...

Page 9: ...gersinn 4 Schieben Sie die Ventilatorflügel 2H auf die Achse die Aussparung müsst sich genau über den Nocken der Achse befinden 5 Bringen Sie den Befestigungsknopf 2I wieder auf der Achse an und ziehen Sie ihn fest an links herum während Sie die Ventilatorflügel festhalten 6 Bringen Sie den Ring des Korbs 2K auf die Rückseite des Ventilatorkorbs 2F an Legen Sie die Vorseite des Korbs 2J in den Rin...

Page 10: ...EN los Nehmen Sie die Ventilatorflügel vom Motorgehäuse herunter 5 Entfernen Sie die Rückseite des Ventilatorkorbs indem Sie den Befestigungsring in der Korbmitte gegen den Uhrzeigersinn losdrehen und den Korb des Motorgehäuses abnehmen 6 Reinigen Sie die abgenommenen Teile und den Ständer mit einem feuchten Tuch Trocken Sie diese mit einem trockenen Tuch gründlich nach 7 Reinigen Sie das Motorgeh...

Page 11: ...arantiebestimmungen kann kein Anspruch erhoben werden im Falle von a Verlusten die während des Transports auftreten b Entfernung oder Änderung der Geräteseriennummer 8 Ausgenommen von der Garantie sind Kabel Lampen und Glasteile 9 Außer einem Ersatz bzw einer Reparatur der schadhaften Teile räumt die Garantie kein Recht auf Erstattung eines eventuellen Schadens ein Der Importeur kann in keinem Fal...

Page 12: ...de sécurité Électricité et chaleur Avant d utiliser cet appareil assurez vous que la tension du réseau correspond à la tension du réseau indiquée sur la plaquette type de l appareil Débranchez toujours l appareil lorsque vous ne l utilisez pas Lorsque vous débranchez la fiche saisissez la fiche elle même ne tirez pas sur le cordon Vérifiez régulièrement que le cordon de l appareil est intact N uti...

Page 13: ...st tombé à l eau débranchez immédiatement la prise Cessez d utiliser l appareil N immergez jamais l appareil le cordon ni la fiche dans l eau ou tout autre liquide Fonctionnement Généralités L appareil est destiné uniquement à l utilisation domestique et non à l usage professionnel 1 Pales du ventilateur 2 Corbeille du ventilateur 3 Bloc moteur 4 Verrouillage de pivotant 5 Boîtier de commande 6 Ré...

Page 14: ...coche passe exactement par dessus le came de l arbre 5 Remontez le bouton de fixation 2I sur l arbre et fixez le fermement tournez vers la gauche pendant que vous immobilisez les pales du ventilateur 6 Placez l anneau de la corbeille 2K sur l arrière de la corbeille 2F Ensuite placez le front de la corbeille 2J dans l anneau de la corbeille et fixez l anneau par visser la vis 2L avec un tournevis ...

Page 15: ...u bloc moteur 5 Retirez la partie arrière de la corbeille du ventilateur pour ce faire vous faites tourner l anneau de fixation au milieu de la corbeille vers la gauche contre le sens des aiguilles d une montre puis vous retirez du bloc moteur l anneau et la corbeille 6 Nettoyez avec un chiffon humide les pièces démontées ainsi que le pied Séchez bien avec un chiffon sec 7 Nettoyez le bloc moteur ...

Page 16: ...mballage appropriés 7 Les présentes conditions de garantie ne peuvent pas être invoquées dans les cas suivants a pertes survenues pendant le transport b effacement ou modification du numéro de série de l appareil 8 Les cordons ampoules et pièces en verre ne sont pas couverts par la garantie 9 La garantie ne donne aucun droit d indemnisation pour des dommages éventuels autres que le remplacement ou...

Page 17: ...uctions Electricity and heat Verify that the mains voltage is the same as that indicated on the type plate on the appliance before use Always remove the plug from the socket when the appliance is not in use Always remove the plug from the wall socket by pulling on the plug not the power cord Check the appliance s power cord regularly to make sure it is not damaged Do not use the appliance if the p...

Page 18: ...ing it after use Remove the plug from the wall socket immediately should the appliance fall in water Do not use the appliance any more Never immerse the appliance the plug or the power cord in water or other liquid Operation General The appliance is intended only for domestic use not for professional use 1 Fan blades 2 Fan housing 3 Motor housing 4 Swivel lock 5 Control unit 6 Speed controller 7 T...

Page 19: ...e the fan blades onto the shaft making sure that the notch is aligned precisely with the key on the shaft 5 Place the fixing knob 2I back on the shaft and tighten it firmly anticlockwise while holding the fan blades 6 Place the housing ring 2K over the rear fan housing 2F Then place the front fan housing 2J in the ring and tighten the ring firmly by fastening the screw 2L using a crosshead screwdr...

Page 20: ...emove the fan blades from the motor housing 5 Remove the rear half of the fan housing by turning the locking ring at the centre of the housing anticlockwise Remove the ring and the housing from the motor housing 6 Clean the dismantled parts and the base with a damp cloth Dry thoroughly with a dry cloth 7 Clean the motor housing with a dry cloth Verify that the appliance is not connected to the pow...

Page 21: ... Careless transport i e without suitable packaging materials or protection 7 No claims may be made under this warranty for a Losses incurred during transport b The removal or changing of the appliance s serial number 8 The guarantee does not cover power cords lamps or glass parts 9 No claims can be submitted under this warranty for damage other than the repair or replacement of faulty parts The im...

Page 22: ...ollare che la tensione di rete corrisponda alla tensione di esercizio indicata sulla targhetta identificativa dell apparecchio Disinserire sempre la spina dalla presa quando l apparecchio non è in uso Quando si toglie la spina dalla presa esercitare la trazione sulla spina stessa e non sul cavo Verificare regolarmente l integrità del cavo dell apparecchio Non utilizzare l apparecchio qualora il ca...

Page 23: ...la presa qualora l apparecchio sia caduto in acqua e non utilizzare più l apparecchio Non immergere mai l apparecchio il cavo e la presa nell acqua o in altri liquidi Funzionamento Avvertenze generali Questo apparecchio è concepito esclusivamente per l impiego domestico e non per l uso professionale 1 Pale del ventilatore 2 Griglia di protezione 3 Vano motore 4 Dispositivo per il blocco direzional...

Page 24: ...tore 2H con la tacca presente sull albero esattamente sopra la cresta del mandrino 5 Posizionare il tasto di conferma 2I indietro sull albero e serrare senso antiorario mentre si tiene premuto le alette del ventilatore 6 Posizionare l anello di cestino 2K sopra il cestello ventola posteriore 2F Quindi posizionare il cestino anteriore 2J nell anello della gabbia e ruotare l anello di cesto stretto ...

Page 25: ...arte anteriore della griglia 4 Tenere fermo il blocco pale del ventilatore e ruotare in senso orario la manopola di fissaggio seguendo la direzione indicata dalla freccia LOOSEN Estrarre il blocco pale dal gruppo motore 5 Rimuovere la parte posteriore della griglia di protezione del ventilatore ruotando in senso antiorario l anello di fissaggio presente al centro della griglia estrarre quindi la g...

Page 26: ...eseguito in modo improprio privo dell imballaggio o delle protezioni idonee 7 Le presenti condizioni di garanzia non si applicano inoltre in caso di a perdite che si verificano durante il trasporto b rimozione o modifica del numero di serie dell apparecchio 8 Sono esclusi dalla garanzia i cavi le spie luminose le lampade e i componenti in vetro 9 La garanzia non riconosce alcun diritto al risarcim...

Page 27: ...e utilizar el aparato verifique que el voltaje de la red corresponda al voltaje indicado en la placa Retire siempre el enchufe de la toma de alimentación cuando no esté utilizando el aparato Al retirar el enchufe de la toma asegúrese de tirar del enchufe y no del cable Verifique regularmente que el cable del aparato esté en buenas condiciones No utilice el aparato si el cable está averiado Si el c...

Page 28: ...ire directamente el enchufe de la toma de pared No vuelva a utilizar el aparato No sumerja nunca el aparato ni el cable ni el enchufe en agua o en otro líquido Funcionamiento General Este aparato está concebido únicamente para uso doméstico no para uso profesional 1 Aspas 2 Rejilla 3 Alojamiento del motor 4 Bloqueo de la función de rotación 5 Caja de mando 6 Botón de parada 7 Botones para ajuste d...

Page 29: ...s de ventilador 2H con la muesca en el eje exactamente encima del borde del huso 5 Coloque el botón de confirmación 2I en el eje y apretar izquierda mientras que se sostienen las aletas del ventilador 6 Coloque el aro de basket 2K sobre el filtro del ventilador trasero 2F Luego coloque la cesta delantera 2J en el anillo de la jaula y gire el anillo de cesta firmemente por el tornillo 2L con un des...

Page 30: ... la flecha LOOSEN Retire las aspas del ventilador 5 Gire el anillo de fijación que se encuentra en el centro de la parte posterior de la rejilla en dirección opuesta a las agujas del reloj y retire la rejilla del alojamiento del motor 6 Limpie las partes y el pedestal con un paño húmedo Séquelas a continuación con un paño seco 7 Limpie el alojamiento del motor con un paño seco Asegúrese de que el ...

Page 31: ...e o protección adecuados 7 No podrá apelarse a estas disposiciones de garantía en los siguientes casos a pérdida ocurrida durante el transporte b remoción o modificación del número de serie del aparato 8 La garantía no cubre los cables las bombillas ni las partes de cristal 9 La garantía no concede derecho a reclamar indemnización alguna por daños diferente a la sustitución o reparación respectiva...

Page 32: ...Bestron Customer Service WhatsApp bestron com whatsapp ...

Reviews: